nhtechie's stats
- Review count135
- Helpfulness votes811
- First reviewMarch 30, 2011
- Last reviewApril 27, 2024
- Featured reviews0
- Average rating4.3
- Review comment count1
- Helpfulness votes0
- First review commentApril 20, 2015
- Last review commentApril 20, 2015
- Featured review comments0
Questions
- Question count0
- Helpfulness votes0
- First questionNone
- Last questionNone
- Featured questions0
- Answer count5
- Helpfulness votes15
- First answerJanuary 16, 2017
- Last answerApril 27, 2021
- Featured answers0
- Best answers1
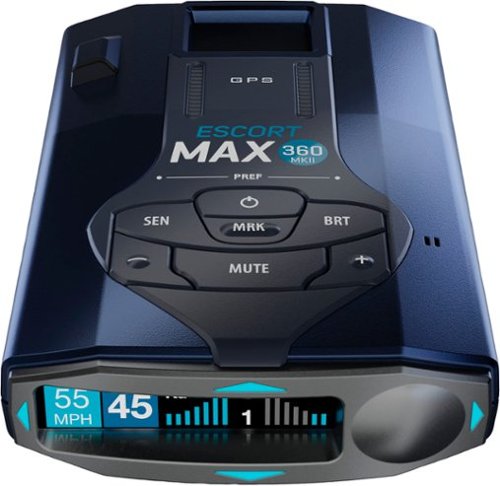
The Escort MAX 360 MKII can help make every drive legendary with many of the powerful features in our top-of-the-line radar detectors. Like the MAX 360c MKII, it features an all-new internal platform and more powerful components, providing 50% improved range and performance with the included Blackfin DSP chip and advanced false alert filtering intelligence.
Customer Rating

4
A nice detector, but keep current with firmware!
on June 13, 2023
Posted by: nhtechie
I have to admit, I’ve been out of the radar detector game for 20 years, but I’ve been doing a lot of interstate miles lately and figured I’d get back in.
Let me start off & say, I can’t test this with my own radar gear; I don’t have a Lidar gun for my wife to run at me and I don’t have a "Kustom" setup to stick on the side of the road and zap me; this is all based on in-town & highway driving.
My review will be focused on the Escort Max 360 MKII, however I may point out features that are lacking (or are better) on this detector vs other “unnamed” brands.
TL;DR for my frequent readers and details below.
TL;DR for my frequent readers and details below.
Good:
Directional Arrows
Novice mode
Suction Cup, mag mount
Power Cord / Mute button
GPS for current Speed
Advanced Customization (sounds, bands, color)
Mounting hardware (magnetic + suction cup)
Alerting / Alerting Distance (pic)
Bogey Detection
Good at filtering Blind Spot Monitoring of other cars
Directional Arrows
Novice mode
Suction Cup, mag mount
Power Cord / Mute button
GPS for current Speed
Advanced Customization (sounds, bands, color)
Mounting hardware (magnetic + suction cup)
Alerting / Alerting Distance (pic)
Bogey Detection
Good at filtering Blind Spot Monitoring of other cars
Bad:
Some features (i.e. Auto Mute)
Speed Limit indicator (via the App)
Picky about USB Cables for firmware updates
Some features (i.e. Auto Mute)
Speed Limit indicator (via the App)
Picky about USB Cables for firmware updates
Meh:
Carrying case
App / Bluetooth Connection
Lack of Frequency Voice alerts
Carrying case
App / Bluetooth Connection
Lack of Frequency Voice alerts
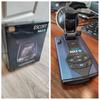
In comparison to another radar detector (pic), the MKII is much larger and heavier. First thing I noticed was the side where the power / microUSB port is, is a bit creaky as you grip it, as it’s where my thumb lands. The bag it comes in has a quarter edge opening where you drop the detector in; the handle is on the opposite side, so don’t pick it up if you haven’t zippered it or – crash.
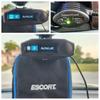
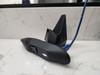
The windshield mount has a bit of grip on the suction cup & a nice snap which makes me believe it’ll stay put and the magnetic mount is great for easy take-off / put-on. Also included is a “smart” power cord with the curly part of the cable at the bottom (nice!), a USB port (2A) and mute button (pic).
Now, onto the features and functionality …
First, download the user manual to see which Advanced Settings you want to use from the bottom of the page (Installation & Downloads section of the included pamphlet). If you want to manipulate the settings on the detector itself you can, however the idle timeout is fast, so know the setting you want.
Next, download the Drive Smarter App. Drive Smarter is the App to install, which not only registers your radar detector but lets you change the features that are enabled / disabled, gives current Speed Limit to your detector, as well as other App settings. While you drive, running the App isn’t mandatory, however you do lose the current Speed Limit & the ability to mute on the App (vs the button on the power cord or unit itself), but also report each detection. While pretty cool, the App does seem to use a decent amount of battery so keep your phone/tablet plugged in.
Don’t want to tweak and tune all the settings, but want more of a Highway / City radar detector? Sure, that capability is there, but it’s a fairly expensive detector to not do the homework to see what settings you should be running. Curious about those settings in the US? Check out the ‘rdforum’ thread 58040 out for some band segregation guidance.
After tweaking and tuning, I found that AutoNoX (pics are while I was messing with the values) as X band isn’t in my area for Police Radar.
I did get some alerts on the Highway for speed signs and the local County & Highway Patrol radar traps hit every time; I even caught a Highway Patrol running always-on while driving in the night (see circled SUV in pic), which is cool because I wasn’t aware they did this in my area amd each time, I got a decent directional arrow - forward / sides / rear. When approaching areas that Waze has marked as having a presence, I got around 1 mile of warning off the Ka band and in some cases, I had a few miles of warning but never had to go all the way before turning off - but the detector was chirping.
When getting a few alerts at the same time, Bogey Detection is clean and there’s a clear alert to another detection & indication of the direction of each. Cars with Blind Spot Monitoring can generate false positives and I was listening for them and didn't appear to get tripped up by them which is a huge plus.
Some oddities that I ran into …
- Speed limit can be off by 1 MPH on the display - so, a 56 instead of 55 & 61 instead of 60. The speed limit in the App is fine, however.
- Caught a Highway speed sign running at 24.121GHz, indicated rear as it was in front of me and as I passed, then transitioned to side, then to rear. Maybe it was another sign, but it struck me as odd
- Auto Mute didn’t work for me, it kept on false alerting in the same spot, day in & day out, regardless of a mute button press (no lockout)
- It was picky about USB cables when attempting to see if there was new firmware. If there’s no detector detected, get a different microUSB cable
Something I miss which my other detector has, is the announcing of the frequency after the band. So announcing “34.677” is helpful and lets me keep my eyes on the road because I’m becoming more familiar with the bands in use by the locals/highway.
A few decent websites for setting recommendations of a similar detector & where each band / Lidar is run in your state (people sourced).
Vortex Radar has a good demo on how to configure / setup your detectors — I used the Max 360c as an example.
Finally, lexbrook has a crowd sourced site that indicates the radar bands, lidar and where they do aerial patrol - very helpful.
So, how would I rate this? I’ll roll with a 4 as I can’t do 4.5. Mostly deducted due to the App and not announcing the band frequency. If that doesn’t matter to you, then you’d probably call it 5-stars.
I would recommend this to a friend!


Share this review:
0points
0of 0voted this as helpful.

Heavy, wet leaves and other stubborn debris are no match for the Greenworks 80V battery powered handheld leaf blower. The jet fan design provides up to 730 CFM of constant airflow for blasting through heavy, wet leaves and tough debris with ease; and a variable speed trigger delivers on-demand power and up to 170 MPH of high-velocity air speeds. It’s one of the most powerful battery-powered handheld blowers in the industry, with Greenworks exclusive Intelligent Power that combines Brushless motor technology, lithium-ion battery power, and ultra-fast control systems for power output equivalent to a 26cc gas-powered motor. Includes 2.5 Ah battery and rapid charger. Battery is compatible with 75+ Greenworks 80V products. Life. Powered. By Greenworks.
Customer Rating
4
Blower with a good battery life
on April 25, 2023
Posted by: nhtechie
Greenworks’ 80V blower is my first beefy, battery-operated leaf blower and another battery platform added to my collection
TL;DR for my frequent followers:
Good:
Controls (primary and supplemental)
Battery / Battery Life (for only 2.5Ah)
Charger
Controls (primary and supplemental)
Battery / Battery Life (for only 2.5Ah)
Charger
Bad:
Battery connection
Battery connection
Meh:
Weight distribution
Air intake location
Weight distribution
Air intake location
The Greenworks 80V blower came in a box with the blower, battery + charger and the nozzles.
Not that I’d ever try a battery without a full charge, but this battery was just about dead and required a full charge which seemed to take the better part of an hour. While charging, a fan whirred very similarly to my 56V outdoor tool vendor, for which I imagine keeps the fast charging controller cool.
Assembly of the nozzle pieces was a no brainer, but inserting the battery, well - it baffled me at first. I tried inserting it but it seemed to stop before the clip caught it and looking inside didn’t show anything blocking it. I lined up the contacts and tried again, still wouldn’t lock into place. After the third try, I resorted to the manual - believe it or not - to insert a battery and it was just that - do what I did, except push REALLY hard and it eventually pushed in enough for the clip to lock it in.
Once the battery was connected, dust, dirt, leaves and mulch bits went flying.
The trigger allows you to pull all the way for full power or back it off a bit to be a lower wind speed and less invasive. There’s a pretty cool thumb lever that lets you set the speed and leave it there, dialed to how high or low you want it. Or, when you think you need a bit more power and you’re already on full, hit the turbo button for some more air movement.
As someone that doesn’t do much with a hand-held leaf blower, a strap could be handy and there’s an eyelet for what seems like a blower strap, but I couldn’t find one on their website. I’ve used it to clear out my front corridor, clean up a cabana after a birthday party and some other miscellaneous chores and I’ve been able to do all of it on a single charge - lots of high speed usage and the turbo button as well!
Overall, the blower is fine and here are a few ‘rookie’ observations. The plastic at the bottom is pretty rigid and not very refined compared to others that I’ve seen - at least online. Also, I found myself using the side of my leg after a bit of continuous use and that’s where the air intake is, so the placement is a bit ‘meh.’ With the lightweight nature of the blower, a heavy battery at the back might not be the best location; an underbody mount might have made more sense.
Recommended? Yep!
I would recommend this to a friend!

Share this review:
0points
0of 0voted this as helpful.

Mind all your manholes with MANSCAPED Power Duo Plus Package with everything you need to look good from every angle. The Lawn Mower 4.0 takes any man’s groin and body grooming game to the next level while the Weed Whacker 2.0 makes those dangling ear and nose hairs disappear without the ouch factor. To make sure you smell the part, MANSCAPED Crop Cleanser will keep your groin zone so fresh and so clean with a luxurious lather.
Customer Rating

5
Clean cuts with no nicks or pulls
on March 6, 2023
Posted by: nhtechie
After seeing the Lawn Mower online since v1, I was shocked to see it was at v4 and this set comes with a nose hair trimmer and some ‘wash’ product too. I’ve used a series of trimmers over the years and after a few uses of these two, I think I found my new favorite set.
TL;DR for my frequent readers and details below.
Good:
Lawn Mower 4.0:
- Size
- Light
- Charging cradle
- Waterproof
- Replaceable Blade
- Lockout for traveling
- Braided cable & compact charge adapter
Lawn Mower 4.0:
- Size
- Light
- Charging cradle
- Waterproof
- Replaceable Blade
- Lockout for traveling
- Braided cable & compact charge adapter
Ear & Nose Trimmer:
- Non-pulling cuts
- Waterproof (more or less)
- Non-pulling cuts
- Waterproof (more or less)
Bad:
Lawn Mower 4.0:
- Concave slider isn’t easy to slide
Ear & Nose Trimmer:
- Can’t be charged via the dock
- Concave slider isn’t easy to slide
Lawn Mower 4.0:
- Concave slider isn’t easy to slide
Ear & Nose Trimmer:
- Can’t be charged via the dock
- Concave slider isn’t easy to slide
Meh:
Lawn Mower 4.0:
- Nothing really
Ear & Nose Trimmer:
- Nothing really
Overall:
- Lacks a travel case (but has a travel lockout?)
Lawn Mower 4.0:
- Nothing really
Ear & Nose Trimmer:
- Nothing really
Overall:
- Lacks a travel case (but has a travel lockout?)
So, this pack came with both the Manscaped Ear & Nose Trimmer (called something else, but the naughty word catcher will block my review) and the Lawn Mower 4.0.
Right off the bat, I saw the charging cradle & was like “Yes” but then I saw that the nose hair trimmer didn’t sit as nicely in it so I was confused. I took the nice braided USB-C cable and compact wall charger, found a charger from a drawer and plugged it in to find that the Lawn Mower is the only one of the set that can be used in the cradle and I’d have to unplug the cradle to charge the nose hair trimmer; that gets a “meh” from me.
Now, in my photos I use a blue cable - but that’s not the one that comes with it; I use a USB-C cable that came with my toothbrush and move it between all three accessories to save on outlet usage in the bathroom. I must repeat, the cable seems nice; it’s braided and even has “Manscaped” on the USB-C end, in case you forget where it came from.
In looking at the features of the Lawn Mower, I find it nice to see that the blades are replaceable; however given the iterations of the accessory, what the interoperability will be like when they’re at v8.
In my use of these grooming devices, of which I’ll keep short (and curly?) they performed exactly as I had hoped. The light on the Mower was a nice touch and very handy as I don’t have a light directly above my grooming location. A pair of trim guards take you from directly on the skin to a bit of a buffer in the event there’s hesitation on getting nicked. Easy to snap on and off, the guards are a keeper but I foresee them getting lost as there isn’t a travel pouch or the like. Finally, I found the slider switch a bit rigid and a tough slide when comparing it to other products that I’ve used. Being concave, I found my thumb in the groove and pushing with my thumb tip where my nail was over the lip; others I’m able to use the middle of my thumb for leverage. Not a deal breaker, just an observation.
An Ear & Nose Hair trimmer are devices that are a dime a dozen and I haven’t met one that didn’t pull my nose hair that my eyes didn’t start watering.
After a few uses in my nose and ear, and around my ear lobes and the like, I found the cuts very nice and no pull. I hit a few white hairs in the nose and instead of pulling it out because it’s wiry, it cut it right down and I moved on along.
If the nose trimmer keeps sharp and doesn’t start pulling, I’ll be a happy camper.
Lastly, the “groin wash” is a nice touch after a trim. Not overly aromatic or greasy, I find myself using it without concern and - sensitive skin be darned, this didn’t irritate me whatsoever.
Overall - a 5 star product. Well done.


Share this review:
0points
0of 0voted this as helpful.
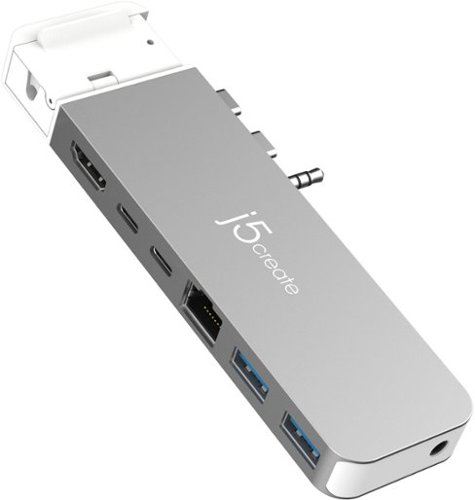
The 4K60 Elite Pro USB4 Hub with MagSafe Kit expands your computer’s connectivity. Seamlessly connect peripherals such as a keyboard, mouse, or USB flash drive to this pocket-sized multi-adapter, which has two USB Type-A 3.2 Gen 2 ports and one USB-C port. Data transfer is quick and easy with the included Gigabit Ethernet port to access a wired network. Transfer files from one media to another with the 10Gbps USB connections. You can use the HDMI port to connect to a 4K UHD HDTV, monitor, or projector. Equipped with a USB4 port it provides 6K60 resolution, 40Gbps data transfer, and charging up to 100W of power for charging your computer when a USB-C power adapter is connected. You can connect your headphones or speakers to the audio/mic combo jack. The MagSafe dongle is a convenient way to store your original MacBook MagSafe charger. For Intel MacBook models, the audio/mic combo jack may be removed.
Customer Rating
4
Nice little unit for travel
on December 18, 2022
Posted by: nhtechie
Sometimes you need a Network Adapter and some USB-A ports on your M1 14in MacBook Pro; enter j5create to help solve this with minimal effort
TL;DR for my frequent readers and details below.
Good:
Noise-free
Form Factor
Ports (HDMI, USB-C, USB-A, 3.5mm audio)
Magsafe compatible
Supports a 4K screen
Noise-free
Form Factor
Ports (HDMI, USB-C, USB-A, 3.5mm audio)
Magsafe compatible
Supports a 4K screen
Bad:
Small gap between the adapter & the computer, leaving the metal parts visible
Doesn’t support my Samsung G9 5120x1440 screen
Tough to remove the 3.5mm pin once it’s in
Small gap between the adapter & the computer, leaving the metal parts visible
Doesn’t support my Samsung G9 5120x1440 screen
Tough to remove the 3.5mm pin once it’s in
Meh:
Lid covers interfere with the edge, making a non-so-snug closure
Needs an easier way to quickly remove from the computer
Lid covers interfere with the edge, making a non-so-snug closure
Needs an easier way to quickly remove from the computer
An adapter to add a physical Network interface and some USB-A ports to a USB-C only MacBook Pro, all while supporting the MagSafe connector is something you should have in your travel bag all the time. While this does have limitations that traditional USB-C docking stations don’t have, it’s good in a pinch and I found it quite useful when I was on the road for work recently. Also, it adds another HDMI port, so if you’re stuck with only HDMI screens at least you could run two vs 1 from off the MacBook Pro alone.
Getting the MagSafe connector into the adapter was easy and once I realized that lifting up on the cable (vs the white block) was the way to quickly detach, it made more sense. Once the MagSafe connector has been ‘detached’ from the computer, there isn’t an easy way to remove the adapter from the computer. I felt like I needed to shimmy it off, but that wasn’t right. Pulling on the top and bottom simultaneously disconnects it, however there should be ‘something’ to pull on to take it off easier.
Once it’s on and in use, you can see the connectors between the adapter and the computer (see pic). Not sure if I’m a huge fan of this - I always have paperclips, sim pushers, etc out for various reasons and feel that the thinner metal things could fall in the groove & who knows what would happen.
When attempting to use my Samsung G9 Gaming screen (5120x1440), it stayed black with no signal, but my Dell 27in 2k display had no issues and a traditional USB-C 4K Samsung screen was also just fine so it may be a refresh rate thing, but it’s one reason I can’t use it as my primary adapter for work.
A clear 4K resolution without any flickering or lag was a nice thing to experience. I didn’t have any 3.5mm audio to test, so I can’t speak to that but I’m sure it’ll come in handy for those that are anti-Bluetooth and want a wired headset.
All in all, this is a great little unit and I’ll give it 4 stars because of the connection gap and that it can’t support one of my screens.
I would recommend this to a friend!

Share this review:
0points
0of 0voted this as helpful.
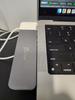
The best just got better with the new Nextbase 622GW 4K Dash Cam. With an abundance of new features and world’s firsts, the 622GW is the most accurate, powerful and highest image quality Dash Cam in the market today. Ultra-clear 4K recording at 30fps captures those all-important finer details, with recording at 1440p HD at 60fps or 1080p HD at 120fps for super slow motion available. An improved sensor ensures enhanced night vision on even the darkest roads. Image quality is at the forefront of the Dash cam revolution, with Image stabilization reducing vibrations from your vehicle and improving footage clarity. Another first for Nextbase is Extreme Weather Mode, to provide a clearer image in misty conditions using special defogging algorithms, crucial for winter and night-time driving. The 622GW is the world’s first Dash Cam to include what3words. This provides your exact location to a 3m square location without the need for a data connection, crucial for emergency services to precisely locate you. Coupled with Emergency SOS and Alexa Built-In, the 622GW shows its further ahead the field with technology advancements. Increased connectivity for transferring footage to your mobile phone is key with new built-in Bluetooth 5.0 and Hyper-Sync Wi-Fi 5GHz speeds are up to 10x faster. This ensures syncing times with the MyNextbase Connect app (IoS 12.1 or later and Android 5.1 and up). The 622GW is compatible with any Nextbase Rear View Module, to offer-all around protection, whilst crucially maintaining front 4K image quality, with 1080p full HD rear recordings. The 622GW features all the much loved Nextbase features including Intelligent Parking Mode, high accuracy 10x GPS readings, a 3” HD IPS touch screen and the fully patented Click&Go PRO mount design, for the ultimate Dash Cam user experience. Note- For this product a U3 class Nextbase microSD card is required (Not included). The ability to maintain a high WRITE speed consistently is what Nextbase SD cards are designed to do better than any other SD card. Any drop/fluctuation in WRITE speed within the SD card causes the Dash Cam footage to buffer, and in some cases will stop the recording entirely. Our Nextbase SD card controller and Firmware on the SD card achieves the requirements from our Dash Cam, where other SD cards cannot. Due to the continuous recording and overwriting of the card, the SD card needs to be a high-endurance card, otherwise the card may develop faults after a period of time; if a lower-capability card is used, certain features on the camera will not fully function due to being unable to re-write and record. Nextbase has over 3 million dash cams sold, 115 unique patents, custom designed processors and improved sensors which record fast moving objects in perfect picture clarity for day and night time driving. Auto adjusts contrast and brightness to further improve the footage details in the event of an accident. Save time, money, and ease with Nextbase Dash Cams.
Customer Rating
4
Great Dash Cam with some cool features
on December 12, 2022
Posted by: nhtechie
I’ve been using a dashcam for a few years and when the GW622 arrived, my kid said - “wait, you still have that old one after all this time?” I guess I go through a lot of tech …
TL;DR for my frequent readers and details below.
Good:
WiFi access to videos without having to pull the SD Card
Touch screen
GPS
Speedometer
Auto Time Update
Adhesive Mount
Magnetic Mount
Sound
1080p 120fps / 2k 60fps / 4k 30fps
So many software features
WiFi access to videos without having to pull the SD Card
Touch screen
GPS
Speedometer
Auto Time Update
Adhesive Mount
Magnetic Mount
Sound
1080p 120fps / 2k 60fps / 4k 30fps
So many software features
Bad:
App access to videos, screenshots
App access to videos, screenshots
Meh:
MicroUSB (just shocked to see it)
Setup hurdles (SD Card)
MicroUSB (just shocked to see it)
Setup hurdles (SD Card)
OK, this thing is great, but for more than 3x the price of my last dashcam I guess it comes with the price point.
I started right off setting up the camera, but every time I went to do the firmware updates, it failed! Then, I grabbed an old MicroSD card and put it in the camera, formatted it and fixed the firmware update issue: you need to have a card inserted. Maybe it said that somewhere, but I clearly missed it.
Once updated, Live View was pretty cool and responsive - say, maybe 1.5 seconds of delay.
Now, onto the camera and controlling the menus. Talk about a responsive touch screen! Easy to tap on & swipe; it made going through the menus a breeze, vs having to click buttons that may or may not be intuitive.
Want the speed recorded on the video? Or GPS coordinates, or model, etc? It’s just about all there for you to enable/disable. Another great thing is that it auto-corrects time drift with GPS - great for keeping accurate time.
Once I got it where I wanted it configuration wise, I went out to mount it to the windshield. In a hot and sunny year-round area, suction cups don’t work and I’ve had great luck with the double-sided tape for my old dash cam for ages, so this was a good thing for me to see. A magnet holds the camera to the mounting bracket and the power goes into the bracket. This makes removing the camera so easy, which is great because I used to fear the eventual 150 degree bake-off the windshield of my last camera where removing it wasn’t so easy.
Off to the road I went in the evening, to get a feel for the footage at dusk & night.
To save the current video, click at the bottom of the screen - the red Nextbase button; to take a picture, tap the screen.
After getting home, I decided to fiddle with downloading & watching the footage. Internal audio is nice and crisp, easy to know what song was on & hear conversations and my awful singing. I stuck with 2k 60fps as my default as I wanted a bit more resolution and a decent FPS; 1080p / 120fps is tempting, but at this time - neither that, nor 4k 30fps are a setting I want to go with. When the download hits the App and you’re back on Data - the ‘follow my drive’ map is pretty cool.
Some things to note about interacting with the App:
- When you download the photos, they stay in the App & don’t to to your Gallery
- You need to ‘share’ them somewhere like Google Drive, but none of those places are the local device
- “Screenshots” don’t snap the current spot in the video, just the beginning thumbnail
- You can’t see your GPS track in the App until you have downloaded the file & are back on a Data network (WiFi/LTE/5G, etc).
- Uploading to the Nextbase Cloud needs to be on vehicle power as via USB at home seems to let the camera go to sleep and interrupt the upload. I never got one to complete.
NOTE: Because the videos themselves are stamped, there’s no going in after and removing GPS or your speed, unless you video-edit/crop the entire bottom out.
The videos overall are pretty good, to be honest; nice and clear enough to see speed signs at 50mph.
With the videos and the ability to crop some of the photos after the fact, this thing gets a 4. Why not a 5? Getting videos out of the App’s Library is a pain; I don’t want to share it 95% of the time, I want to save it to my local device. When videos range from 200-500MB, sharing it becomes a struggle.
Do I recommend this? I sure do. Why? Well, the quick connect magnetic base, 2k 60fps & 1080p 120fps options and some cool details when looking at the map + video view.
I would recommend this to a friend!


Share this review:
0points
0of 0voted this as helpful.
![McAfee - McAfee+ Advanced Individual ID Theft Coverage, Monitoring, Privacy Protection & Security Software (1-Year Subscription) - Android, Apple iOS, Chrome, Mac OS, Windows [Digital]](https://pisces.bbystatic.com/prescaled/500/500/image2/BestBuy_US/images/products/6518/6518282_sd.jpg)
McAfee+ Advanced for unlimited devices delivers worry-free, all-in-one protection for all your devices — with McAfee+ Advanced stay private and secure online with all-in-one protection, including personal data removal from websites that sell it, monitoring of your personal and financial info and accounts, $1 million identity theft coverage and assistance, plus all the McAfee+ Premium features like award-winning antivirus, VPN, identity monitoring, and a password manager.
Customer Rating
5
Lightweight software for the win!
on November 19, 2022
Posted by: nhtechie
I was a pusher of AV software back when I did in-calls for PC problems at peoples homes; these days, I’m lucky if I even keep Defender on. So, why not see how things have progressed over the past few years regarding scanning & identity protection software and services.
Pros:
Easy download / install
Features
VPN Included
Lightweight
Startup Speed consideration
External Drive recognition
Easy download / install
Features
VPN Included
Lightweight
Startup Speed consideration
External Drive recognition
Cons:
Identity / Breach review hoops
Identity / Breach review hoops
Meh:
Run a scan now, isn’t on the main screen
Run a scan now, isn’t on the main screen
Once the code came to me in email, I followed instructions to download & install. Once some system compatibility checks passed, onto the Install & subsequent “Install complete.” As I use an iPad for browsing the web & my PC primarily for gaming, I don’t run anything outside of Windows Defender. Well, that is if I remember to turn it back on after some COD.
Right off the bat, I was greeted by a number of features, but “Run a Scan” wasn’t there; it’s in the 4 squares menu on the left. Strange. I ran with a scan and not surprisingly, nothing was found. To make sure it was working, I pulled down EICAR and that was caught, so it’s all good… and I’m not a risky computer user.
In a week of using the program, I found it shockingly lightweight and didn't notice any lag - even when scanning and that (back in the HDD days at least) was a huge
Settings include ‘startup speed’ considerations
Settings include ‘startup speed’ considerations
There isn’t a ‘safe’ amount of time to review password / ID breach info. Over and over again, I was required to verify who I was. I get the need for security, but that’s like the bank asking you for your verification every time you change menus or go to transfer funds; once you’re logged in you should be good for a while.
VPN speeds are pretty great; my traditional 500Mb/s is dropped to between 320-420Mb/s on VPN , while CyberGhost nets me 140Mb/s.
Overall, there is a nice set of lightweight features here that can only add to your online security and privacy.
Recommended? Yep!
I would recommend this to a friend!


Share this review:
0points
0of 0voted this as helpful.
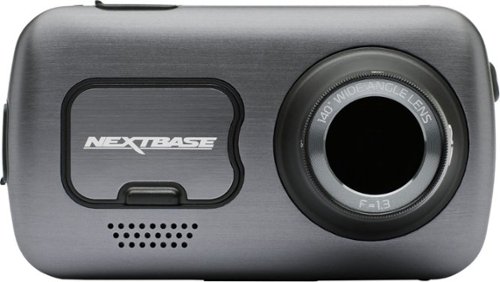
The Google Pixel Watch has a beautiful circular, domed design and new experience with Wear OS by Google.₁ Live healthier with sleep, heart rate, and activity tracking on Fitbit₂ and get things done on the go with Google Assistant, Maps, Wallet, Calendar, and Gmail.₃ Works with most phones running on Android 8.0 or newer.
Posted by: nhtechie
This watch has more features than it does diameters.
TL;DR for my frequent readers and details below.
Good:
Display Clarity
Touch screen functionality
Samsung interoperability
Ease of band changing
Additional smaller band
Display Clarity
Touch screen functionality
Samsung interoperability
Ease of band changing
Additional smaller band
Meh:
Proprietary magnetic charger
Proprietary magnetic charger
Bad:
Gets warm when charging
Diameter / size
USB-C with no wall Adapter
Updates only when charging
Gets warm when charging
Diameter / size
USB-C with no wall Adapter
Updates only when charging
Unknown:
Cellular use / activation
Cellular use / activation
So, to start - the watch came well packaged and included the proprietary wireless charger and an extra band; no wall adapter was included and all of my USB-C adapters are 35W+ which is overkill, so I had to reallocate one for this purpose (sorry Pixel Slate!).
As always, I let the watch charge up before using it for the first time; why start with a low battery and then have to stop playing only to charge it when you could have done it in the first place, right? In not too long (45ish minutes), the watch was charged up and ready to configure. Once on my watch, I realized how small this watch face was and realized it was more of a Fitbit size and one that wasn’t going to work for “me” but maybe this would be better suited for my paddle boarding wife? If you like the G-SHOCK line, or even the mid-size Garmin Fenix devices, this may not work for you. Speaking of smaller wrists, the watch band swap out is so easy - like, super easy and they even give an extra “smaller” sized band in the even this is going to someone with a smaller wrist.
Setup and configuration were a breeze, but be careful if you’re close to another Android device at the beginning because it pops up a pairing request to seemingly every phone that’s active. Get a comedian roommate or spouse and it may take you a little bit longer to set it up, should they steal the request.
Once going, the setup was easy as pie and my only complaint was that I had to take the watch off and put it on the charger to update the software; even phones have a minimum battery requirement to do updates - Google should do the same here.
Onto the usage. For me, no security PIN or swipe pattern, that’s silly. Other than that, use the App and get a nice watch face to configure with some of the widgets that suit your style and go for a walk, or ride, or whatever! Hopping on my Trek with my Garmin Fenix 6 Pro Solar on one arm and the Pixel Watch on the other, was a success. Without needing to pick an exercise (like Google Fit), it knew I went for a short ride around the neighborhood. When compared with my Garmin watch, the heartbeat seems pretty on point however it didn’t track my distance so /sadface.
Once a bit pairing circle happens (speaker/phone/watch), controlling Bluetooth speakers is pretty simple, as are most functions of the watch. If you’re a bit far sighted, you may have issues with this watch face - just a heads up.
Some overall thoughts:
When hanging around, the notifications are haptic enough to know they happen, but not enough to ruin a conversation and I found this pleasant.
The screen is nice enough to give you YouTube image updates that make sense (see pic).
A responsive touch screen makes all the difference and this is very responsive.
The screen is nice enough to give you YouTube image updates that make sense (see pic).
A responsive touch screen makes all the difference and this is very responsive.
When it comes to compatibility, I didn’t use a Pixel device, I used both a Galaxy S22 & S22 Ultra, seamlessly; I literally had no complaints during use or any of the features that are thrown in my face regularly (notifications, alarms, etc.).
After charging, it was warm to the touch where the top of my wrist is and I found it uncomfortable.
I had to allocate fast charger wall adapters to this as all of the traditional chargers are USB-A.
Finally, this is for the Cellular version, however I didn’t test cellular as I had originally wanted the WiFi version, but for an extra $50, it wasn’t a bad thing to have ‘just in case I changed my mind.’
From a battery perspective, I found that without Fitbit connected & always polling, battery life was much better.
Here are some rough eyeball’d stats:
Setup took around 4% of the battery (I did the setup a few times)
30 hours until it dies without Fitbit & great WiFi
24 hours until it dies with Fitbit
Charge it every night and don't worry about a thing
Setup took around 4% of the battery (I did the setup a few times)
30 hours until it dies without Fitbit & great WiFi
24 hours until it dies with Fitbit
Charge it every night and don't worry about a thing
Do I recommend this? Sure, given the caveats (battery life, face size).
Would I get another one for me? No.
Would I get another one for me? No.
So, I guess that makes it a 4 star device because I’d recommend it to a certain demographic; one that’s smaller than I.
I would recommend this to a friend!


Share this review:
+3points
3of 3voted this as helpful.
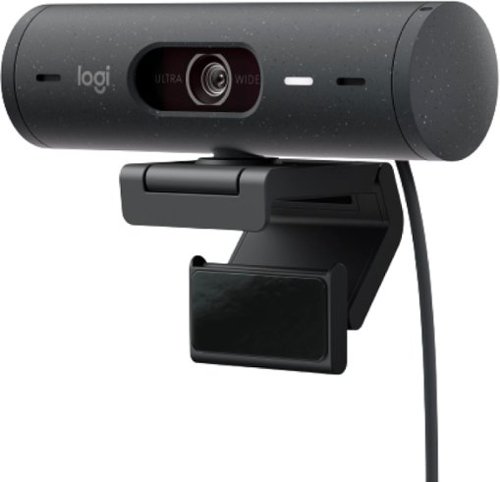
Show up to every video call feeling confident, seen, and heard. Logitech Brio 500 includes features like auto light correction for low-lighting conditions, auto-framing so you can move during calls, and Show Mode for presenting objects on your desk. Brio 500 Webcam creates a more authentic Google, Teams, or Zoom meeting experience, allowing you to connect genuinely with others.
Customer Rating
5
Great camera with nifty features
on November 7, 2022
Posted by: nhtechie
Needing to be on camera for work isn’t my favorite; this camera proves that I have a face for radio.
TL;DR for my frequent readers and details below.
Good:
USB-C
Built in privacy lens cover
Magnetic connection to mount
Software (G Hub & Logi Tune)
Camera rotation when pointing down
USB-C
Built in privacy lens cover
Magnetic connection to mount
Software (G Hub & Logi Tune)
Camera rotation when pointing down
Meh:
USB-C (yes, both good and Meh)
Cable location on camera
2 pieces of software needed
USB-C (yes, both good and Meh)
Cable location on camera
2 pieces of software needed
Bad:
Nothing I came across
Nothing I came across
Arriving in a compact box as expected, having ordered a few of the C920S cameras from Logitech in the past, it was a cinch to get it ready to install. With this camera, the mount to the monitor has a tape you can use to keep it stationary but I elected to not use it. It’s also held on with a magnet, vs being all one piece.
When going to hook it up to my computer, I see a USB-C connector which in theory is great, but I don’t have any USB-C ports open; my extra USB-C port is an extender adding more USB-A ports for accessories like my mouse & keyboard. Luckily I had a USB-C to USB-A adapter and plugged that in & got up and running. Turning the right cap of the camera backward, uncovers the camera and doing the opposite allows for video privacy. I found that the camera has the cable going right out the back in the middle, which interferes with my top monitor (see pic), so I had to shift it to the side; not optimal but not horrible.
Neither Logitech Options or Options+ showed the Webcam, so I needed to install G-Hub on my MacBook Pro.
Once installed, it said I didn’t have any firmware updates needed for the camera and I found that odd, but I went with it. I was able to adjust how wide / zoomed in the camera should be & it even had some not-really-useful filters (B&W, “zombie” and a few others). I stuck with the widest view & a Normal filter and it seemed good for me.
Off to the features that make this a reason to buy … the camera flips when pointing down from the monitor to display things on your desk & the ability to track / re-center you when you move.
Right off the bat, tilting the camera down showed things right-side up vs upside down and that’s pretty slick (see pic). If I need to show something, I don’t have to take the camera down, string the cable and show it straight on, I can just tilt the camera and get the same type of result!
Next was the tracking and boy I had no idea what it was supposed to do or look like. Instructions said that if you’re using Zoom, to turn off background blurring and you should be good to go – except I wasn’t. Then, I found ANOTHER piece of software has to be installed: LogiTune. Once LogiTune was installed, it saw my Brio 500, however it told me that I had a firmware update! Seems like G Hub and LogiTune aren’t in sync - but the update was applied and I found “RightSight” - the software that adjusts and tracks you if you are … moving, shifting your body weight or sliding around in your chair.
Things like default field of view (wide), Zoom, Image adjustments (focus/exposure/HDR), Show Mode (which worked without the software / tilting to show your desktop) and the LED light telling you that the camera is on, are all readily available in LogiTune.
With a few extra pieces of software, you get a camera that has some great features and a price that I don’t consider “premium.”
Recommended? Yes!
I would recommend this to a friend!


Share this review:
+1point
1of 1voted this as helpful.

A minimalist keyboard mastered for Mac with extraordinary feel, precision, and performance. Low-profile mechanical switches deliver a satisfying and quiet typing experience. Dual colored keycaps with a key layout for Mac computers help improve precision through your peripheral vision. Plus, get a complimentary 1-month Creative Cloud subscription with your purchase of MX Mechanical Mini For Mac and create, make, and do like never before.
Posted by: nhtechie
I do like mechanical gaming keyboards and the responsiveness and feel that they have. Logitech making a Mac-specific mechanical “mini” keyboard sounded awesome, so I jumped on it.
TL;DR for my frequent readers and details below.
Good:
Quiet
Soft feel / sound
Prominent F/J bars to easily center yourself
Backlight / customization
Options+ software
Responsiveness
Quiet
Soft feel / sound
Prominent F/J bars to easily center yourself
Backlight / customization
Options+ software
Responsiveness
Meh:
Single height adjustment feet
Column of buttons to the far right
Single height adjustment feet
Column of buttons to the far right
Bad:
Nothing
Nothing
Unboxing this keyboard gave me a white/gray keyboard with a very soft feel to the keys. I noticed right away that the height adjustment is a single adjustment where I’ve been seeing keyboards (gaming sure, but also mechanical) have two step height adjustments.
A not-quite 60% keyboard has a column of keys after the Return/Enter key with buttons such as Home/End Page Up/Down and the right arrow. If you think you’re just gonna feel for the furthest right button off the home row to give you a new line, you’re wrong; the button you will be pressing is Page Up and that has really messed with some of my typing.
Being a long-time Logitech user, I had the Options software installed for my MX Anywhere 3 mouse & MX Keys keyboard. I was presuming that after pairing the keyboard via Bluetooth would have brought up the new keyboard and allow me to pop right into customization but that wasn’t the case. A quick Google search showed me that Options+ was needed and an easy removal of Options & install of Options+ gave me all of my devices AND the new MX Mechanical Mini keyboard to start to play around with.
Having a few backlight lighting patterns to select is a nice touch (see pic), but I stick with constant as I want to look down & see all of the keys illuminated.
Like most wireless keyboards these days, this does also support 3 paired devices and that’s great for switching between devices on the fly.
As this is a Mac-centric keyboard, it has all of the goodies that you’d expect; quick access to screenshot, keyboard backlighting, volume controls and spotlight search to name a few. I was messing around and accidentally put the Mac into “Focus Mode” by hitting the moon & was wondering why I wasn’t getting my Slack notifications.
With the prominent bumps on the F & J keys, it helps me center myself if I need to type numbers because I’m a terrible number typer. This keyboard is also super responsive and I haven’t witnessed any typing lag; I type it, it shows up just as fast.
My normal charging routine is - use the mouse and keyboard all week and charge it Sunday night to get me through the next week. After a week of pretty constant use, the battery was only at 95% (see pic) and that’s crazy. My MX Keys would be around 80% for the week and that has been the case for most of its life.
Can you hear me typing with this? Sure. Does it echo a bit throughout my office? Sure, a bit depending on how hard I’m typing. Is it a comfortable keyboard to use all day and pretty stable (doesn’t slide around)? Absolutely.
Not too sure how much more I can talk about this as I hit on the major things that I look for in a keyboard.
Recommended!
I would recommend this to a friend!


Share this review:
+2points
2of 2voted this as helpful.
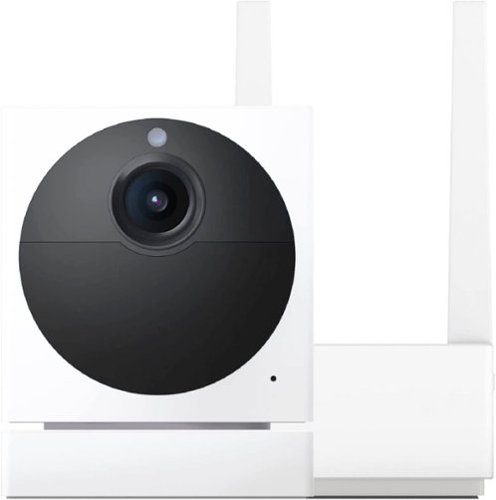
Wyze Cam Outdoor v2 takes everything you loved about the original wire-free, battery-powered Wyze Cam Outdoor to a whole new level. Now with our award-winning Starlight Sensor, you can see at night just as clear as day with Color Night Vision 1080p HD resolution. Get alerted when motion is detected, now up to 28% further away and set custom motion detection zones to only get alerts that matter to you. See even more than before with a wider, 130 degree field of view, so you can see more of what’s out there. Take advantage of the built-in security features like a motion-activated siren, two-way audio, and motion-detection alerts for even more peace of mind. Best of all, it’s easy to mount, has a 6-month battery life with easy recharging via microUSB, and you can even connect it to Wyze Solar Panel to eliminate the need to recharge ever again, depending upon your location.
Customer Rating

3
Good quality - subscription needed for recordings
on September 30, 2022
Posted by: nhtechie
Another Security Camera review under my belt with this Wyze Cam Outdoor Starter Bundle; boy do I wish I didn’t pick this one up.
TL;DR for my frequent readers & more below.
Good:
Clarity & Quality of Video/Images
Form Factor
Simple App configuration
Easy updates
Clarity & Quality of Video/Images
Form Factor
Simple App configuration
Easy updates
Bad:
Hub has a proprietary power connector
MicroUSB charging port for Camera
Subscription based recording
WiFi "N" from 2009
Hub has a proprietary power connector
MicroUSB charging port for Camera
Subscription based recording
WiFi "N" from 2009
On opening this box, I was shocked to find a MicroUSB cable and thought it must be for the hub to get power. Nope, it was for the camera (nooooooooooooo!). Looking further, the Hub itself has a proprietary ‘round’ power connector instead of something universal, like USB. I found that pretty weird, as it doesn’t seem to be something that needs a brick given it doesn’t need to do much more than WiFi on top of its compute functions.
The base is pretty nice & has a sturdy magnet for the camera to snap onto; I didn’t mount the base but it did include some screws and anchors. An angled position (point up, etc) can be achieved by exposing the arm from the base, allowing it to be placed on the ground and have a good view upward, vs straight / down.
The App setup was fine, super simple and both the Base station & Camera each received updates straight away and both the App and Base station received another set of updates in the time I was playing with the camera and features. At first, the Base station needs to be hard-wired (Ethernet cable) to the network during setup; kind of weird, but whatever. Then, in Device Info, you can kick it over to WiFi.
On the box, it calls out 802.11b/g/n as the WiFi capability - which is weird since we've hit "ax" and WiFi6; "n" is from back in 2009 ish. I'm not too sure how accurate that is.
In my first few minutes, I received notifications, set up the AI part that looks for people vs vehicles and ran through the App for different features. Trying to see what happened on the other hand, not so easy. The notification has a still image but unlike other ‘starter’ type budget cameras, that’s where it ends. No ability to have recordings saved without a subscription is … not for me. Even with a limited recording ability such as: “Record 12-second Event videos every 5 minutes” still ends up costing something like $2.48/month; paying annually typically knocks the cost down but come on - 12 seconds every 5 minutes they want to cost (2.48*12) ~ $30/year? Adding a MicroSD card to your Base station doesn’t help either as the MicroSD card holds: “[the] same recordings that are stored in the cloud, but the microSD serves as an additional, physical backup.” So pay for the card & pay for the sub.
From a clarity perspective when I took manual photos and videos that ARE saved to my mobile device, I found them to be nice, clear and detailed for only 1080p!
To conclude, if you want a subscription-based camera that takes the price tag up about $20 + a yearly subscription fee moving forward, go for it because with your MicroSD card (not included), you can have 2 copies. If you don’t want it for ‘actual security’ then skip it and find a different vendor that doesn’t go the subscription route.
No, I would not recommend this to a friend.

Share this review:
0points
2of 4voted this as helpful.
nhtechie's Review Comments
Enjoy rich, immersive bass with this Pioneer SW-8MK2 subwoofer that features phase and frequency controls, so you can easily customize your sound. High- and low-level inputs allow flexible installation.
Overall3 out of 5
3 out of 5Nice for the price, but buzz is annoying
By solandmatt
from Chicago, IL
I appreciate the importance of quality sound in a home theater system but I would not call myself an audiophile. I needed a powered subwoofer to integrate with the surround speakers that I hooked up with a new receiver.
The subwoofer works great. Movies, TV and music sound wonderful, with deeper and richer bass than I expected for the price.
My only disappointment, and it is a major one, is that it started to buzz after a few days. It does this whether on or off. I have to unplug it because it is extremely annoying otherwise. I searched reviews and it seems that other customers have had this problem as well. An Amazon customer spoke with Pioneer tech support and they indicated that this is a known issue. I guess the price is too good to be true.
nhtechie
Nashua, NH
buzz / hum
April 20, 2015
I purchased one, ordered another to have the "5.2" - and the same buzzing / humming is coming from the one from the store. I'm waiting for my second one to come in & see if it's the same. If it is, sigh - I'm going to dump them.
0points
0of 0voted this comment as helpful.
nhtechie's Questions
nhtechie has not submitted any questions.
nhtechie's Answers
Featuring a 1-inch CMOS sensor, powerful autonomous functions, and a compact body weighing less than 600 g, DJI Air 2S is the ultimate drone for aerial photographers on the move. Take this all-in-one aerial powerhouse along anywhere to experience and record your world in stunning detail.
can you use the air 2 app to fly the 2s
Short Answer: No
Longer Answer: There isn't an Air 2 App.
The DJI Fly App has been (seemingly) pulled by the Google Play Store (you may still have it, but it won't update), so you have to get it right from DJI now.
If you don't get the current App from DJI, you can't activate and subsequently fly the Air 2s.
Longer Answer: There isn't an Air 2 App.
The DJI Fly App has been (seemingly) pulled by the Google Play Store (you may still have it, but it won't update), so you have to get it right from DJI now.
If you don't get the current App from DJI, you can't activate and subsequently fly the Air 2s.
3 years ago
by
nhtechie

Experience crystal-clear sound quality with this Sony 3.1 Ch. Atmos sound bar. Vertical sound engine technology creates cinematic audio that seriously enhances your listening experience. Enjoy smartphone and iPad streaming with voice-activated Bluetooth technology. This Sony 3.1 Ch. Atmos sound bar is easy to connect and features an adjustable 7.12-channel entertainment mode for enhanced listening.
This only has 1 hdmi input? So I can’t hook up my Apple TV n my PlayStation thru the sound bar? Or does it just pay to go with HTZ9F
Use an optical cable OUT of your TV and INTO the bar and use the HDMI ports on your TV for your accessories. That way, the sound will be sent through the bar and it'll be one less hop to risk degradation of the video signal. Any Apps on your TV will also go through the bar, so another win there.
I have a PS4, Blu Ray Player and PC running through this soundbar without issue.
The user guide has a cabling diagram that's very straightforward.
I have a PS4, Blu Ray Player and PC running through this soundbar without issue.
The user guide has a cabling diagram that's very straightforward.
3 years, 11 months ago
by
nhtechie
With 15 programmable controls, LIGHTSPEED wireless technology, hyper-fast scroll wheel, and the revolutionary HERO 25K sensor, G604 offers both versatility and high-performance with endless possibilities to play with mastery. Dual connectivity lets you toggle between Bluetooth and ultra-fast 1 ms LIGHTSPEED advanced wireless technology—even on separate machines. Extremely accurate tracking and class-leading power efficiency enables up to 240 hours of high-performance gaming with one AA battery.
I read online that this mouse doesnt work with windows 10?
With the G Hub software for customizations (and to make the left-click work at first), it works flawlessly.

4 years, 6 months ago
by
nhtechie
Listen to music for up to 10 hours with this black JBL portable speaker. It has a built-in Google Assistant that responds to voice commands, and it delivers rich stereo sound while you stream music via Wi-Fi or Bluetooth. This water-resistant JBL portable speaker is made of durable materials, so you can use it outdoors safely.
Can the Link 20 be paired to more than one device? I got it set up on my phone with the Google Home app. I put Google Home on my tablet. When I try to pair it can't find a device.
Pairing is for Bluetooth, Linking is for Google Home.
As long as your tablet is on the Same WiFi network name (linksys vs linksys-5G) and you're using the same Google account, it should be listed in Devices in the Home App.
If any of those items aren't the same (like using another google account), you'll have to link your account or join the same WiFi Name.
6 years, 4 months ago
by
nhtechie

Make your home an internet haven with this versatile Linksys Velop wireless Wi-Fi system. Three identical tri-band dual-stream AC2200 routers, each equipped with a quad-core ARM Cortex-A7 processor, deliver lightning-fast internet. Equipped with Bluetooth 4.0/LE, this Linksys Velop wireless Wi-Fi system is simple to set up and pairs easily with computers, tablets and smart devices.
Have Linksys EA9500 which is hooked via Ethernet with my current provider which ihas a modem/router. Had to add 2 D-Link Power line adapters to get better wifi. Would returning all above work better with Velop?
I had the same thing. I disabled all of the functionality (Wireless, DHCP, etc), changed the IP (from 192.168.1.1, as the Velop uses that IP as well) and changed the hostname on the EA9500 and set these up with the same SSID that I had on the EA9500.
The additional devices only require power - no extra Cat5e/Cat6 cables needed. Since the Velop doesn't have a bunch of ports (just 1), I kept the EA9500 to act as a switch.
Spreading out the Velop units DOES make the signal better with little to no impact on speed.
The additional devices only require power - no extra Cat5e/Cat6 cables needed. Since the Velop doesn't have a bunch of ports (just 1), I kept the EA9500 to act as a switch.
Spreading out the Velop units DOES make the signal better with little to no impact on speed.

7 years, 3 months ago
by
nhtechie