gadgeTT's stats
- Review count171
- Helpfulness votes799
- First reviewOctober 1, 2015
- Last reviewApril 21, 2024
- Featured reviews0
- Average rating4.5
Reviews comments
- Review comment count0
- Helpfulness votes0
- First review commentNone
- Last review commentNone
- Featured review comments0
Questions
- Question count0
- Helpfulness votes0
- First questionNone
- Last questionNone
- Featured questions0
- Answer count11
- Helpfulness votes19
- First answerAugust 12, 2017
- Last answerDecember 2, 2021
- Featured answers0
- Best answers2

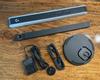
Logitech G Litra Beam LX is a dual-sided streaming light — one illuminates you with an LED key light for natural, radiant skin tones, while the other accents the room with an RGB light. With TrueSoft technology, LIGHTSYNC, Bluetooth pairing and advanced G HUB control, it’s two premium gaming lights in one slim, flexible design.
Customer Rating

5
Better Video Lighting and Cool Ambient Effects
on September 27, 2023
Posted by: gadgeTT
If you spend all day on video calls for work like I do, you’ll appreciate having better lighting. But that only covers to the front of the Litra Beam LX. The back of the light bar has RGB lights to wash the space behind it with cool ambient light effects. The provided stand is sturdy, extends and rotates and has cable management. The software is fully-featured and integrates with your other Logitech G gear.
Pros:
* Buttons on the light bar for most features.
* App-based full control.
* Color Temperature and Brightness settings for the front white light.
* RBG color and ambient effects for the back RGB light.
* Stand extends and light bar rotates for optimal placement.
* Orient the light bar vertically or horizontally.
* Cable management keeps the two cables tidy.
Cons:
* Stand’s base needs a bunch of table space.
* Local buttons could be easier to find by touch.
* Would be nice if the white light could be triggered when your camera turns on or off.
* Stand’s base needs a bunch of table space.
* Local buttons could be easier to find by touch.
* Would be nice if the white light could be triggered when your camera turns on or off.
Installation and Setup:
The stand arrives in two pieces that are easy to assemble- the weighted base and the vertical beam where the light mounts. Just place the vertical part on the base and rotate the lock to attach them together. The top of the mounting arm has a standard tripod screw and the light has two threaded tripod mounting holes; one on the left end for vertical mounting and one on the underside for horizontal. Choose the way you want to mount the light bar and screw it on. You can’t over-tighten it which is nice.
The stand arrives in two pieces that are easy to assemble- the weighted base and the vertical beam where the light mounts. Just place the vertical part on the base and rotate the lock to attach them together. The top of the mounting arm has a standard tripod screw and the light has two threaded tripod mounting holes; one on the left end for vertical mounting and one on the underside for horizontal. Choose the way you want to mount the light bar and screw it on. You can’t over-tighten it which is nice.
There are two plugs; one for power and one for USB control if you’d rather not do it by Bluetooth. Both plug into the bottom of the light and route the wires through the cable management holders on the arm and in the base. There’s space in the cable management for one wire, but it also came with clips to attach the two wires together at several points to neaten things up.
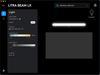
The last step is installing the software for your Mac or PC. While you can use most of the features of both the front and rear lighting with the local buttons and not bother with the app, the app gives you full control and the ability to update the light’s firmware. I use a Mac so that’s what I’ll describe here. It’s the same app as all other Logitech G stuff uses, but if you don’t already have it, it’s a quick download and it easily found my Litra Beam LX. That was it for setup!
Usage:
For local control, there are buttons on the top (the left if vertically mounted) of the light bar to turn the lights on and off, adjust their brightness and adjust their color (or pattern for the rear lights). There is a slide switch to choose whether you’re controlling the front (white) light or the rear (RGB) light with the buttons.
For local control, there are buttons on the top (the left if vertically mounted) of the light bar to turn the lights on and off, adjust their brightness and adjust their color (or pattern for the rear lights). There is a slide switch to choose whether you’re controlling the front (white) light or the rear (RGB) light with the buttons.
Depending on where and how you orient the light, the buttons may not be easy to see or find by touch. For example, if you have the light bar right in front of you and you turn the white light on, the light is bright enough to blind your view of the buttons and the buttons don’t have much in the way of physical dots or dips to feel for them. That’s where using the app for control comes in handy.
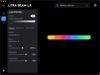
The app has a TON of features. You can set up profiles for the white and RGB lights, and assign them to various apps, too. For example, if you use Teams or Zoom for work calls, you can have the white lights turn on when those apps are in the foreground. This isn’t a perfect solution, though, since switching away to another app will switch light profiles or potentially turn off the light if you have it set to be off normally. As an example, you switch to a window to present that app on your video call and the profile switches away from the one assigned to your video calling app. For this reason, I don’t use the profiles feature much and instead just manually turn the lights on or off as needed using the Mac’s menu bar shortcuts.
If you’re a gamer in the Logitech G ecosystem, the lights tie in to the lighting effects that your other products use so you can have the RGB lights on the back of the Litra match the rest of your system.
One of my favorite parts is the app puts shortcuts in the Mac Menu bar. Here, you can quickly turn the white light on or off, switch the presets and manually adjust the white light’s brightness or color temperature. You can’t modify the RGB lighting from here, but you can still use the local buttons and the full app for that.
On my Teams call for work, I notice a huge improvement in video quality with the Litra Beam on. The RGB colors are more for me than those on the call as the camera doesn’t see the cool lighting effects that are behind my Mac ;-)
Since the light is powered from an AC adapter and not a built-in battery, you can leave it on all day without fear of it dying during a video call. This also means that the light isn’t really for portable use. You basically set it up and leave it where it is.
Overall:
Easy to set up and configure. Great lighting improvement with the front white light and fun ambient lighting effects with the back RGB lights. While I couldn’t get it to automatically light me up during my work video calls, it is easy enough to turn the lights on and off manually with the local buttons or the app. Overall, a great way to improve your video calls and add a splash of fun to the work space.
Easy to set up and configure. Great lighting improvement with the front white light and fun ambient lighting effects with the back RGB lights. While I couldn’t get it to automatically light me up during my work video calls, it is easy enough to turn the lights on and off manually with the local buttons or the app. Overall, a great way to improve your video calls and add a splash of fun to the work space.
I would recommend this to a friend!


Share this review:
+1point
1of 1voted this as helpful.
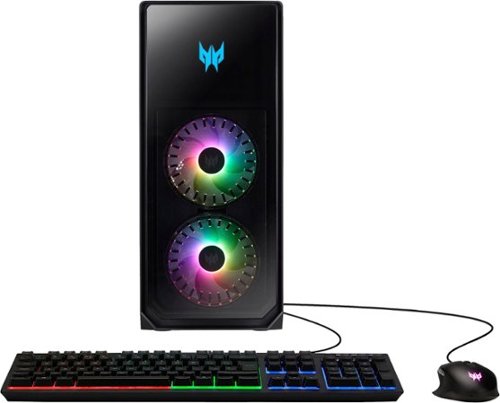
Show off that new powerful Predator PO5-650-UB11 gaming PC and illuminate your room in the multi-hued ambience of ARGB as fiery FrostBlade fans hum in an endless high-speed harmony giving constant cool to the Herculean hardware hidden away within. Powered by a 13th Gen Intel Core processor and high-performance NVIDIA GeForce RTX 3070 graphics, the Predator Orion 5000 delivers an awe-inspiring gaming experience that's second to none! Get ready for an unforgettable gaming experience that ignites the senses and takes your passion to new heights!
Customer Rating

4
Fast and capable but needs better CPU cooling
on September 15, 2023
Posted by: gadgeTT
For those PC gamers that don’t want to assemble their dream gaming rig from hand-selected parts, a pre-built gaming PC might suit their needs. The Acer Predator Orion 5000 Gaming Desktop PC is fast, capable, well-built and has plenty of room for expansion. If going hard but not extreme is enough, this PC will meet your needs for quite a while. The CPU cooling system is slightly less than what is needed to drive this PC to the max, though.
Pros:
* Case is easy to get into and upgrade.
* Plenty of interior room for expansion.
* Easy-access power button, 4 USB (3xC, 1xA) and audio jacks on the top front.
* Two colorful hub fans in the front and two more inside.
* Motherboard RGB lighting.
* Clear side door (to see all the cool interior lighting) that is easily removed for access.
* Comes with a keyboard and a mouse that each have controllable lighting effects.
Cons:
* CPU cooling is not up to hard gaming.
* Provided keyboard is acceptable but not great.
* Provided mouse is better than average but not great.
* Some pre-installed software to be removed after setup.
* CPU cooling is not up to hard gaming.
* Provided keyboard is acceptable but not great.
* Provided mouse is better than average but not great.
* Some pre-installed software to be removed after setup.
Installation and Setup:
This is a standard-sized metal desktop chassis that is probably best set up on the floor under your gaming area. When looking at the front, the left side door is glass and can be removed for easy access. Since the clear door is on the left, you might want to set up this PC on your right and facing you so you can see all the color effects if that’s you’re thing.
This is a standard-sized metal desktop chassis that is probably best set up on the floor under your gaming area. When looking at the front, the left side door is glass and can be removed for easy access. Since the clear door is on the left, you might want to set up this PC on your right and facing you so you can see all the color effects if that’s you’re thing.
The back panel has 6 USB connections (4x2.0/A, 1x3.2/A, 1xC) and 3.5mm for microphone, audio in and out, and an Ethernet port. The pre-installed graphics card has 3xDisplayPort and 1xHDMI ports. With those and the built-in WiFi and Bluetooth, you probably have everything you need to connect up your keyboard, controllers, monitor and headphones/speakers. The rest can be added separately with the open card slots or via a USB hub.
Plug in a monitor, the provided keyboard and mouse (or others if you prefer) and the power cord, then start it up!
Initial software setup was standard Windows with nothing special to mention. Get it up and running and then you can start your customization, remove any bloatware and install some games.
Usage:
The front of this PC looks nice but isn’t too crazy. There’s a convenient power button on the top front and the two front case fans have hub lighting that you can set up with the pre-installed app. On top near the front are also some extra USB and headphone/microphone jacks for easy access. Also on top is a deep tray where you can store controllers, thumb drives or snacks but nothing too moist as is it also part of the case ventilation ;-)
The front of this PC looks nice but isn’t too crazy. There’s a convenient power button on the top front and the two front case fans have hub lighting that you can set up with the pre-installed app. On top near the front are also some extra USB and headphone/microphone jacks for easy access. Also on top is a deep tray where you can store controllers, thumb drives or snacks but nothing too moist as is it also part of the case ventilation ;-)
The provided keyboard is not really gaming-specific, but it does have a few special things going for it. There are dedicated keys for volume up/down/mute as well as transport keys (play/pause/stop). You can turn on and adjust the keyboard backlighting brightness level as well.
The best one, however, is the dedicated key that disables the Windows keys so you won’t interrupt your game by accidentally hitting the Windows keys that flank the spacebar.
The provided mouse is nicer than average but is still on the lighter-weight side. It is sculpted to fit your hand (righties only) and has two side buttons, a rubberized scroll wheel and an extra top button. The sides of the scroll wheel and the Predator logo light up and are controllable, too.
The Predator Sense software is the home for lighting, fan control, temperature status and a few other things. It can be used to adjust the colors of the interior lighting (fans, etc.) as well as the keyboard and mouse. It also provides temperature readouts for the CPU, the GPU and the system overall and allows for control of the fan speeds manually or automatically. The fans are reasonably quiet at lower speeds but under hardcore gaming stresses, the fan ramp up and get a bit loud. Nothing that a good (optional) headset can’t remedy ;-)
The provided graphics card can handle some serious gaming as can the CPU, but under hard load, the CPU cooling just can’t keep up and the speed throttles down. If you like high-end gaming with the settings cranked up, you might want to invest in some upgraded cooling options. Otherwise, this system works well as-is.
Overall:
A reasonably fast and easy to expand gaming system for those who don’t want to hand-build their own and don’t have extreme needs. The CPU cooling supports moderate use but not heavy loads, so cooling upgrades should be a planned expense.
A reasonably fast and easy to expand gaming system for those who don’t want to hand-build their own and don’t have extreme needs. The CPU cooling supports moderate use but not heavy loads, so cooling upgrades should be a planned expense.
I would recommend this to a friend!


Share this review:
+4points
4of 4voted this as helpful.
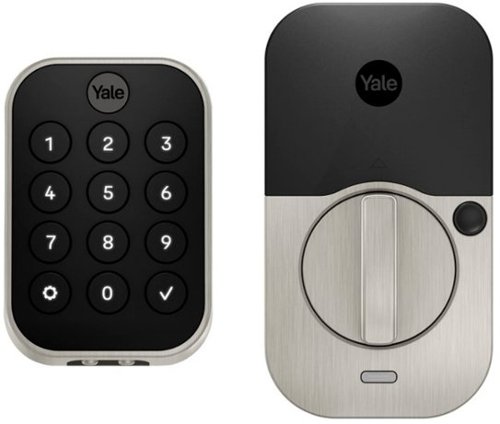
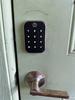
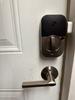
You've got enough on your plate, let Yale get the door with the Yale Assure Lock 2. With multiple ways to unlock, the ability to easily share and track entry codes and advanced Auto-Lock with DoorSense, this Wi-Fi smart lock gives you one less thing to worry about. With built-in Wi-Fi, you can easily check in on home, from wherever you are.
Customer Rating
5
A trustworthy keypad lock with tons of smarts
on September 12, 2023
Posted by: gadgeTT
This Yale Assure Lock 2 is essentially a Yale keypad deadbolt using August Lock app “smarts.” It’s the best of both worlds giving you all the security you need from Yale with all of the connectivity and automation features of an August Lock. It’s compact and easy to operate as well as being very solidly built.
Pros:
* Easy to set up and install.
* Solidly built.
* A backlit keypad with actual buttons to press.
* App access and control.
* Useful “passage” button to temporarily disable auto-locking.
* Easy to set up and install.
* Solidly built.
* A backlit keypad with actual buttons to press.
* App access and control.
* Useful “passage” button to temporarily disable auto-locking.
Cons:
* DoorSense feature was tricky to set up.
* As with all replacement door locks, installation requires a screwdriver and some know-how.
* Not compatible with Apple HomeKey.
* DoorSense feature was tricky to set up.
* As with all replacement door locks, installation requires a screwdriver and some know-how.
* Not compatible with Apple HomeKey.
Installation and Setup:
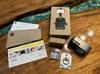
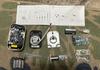
The packaging is quite nice with everything clearly laid out and nicely labeled. The physical portion of the installation is typical for this type of product but it all starts in the app. First you get the app up to the point where it expects the lock to be ready. Then, for the actual lock installation, uninstall the old lock and then start installation with the deadbolt, the inside portion and the outside portion of the new lock. Finally, return to the app to get everything online, connected and set up the way you like.
The packaging is quite nice with everything clearly laid out and nicely labeled. The physical portion of the installation is typical for this type of product but it all starts in the app. First you get the app up to the point where it expects the lock to be ready. Then, for the actual lock installation, uninstall the old lock and then start installation with the deadbolt, the inside portion and the outside portion of the new lock. Finally, return to the app to get everything online, connected and set up the way you like.
A few parts of the setup didn’t go 100% smoothly, but you can’t expect something like this to be perfect for everyone and a quick remediation fixed it all. The lock comes with an optional DoorSense magnet that is used to tell the lock when the door is open, ajar or closed. Calibration of this feature kept ending with success, but then the app would claim this feature wasn’t set up and it would show the door as open and locked when it clearly was closed and locked. I tinkered a bit more with it and finally got it working. The reset of the setup was super-easy.
Usage:
For those who have installed or used an August Lock before, this lock can be controlled by either the Yale Assure app or the August app, and seems to have the exact same functionality in both apps. You can set up keypad codes per person as well as guest codes. You can limit the use of anyone’s codes by date and time including a Vacation mode that disables keypad use but allows app use.
For those who have installed or used an August Lock before, this lock can be controlled by either the Yale Assure app or the August app, and seems to have the exact same functionality in both apps. You can set up keypad codes per person as well as guest codes. You can limit the use of anyone’s codes by date and time including a Vacation mode that disables keypad use but allows app use.
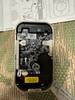
My favorite feature that I have not seen on even the August locks was the “Passage” mode. With other locks that have an auto-lock feature, sometimes you are going in and out of the door often and the door keeps locking after 5 minutes so you have to unlock it again and again. There is a button on the inside portion of the lock that when pressed, deactivates the Auto-Lock feature until the next time you intentionally lock the door. No more annoying auto-lock when you’re walking in and out a bunch, but you do need to remember to lock it when you’re done to reset the feature.
The keypad is nicely backlit and gives you the ability to press one button to lock the door behind you rather than waiting for an automatic lock or using the app.
The inside lever that rotates to lock the deadbolt is smooth and easy to tell from a distance when the door is locked. Plus, there is a light on the inside of the door that you can optionally enable to show the door’s status from a distance.
Of course, the app gives you full control of the lock remotely including access to all settings and the status of the door and lock. Through the app, you can set up and revoke guest access as well. You can even access the lock’s status and lock/unlock the door from an Apple Watch app.
I haven’t been using the lock long enough to comment on battery life, but the lock takes 4 AA batteries and came with the long-life lithium variety. This is a welcome change to other brands of locks that use more specialized, expensive and harder to find batteries. I’m hoping to get at least the expected 3 months out of a set which would be a LOT more than I ever got out of competitor’s locks.
Integration of the lock to various home systems is great! This model has built-in Bluetooth (for local connections) and WiFi (for remote access) without the need for a separate WiFi gateway box. It is compatible with Apple HomeKit, Google Home and Alexa. Just be aware that this lock is not compatible with Apple’s new HomeKey feature.
Overall:
Very easy to set up, nicely designed, solidly built and flexible. This lock has most everything you could want. The only thing missing, as an Apple user, is HomeKey support.
Very easy to set up, nicely designed, solidly built and flexible. This lock has most everything you could want. The only thing missing, as an Apple user, is HomeKey support.
I would recommend this to a friend!

Share this review:
0points
0of 0voted this as helpful.
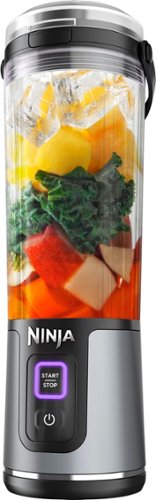
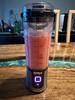
The Ninja Blast Portable Blender brings high-speed Ninja blending power on the go with a cordless, hand-held design. The 18-oz. vessel is perfect for smoothies, protein shakes, and frozen drinks. Blast through frozen ingredients with Ninja’s BlastBlade Assembly. Ninja Blast is rechargeable via USB-C. One-handed, easy-open sip lid and carrying handle make drinking on the go easier than ever.
Customer Rating
5
Convenient for smoothies away from home
on August 30, 2023
Posted by: gadgeTT
This portable blender is great for making smoothies and other blended drinks on-the-go. Whether you’re at the office, the gym, on a boat or anywhere in between, you can blend up your favorite drinks on demand for the ultimate in freshness. A quick and quiet 30-second blend is all it takes. The built-in rechargeable battery should last through several day’s worth of uses and its compact design is not a ton bigger than a regular tumbler. Cleanup is super easy, too.
Pros:
* Works really well.
* Is relatively quiet.
* Easy to clean with or without disassembly.
* Entire base is safe to be rinsed for deep cleaning.
* USB-C charging.
* Great battery life at up to 15 blends (30-sec each) per charge.
* Works really well.
* Is relatively quiet.
* Easy to clean with or without disassembly.
* Entire base is safe to be rinsed for deep cleaning.
* USB-C charging.
* Great battery life at up to 15 blends (30-sec each) per charge.
Cons:
* A bit awkward to drink with the weight of the attached base.
* Spring-loaded lid stays open until the last sip when it taps you on the head ;-)
* Not insulated, so chilled/frozen drinks start warming up and condensation starts soon.
* No travel lock - can trigger a blend accidentally.
* Not really 18oz - more like 14oz at most.
Sometimes you want to have a fresh blended smoothie or frozen drink when you’re not near your full-size blender at home. Perhaps you just crushed that workout at a park or gym, or need a break while working at an office… This Ninja Blast portable blender has you covered! The built-in battery powers through up to 15 blends (at 30-seconds each) and is easily recharged by USB-C. It’s relatively quiet and completely stable while blending.
Setup is super easy. There were a ton of informational stickers on the various parts, but they all had pull tabs and peeled off cleanly and easily. Charge it up with the provided USB-C cable and any suitable USB power adapter (not included). The light ring on the Start/Stop button indicates when charging is complete. There are really only 3 parts; the motor base, the blend vessel and the sip lid. Screw them together and you’re ready to blend up something tasty.
The instructions recommend a specific order of adding ingredients for the best results; liquids first and ice and frozen stuff last with everything else in the middle. The advertising says it’s an 18oz blender, but at least according to the measurements on the side of the vessel, the max fill line is 16oz and once all blended up, is a bit less than that. There is an optional 18oz vessel available separately, at least.
Turn it on and wait for it to verify that the vessel is screwed on properly. Then just tap the Start/Stop button to run a 30-second blend. Tap it again mid-blend to stop it early. If necessary, you can pick the whole thing up and shake or swirl it if anything isn’t blending well, but I never had a problem that needed to do this.
When the blending is done, just press the release button on the lid to sip away. You can even slide a straw (not provided) into the sip lid if you’d prefer. Keep in mind that the vessel is not insulated, so your cold or frozen concoction will start warming up and/or melting right away and if you’re outside on a warm day, don’t expect it to stay cold or frozen for long. While not necessarily intended, you can always unscrew the sip lid and pour your drink out into an insulated tumbler or glass for a longer-lasting chill.
The lid’s cover is spring loaded and mostly works fine. The shape of the sip opening is oval so the lid springs open away from you (not to the side). When you get to the last drops of goodness and the vessel is tipped to get the last few drops out, the lid’s spring just isn’t strong enough and the protective lid taps you on the head. Just be aware of this when finishing your drink and hold the lid open with your other hand and you’ll be fine.
After enjoying your smoothie, cleanup is really easy. The fast way to clean it is just to rinse out the vessel with the base still attached, then fill the vessel with fresh water to the “Min Liquid” line, add a drop of dish soap, and run a blend cycle (with the lid screwed on and closed of course). Rinse the soap out and you’re ready for another blend.
For a deeper clean, just unscrew the vessel and the lid and then either hand wash them or put them in the dishwasher (no heated dry cycle). The base can safely be rinsed under a faucet but be careful around the blades as they are really sharp. Best to use a bottle brush or other similar washing tool and not a simple sponge for safety. The entire base is splash resistant including the USB port. Don’t submerge it and definitely don’t put it in the dishwasher, but hand washing and getting the whole base wet is OK.
This blender is slim and relatively lightweight for carrying around in a gym bag, a backpack or really large cargo short pockets ;-). Regardless of how you pack it, something to be careful of is accidentally triggering a blend. The power button is a simple tap to turn on or off (not a press and hold). And when on, the blend starts with a single tap of the “start/stop” button.
Overall, this portable blender works great and is easy to use and clean while away from home. A few small improvements would upgrade it from great to amazing, though… A stronger spring on the lid so it stays open to the last drop. A travel lock on the power button to prevent accident blending. An optional insulated vessel for longer-lasting chill. None of these detract from what this blender does well.
I would recommend this to a friend!


Share this review:
+3points
3of 3voted this as helpful.
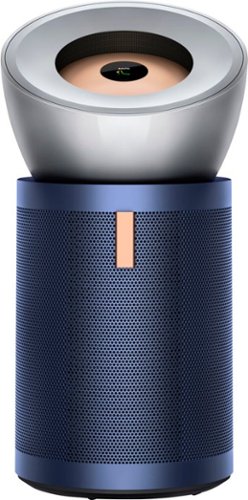
The Dyson Purifier Big+Quiet Formaldehyde is our biggest purifier yet, engineered from the ground up, to evenly purify large spaces.¹ Cone aerodynamics creates a condensed jet of air to project purified air over 32 feet. Quietly. An advanced 360 HEPA H13 grade filter captures allergens and 99.97% of fine particles⁴. Removes gases and odors.² Destroys formaldehyde, permanently.³
Customer Rating
5
Big & Quiet- Definitely Both!
on August 20, 2023
Posted by: gadgeTT
This Dyson air cleaner, as its name clearly states, is both Big and Quiet. Like its smaller siblings, this one works well but is designed for spaces where the smaller models would struggle. It is quite imposing on the floor but fills even the largest of spaces with purified air. Even at the highest fan speed, it’s still quiet enough to enjoy a movie or quiet conversation in the same room. The built-in display provides useful information and the wifi connectivity and app integration provides convenient control and detailed historical data.
Pros:
* Exceedingly quiet even at the fastest fan speed.
* Automatic mode is suitable for nearly all situations.
* Works well for larger spaces like a great room or a home with an open floor plan.
* Hidden wheels allow for easy relocation or aiming.
* Convenient remote control that stores on the unit.
* Useful app integration for control and data.
* Long-life filters with easy replacement.
Cons:
* Large.
* Requires floor space (not for mounting on a table).
* Not inexpensive.
* Large.
* Requires floor space (not for mounting on a table).
* Not inexpensive.
Like most other Dyson air cleaners, this one works very well at keeping the air in your interior spaces clean and free from harmful pollutants. True to its name, this one’s main benefits are being both big and quiet. It is intended to be used in larger interior spaces like an open floorpan home or a large home with huge rooms. There are hidden wheels to allow you to move it around or spin it easily, and the Dyson app provides full connectivity and data from anywhere. While it looks like the top portion might swivel or rotate, it does not. Instead, the vertical angle of the air stream can be adjusted via the app to either project out closer to the middle of the room, or up toward the ceiling to reach further.
Setup was easy as usual for Dyson. It essentially came as two parts plus the remote control. The “dome” portion just snaps onto the top of the main unit, then plug it in and connect it the app. The filters were pre-installed and everything started up smoothly. The app makes it easy to change settings, register it for the warranty and start getting air quality and filter status data.
Once you find a good location for it, it will basically continue to run unattended; silently cleaning the air, until the filters need replacement after about 2 years of normal use.
The main settings are the fan speed and the air output angle. I have mine set for automatic fan speed and the air tilt set to randomly change angles to create a breeze effect. It is placed in the corner of a great room that includes 3 open concept smaller rooms and it easily reaches everywhere.
Overall, the main reason to select this Dyson air cleaner instead of its smaller sibling models is its ability to sustain clean air in large spaces without the need for loud fans and exceedingly strong air movement. Provided your needs allow for its size and price, this unit will exceed at keeping your air as clean as possible for years to come.
I would recommend this to a friend!


Share this review:
0points
0of 0voted this as helpful.
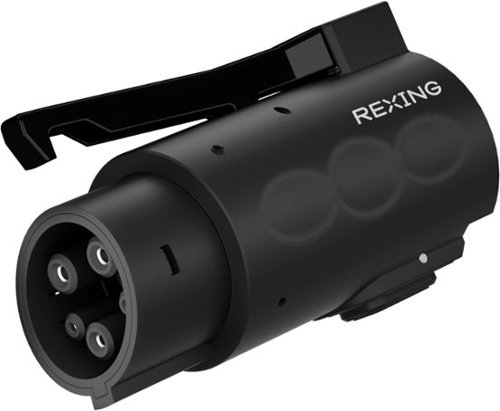
Charge any J1772 compatible electric vehicle with this Rexing to J1772 charging adapter. Use at any Tesla Level 1 and Level 2 charging stations.
Customer Rating
5
Top-up at Tesla Destination Chargers
on August 17, 2023
Posted by: gadgeTT
While the NACS plug is quickly becoming the standard for EV charging in the US, nearly all existing EVs, that are not Teslas, currently use the J1772/CCS standard. These cars can only charge at Tesla Superchargers that have been updated with a Magic Dock but there’s still a lot of lower-powered chargers for topping up while driving around. For ultimate flexibility in charging at any L2 charger, this Rexing adapter allows non-Teslas to add some range at Tesla Destination chargers when on-the-go.
Pros:
* Solid build quality.
* Small size fits easily in even the smallest frunk or glove box.
* Comes with a hard carrying case.
* Has a keyed lock for the car side with 3 keys.
* Has a friction lock for the Tesla plug side.
* Solid build quality.
* Small size fits easily in even the smallest frunk or glove box.
* Comes with a hard carrying case.
* Has a keyed lock for the car side with 3 keys.
* Has a friction lock for the Tesla plug side.
Cons:
* Case has a loose and awkward foam frame inside.
* Could be devastating if you loose the keys once plugged in.
* Case has a loose and awkward foam frame inside.
* Could be devastating if you loose the keys once plugged in.
Short review for those who are familiar with the needs and benefits of an NACS-to-J1772 adapter… this Rexing adapter works great! It is solidly built, has a nice carrying case and can be locked to prevent removal or theft. It allows charging from Tesla Destination Chargers at up to 80A speeds and is definitely a must-have for charging flexibility for cars that aren’t a Tesla like my Polestar 2.
For those new to EV charging… There are currently two standards for charging an electric car in the US (not worth including CHAdeMO that’s basically just for the Nissan Leaf); J1772/CCS and Tesla’s now-renamed NACS. There are also essentially two types of charging; fast chargers and home/destination chargers. Fast Chargers (aka Level 3 chargers) and typically not free, are located off highways or places similar to gas stations and charge up to 80% in 30 minutes or less. Slower chargers (aka Level 2 chargers) are typically installed at homes, shopping areas or hotels and usually add about 25-30 miles per hour of charging. While most EV owners charge at home with an installed charger that supports their car’s specific needs, sometimes when you’re out driving around, there is an opportunity to add a few extra miles at local public charging spots while shopping or staying at a hotel or workplace. These spots can usually add enough range to make it worthwhile to plug in but you have to have the right plug for your car.
If you happen to find yourself near one of these slower chargers that has an NACS plug and your car is not a Tesla, this Rexing adapter will allow you to plug in and get some extra range. The adapter accepts the NACS plug from a Tesla Destination Charger (NOT compatible with Tesla SuperChargers) and then plugs in to your car’s J1172/CCS port. There is a keyed lock available to prevent someone from disconnecting it from your car; just be aware that this doesn’t prevent someone from disconnecting the Tesla end from the adapter. There is a small friction button that can help keep the Tesla end from sliding out, but anyone can still pull it free if they want to.
Also be aware that many cars like my Polestar 2 lock the charging plug (the adapter, in this case) from being removed when the car is charging and the doors are locked. If you happen to lock the adapter with the key, you’ll need to unlock both the physical key and the car’s plug lock. The lock comes with 3 keys but be careful because if you lock the adapter and loose the keys, you might not be able to remove the adapter from your car. You can at least remove the Tesla Destination Charger cable and can still drive away, but you’ll have your charge door open with the adapter sticking out.
When not in use, there’s a nice carrying case to keep the adapter and the keys together and protected. The case has a foam insert to keep the adapter inside from rolling around, but the foam insert isn’t glued in so it just pops out when you open the case. This isn’t a huge deal, but it would have been nice if the foam insert were a more snug fit or glued in. It would also have been a nice touch to put hook-type Velcro on the bottom of the case so it would stick to the fuzzy insides of most trunks and frunks and not slide around.
Be sure to connect the Destination Charger’s NACS cable to the adapter first and wait for the Tesla Destination charger to recognize the adapter before plugging them into your car. This took only a few seconds and everything worked great with my car immediately starting to charge.
While charging at DC fast chargers adds more range in less time, destination chargers can be a convenient and useful way to just top up your range and are usually free. With this sturdy and fast Rexing adapter, you can have flexibility to charge at nearly all Level 2 chargers; whether they match your car’s J1772 plug or the NACS plug (currently just Teslas).
I would recommend this to a friend!


Share this review:
+2points
2of 2voted this as helpful.
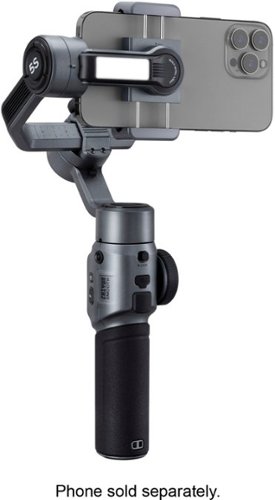
Upgraded with a powerful built-in fill light and embodying the spirit of Make-It-Real, SMOOTH 5S offers an integrated yet simplified way of filmmaking for everyone. With the classic 3-axis design, you can create inspiring content with no angle limitations. SMOOTH 5S makes your one-man crew.
Customer Rating
4
Flexible and professional but needs improvements
on July 27, 2023
Posted by: gadgeTT
This is a sturdy handheld phone gimbal with great build quality, good range of motion and a lot more professional features. However; it is cumbersome to set up when used with larger phones, the buttons and controls are not easy to reach with one hand, and the included phone app has a lot of non-English text. Overall, it works well if you’re a more advanced videographer who appreciates the greater flexibility and doesn’t mind the rough edges, but beginners and novices might want to look elsewhere.
Pros:
* Solid build quality.
* Numerous buttons and dials for gimbal control without having to navigate the phone app.
* Very long battery life.
* Useful built-in fill-light with the ability to add 2 more as options.
* Fits large phones in cases.
* Can charge the phone from the gimbal’s battery.
* Solid build quality.
* Numerous buttons and dials for gimbal control without having to navigate the phone app.
* Very long battery life.
* Useful built-in fill-light with the ability to add 2 more as options.
* Fits large phones in cases.
* Can charge the phone from the gimbal’s battery.
Cons:
* Cannot reach all controls with one hand while holding.
* Several apps available and each has different features and functions.
* Not as convenient to use with really large phones such as the iPhone 14 Pro Max (in slim case).
* ZY Cami app has a lot of Chinese text even when set for US English.
* Mode status indicators are very difficult to read off-angle and in daylight.
* Battery status uses mode status indicators and is not clear.
* Have to manually adjust and rebalance after every use with a larger phone (such as the iPhone 14 Pro Max).
* Switching between Portrait and Landscape phone orientation requires complete disassembly and re-setup… at least with larger phones.
* The button in the center of the Zoom wheel looks like it should start/stop recording, but it only switches modes of that dial.
* Trigger control seems like it should start/stop recording but only enables functions such as subject tracking or sports mode.
Let’s start with basic setup… When powered on, the motors will move so it’s best to screw on the provided tripod base and sit the gimbal on a table while setting it up. Then plug it in to a suitable USB brick (not included) via USB-C to charge it up. This is where the design oddities start. At the top edge of the button panel is a thin row of backlit letters that are mainly used to indicate the “mode” of the gimbal; one indicator at a time for each mode - “PF”, “L”, “F”, “POV” and “V”. When being charged, these indicators light up in sequence as the battery is charging. I can understand the product designers thinking it was a great cost-savings to reuse these backlit letters as a battery status gauge, but in practice, it’s just a weird design decision to use these backlit letters to indicate battery level. Anyway, once the gimbal is fully charged, you can start setting it up by mounting your phone and setting up the provided app.
Before each use, you need to manually unlock all three motors and then mount your phone in the spring-loaded holder. The main axis has a slide lock on the back of the handle and the other two axes have snap locks that require you to apply moderate rotation force to unlock. Once all three motors are spinning freely, you can mount your phone in the holder. The phone holder can be used in Portrait or Landscape orientation depending on which way you want to shoot with your phone’s cameras. The gimbal cannot switch between Landscape and Portrait while a phone is mounted, so to switch between the two, you have to manually apply a moderate amount of force and rotate the holder 90 degrees before inserting your phone and before turning the gimbal on.
Balancing the phone on the gimbal isn’t terribly difficult, but it does require careful attention. Once the phone is clipped in, the roll axis arm needs to be unlocked by turning a knob and the arm must be slid left or right to balance the phone. The balance is different depending on whether you’re shooting in Portrait or Landscape, so you’ll need to do this process whenever your mount or want to rotate your phone. My iPhone 14 Pro Max in a slim case does fit in the holder, but it really stretches the physical and control limits of this gimbal. For example, when mounted and balanced in Landscape orientation, the roll axis arm hits the bottom motor housing when the handle is tilted sharply. Since the gimbal cannot be folded up and locked as-is, the roll axis arm must be loosened up and reset for storage, and then the whole balancing act must be done again the next time you want to use it. Again, not difficult, but certainly not fast or convenient. If you always shoot with the same phone, case and phone lens attachments, you can probably mark the Portrait and Landscape arm positions so you can just adjust the arm to those points directly without having to actually rebalance things.
Once the phone is mounted and balanced, you can turn the gimbal on by pressing the power button on the right side. Like most of the other buttons on this gimbal, the power button has no bumps or anything that makes it feel different if you’re hunting for a button by touch while looking at the phone’s screen. If you’re holding the gimbal and watching what you’re filming, you might want to press the Fn button by feeling for it and you might accidentally press the Power button instead… so just be careful. Same applies to the Record button and the nearby Mode button.
There are several apps provided for use with the gimbal, but the primary one is ZY Cami. Finding, installing and setting up the ZY Cami app was relatively easy. The app discovered the gimbal’s Bluetooth connection quickly and got paired up without any issues. The app has a lot of features and is relatively straightforward to use, but it is obviously written primarily for the Chinese market and has been incompletely translated into English. There’s some text and buttons still in Chinese even though the app is set for English. This makes it much harder than necessary to use the app. Fortunately, the gimbal has buttons and controls for nearly all of the functions you might need so you don’t have to poke around in the app too much after first-time setup.
It takes a while to get used to the large number of buttons and controls on the gimbal, what they do and how they work together. Regardless of whether you hold the gimbal with the left or right hand, it’s unlikely you’ll be able to press all of the buttons without looking down and reaching with your other hand. This makes it a bit more difficult to adjust settings while filming. As mentioned above, the gimbal Mode indicators are a thin strip of backlit letters that are hard to read in bright light (like filming outside) or when viewed from anything other than a straight-on angle. While it’s nice to have all of these buttons, they don’t all work as expected in both of the official apps. I also noticed that when changing modes in the ZY Cami app, the mode indicator on the gimbal itself didn’t always match.
The joystick is handy for moving the camera, and the trigger and side knob are useful, but many of the other controls require more attention and practice to use. The main functions of this gimbal work well enough but there are just a lot of odd design decisions that make this gimbal harder to use in practice than necessary.. at least for novices. This is especially true for setting it up and putting it away from each use. With my larger iPhone 14 Pro Max, the roll axis arm position and adjustment knob must be changed every time I use the gimbal which just adds to the time and complexity of getting it ready to use. Small phones might allow the arm position to be set for Landscape or Portrait and left there when folding it up to put the gimbal away, but you still need to adjust the arm position between shooting in Portrait versus Landscape.
Overall, this gimbal works reasonably well and has a lot of more flexibility and advanced features, but at the expense of complexity in setup and use. The included ZY Cami app is mostly good, but it’s frustrating to have Chinese text and button labels that an English-only user cannot figure out easily. For those who appreciate the extra features and flexibility, this gimbal works well. For those who just want an easy to use gimbal, perhaps other options might be worth investigating.
I would recommend this to a friend!


Share this review:
+1point
1of 1voted this as helpful.
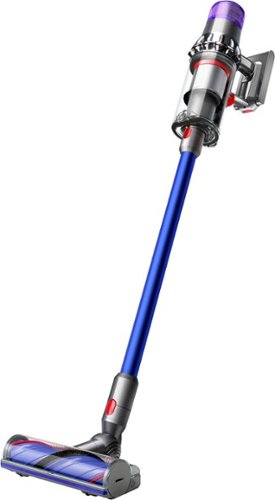
The Dyson V11 cordless vacuum is engineered with the power, versatility, and run time to deep clean homes with pets. An LCD screen displays the run-time countdown to the second, as well as the power mode and maintenance alerts. Dyson’s de-tangling Motorbar cleaner head deep cleans carpets and hard floors with hair removal vanes that clear long hair and pet hair from the brush bar as you clean. The innovative Hair screw tool with a conical brush bar is perfect for cleaning upholstery and pet beds. The Dyson V11 has advanced, whole-machine filtration that captures pet allergens and fine dust and expels cleaner air. Its versatile cordless format transforms into a handheld vacuum with one click so you can clean up high, down low, and everywhere in between with three cleaning modes for the right power where you need it. Comes with a 2-year warranty and lifetime Dyson support.
Customer Rating
5
Great Vac & Worthy Upgrades from Prior Model
on June 13, 2023
Posted by: gadgeTT
Dyson hand vacuums are always well-designed and work great! This model is an upgrade for the entry of the lineup and has several worthwhile improvements. The screen is handy and the replaceable battery extends the unit’s longevity when the charge no longer holds.
Pros:
* Amazing suction.
* Long battery life.
* Useful and convenient display.
* Easy to empty.
* Easy to clean filters.
* Convenient charging wall mount.
* Replaceable battery.
* Easy to hold trigger.
* Useful included attachments with tons of available options.
* Amazing suction.
* Long battery life.
* Useful and convenient display.
* Easy to empty.
* Easy to clean filters.
* Convenient charging wall mount.
* Replaceable battery.
* Easy to hold trigger.
* Useful included attachments with tons of available options.
Cons:
* Have to remove all attachments to empty.
* A bit heavy when used without floor attachments.
* Have to remove all attachments to empty.
* A bit heavy when used without floor attachments.
For those with no prior experience with this model’s predecessor, the V10, this Dyson stick vacuum can easily be your home’s only manual vacuum. It has great suction that sustains from empty to full. The battery life is rated at about an hour of normal use which is probably more than enough for regular whole-home cleaning on and above the floor. It easily converts from handheld to floors with a multitude of included and optional attachments that enable anything from light dusting, to cleaning car interiors to carpets and hard floors.
For those who considered or perhaps already own the prior V10, this model has all of the run-time and suction you’re used to, plus a few welcome improvements. For one, the battery is now easily removable and replaceable so when it inevitably doesn’t last as long between charges, you won’t need to replace the whole unit or send it in for replacement servicing. Also, the control buttons and simple displays from the V10 have been replaced with the full-color screen and single button from last year’s step-up models.
The box it comes in is quite large, but everything is laid out clearly and is well-protected. I definitely appreciate that all of the packing material is recycled cardboard and there’s no huge printed user’s manual - just a single page with a QR code.
This particular kit included the wall dock and AC adapter for convenient wall mounting and charging, but you can always just plug the provided cord directly into the vacuum if wall mounting doesn’t meet your needs. It also came with the long extension tube and a floor attachment for making quick work of cleaning carpets and area rugs, as well as hard floors like wood, tile and linoleum. This newer floor attachment has an improved design that makes it less likely to get tangled up from long hairs and other such things that wrapped around prior floor attachments. Speaking of that, there is also a smaller attachment for cleaning car interiors, fabric furniture and other above-floor surfaces and it, too, has an anti-tangle design. I find this smaller attachment great for cleaning pet beds and car floor mats. The usual long nozzle and wide brush-style attachments are also provided but these are the same that I’ve see packaged with Dyson vacuums for years with no noticeable differences or improvements. They’re still useful, but nothing new to see here.
This vacuum has no Bluetooth or Internet connectivity, so there’s no app per-se. You can use the My Dyson app or the Dyson web site to register your warranty, see helpful setup and usage videos, read the full user’s manual and order any optional attachments. Setup, otherwise, is simple; just plug in the power cord and charge it up for about 2 hours or until the screen says that it’s ready. All Dyson attachments snap fit easily and several even store in the provided wall dock.
When it’s time to empty the dust bin, just remove any attachments and slide the red handle toward the front to eject all dirt into a garbage can or bag. This works great and leaves the vacuum ready for the next use. While I find this method easier than prior models that dumped the bin downward rather than forward, it does require you to remove all accessories first which is a small nuisance.
The trigger is light and easy to press, and when used for cleaning floors, the weight of the vacuum part is supported by the extension tube to the floor. It’s easy to hold and maneuver around just about anything. When used for handheld cleaning, though, the weight of the vacuum can get to be a bit much after a while. For shorter bursts it’s fine, but for longer cleaning sessions, you might need to put it down and rest after a while of holding it up.
To maintain peak performance, the filters need to be cleaned periodically. The vacuum’s display will notify you when it recommends cleaning the filters, and it’s a simple task to rotate the end of the vacuum and slide off the filter section. After hand washing and air drying, just reverse the procedure and you’re good to go.
There are 3 main vacuum power settings; Eco, Medium and Boost. Medium is the default and is great for everyday use. It’s a balance of suction and battery life that estimates about 60 minutes of continuous vacuuming. Eco extends the battery life but reduces suction so it may be OK for light dust but not serious dirt. Boost is max suction but reduces the battery life by a lot and is great for deep or heavy dirt when you need it.
Overall, this Dyson vacuum is a great all-around cleaner with tons of useful features and accessories to meet just about any cleaning need. Aside from being a tad heavy to hand-hold for long above-floor cleaning, it is super easy to use and maintains its suction for a long time between charges. It’s easy to maintain and does a great job cleaning whatever needs vacuuming.
I would recommend this to a friend!


Share this review:
+3points
3of 3voted this as helpful.
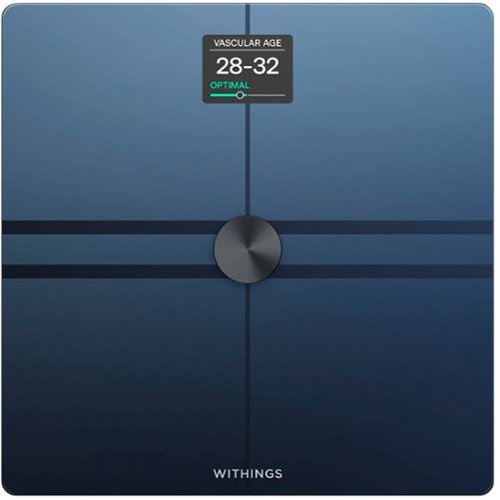
Body Comp offers a total body assessment with weight precise up to 50g, plus full body composition metrics (body fat and water percentage, plus muscle and bone mass), cardiovascular assessment (Standing Heart Rate, Vascular Age), and an Electrodermal Activity Score, providing the most complete and accurate overview of body metrics ever offered. Every weigh-in appears in the Withings app automatically, via Wi-Fi or Bluetooth sync. And unlike many smart scales, with Wi-Fi sync, you don’t have to have your phone with you when you weigh-in to synchronize your data.
Customer Rating
5
Comprehensive station for healthy habits
on June 1, 2023
Posted by: gadgeTT
A stylish addition to your home, this WiFi connected scale helps monitor your heath with new metrics and helpful guidance toward meeting your health goals. The free app not only serves as the portal to your measurements and trends, but also guides you to making healthy habits. The new screen is easier to read with its higher resolution and now is full color to enhance how it shows information. This scale’s even longer battery life than the prior models now uses replaceable AAA batteries instead of a built-in rechargeable battery.
Pros:
* Fast, accurate and meaningful measurements.
* Bright, clear screen with impactful color.
* Easy to switch between household members if it doesn’t auto-identify.
* Integrates with Apple Health, Google Health, and more.
* Easy to set up and modify.
* Long battery life (claims over a year) with replaceable AAA batteries.
* Rubber feet keep it stationary.
Cons:
* Doesn’t feel as solidly constructed as my older Withings Body Cardio scale.
* Doesn’t feel as solidly constructed as my older Withings Body Cardio scale.
Some quick comparisons to the older Body Cardio Scale:
* Measures a wider range of body weights in smaller, more-account increments.
* Measures 9 - 440lbs in 50g increments vs Body Cardio’s 9 - 396lbs in 100g increments.
* Higher-resolution color screen.
* 320 x 240 color screen vs Body Cardio’s 128 x 64 gray screen.
* Longer battery life with easily replaced AAA batteries:
* Average battery life of 15 months on 4x AAA batteries vs Body Cardio’s 12 months on its built-in rechargeable battery.
* Same size but slightly thicker:
* Scale dimension of 12.8” x 12.8” x 1.1” vs Body Cardio’s 12.8” x 12.8” x 0.7”
I’ve been using the older Withings Body Cardio scale for years. I have always appreciated its style and build quality, and the measured metrics helps me stay healthy by spotting trends before they get too far out of whack. This new Body Comp scale takes everything I’ve loved and amps it up! The Body Comp is even more accurate than before and has new metrics to provide far deeper insights into my health as I get older.
The scale itself is the same basic shape but is just a tad thicker than before (about 1/2” thicker) - perhaps to support the replaceable batteries. This actually can be an advantage to those with robot vacuums as the slightly thicker scale is easier for the bot vacs to bump into rather than roll on top of. The platform is still tempered glass which is easy to clean and comfortable to stand on.
Prior models had built-in rechargeable batteries that lasted about a year of typical use before needing to be pugged in to a microUSB cable for a few hours. While the scale was mostly good about letting you know when it needed a charge, it was sometimes inconvenient to stand on the scale for a measurement but be denied as you forgot to charge it. This new scale has replaceable AAA batteries instead, and claims to last even longer before popping out the old for new batteries in an instant. If the scale’s battery is dead when you go to take a measurement, just step off, swap in 4 new AAA batteries that most have lying around, and you’re back up and measuring in minutes rather than hours.
The new screen is about the same physical size as before, but doubles the resolution and adds color to make everything easier and more enjoyable to read. Even without my glasses on, I can read the screen more easily now. The use of color highlights bits of info on the screen and doesn’t just add color to the sake of using colors.
Setup was super easy with a compatible iOS or Android smartphone for the free Withings app. First remove the battery saver plastic tab under the scale to power it on. On the screen are clear instructions with a QR code to scan with your phone to get the Withings app. Create an account if you don’t already have one, then choose to add the scale to your account. Both the scale’s clear screen and the great Withings app guide you through getting the scale on your home’s WiFi, associating it with your Withings account, and setting up all the basics for the scale. That’s it!
As part of setup or at any time later, you can select your personal health goals such as maintaining weight, loosing weight (how much and how quickly), adding muscle, etc. The scale will provide guidance to meet those goals and nudge you in the right direction if the trends aren’t aligning with those goals.
Now just place it in a convenient spot where you’ll get in the habit of taking your measurements at a consistent time each day. This is probably in a bathroom or closet, but can be anywhere your scale has good WiFi signal and a flat, stable surface. As part of the account setup in the app, you an add up to 7 more family members (8 total) for shared use. Each family member has personal goals, settings for what is measured and how information appears on the scale’s screen. You can even set up the scale to take measurements silently by adding them to the app and including them in trends and suggestions, but not showing them on the scale’s screen. This might be better motivation for those just starting on a weight loss journey.
When you’re ready to take a measurement, just step on the scale to wake it up and start your body analysis. The first thing it does is guess which of the family members is using the scale. It shows your name for confirmation and if it got it wrong, you just lean left or right to scroll through the family members list until your name is shown. All measurements are quick and clearly shown on the screen with colorful animations. When done, it lets you know it’s safe to step off the scale until next time.
The scale takes the measurements and shows some basic information on the screen while you’re standing there, but the real magic happens in the cloud and the app. Trends are spotted and guidance is offered with clear and concise summaries that you can dive deep into for charts and raw data. Some people may find motivation in the details while others may prefer to just get suggestions for how to improve. The app makes it easy to get whatever you need in the way you want it. As I’m getting older, key indications of my health before more impactful. I really appreciate being able to monitor my health from home and take action while it’s still easy to do so.
Whether you’re just starting on your health improvement journey, a seasoned athlete trying to stay on top of your game or someone who just wants to keep an eye on major trends, this scale will be a trusted and helpful partner for years to come.
I would recommend this to a friend!


Share this review:
+1point
1of 1voted this as helpful.
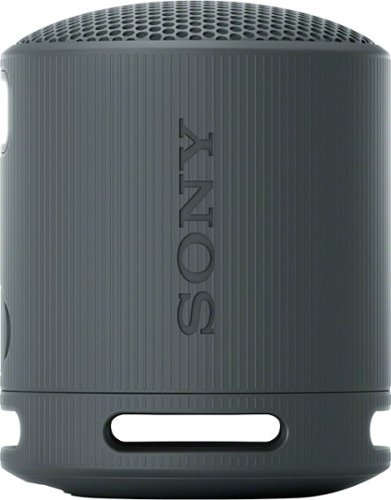
Enjoy big sound with the super-compact SRS-XB100 wireless speaker, offering powerful, clear sound, an updated IP67 waterproof and dustproof design1,2, and up to 16 hours of battery life.3 Small enough to fit in a bag or cupholder, the XB100 also features a versatile strap to take with you wherever you go.
Customer Rating
5
Impressive Sound and Features from a Small Package
on May 25, 2023
Posted by: gadgeTT
This compact bluetooth speaker doubles as a speakerphone. It’s about 2/3 the size of a soda can and sounds more impressive than you’d think for its size. The convenient and versatile strap is great for hanging it from chairs, handlebars or anything else you might have nearby.
Pros:
* Clear and crisp sound with good bass.
* Easy to use as a speakerphone for voice calls or voice assistants.
* Great battery life.
* Safe to use in wet and dirty environments.
* Convenient strap for hanging or securing to rails, handlebars, etc.
* Can run from an external battery or charger for longer sessions.
* Can pair two of them for stereo sound.
Cons:
* Small LED for battery level display is too simple and is hard to see outside.
* Only one microphone on the side of this can-shaped speaker.
* Works with Sony’s Music Center app but only mentions this deep in the online documentation.
* Small LED for battery level display is too simple and is hard to see outside.
* Only one microphone on the side of this can-shaped speaker.
* Works with Sony’s Music Center app but only mentions this deep in the online documentation.
Bluetooth speakers are so common these days that it’s hard to find a good one. Sound quality is subjective and each speaker prioritizes different things, so you really have to go in with the right expectations. This Sony XB100 speaker is first and foremost a tiny go-anywhere speaker. It tries to maximize the sound and battery life given its small size and is objectively successful.
Setup is typical for a Bluetooth speaker. Plug it in to charge it up, then power it on and it goes immediately into Bluetooth pairing mode. Pairing to your device of choice is mostly dictated by that device, but pairing was as simple as can be expected.
Charging is done via a USB-C connector located under a protective rubber flap. While charging, a small orange light is on, and when the light is off, it’s safe to unplug and go traveling. This speaker has great battery life claimed at 16 hours at moderate volume, but you can also plug it in to an external USB battery pack or wall adapter for much longer playback than the built-in battery provides.
There are individual buttons to turn the speaker on/off with a simple tap, raise or lower the volume, play/pause/answer/end, and a separate button to put it in pairing mode. While it may seem odd to have the pairing button be as large and prominent as the rest, this is probably to make it easier to share the speaker around a group by easily allowing it to be paired with someone else’s device and not have to remember button combinations or find a small, hidden button.
The built-in speakers on most smartphone are getting good, but there’s still no match for a separate dedicated speaker. This compact Sony speaker is smaller than a soda can and sounds much louder and clearer than a typical smartphone speaker. There’s even a microphone with echo cancellation so you can use this as a speakerphone for calls or talking to a voice assistant. Just be aware that there is only one microphone (located below the play/pause button) so it might not clearly pick up everyone gathered around it speaking.
This unit is rated to get wet and dirty without complaining. It’s not recommended to float in water or be placed directly on sand, but otherwise should be good wherever you want great sound. You can even rinse it in a sink to get the gunk off… just be sure that the battery flap is securely closed.
The sound is clear and the bass is really good for a speaker of this size. It’s really nice for small gatherings or when the action is near the speaker, but I wouldn’t expect it to be as amazing once you start getting far from it… it can only do so much in such a small package ;-)
When the battery needs a charge, the small orange LED below the power button starts blinking. This is your primary indication that It’s time to charge the speaker, but the light isn’t very visible outside in bright sunlight. The speaker does have a small set of voice prompts but they’re mostly limited to pairing activities. It would be great if the speaker periodically said something when the battery is getting low like “Charge me soon.”
While not mentioned anywhere on the box or in the printed manuals in the box, this speaker does connect to the “Sony Music Center” app for iOS and Android. In the app, you can see the speakers power level, update its firmware and a few other things.
Overall, this speaker is an amazing balance of size, battery life, features and sound quality. It’s a great companion for those who want better sound than the built-in speakers in their phones and want to share the audio without headphones.
I would recommend this to a friend!


Share this review:
+4points
4of 4voted this as helpful.
gadgeTT's Review Comments
gadgeTT has not submitted comments on any reviews.
gadgeTT's Questions
gadgeTT has not submitted any questions.
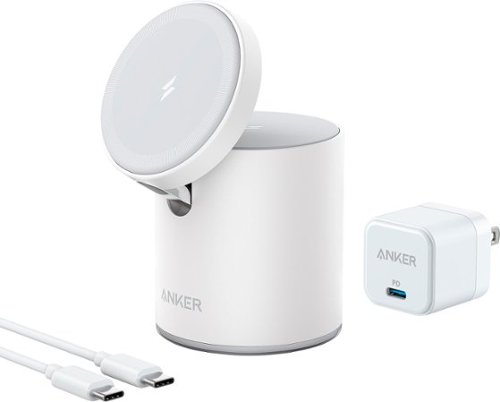
Introducing the MagGo Magnetic 2-in-1 charger, featuring magnetic precision for effortless alignment during charging. Compatible with iPhone 12 and beyond, this sleek design offers secure charging for your phone, AirPods, and AirPods Pro. With a versatile free-standing design, you can adjust your iPhone's viewing angle for convenience and comfort. Plus, enjoy an illuminating charging experience with a beautiful ambient light glow.
Does this charge at the full magsafe 15W?
No. This charger is not MagSafe. It is qi and has magnets but is not recognized by an iPhone as MagSafe so charging is limited to standard qi rates.
2 years, 5 months ago
by
gadgeTT
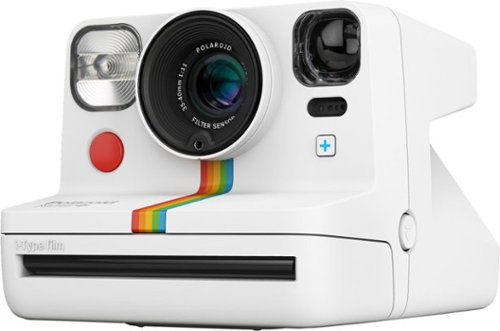
Our most creative camera yet. Polaroid Now+ is our revamped analog instant camera with even more creative tools. Get 5 new lens filters, and unlock two extra tools — aperture priority and tripod mode — inside the Polaroid mobile app. Try light painting, double exposure, manual mode and more. Plus a tripod mount to steady your ideas inside the original Polaroid square format frame.
How many megapixels does this camera have?
This is an analog camera. There is no digital sensor and thus no Megapixel count.
2 years, 5 months ago
by
gadgeTT
Enhance the performance of your gaming rig with this Western Digital WD_BLACK game code bundle. A NVMe 1TB SSD delivers fast load times and vast storage for all your titles, while the included game code allows access to the full PC game download of Battlefield 2042. This Western Digital WD_BLACK game code bundle boasts backward-compatible PCIe Gen4 technology, providing speedy and reliable performance.
Will this work on the PS5?
I just posted my review and the short answer is YES! You need to buy a separate heat sink but the SSD works great in my PS5.


2 years, 6 months ago
by
gadgeTT

The Nest Doorbell is the battery-powered video doorbell that works with any home. See what’s happening at your door from anywhere and get intelligent alerts about important activity, like when there’s a person, package, animal, or vehicle.* And because there are no wires, you can install it yourself. Nest Doorbell requires the Google Home app and a Google Account – it’s not compatible with the Nest app or the home.nest.com site.
Where can I buy a replacement battery? How much does the replacement battery cost?
The internal battery is not replaceable by the customer. You have to remove the whole doorbell from the mounting bracket using the supplied metal "key", bring it inside and plug it in to recharge it... about every 2-3 months.
2 years, 7 months ago
by
gadgeTT
Organizing financial paperwork and accurately processing piles of messy receipts and invoices can be a challenge. The Epson® RapidReceipt RR-600W desktop scanner was specifically designed to quickly scan stacks of invoices and receipts of varying sizes, then automatically and accurately process the information into smart digital assets. With the included Epson ScanSmart® financial software, you can turn stacks of unorganized receipts and invoices into categorized digital data that easily integrates into applications such as QuickBooks®, TurboTax® and more1. Plus, create searchable/editable PDFs with the included bonus software. Do it all with zero subscription fees. Featuring smart technology, this scanner learns from each receipt scanned ̶ recognizing more data and logos over time, ensuring receipts and invoices are accurately converted and categorized. And, it’s all done on your own device, giving you complete control over your data, where it’s stored and how it is used. It’s the easy, cost effective way to organize and manage your finances.
Does it extract receipt information into software that can be sent to quickbooks online?
It claims to, although I'm not a QuickBooks user so I cannot verify. The box clearly states that it does this, tough.
3 years, 2 months ago
by
gadgeTT
The reliable Brother HL-L3210CW compact digital color printer is a great choice for the busy home or small office. Quick print speeds of up to 19 pages per minute¹ plus manual feed slot accommodates varied printing needs and can handle a variety of paper types and sizes including card stock, envelopes and more. Connect with versatile options including built-in wireless or USB interfaces and print wirelessly from mobile devices. The 250-sheet capacity adjustable paper tray helps improve efficiency with fewer refills and handles letter or legal sized paper. Brother Genuine high-yield replacement toner cartridges help lower printing costs. Comes with a 1-year limited warranty and free online, call or live chat support for the life of your product. Prints up to 19 ppm¹ in black and up to 19 ppm¹ in color.
Does this printer have two trays, one letter and one legal?
One tray is included. This tray supports sizes all the way up to legal. See attached photo where the paper stop is set for letter but can go all the way back to legal.

4 years, 7 months ago
by
gadgeTT
Unlock new potential for your wireless headphones with this Airfly headphone accessory. It plugs into any conventional headphone jack to enhance your listening experience and can pair with in-flight entertainment systems for added convenience. This Airfly headphone accessory has an eight-hour battery life and recharges through USB, so it's easy to take anywhere.
Does this charge air pods. Lost my charger
No. This has a built-in battery that requires charging but does not supply power to charge any other device. AirPods in specific must be charged with an AirPod charging case.
4 years, 11 months ago
by
gadgeTT
Unlock new potential for your wireless headphones with this Airfly headphone accessory. It plugs into any conventional headphone jack to enhance your listening experience and can pair with in-flight entertainment systems for added convenience. This Airfly headphone accessory has an eight-hour battery life and recharges through USB, so it's easy to take anywhere.
Can you plug wired headphones into this to make them wireless?
No. This does the reverse. You plug this into your source's headphone jack to work with your wireless headphones.
4 years, 11 months ago
by
gadgeTT
Experience lag-free, immersive audio with this wireless Plantronics gaming headset. It has support for lifelike Dolby Atmos sound, and the sound-isolating ear cups and noise-canceling microphone keep your focus on the game. This lightweight Plantronics gaming headset has a 24-hour battery life and convenient analog adjustments for custom game audio settings.
Has anyone been able to get the game/chat balancer working properly? I have looked everywhere for a solid solution and have not been able to get it working or find a working example. the game/chat balancer for me makes ALL sounds quieter or louder.
As near as I can tell, this balances the audio between the TOSLINK (optical) input on the USB puck and the audio coming from the USB connection. If you're not using the TOSLINK input, then the switch will basically be useless. Hope this helps.
5 years, 8 months ago
by
gadgeTT
Monitor your travels with this Full HD THINKWARE dash cam. It begins recording automatically when you start your vehicle, and its 140-degree viewing angle and high-resolution camera capture the action as you drive. This THINKWARE dash cam has a file lock feature to let you save important videos.
Does it need connecting to the car battery when hardwired?
Yes. Otherwise it won't have power to record when parked (and the ignition off).
6 years, 8 months ago
by
gadgeTT