gadgeTT's stats
- Review count169
- Helpfulness votes799
- First reviewOctober 1, 2015
- Last reviewMarch 24, 2024
- Featured reviews0
- Average rating4.4
Reviews comments
- Review comment count0
- Helpfulness votes0
- First review commentNone
- Last review commentNone
- Featured review comments0
Questions
- Question count0
- Helpfulness votes0
- First questionNone
- Last questionNone
- Featured questions0
- Answer count11
- Helpfulness votes19
- First answerAugust 12, 2017
- Last answerDecember 2, 2021
- Featured answers0
- Best answers2
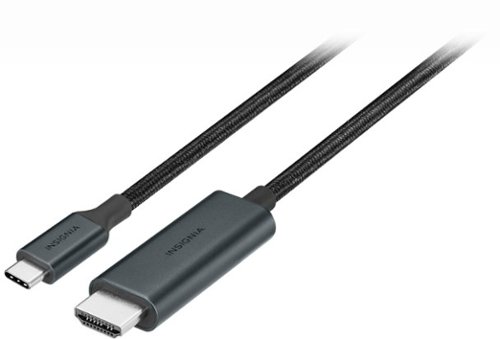
Host high-quality watch parties on a bigger screen that everyone can enjoy. The Insignia NS-PC5CH6B24 6’ 8K Ultra HD USB-C to HDMI 2.1 Braided Cable extends or mirrors the screen of your USB-C laptop, tablet, smartphone and more to an HDMI-capable display. Compatible with Windows, macOS, ChromeOS, iPadOS, iOS and Android systems, the 6 ft. cable transmits reliable video and audio signals for an unmatched viewing experience. In addition, it supports resolutions of up to 8K @ 60 Hz, allowing you to watch movies, videos and more with a quality image that will further impress your viewers. Share your display to comfortably view your favorite shows and movies on a full-size screen.
Customer Rating

5
Watch on your hotel’s HDTV.
on March 24, 2024
Posted by: gadgeTT
Great for regular use of a computer with a TV but even better as a travel companion to connect your compatible device to a hotel or cruise ship TV. It’s long enough to reach between easily and compact to carry.
Highlights:
* Slim and sturdy metal over-molds.
* Long braided cable.
* Slim and sturdy metal over-molds.
* Long braided cable.
Room for Improvement:
* HDMI over-molding is very long (deep).
* HDMI over-molding is very long (deep).
Usage:
I like watching videos from my tablet or phone when traveling but if there’s an HDTV available in the room, it’s better to use the larger screen instead. With this cable, it couldn’t be easier to get your device’s video on the big screen. Just plug in the USB-C end to your compatible device such as an iPad, a newer iPhone or a laptop running MacOS, Windows or Chrome. Then plug the other end into any HDTV or monitor that has an HDMI input. Most hotel and cruise ship rooms have a TV with a spare HDMI port, so this cable allows you to use that TV’s big screen instead of your device’s small one.
HDMI carries both audio and video, so you can also use your TV’s speakers. If you’re using this cable to connect to a computer monitor, you’ll probably need to use your device’s speakers or something connected via Bluetooth like headphones or a portable speaker.
The cable supports surround audio and up to 8k video at 60hz. Most TVs are 4k or less, so this cable should be relatively future-proof.
At 6 feel long, there’s more than enough cable to reach between a wall-mounted TV and a table, chair or even the floor below it for your device. Depending on the room layout, you can probably run the cable from the TV to the bed and just leave your device next to you.
The over-molds on both ends are slim enough to fit typically-spaced USB-C and HDMI ports. The HDMI over-mold end is long so you’ll need a good bit of depth for the cable to fit. Most TV ports are on the edges rather than the back so you should be OK.
I tried connecting my iPad Pro, iPhone 15 Pro Max, Microsoft Surface Laptop and an older MacBook Pro to my 4k HDTV and all worked flawlessly.
Overall:
Provided the length suits your needs and the over-molds on both ends fit the ports you’re connecting to, you can’t go wrong with this cable to mirror or connect your device to a TV or monitor. It’s a handy travel companion to watch your device’s videos on the room’s big screen with a single simple connection.
I would recommend this to a friend!


Share this review:
0points
0of 0voted this as helpful.
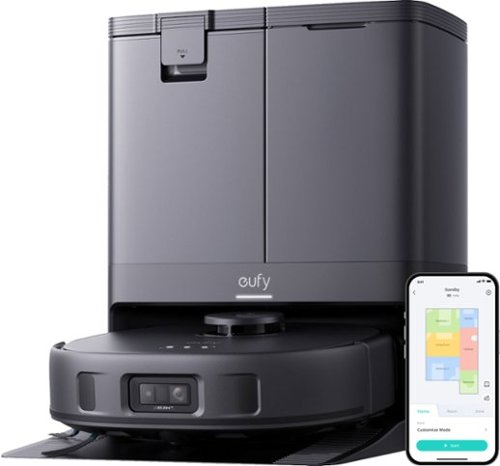
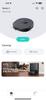
The World's First MopMaster™ with 8,000 Pa Powerful Vacuum. Forget Mopping, Go Hands-Free.
Customer Rating

4
Great value fully-featured robot vacuum and mop.
on March 10, 2024
Posted by: gadgeTT
All the features of the more expensive well-known brands, but at a fraction of the price. Great suction, great mopping performance, mostly easy to use app. It does everything you need it to, to keep your floors clean on the regular without having to fuss. Just beware that it really likes to work on a single floor (map) even though the app claims it can have multiple floors (maps).
Highlights:
* Good vacuum suction.
* Good navigation.
* Excellent mopping with auto-rising rotating pads.
* Relatively quiet for suction level.
* Large fresh and waste water containers.
* Good vacuum suction.
* Good navigation.
* Excellent mopping with auto-rising rotating pads.
* Relatively quiet for suction level.
* Large fresh and waste water containers.
Room for Improvement:
* Small dustbin means more frequent mid-job return trips to the base to empty.
* Design of water container lids doesn’t inspire confidence.
* App is good but the more expensive brands are better.
* Robot gets really confused with multi-floor maps.
* Small dustbin means more frequent mid-job return trips to the base to empty.
* Design of water container lids doesn’t inspire confidence.
* App is good but the more expensive brands are better.
* Robot gets really confused with multi-floor maps.
Setup:
The box was exceedingly easy to open and unpack. It all started with an outer shipping box that had pull tape to separate it into an upper and lower half which really made it easy to remove the main box. If you buy it in a store, it probably won’t have that outer shipping box, but the main box was also easy to unpack everything. The robot was stored vertically in a carton with a handle and the base was fully assembled aside from the mop-cleaning ramp which easily snapped in place.
As with most robot cleaners that include a base station, you find a good spot for the base and plug it in. This one has separate tanks for both dirty and clean mop water as well as a spot for the self-emptying dustbin bag. Your first bag is pre-installed so all you need to do is lift off the clean water tank, fill it up and then put it back. That’s it for the base.
Next is the robot - remove all packing and protective tape and slide it back-end-first into the base. It powers on and starts providing voice guidance. Install the free eufy Clean app, sign up/in, and then choose to add a product. The app walks you through adding the robot, getting it on your home’s wifi, and setting up the basics.
The last step is having the robot create the first map of your home. Just tap the button in the app to create the first map and watch the robot quietly explore your home. It took about 20 minutes to automatically create the map and it did a surprisingly good job. I then went back in the app to refine the map and give each room a name. Joining “rooms” together was easy, but separating them was a bit more of a chore and zooming in on the map isn’t as straightforward as doing the pinch zoom gesture as you have to start pinching on just the right spot or it won’t do anything. Since the maps are created by the robot’s lidar vision, sometimes it creates phantom rooms like at a staircase or a sunken room. It is impossible to remove those rooms so the best you can do is separate them out and name them something that you’ll remember is not a real room. This also makes it impossible to use the “Clean Everywhere” command as that would cause the robot to try to clean these phantom rooms.
My home has two “levels” that are separated by a single step-down of about 6”. The barrier between these two levels is enough to keep the robot from jumping off the cliff but it still added parts of each level to the other level’s map. This may seem like a small issue, but it creates a massive problem later on.
Anyway, setup went as expected and aside from the above issues with multi-level maps, everything went smoothly.
Maintenance of the robot is well thought-out and easy. On the robot itself, the roller bar is easy to remove to clean or untangle debris. There is a novel comb in there to cut any wound up hair, too. The dustbin is easy to remove from the top so you can clean or replace the filter. The base cleans and dries the mopping pads so regular maintenance is automatic, but the pads are easy to remove if you have to swap them out. In the base is a removable tray where the mopping pads are cleaned. Periodically remove that tray, give it a good wipe and rinse and slide it back in. That’s about it for periodic maintenance.
Usage:
With the fresh water tank full, the dirty water tank empty and a fresh bag pre-installed in the base, I sent my new robot helper out on its first job. I told him to clean two specific rooms and he performed well and then returned home to clean the mopping pads and empty the bin. The next time I sent him out to a different room and he again did an admirable job. So far, so good!
Now here’s where the problems started…. the cleaning base is on the “main” level, but I wanted him to vacuum and mop all rooms in the “lower” level. Apparently, he doesn’t like it when his base isn’t on the same map that he’s cleaning. The “main” map clearly shows the base and the “lower” map does not.
I told him to switch to the “lower” map and clean there. First I tried to just pick him up from the base and plop him on the “lower” floor, then start the job. He wanted to first wash his mop and refill his tank, but he couldn’t do that since the base was on the other map. Fail. I manually put him back on the base on the “main” map and tried again.
This time I told him to clean on the “lower” map but before moving him there. I let him clean the mop and refill the tank and when he started making his way to the other map (which is impossible for him to reach on his own), I paused him, picked him up and put him on the lower floor. He “positioned” himself correctly and started cleaning. Woohoo! However, part-way through cleaning, he wanted to return to the base to wash the mop, but since the base was elsewhere, he just stopped and issued an error.
As much as I tried, I could not get him to clean and mop the rooms of the second map. Given that he is aware that there are two maps and exactly where the base is on one of them, I’d expect a bit more “smarts.” I would expect him to recognize that the job is on a different map, and to ask to be put on that map after mop preparation. I would also expect him to to pause during the job on the map that doesn’t have the base, ask to brought to the dock for mid-job mop cleaning, and then ask to be put back on the other map. Fail.
It’s neither convenient nor advisable to move the base once the maps are created, so if your home has two distinct floors (upper and lower, for example), until his smarts get improved, you should expect him to stick with only cleaning the floor his base is on.
Another feature that other robots do better is zone cleaning and the ability to name a zone. I figured out how to do this, but it was not obvious. He can schedule cleaning and like the apps of other brands, the app shows where the robot is “live” during cleaning which is really nice.
The on-board dust bin is smaller than other models. Given that there is an auto-empty feature in the base, the robot will just return to the base when it’s full, but a small bin means more frequent pauses and returns to the base mid-job. The same applies to the mops and going back mid-job to clean the pads.
The mop does work really well, though. It rises up about 12mm to keep the moist pads off your carpets, unless you want to clean the carpets, too. The roller bar works well but is a bit narrow meaning that the robot has to overlap vacuuming passes to ensure coverage. Other brands and models have wider bars/openings, larger bins, etc…
Overall navigation was rather good. He rarely bumped into walls or furniture and the AI vision system did a good job of recognizing obstacles and avoiding them. My dog didn’t seem to mind the robot and the robot didn’t seem to be bothered by the dog, so both peacefully coexisted.
Overall:
For single-level homes which any combination of carpet and hard flooring, this robot vacuum does a great job navigating and cleaning. It is easy to set up and maintain, and has most of the features of the more expensive brands at a fraction of the cost. For homes with multiple floors (multiple maps), beware that without a software update, this robot gets really confused and probably won’t get the job done without significant frustration on your part and confusion on its part.
I would recommend this to a friend!


Share this review:
+1point
1of 1voted this as helpful.
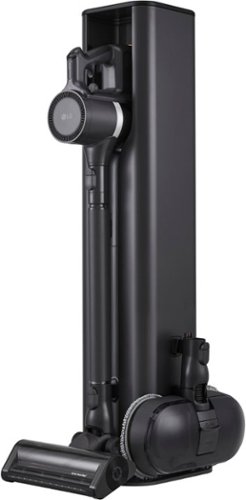
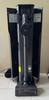
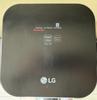
Get hands-on cleaning control and hands-off debris removal with the All-in-One Tower—and more. Not only does it automatically keep your LG stick vacuum clean, charged and ready to go, but the vac now includes our most powerful suction¹, more than 3 hours of run time² and enhanced multi-surface cleaning. Dust and debris don’t stand a chance. Done for the day? Return the vac to the tower to recharge, store tools neatly out of sight and let Auto Empty clean out the dust bin for you. Your hands, floor and air stay clean and your CordZero vac is ready to go when you need it next.
Customer Rating
4
Flexible Auto-Empty Stick/Hand Vac
on March 6, 2024
Posted by: gadgeTT
This flexible stick/hand vacuum can be used to clean up more than just dust and dirt. It also includes a mopping head that is handy for washing tile and hard floors. Everything stores in the base and is kept neatly concealed. The base also can automatically empty the vacuum’s dustbin into a larger bag. The battery is even swappable with one that stores and charges in the base.
Highlights:
* Swappable batteries (2 included) that both charge in the base.
* Good suction.
* Relatively quiet (except when the base is emptying the vac).
* Includes 4 vacuuming tools and 1 mopping tool.
* Extending tube.
* Base stores everything neatly.
* Can disable auto-emptying if not needed every time.
* Easy to replace bags in the base.
* WiFi-connection and app.
* Easy to clean filters.
* Easy to swap tools.
* Easy to clean brush rollers on the tools.
Room for Improvement:
* Auto-emptying doesn’t always get everything.
* Base takes up a considerable about of space to allow for tool doors to open.
* Mopping attachment gets stuck after a while of use.
* App has limited value and can get annoying.
* Auto-emptying doesn’t always get everything.
* Base takes up a considerable about of space to allow for tool doors to open.
* Mopping attachment gets stuck after a while of use.
* App has limited value and can get annoying.
Setup:
This vacuum comes in a HUGE box that is actually a holder for 3 smaller (yet still large) boxes. One box has the auto-empty charging base, one box has mostly the vacuum and main attachments. The last box has mostly smaller bits. Unpack them all and then you can get started setting everything up.
First, set up the auto-emptying base station. Find a suitable spot for it, because it really needs clearance twice its own width so you can swing the doors open on both sides to get to the built-in tool storage. Even though the vacuum docks in the front, there still needs to be room above the stand so you flip up the lid to gain access to the spare battery charging/storage compartment. The base also needs to be near an outlet so you can plug it in, and be aware that when auto-emptying the vacuum bin, it can generate quite a breeze and can be quite loud.
After putting the base in place and plugging it in, next is to store the 3 provided hand-held attachments. The pet brush attachment stores inside the left door. The crevice and combination tools store in the right door. The first dust bag is pre-installed but you need to be able to open both doors fully to get access to it for replacing the bag when it’s full. The mopping head can hang from a flip-out hook on either the left or right door, but it requires a bit of extra clearance when hung on either side.
Two batteries come with the kit. Flip up the lid on the top of the base and put one of the batteries in the cavity to charge it up and store it for future use.
Next up is the vacuum itself. Slide the other provided battery in the base of the vacuum. LG recommends that the vacuum be stored in the base with the extension pipe and the floor nozzle installed. Everything attaches easily and then can be removed by pressing a release button. Slide the extension pipe on the vacuum and then slide the floor nozzle on the pipe.
Dock the vacuum in the base by pushing it straight back in the provided docking hole and then lowering it down. By default the base will automatically empty the bin and start charging the battery that was inserted in to the vacuum itself.
Last step is to set up the app if you want. The app will indicate charging status of the vacuum, provide details like how long and often it was used, and has easy links to help and documentation specific to this model of vacuum. To set it up, download the free LG ThinQ app and choose to add a new product. The app then walks you through turning on the vacuum’s WiFi and adding it to your home and the app.
Usage:
In the simplest terms, it’s a really nice and flexible stick vac that easily converts to a hand vac. Lift it up and out of the base, swap out your attachments of choice, and tap the Power button to turn it on to clean up. When done, tap the Power button to turn it off, then dock it and walk away. The vacuum’s bin will get emptied and its battery charged up for the next use.
The dock itself has a basic display and a few buttons. There are backlit icons that indicate when the base is emptying the dustbin, when it’s charging the spare (Aux) battery and to indicate whether the base will automatically empty the vacuum’s bin every time or not. There are also buttons to turn the automatic emptying on or off, and to start or stop the emptying if done manually. In addition, there is an icon to indicate when the base’s bag is full and needs replacement. This kit includes a total of 3 bags; 1 preinstalled and 2 spares.
The vacuum itself doesn’t use a temporary trigger but rather has a power button to toggle the power on or off. There are separate buttons to increase or decrease the suction power from the default suction. Each button has a few extra functions; for example, when using the provided powered mop head, the Power button starts rotating the mop heads with no suction, and the “+” button sprays fluid rather than increasing the suction as it does when vacuuming.
There are backlit indications on the top of the vacuum for power level of the installed battery, whether WiFi is on, if the filter needs cleaning, and if the tube is plugged up and needs to be cleared.
I really like how I don’t need to hold a trigger to vacuum since most of the time I’m using it for more than a quick clean. It also has a soft start that kinda ramps up and down rather than just turning on or off.
The “Dual Floor Max Nozzle” is easy to maneuver around to suck up floor-level dirt. It has LED lights on the front that not only illuminate the floor so you can see where you’re vacuuming, but they also do a great job of highlighting the dirt that needs to be cleaned up. It is easy to disassemble if anything gets tangled or caught up. This tool is meant to attach at the end of the Extension Pipe and works for people of various heights. The Pipe can also be used with the other tools as necessary and is easily adjusted to various lengths.
The “Pet Nozzle” is designed for cleaning up pet hair and has a rubber beater bar that is easily removed if it gets tangled. The “Combination tool” is easily converted between a wide nozzle and a soft brush.
For anyone interested, the vacuum vents out of the top and that area is easily disassembled to access and wash the handheld’s filter. Keep in mind there are two filters; one in the vacuum and one in the auto-empty charging base.
The handle is rubberized which at first seems nice as it’s a bit more comfortable to hold, but be aware that rubberized plastics like this tend to get sticky as they age, so this part may not be so nice in a few years.
The mopping attachment is a bit odd. it essentially is just a rotating mopping pad with a manual spray that happens to use the vacuum as the power supply. It attaches to the end of the Extension Pipe and has two counter-rotating motorized spinning mopping pads. The kit includes 4 pads so you can use 2 which 2 are being cleaned themselves. There is a removable water reservoir on the top of the mopping head. Fill that up with your choice of diluted floor cleaner or just water, then mount it back on the mopping head. Once the head is attached to the Extension Pipe which is attached to the vacuum body, turn on the power and the heads start spinning. The vacuum does not provide any suction so it’s quieter than when vacuuming. You’re supposed to moisten the mopping pads before attaching them so they’re wet to start off with. As you slide the mopping head over your hard flooring, you can manually spray more fluid ahead of the mop.
One difficulty I had while cleaning my tile floors was that the more I sprayed fluid, the more the mopping pads got saturated. After a short while, they started sticking to the floor and refused to rotate any more. I don’t know if this is a design flaw or not, but I could only clean about 1 room at a time before I had to remove the pads, wring them out, and start again.
Battery life it really impressive on a single charge, but remember that you essentially have double that because you can swap out the dead battery in the handle for the charged one in the base if you need more cleaning time.
The “Kompressor" is basically a manually actuated squeegee to both wipe the metal mesh filter and force all sucked debris down to the bottom of the dirt bin, so that the auto-empty station has a better chance of removing everything. It works but is not a completely smooth experience. It’s mostly optional which is better than having to use it, but perhaps an improvement in design could make it smoother and easier to use.
While I appreciate being able to store all of the tools and accessories in the base unit, doing so does mean that the already large base needs even more room around it to open the doors. And even if you don’t like storing the stuff in the doors, you still need to open them periodically to change the base’s vacuum bag.
The app is completely optional in that it really doesn’t provide a ton of benefit. It can send you push notifications when the battery in the vacuum is charged or when the filter needs cleaning. It has links to the manuals and helpful tips. It has a log of how often the vacuum was used and when. Otherwise, it’s unnecessary. In fact, I turned off the “battery charged” notification because it was just annoying to get that every time I used and re-docked the vacuum. It was easy to set up and use, however.
Overall:
Great suction with convenient tools that attach easily and store out of sight in the base. Great battery life with swappable removable batteries (2 included). A convenient docking station that charges both batteries and empties the dustbin. The mopping attachment is useful but not amazing. The app is easy to set up and use but unnecessary. Overall, a versatile and impressive stick/handheld vacuum.
I would recommend this to a friend!


Share this review:
0points
0of 0voted this as helpful.
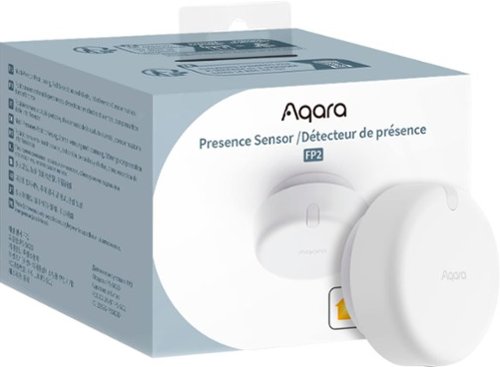
Aqara Presence Sensor FP2 uses cutting-edge millimeter-wave radar technology, which can accurately detect the presence of people even with slight movements. This technology ensures continuity and stability of the smart device. It also has the function of zone positioning, which allows for the automation of different conditions in different zones, such as beds and tables. One space can now be divided into up to 30 small zones and recognize up to five targets (Multi-person Detection). It can also control other smart home devices through ecosystems such as Apple Home to achieve wider applications. It features functions such as human fall recognition, sleep monitoring and a built-in light sensor. Likewise, it is a great helper that can truly combine the diversity of the user's home life and realize the automation of different personalities.
Customer Rating
5
Flexible detection for automation.
on February 28, 2024
Posted by: gadgeTT
This small sensor can add some serious smarts to your home automation system.
Highlights:
* Multi-zone presence sensing via mm wave rather than PIR.
* Illumination measurement.
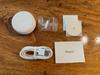
* Numerous mounting options.
* Adjustable bracket.
* Magnetic mount.
* Includes long USB-C power cord.
* Easy basic setup.
* Can be used for creative automations.
* Multi-zone presence sensing via mm wave rather than PIR.
* Illumination measurement.
* Numerous mounting options.
* Adjustable bracket.
* Magnetic mount.
* Includes long USB-C power cord.
* Easy basic setup.
* Can be used for creative automations.
Room for Improvement:
* Tricky configuration.
* Setup screens have numerous text mistakes and some Chinese text.
* Fall detection requires ceiling mounting (with power cable trailing to ceiling).
* Tricky configuration.
* Setup screens have numerous text mistakes and some Chinese text.
* Fall detection requires ceiling mounting (with power cable trailing to ceiling).
Setup:
Installation was straightforward and easy. You plug in the supplied USB-C cable into the back of the sensor and then mount it where you’d like to detect presence and luminance. The built-in bracket allows for various pitch angles and can either be directly screwed into a wall or ceiling, or you can mount one of the two provided metal discs and then magnetically mount the sensor to the disc. The primary restriction is that if installed vertically, like on a wall, that the sensor be vertical (logo flat and right side up or down) and not at a rotated angle.
For fall detection, the sensor must be mounted on a ceiling which for most will be a challenge to trail a USB-C power cord to the sensor. Otherwise, mounting is fast and easy.
The printed documentation was minimal, but that’s OK for me. The sparse printed material had a QR code that directs you to get the free Aqara Home app. You don’t really need the app after setup if you’re using Apple Home or similar, but it has options and features that are only present in the app, so it’s a good idea to keep it around after setup. The app itself guides the installation with simple steps that sometimes felt like it was translated from another language. In fact, some of the steps still have non-English characters and text instructions that don’t match the step, but overall everything worked as expected. There are a lot of configuration and calibration steps so read each screen and follow the instructions for a successful setup.
There is an indicator light on the sensor for various statuses and a button to start a reset if necessary. There is also the Apple HomeKit sticker for use during setup and if needed again later.
Usage:
Once fully set up in both the Aqara app and Apple HomeKit, the sensor detects both light levels (luminance) and person/pet presence. Not only does it detect whether there is presence or not (like a typical sensor) but also how many people are in the detection area and where in the detection area they are! All of this information can be used to trigger automations which is really cool.
The app isn’t the best I’ve seen, but it is mostly organized and there are tons of options you can set up after the initial configuration. As mentioned above, some of the screens have non-English text or statements that don’t match the screen, but I’m sure the app will be updated and improved regularly. In the meantime, there is nothing in the app that prevents success in setting up or using the sensor.
Overall:
The product is thoughtfully designed and has a modern and sleek appearance. The mounting options are flexible and the features it provides for home automation are really unique at this price point. Aside from small improvements in the App, this presence sensor will really add some smarts to your home automations and should definitely be on your short list if you value the feature set like I do.
I would recommend this to a friend!


Share this review:
0points
0of 0voted this as helpful.
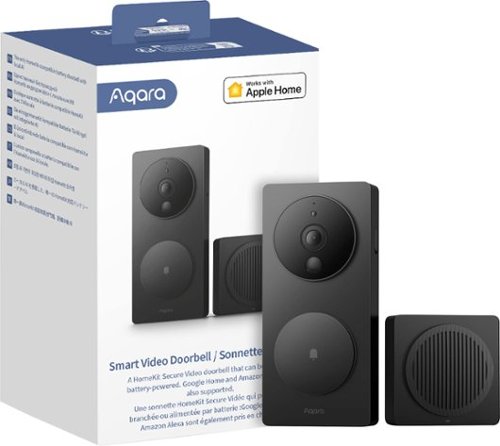
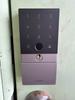
Aqara Smart Video Doorbell G4 is a unique video doorbell that can be wired or battery-powered. It is also the first battery-powered option to work with Apple’s HomeKit Secure Video and supports streaming to Google and Alexa smart displays, featuring local AI used for facial recognition alerts, automations, and much more.
Customer Rating
5
Great features, easy installation, good value.
on February 27, 2024
Posted by: gadgeTT
Tons of built-in smarts, full integration into Apple Home and others, plus local and free cloud storage make this smart video doorbell a worthy addition to any smart home.
Highlights:
* Modern-looking external camera/doorbell that matches the Aqara Smart Lock design.
* Claims up to 4 months of life from the set of 6 AA batteries.
* Easy installation.
* Easy integration into Apple HomeKit, Alexa, Google Home and more.
* Native app has a lot of features and customizations.
* Apple HomeKit Secure Video compatibility.
* On-device facial recognition.
* Free cloud storage plus optional subscription plans for more.
* Remote chime with optional local storage of video clips.
Room for Improvement:
* Materials feel plasticy.
* Remote chime (provided) is required.
* Remote chime must be USB-powered.
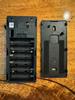
* Doorbell battery replacement requires a screwdriver (and disablement of tamper alarm if previously enabled).
* Materials feel plasticy.
* Remote chime (provided) is required.
* Remote chime must be USB-powered.
* Doorbell battery replacement requires a screwdriver (and disablement of tamper alarm if previously enabled).
Setup:
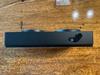
Installation was straightforward and easy. There are two hardware parts; the Doorbell that is installed outside and the Chime that is placed somewhere inside to announce visitors without needing a phone nearby. The Doorbell connects wirelessly directly to the Chime and the Chime then connects to your network and/or home automation system.
The printed documentation was minimal, but that’s OK for me. The sparse printed material had a QR code that directs you to get the free Aqara Home app. You don’t really need the app after setup if you’re using Apple Home or similar, but it has options and features that are only present in the app, so it’s a good idea to keep it around after setup. The app itself guides the installation with simple steps and short video demonstrations. The video and text sometimes felt like it was translated from another language but overall everything worked as expected. I was able to physically install the hardware in about 15 minutes with no questions or difficulties.
Unlike other home automation products, my recommendation is to get everything set up and working before physically mounting the doorbell so you can see live video while choosing where to mount it outside for the best camera views.
Before powering up the doorbell, first apply power to the Chime unit using any suitable USB-C power supply (cable and power supply not included). In the Aqara Home app, tap the “+” button and choose the Smart Video Doorbell to start installation. The setup guides you all the way through setting up the doorbell in Apple Home or other compatible automation systems.
Once the Chime is set up in the Aqara App, you can power up the Doorbell itself. The Doorbell can either be powered directly from the house or you can pop in 6 AA batteries. There are obvious advantages and disadvantages to each installation, and the option is yours. If you decide to use batteries, there are power-saving options in the App to make them last as long as possible, but be aware that installation outdoors in a really hot or cold climate may increase the frequency of battery replacement.
My recommendation is to set up everything using batteries in the doorbell first so you can see live video while mounting the doorbell. After that, you can take out the batteries if you’re going to power the doorbell from house wiring instead.
A wedge is included to mount the Doorbell at an angle if that works best for your chosen location. Both the wedge and the doorbell itself have both adhesive tape and screws to make mounting them fast and secure. To secure the Doorbell to its mount, there is a single screw behind a rubber flap on the right side. Tighten that screw and close the flap to keep your Doorbell from being easily removed or tampered with. Note that you’ll need to open that flap and loosen that screw to replace the batteries, so keep that in mind with your mounting location that you’ll have to leave room for a screwdriver on the right side.
Once you get the angle all set for the Doorbell and either leave the batteries in or remove them to go hard-wired, you can choose a good location for the Chime. Note that they must be within 15 feet of each other and the Chime must also be within range of your WiFi access points.
By the way, the Chime has a speaker, a button to silence alerts, and a microSD card slot for use as local video storage, so you might want to mount it where you can get to if necessary. There is also the Apple HomeKit QR code sticker if needed later.
Usage:
Once fully set up in both the Aqara app and Apple HomeKit, when a visitor presses the doorbell button, the Chime plays a sound, the app issues a notification on my phone and my AppleTV shows a notification with a thumbnail (if the ATV is on). I can tap into the notification on the phone or AppleTV (if on) to connect to the Doorbell with live video and optionally speak with the visitor. I inserted a modest memory card into the Chime so video is recorded both locally and to the Aqara cloud service that is accessible via the app. The free service stores a rolling 7 days-worth of video but the local memory card can store as much as there is space for.
Two-way audio is also available if you want to speak with the visitor. Video quality is quite good both during the day and night, but is limited to 1080p resolution. The video is wide-angle to capture about 160 degrees which is great but it does introduce a bit of fish-bowl effect. You can reduce that effect with a setting in the App, but doing so will diminish the effectiveness of the on-device facial recognition according to the app.
Speaking of facial recognition; to set it up, you can upload photos of each person via the app to “pre-train” the doorbell. The recognition is done locally and a service subscription is not required. Unlike other doorbell cameras, you don’t need to first have a visitor approach the camera to train the facial recognition and instead can upload photos of the visitor prior to their first visit.
The Doorbell has a passive infrared sensor to determine when a person is nearby. That sensor can be used to trigger “loitering” notifications and video recording without needing that person to press the doorbell button. If your doorbell is battery-powered, this sensor can also be used to “wake up” the doorbell from a sleeping state to prolong battery life. If you enable this Loitering recording on a battery-powered doorbell, it will shorten the device’s battery life, so just be aware of that.
The Chime has a small LED light that also indicates the state of the Doorbell and its connection to the Chime that turns red when video recording is in progress. There is also a button on the top to silence any alerts locally so you don’t have to run for your phone if you’re closer to the Chime when the doorbell rings.
Integration into home automation systems is really nice and I appreciate the alert with a thumbnail on my AppleTV as well as on my phone. However; if you have the Aqara Home app installed, you may need to tweak your phone’s notification settings. Otherwise you’ll probably end up with multiple notifications for the same event; one each from Aqara and Apple Home.
The app isn’t the best I’ve seen, but it is mostly organized and there are tons of options you can set up. You can configure detailed notifications for visitor presence (aka “Loitering”), doorbell presses, tampering with the doorbell, etc… If you do turn on the Tampering alarm, just remember to disable that feature before taking the doorbell down to change its batteries.
As mentioned above, you need to loosen a screw on the right side of the doorbell to replace its batteries. Be careful not to strip that screw or you won’t be able to access the battery compartment.
If you have other smart home devices such as the Aqara Smart Lock, you can easily set up automations that either trigger by the Doorbell and control the Lock, or vice versa by recording video when someone unlocks the door… plus many other automations.
Overall:
The product is thoughtfully designed and has a modern and sleek appearance. While the materials are not amazing, they are adequate and the exterior portion looks nice and matches their Smart Home Lock if you have that installed as well. The features and video options are great - especially having the option for local video storage and on-device facial recognition. I haven’t had it installed long enough to confirm the stated battery life, but so far this doorbell was easy to install, easy to set up and easy to use. I love having the Apple Secure Video available to see visitors on my Apple TV as well as my phone. This smart video doorbell should definitely be on your short list if you value the feature set like I do.
I would recommend this to a friend!


Share this review:
0points
0of 0voted this as helpful.
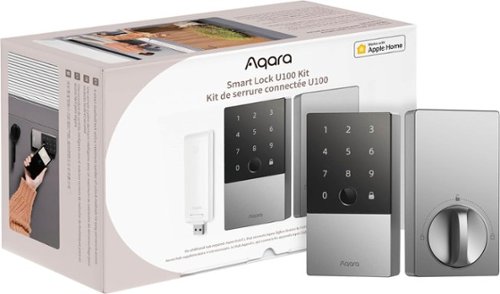
Say goodbye to the hassle of fumbling with keys and welcome the seamless experience of unlocking your door with a simple touch of your iPhone or Apple Watch. By also fully supports the Apple Home app, including guest access code, gaining entry to your abode has never been easier or cooler. Even if there's a power outage of your Apple devices, you can still tap your device and enter your home effortlessly.
Customer Rating
5
Tons of unlocking options. Easy to install.
on February 26, 2024
Posted by: gadgeTT
With up to 6 ways to unlock and numerous integration options, this smart lock will fit into nearly any home and add security and convenience.
Highlights:
* Sturdy and modern-looking external keypad.
* 6 options to unlock: Keypad, fingerprint, NFC tag, Apple HomeKey, Physical metal key and app-based/automation access.
* External USB-C port for emergency power to gain access when batteries are dead.
* Physical Key lock is hidden and protected behind a sliding door.
* Includes a hub for remote access if not using Apple HomeKit, etc.
* Claims up to 8 months of life from the set of 4 AA batteries.
* Easy installation.
* Easy integration into Apple HomeKit, Alexa, Google Home and more.
* Matter compatible.
* Native app has a lot of features and customizations.
Room for Improvement:
* Internal part is plasticy.
* Difficult to open inside section for battery replacement.
* Not able to reliably determine if door is open, closed or ajar.
* Internal part is plasticy.
* Difficult to open inside section for battery replacement.
* Not able to reliably determine if door is open, closed or ajar.
Setup:
Installation was typical of other smart locks. There is the hardware installation followed by the software setup.
Like other smart locks, installation includes a keypad portion that is on the outside of the door, a portion with the batteries that is on the inside of the door, and the deadbolt itself that is sandwiched between.
The printed documentation was minimal, but that’s OK for me. The sparse printed material had a QR code that directs you to get the free Aqara Home app. The app itself guides the installation with simple steps and short video demonstrations. The video and text sometimes felt like it was translated from another language but overall everything worked as expected. I was able to physically install the hardware in about 15 minutes with no questions or difficulties.
Software setup was equally easy. The hardware setup in the app continued to the setup of the software part and also included integration into Apple HomeKit and linking of a HomeKey. I already have an existing Apple HomeKit setup and another smart lock that uses HomeKey. The same virtual “key” now opens both locks even though they are different brands - cool!
The provided hub is not completely necessary depending on the ecosystem you want to connect to, but it is included in the box and doesn’t seem to introduce any issues into my existing HomeKit system. The lock is compatible with Matter as well, so integration is fast and easy for compatible systems.
During setup, the app supposedly calibrated a door sensor to determine when the door is open, closed or ajar. Other smart locks have a magnet that is attached to the door frame to aid in this sensing, but this Aqara lock just uses whatever is built into the lock portion and has nothing on the door frame. As such, it doesn’t seem to accurately and reliably determine when the door is open or ajar, but otherwise everything during the installation went great.
By the way, inside the battery compartment are buttons to reset the lock and re-establish connections to the app or Apple HomeKit. There is also the Apple HomeKit QR code sticker and the QR code for the Aqara user’s manual.
Usage:
Once fully set up in both the Aqara app and Apple HomeKit, the lock is accessible locally via Bluetooth and remotely via the Aqara hub or an integration such as HomeKit or Google Home. The lock’s status and basic control (to lock or unlock) is available in both ecosystems and various automations can be programmed to either be triggered by the lock’s status or to control the lock based on some other event. The lock doesn’t seem to know reliably whether the door is open, closed or ajar, and doesn’t indicate that status on any summary screens in the app.
I set up numerous fingerprints for myself as well as one of the provided NFC tags, a PIN code in the Aqara app and as mentioned above, my Apple HomeKey. In addition to these options to lock/unlock the door, I can also use the Aqara app, Apple Home or the provided physical key. So in all, I have 6 options for opening the door and am fairly confident that at least one of them will be convenient and work when I need it.
In the unlikely event that you’re outside the locked door and the batteries have died, there is a USB-C port on the bottom of the keypad. Attach any suitable external USB battery to temporarily power up the lock and gain access, then swap out the batteries once you’re inside. Also, if none of the electronic methods for unlocking the door are working and the emergency battery jump doesn’t work, you always have the physical key which will work even if the lock is completely dead.
The keypad is backlit so it’s easy to type in a code at night if that’s the method you’re using. The lock is supposed to last up to 8 months on a set of AA batteries and notify you when the batteries need replacement, but I haven’t had it installed long enough to confirm that.
The app isn’t the best I’ve seen, but it is mostly organized and there are tons of options you can set up. Automatic locking, automatic re-locking, temporary access codes, etc… There is also a nice “passthrough” feature whereby you enter a code on the keypad to disable any automatic re-locking until you manually lock the door again. This is super helpful if you’re going through the door often and don’t want it to auto lock behind you each time. Setting up users for various access levels is easy, although once you’ve create that user, it’s difficult to rename them. I’m sure the app will see improvements in the near future, and the hardware itself is good enough already.
The outside (keypad) portion is nicely constructed and feels like it can withstand the elements, but the inside portion of the lock is completely plastic and feels a little cheap to me. To replace the batteries, you have to pry the back of the inside portion off and it feels like doing this will eventually break off the plastic tabs that keep the panel attached. This isn’t a deal-breaker and at the price-point of this lock, you’re getting a lot of value for price paid.
Overall:
The product is thoughtfully designed and has a modern and sleek appearance. While the materials of the inside portion are not amazing, they are adequate and the exterior portion is well-made and looks good to me. The features and connectivity and unlocking options are great - especially having up to 6 choices for unlocking. I haven’t had it installed long enough to confirm the stated battery life, but so far this lock was easy to install, easy to set up and easy to use. I love having HomeKey as my primary unlocking method with several others (like fingerprint, PIN code and NFC tag) as alternates. This smart lock should definitely be on your short list if you value the feature set like I do.
I would recommend this to a friend!


Share this review:
0points
0of 0voted this as helpful.
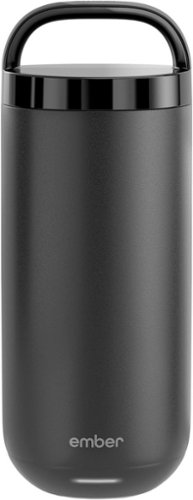
Designed to be used wherever life takes you, the Ember Tumbler does more than simply keep your coffee hot. Our largest mug yet, the 16 oz Tumbler allows you to set an exact drinking temperature and keeps it there for up to 3 hours, so your coffee is never too hot, or too cold. It features our most advanced chip ever for improved Bluetooth® reliability and a simplified pairing process. All Tumblers come with two lids, letting you choose between the leakproof Handle Lid or spillproof Sliding Lid. Made with a durable stainless steel construction, Ember Tumbler is easy to clean and is safe to submerge up to 1 meter in water. Both lids are dishwasher safe.
Customer Rating
5
Biggest Ember yet with lids and long-life battery
on December 10, 2023
Posted by: gadgeTT
This Ember Tumbler is essentially a 16oz version of the Ember Cup with a few lid choices included. It is their largest-capacity yet at 16oz and has a long-life battery that lasts up to 3 hours away from the charging coaster. It’s a sleek and stylish way to carry around a larger portion of warm beverage without spilling.
Highlights:
* Ember’s largest capacity yet at 16oz (bigger than their Travel Mug)!
* Long-life battery keeps beverages warm for up to 3 hours away from the charging coaster.
* Includes an insulated spill-proof lid with handle.
* Includes a Sip lid that is easy to clean with a removable slide part.
* Includes a smaller charging coaster that still works with all other Ember cups.
* Fits most car cupholders.
* Fully water-safe for washing by hand.
* Lids are safe for the dishwasher.
Room for Improvement:
* Bottom retains moisture after cleaning like all other Ember cups/mugs.
* Unlike the Travel Mug, must use the app to see/change the temperature and check battery level.
* Unlike the Travel Mug, must charge on a AC-powered charging coaster (one included) - not compatible with the Travel Mug’s Car Charger accessory.
Setup:
Like all other Ember cups and mugs, setup is super easy. Wash the Tumbler and lids by hand and then charge up the Tumbler using the provided charging coaster or the charging coster from any other Ember drink ware product (cup/mug/etc.). Once fully charged, open up the free Ember app and choose to add a new product. The app quickly connects to the Tumbler via Bluetooth and shows the temperature set point and Tumbler battery charge level.
Now that it is connected to the app, you can personalize the temperature units, temperature presets, and even the change the standby LED color so you can more easily identify similar Tumblers if you have more than one. A firmware update may be needed and if so, is quickly applied. That’s it for setup.
Usage:
Like the other Ember drink ware products, the Tumbler defaults to a set temperature of 135F so even if you never use the app to adjust the temperature, the Tumbler will hold your drink of choice at a temp that is a good base for coffee or tea. Of course, you can use the app to set it to your temp of choice between 120F and 145F and even customize presets by name. The built-in battery will hold that temp for about 3 hours off the coaster, or almost indefinitely if left on the coaster.
I have a few different sizes of Ember drink ware so I have a few of their charging coasters around the house; one at my work desk, one at the dining table, etc.. While the battery keeps things warm while away from the coasters, I tend to put my cup of the moment on whatever coaster is nearby which keeps things warm until it’s time for a refill.
The tumbler holds up to 16oz of warm beverages which makes it the largest offering by Ember - more capacity than even their Travel Mug! In fact, the Tumbler to me looks like a super-sized version of the 6oz Cup in design; but with a lid and a bigger battery.
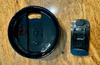
You can use it at your desk like a really large coffee mug, but it also comes with two choices of lid. The screw-on lid has a handle and makes it easy to carry the Tumbler and not worry about the lid popping off or anything spilling. There is a rubber gasket to keep it sealed and little holes on the inside portion to make it easier to clean and drain the wash water. It’s also insulated to keep your drink warmer. The Sip lid is a press-fit with a rubber gasket and has a slide to cover the sip hole While it’s not completely spill-proof, it will minimize any messes if the Tumbler is tipped over. On the inside of this lid is a latch to easily remove the slide portion for cleaning.
Both lids are dishwasher-safe, but like all of the other Ember cups/mugs, the Tumbler itself is water-safe and fully submersible but should be hand washed only. On the bottom of the Tumbler, again like all other Ember cups/mugs, is a rubber coating to keep it from sliding around, the power/pairing button, and two concentric metal rings that mate with the pins in the coaster to charge up the battery. After years of using Ember cups and mugs, I know that this bottom section tends to collect moisture after being washed, and if you put the Tumbler on the charging coaster immediately after being washed, you’ll end up with moisture under the bottom and in the coaster. To prevent this, I always leave the Tumbler upside down for an hour or so to air dry before flipping it over on its coaster to charge.
As mentioned above, the Tumbler is Ember’s largest-capacity product yet. It holds up to 16oz of beverage whereas the Travel Mug only holds 12oz. They both have a 3-hour battery, but the main differences (aside from the 4oz difference in capacity) is that the Tumbler is really designed to work with the app. The Travel Mug, on the other hand, has a display and buttons so that you can control the temperature and see the battery charge level without the app. The Travel Mug also has an accessory charging coaster that plugs into a car’s 12v outlet for keeping it charged up while driving. The Tumbler only works with the standard charging coasters that connect to an AC outlet.
Overall:
If you’re familiar with Ember cups and mugs, this Tumbler is everything you love about them in a bigger 16oz version with a few lids. This supplements their lineup of 6oz, 10oz and 14oz cups with a new 16oz version and even hold more than their prior 12oz Travel Mug. If this would be your first Ember drink ware product, it may seem pricey for what amounts to a battery-powered coffee cup, but it’s really wonderful to never have cold coffee or tea again - when at home or out and about. That’s why I keep coming back for more Ember products!
I would recommend this to a friend!


Share this review:
-1point
1of 3voted this as helpful.
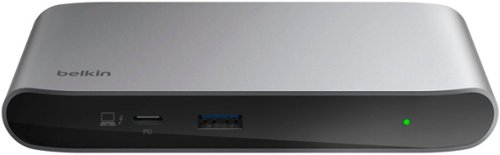
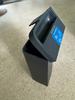
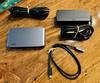
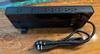
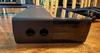
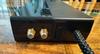
Our Thunderbolt 4 5-in-1 Core Hub with up to 40 Gbps of bandwidth is the perfect all-in-one solution to connect your laptop to multiple devices through one Thunderbolt 4 cable. Create your ultimate workstation and become a production powerhouse connecting your laptop to monitors, external drives and other peripherals you use on the day to day. It also supports Power Delivery up to 96W, eliminating the need to choose between port expansion and power.
Customer Rating
5
Compact and Capable TB4 Hub
on November 25, 2023
Posted by: gadgeTT
This high-power Thunderbolt 4 hub supports most of what you need to connect to your computer with style and confidence supported by solid build quality and a compact design.
Highlights:
* Solidly built.
* Status LED on the front.
* Compact and attractive.
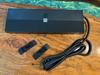
* Includes 150W power supply.
* Solidly built.
* Status LED on the front.
* Compact and attractive.
* Includes 150W power supply.
Room for Improvement:
* Large external power supply.
* Icons can be difficult to read in low light.
* Large external power supply.
* Icons can be difficult to read in low light.
Setup:
The external power supply has a captive barrel plug that connects to the hub and a detachable short AC cable to connect to a grounded wall outlet. Plug in both ends and the hub powers up. Plug in the provided TB4 cable between the front of the hub and your computer, then connect your regular monitors and peripherals to the three (3) ports on the rear of the hub.
Usage:
On the front is a USB-A port for temporary use when you need it, but the hub is mostly of the set-it-and-forget-it type. My setup is a MacBook Pro with two external displays; a 35” UHD (4k) monitor and a Wacom Cintiq 16 external display/tablet. I also have a ton of other peripherals so this hub isn’t my only solution, but everything that I have connected through it has worked great. The monitors are at their full resolution and refresh rate. and everything seems to be working as expected.
The hub includes a 150W external power supply and claims that each port can sustain 15W.
Overall:
This stylish and compact Thunderbolt 4 hub supports everything that I threw at it. All of the TB ports are TB4 compliant and Belkin has great support and warranty if you ever need it. What more can you ask for?
I would recommend this to a friend!

Share this review:
0points
0of 0voted this as helpful.

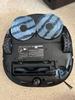
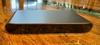
The Bowers & Wilkins Px8 Wireless Headphones, featuring a completely redesigned and optimized acoustic system, an angled ultra-high-resolution carbon drive unit, deliver detailed, rich audio performance with incredible clarity. With its proprietary active noise cancellation, the headphones are designed to block out unwanted external noise, ensuring clear, crisp playback of your favorite tracks. With the redesigned microphone arrangement with 2 external adjustable mics, the wireless headphones ensure exceptional call quality. Easy set up offered through the iOS/Android compatible Bowers & Wilkins Music App that allows you to control he sound and noise cancellation, enable voice control right from your phone. Offers 30 hours battery life from a 2-hour charge, plus quick charge support delivering 7 hours playback from a 15-minute charge. Comes with all round improvements to headband that ensure comfort across differing head-shapes, coupled with lightweight aluminum and fine leathers for a superior fit and finish.
Customer Rating
5
Luxury Wireless Audiophile Perfection
on November 20, 2023
Posted by: gadgeTT
Luxury around ear headphones are typically used for one thing - listening to music in the best possible quality. Everything else is secondary. These Bowers & Wilkins headphones have some expected conveniences, but first and foremost- they excel at audio perfection. Plus, they look really swanky! Of the built-in extras, the Active Noise Cancelation (ANC) is better than most and the Transparency mode is also good. Calls are nice and clear, and the battery life ensures that you’ll be set for marathon listening sessions.
Highlights:
* Built-in 24-bit DsP for exceptional sound quality.
* aptX Adaptive and Bluetooth 5.2 for great audio over Bluetooth.
* Supports the new BLE GATT audio profile for future compatibility.
* Supports Multi-point Bluetooth pairing.
* Better than average ANC with 4 microphones.
* Clear calls with 2 microphones.
* Good ambient passthrough (Transparency) mode.
* Can listen over Bluetooth or USB-C while charging.
* Easy to find and use buttons for local control.
* Long battery life of 30 hrs on a full charge with ANC on (15 min quick charge for 7 hrs of listening).
* Fold flat and store in case with room for included charging and analog audio cables.
Room for Improvement:
* Power light is not easy to see while being charged if folded flat.
* Cannot toggle between ANC and Transparent only.
* Have to choose between shortcut button toggling audio mode OR being able to trigger phone’s assistant.
* Ear pads are not removable or replaceable.
* Power light is not easy to see while being charged if folded flat.
* Cannot toggle between ANC and Transparent only.
* Have to choose between shortcut button toggling audio mode OR being able to trigger phone’s assistant.
* Ear pads are not removable or replaceable.
Setup:
Setup was about as easy as you can get. As always, plug ‘em in to ensure a full charge first using the provided USB-C cord and your choice of USB adapter. Charging takes up to 2 hrs and the LED turns solid green when done. By the way, the battery status LED is on the left edge of the right ear cup which when folded flat, is hidden so it’s not easy to see the LED light.
Install the Bowers & Wilkins Music App on your Android or iPhone and sign in with your free account. Turn on the headphones and slide the power switch to “pairing” until you hear the friendly lady say that pairing is enabled. The app should then quickly find and pair to your headphones.
There are a few basic settings you can change in the app, but nothing is required. Settings include things like what the shortcut button on the left ear cup does and the bass and treble boost (no EQ curves, though).
Once setup, you basically just turn it on and it reconnects to the last two devices you paired to (or used). There’s also audio confirmations for which sound mode you’re in, whether the battery needs recharging, etc.. The reset is just listening to whatever source you like.
Usage:
As with most around-the-ear headphones, the position of ear-cups is adjustable to fit your particular head. The storage case only fits the headphones when the cups are fully retracted, so unless you use them is this position, you have to adjust them for use each time you take them out of the case and adjust them back down to fit them in the case. Of course, if you don’t put the headphones back in the case after each use (or always use them in the most retracted state), then this doesn’t matter.
On the right ear cup is a power button that s slightly non-standard in that it its a physical toggle rather than a momentary tap button like usual. Slide the power button up to turn on the headphones and slide it back down to turn them off. When the switch is on, slide it up further and hold for a few seconds to put the headphones in pairing mode to pair to another device like your tablet or computer.
Below the power button is a trio of buttons that includes dedicated volume up and down buttons and the typical multi-function button. The multi-function button has a nice textured surface so you can easily find it with your finger while wearing the headphones and then easily find the volume buttons from there.
The only button on the left ear cup is a shortcut button that you can set up to either toggle the audio mode (ANC On, Transparency On or both Off), OR trigger your phone’s assistant (if applicable). If I had my way, I would make it so that the shortcut button does one of those options on a tap and the other on a long press, and you can choose which is the tap and which is the long press via the app. As it is, that button can do one or the other so if you choose to invoke your Assistant, you have to use the app to switch audio modes, etc.. Also, it would be nice if we could omit the “both off” option from the audio mode shortcut so that tapping that button toggles only between ANC ON and Transparency ON and skips the “both off” option. This is a nit, though.
The Napa leather-wrapped ear cups are supremely comfortable for long listening sessions as is the leather-wrapped headband. The overall design is very chic and sculpted with excellent craftsmanship and attention to detail. Even the case is well-designed with a compartment with a magnetic lid that stores the provided audio and USB-C cables.
All of this is the details and the fluff for headphones and is meaningless if they don’t sound good…. and these sound AMAZING! I listened to “lossless” audio of various genres via Apple Music on my iPhone 15 Pro Max as well as FLAC files on my dedicated audio player. These headphones revealed nuances in the music that I have never heard before!
Overall:
These headphones sound superb with all genres that I threw at them. They fit great and feel comfortable for hours of listening pleasure. The Hybrid ANC works well, the transparent mode works well, and they look fantastic. What more can you ask for in luxury wireless headphones?
I would recommend this to a friend!


Share this review:
0points
0of 0voted this as helpful.
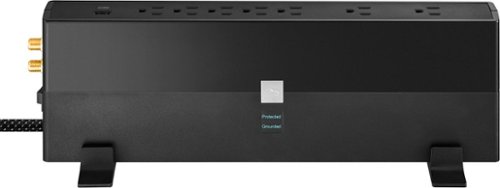
Stay protected from a power spike with the Rocketfish RF-HTS723P 7-Outlet/1-USB-C/1-USB 3,600 Joules Surge Protector. It absorbs power surges up to 3,600 joules, keeping your devices safely connected. A USB-C port and USB port efficiently charge your mobile devices with 32 total watts, and additional jacks give your landline phone, modem/router and cable protection. This surge protector also combines the best of both worlds with five standard-spaced and two wide-spaced outlets to connect wall chargers and other devices. Finally, it includes 3-line protection and a status LED light, so you know when your devices are being protected from surges that can enter all three lines.
Customer Rating
5
Flexible Power and Protection
on November 5, 2023
Posted by: gadgeTT
Most power strips lay flat and have their plugs go in the flat side. This power strip instead has the plugs go in the shorter edge. It might not seem like a big deal, but this allows the strip to snug up against a wall or behind furniture and not have the cords stick out. There’s plenty of outlets for a lot of stuff including powered 2 USB devices without adapters and it’s all protected from surges and spikes.
Benefits:
* Flat design with plugs on the shorter edge.
* Multiple mounting options.
* 7 outlets with 2 widely-spaced for power adapters.
* 2 USB ports; 1x USB-C, 1x USB-A
* Long fabric cord with space-saving plug.
* 2 RJ-11/45 jacks for telephone/networking.
* 2 coax jacks for Cable TV/modem.
* Provided stands to sit it upright.
Areas for Improvement:
* Outlets would fit things better if they were all rotated 180 degrees.
* Is there really a need for the Coax jacks?
* Is there really a need for the RJ-11/45 ports?
* Outlets would fit things better if they were all rotated 180 degrees.
* Is there really a need for the Coax jacks?
* Is there really a need for the RJ-11/45 ports?
Usage:
The slim design and multiple mounting options add to this power strip’s flexibility. You can mount to a wall with the keyholes or lay it flat on the floor or a table. Either way, the cords plug in on the shorter side so it fits snugly against the wall or takes up less room on the shelf. Or you can use the provided stands and have the outlets on the top and place it on the floor behind a home theater or computer desk. Either way, it’s nice having the cords plug in on the side rather than on the wide flat surface to save space.
Of the seven (7) power outlets, two (2) are widely-spaced to fit larger power adapters. The rest are standard spacing to fit power cords, but they still will fit a bunch of USB adapters depending on their size. I would prefer that the outlets were facing the other way, though, so that larger adapters would fit without encroaching on the regular outlets.
There are also two (2) USB ports to directly power USB devices without needing any adapters and they can supply up to 32W total. The USB-C port supports PD and can supply up to 20W while the USB-A port can supply up to 12W. Both ports are on the same edge as the AC plugs.
I’m sure someone out there might find a need for the Coax and RJ-11/45 ports, but I personally have never used them in my setups. If you want them, they are on opposite ends of the power strip so it still fits flat against a wall or behind furniture.
The six (6) foot braided captive cord is really nice and gives the product a quality feel. The space-saving plug not only hugs the outlet but the cord comes out at an angle so it doesn’t block another outlet.
There is a power switch that also resets the unit if it gets tripped.
Other than that, it’s a pretty standard power strip with surge protection. The box claims that it has 3-line protection from surges and spikes and it has a 3-year warranty. Separate lights on the side indicate when the strip is “Protected” and “Grounded.” The box also claims that there is a $750,000.00 limited warranty against damage to connected equipment (certain restrictions apply).
Overall:
A well-designed power strip with surge/spike protection for up to seven AC, 2 USB, 2 coax and 2 telephone/network connections. The design makes it more flexible to mount and it has plenty of space for a lot of stuff.
I would recommend this to a friend!

Share this review:
0points
0of 0voted this as helpful.
gadgeTT's Review Comments
gadgeTT has not submitted comments on any reviews.
gadgeTT's Questions
gadgeTT has not submitted any questions.
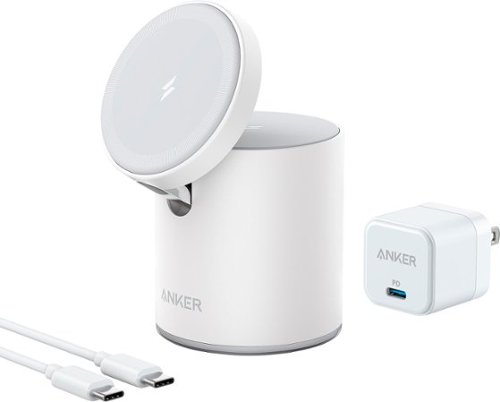
Introducing the MagGo Magnetic 2-in-1 charger, featuring magnetic precision for effortless alignment during charging. Compatible with iPhone 12 and beyond, this sleek design offers secure charging for your phone, AirPods, and AirPods Pro. With a versatile free-standing design, you can adjust your iPhone's viewing angle for convenience and comfort. Plus, enjoy an illuminating charging experience with a beautiful ambient light glow.
Does this charge at the full magsafe 15W?
No. This charger is not MagSafe. It is qi and has magnets but is not recognized by an iPhone as MagSafe so charging is limited to standard qi rates.
2 years, 4 months ago
by
gadgeTT
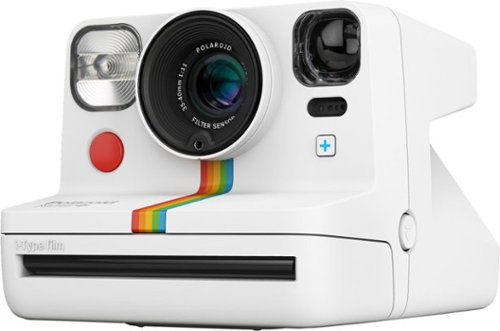
Our most creative camera yet. Polaroid Now+ is our revamped analog instant camera with even more creative tools. Get 5 new lens filters, and unlock two extra tools — aperture priority and tripod mode — inside the Polaroid mobile app. Try light painting, double exposure, manual mode and more. Plus a tripod mount to steady your ideas inside the original Polaroid square format frame.
How many megapixels does this camera have?
This is an analog camera. There is no digital sensor and thus no Megapixel count.
2 years, 5 months ago
by
gadgeTT
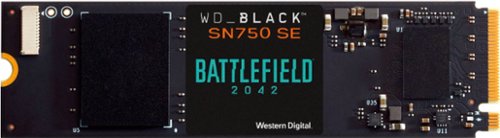
Enhance the performance of your gaming rig with this Western Digital WD_BLACK game code bundle. A NVMe 1TB SSD delivers fast load times and vast storage for all your titles, while the included game code allows access to the full PC game download of Battlefield 2042. This Western Digital WD_BLACK game code bundle boasts backward-compatible PCIe Gen4 technology, providing speedy and reliable performance.
Will this work on the PS5?
I just posted my review and the short answer is YES! You need to buy a separate heat sink but the SSD works great in my PS5.


2 years, 6 months ago
by
gadgeTT

The Nest Doorbell is the battery-powered video doorbell that works with any home. See what’s happening at your door from anywhere and get intelligent alerts about important activity, like when there’s a person, package, animal, or vehicle.* And because there are no wires, you can install it yourself. Nest Doorbell requires the Google Home app and a Google Account – it’s not compatible with the Nest app or the home.nest.com site.
Where can I buy a replacement battery? How much does the replacement battery cost?
The internal battery is not replaceable by the customer. You have to remove the whole doorbell from the mounting bracket using the supplied metal "key", bring it inside and plug it in to recharge it... about every 2-3 months.
2 years, 6 months ago
by
gadgeTT
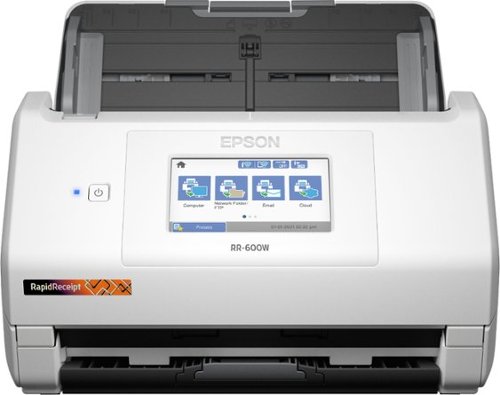
Organizing financial paperwork and accurately processing piles of messy receipts and invoices can be a challenge. The Epson® RapidReceipt RR-600W desktop scanner was specifically designed to quickly scan stacks of invoices and receipts of varying sizes, then automatically and accurately process the information into smart digital assets. With the included Epson ScanSmart® financial software, you can turn stacks of unorganized receipts and invoices into categorized digital data that easily integrates into applications such as QuickBooks®, TurboTax® and more1. Plus, create searchable/editable PDFs with the included bonus software. Do it all with zero subscription fees. Featuring smart technology, this scanner learns from each receipt scanned ̶ recognizing more data and logos over time, ensuring receipts and invoices are accurately converted and categorized. And, it’s all done on your own device, giving you complete control over your data, where it’s stored and how it is used. It’s the easy, cost effective way to organize and manage your finances.
Does it extract receipt information into software that can be sent to quickbooks online?
It claims to, although I'm not a QuickBooks user so I cannot verify. The box clearly states that it does this, tough.
3 years, 2 months ago
by
gadgeTT
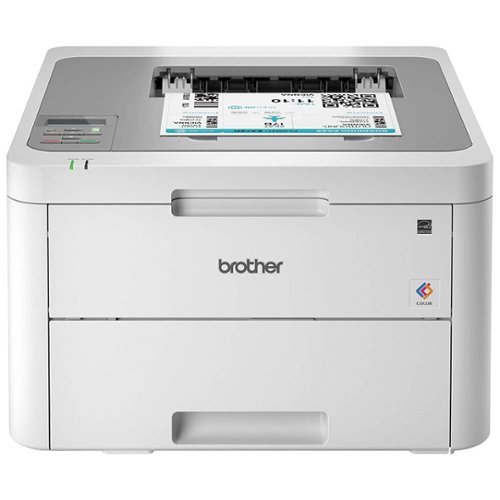
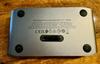
The reliable Brother HL-L3210CW compact digital color printer is a great choice for the busy home or small office. Quick print speeds of up to 19 pages per minute¹ plus manual feed slot accommodates varied printing needs and can handle a variety of paper types and sizes including card stock, envelopes and more. Connect with versatile options including built-in wireless or USB interfaces and print wirelessly from mobile devices. The 250-sheet capacity adjustable paper tray helps improve efficiency with fewer refills and handles letter or legal sized paper. Brother Genuine high-yield replacement toner cartridges help lower printing costs. Comes with a 1-year limited warranty and free online, call or live chat support for the life of your product. Prints up to 19 ppm¹ in black and up to 19 ppm¹ in color.
Does this printer have two trays, one letter and one legal?
One tray is included. This tray supports sizes all the way up to legal. See attached photo where the paper stop is set for letter but can go all the way back to legal.

4 years, 6 months ago
by
gadgeTT
Unlock new potential for your wireless headphones with this Airfly headphone accessory. It plugs into any conventional headphone jack to enhance your listening experience and can pair with in-flight entertainment systems for added convenience. This Airfly headphone accessory has an eight-hour battery life and recharges through USB, so it's easy to take anywhere.
Does this charge air pods. Lost my charger
No. This has a built-in battery that requires charging but does not supply power to charge any other device. AirPods in specific must be charged with an AirPod charging case.
4 years, 11 months ago
by
gadgeTT
Unlock new potential for your wireless headphones with this Airfly headphone accessory. It plugs into any conventional headphone jack to enhance your listening experience and can pair with in-flight entertainment systems for added convenience. This Airfly headphone accessory has an eight-hour battery life and recharges through USB, so it's easy to take anywhere.
Can you plug wired headphones into this to make them wireless?
No. This does the reverse. You plug this into your source's headphone jack to work with your wireless headphones.
4 years, 11 months ago
by
gadgeTT

Experience lag-free, immersive audio with this wireless Plantronics gaming headset. It has support for lifelike Dolby Atmos sound, and the sound-isolating ear cups and noise-canceling microphone keep your focus on the game. This lightweight Plantronics gaming headset has a 24-hour battery life and convenient analog adjustments for custom game audio settings.
Has anyone been able to get the game/chat balancer working properly? I have looked everywhere for a solid solution and have not been able to get it working or find a working example. the game/chat balancer for me makes ALL sounds quieter or louder.
As near as I can tell, this balances the audio between the TOSLINK (optical) input on the USB puck and the audio coming from the USB connection. If you're not using the TOSLINK input, then the switch will basically be useless. Hope this helps.
5 years, 8 months ago
by
gadgeTT
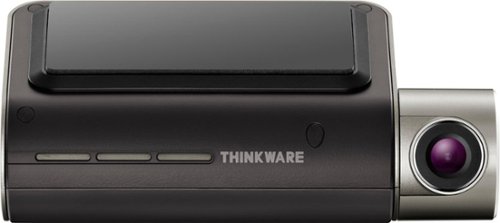
Monitor your travels with this Full HD THINKWARE dash cam. It begins recording automatically when you start your vehicle, and its 140-degree viewing angle and high-resolution camera capture the action as you drive. This THINKWARE dash cam has a file lock feature to let you save important videos.
Does it need connecting to the car battery when hardwired?
Yes. Otherwise it won't have power to record when parked (and the ignition off).
6 years, 8 months ago
by
gadgeTT