


nickcal's stats
- Review count355
- Helpfulness votes1,301
- First reviewApril 12, 2014
- Last reviewSeptember 5, 2026
- Featured reviews0
- Average rating4.7
Reviews comments
- Review comment count0
- Helpfulness votes0
- First review commentNone
- Last review commentNone
- Featured review comments0
Questions
- Question count0
- Helpfulness votes0
- First questionNone
- Last questionNone
- Featured questions0
- Answer count4
- Helpfulness votes0
- First answerMay 23, 2016
- Last answerSeptember 7, 2020
- Featured answers0
- Best answers0
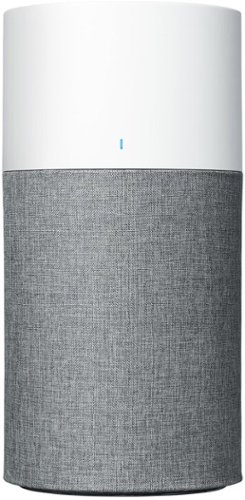
The Blue Pure 311 Auto air purifier is a top pick in Wirecutter's 'The Best Air Purifier 2020' for "Delivering exceptional performance in an attractive form".~ The Blue Pure 311 Auto take a simple approach to air quality management with an integrated particle sensor, Auto mode setting, and LED air quality display. The ENERGY STAR~ certified air purifier delivers high performance with one-button control and customizable pre-filter colors in a lightweight, compact package. Independently evaluated and third-party tested for performance as part of the AHAM Verifide~ Program for room air cleaners, this air purifier has a Clean Air Delivery Rate (CADR) of 250 cfm for fine smoke particles, 250 cfm for pollen particles, and 244 cfm for dust particles. Recommended for medium rooms like a master bedroom, living room, or playroom with a 360~ air intake to completely filter room air about every 12.5 minutes~ (approx. 4.8x an hour at 388 ft~) on the highest speed.~ The 3-step combination particle + carbon filter works with Blueair's HEPASilent~ filtration technology to remove 99.97% of airborne particles down to 0.1 microns, like pollen, dust, pet dander, mold, bacteria, viruses~ and more. An additional layer of activated carbon traps light household odors.~ Blue Pure 311 Auto quietly cleans the air with less noise than a soft whisper~ on low (23 dB) and up to a normal conversation on high (53 dB) ~ while using less energy than a light bulb (3-35 W) on all speeds.~ The one-touch enabled Auto mode is designed to help you maintain a comfortable environment. When enabled, the setting automatically adjusts to real-time conditions reported by the integrated particle sensor. Stay up to date on your air quality with the LED display; it changes color to indicate good, moderate, or poor. Change color in seconds with five fabric pre-filter options inspired by Scandinavian nature. The fabric material of the pre-filter catches larger particles and extends the life of the primary filter. Plus, a hidden compartment in the fabric pre-filter keeps the power cord hidden out of sight. Vacuum the fabric or toss it in the washing machine whenever it needs cleaning. Pre-filter in Arctic Trail (gray) included; Additional colors available for purchase. At Blueair, our Swedish heritage inspires sustainability and quality at the heart of everything we do. All Blueair purifiers are AHAM Verifide for Clean Air Delivery Rate (CADR) and given a recommended room size, certified by ENERGY STAR for energy efficiency and the California EPA Air Resources Board (CARB) for safe ozone emissions. ~From Wirecutter. ~2020 Wirecutter, Inc. All rights reserved. Used under license. ~Air Changes per Hour (ACH) calculation is a product of recommended room size & average ceiling height over pCADR ~According to ANSI/AHAM AC-1 recommended room size ~This air purifier not been tested against & Blueair does not claim to capture, remove, or kill SARS-COV-2 (COVID19) ~Based on GB/T18801-2015 test standards for the removal of formaldehyde & VOC ~Sound pressure according to GB/T18801 & GB4214.1 ~Tested according to GB/T18801-2015 standard. "Light bulb" defined as an LED light bulb with 40 W energy consumption.
Customer Rating

4
Strong purifier for homes
on January 10, 2021
Posted by: nickcal
from Evansville, IN
One of the things we are particularly cautious about these days is our air quality. Even though most air purifiers can’t protect against pandemic-level viruses, it’s good to include them in your home to help with air circulation and the filtering of other dangerous chemicals that seep into the air. The Blue Pure 311 is a great option for homes because its easy operation and low maintenance.
The purifier arrived in its retail box, which doesn’t have a lot flair to it. It’s a simple cardboard box with blue printing on it. The details are highlighted on the box. The retail box was nested inside of a larger shipping box that also had some identifying information on it - like an outline drawing of the purifier. The purifier has its power cord permanently attached to the unit. The wall plug is quite large and will require being plugged directly into the wall or possibly across two outlets on a power strip.
The purifier arrived in its retail box, which doesn’t have a lot flair to it. It’s a simple cardboard box with blue printing on it. The details are highlighted on the box. The retail box was nested inside of a larger shipping box that also had some identifying information on it - like an outline drawing of the purifier. The purifier has its power cord permanently attached to the unit. The wall plug is quite large and will require being plugged directly into the wall or possibly across two outlets on a power strip.
Setting up the purifier is very easy. It’s ready to go right out of the box. This is a refreshing change to other purifiers that I’ve worked with that require filter installation or app set up. You take the purifier out of the packaging, plug it into power, and then tap the top of the unit to select the mode you want it to work with. I chose AUTO and just tapped the control panel once to activate it. I have to admit that it would be really nice if this were a ‘connected’ purifier so that I could see exactly what its sensors detect in the air, but that would eliminate some of the simplicity of its functionality. There is an indicator light on the front of the unit that changes colors when impurities in the air are detected. When the air is clean, the purifier’s light shines blue. It’s a very quick visual that tells you immediately if there is a problem with your environment.
There is a user manual included with the unit and it has suggestions for best performance for the purifier. In order to ensure that it can clean all the air in a given space, the purifier needs room to ‘breathe’ and shouldn’t be placed any closer than 4 inches to any given object. This can present a little bit of a problem if you are trying to hide the unit in a room. You can’t just stick it into a corner and hope it’s going to do its best work. It also suggested that you keep the room closed off while the purifier is in operation. This presents a different problem, too. If your home is anything like mine, the larger spaces are open to other parts of the house. For example, our living room has open doorways to our hallway and dining room/kitchen. Ideally, this purifier would be in the living room since it’s one of the larger rooms in the house. But for testing, I pulled it into a smaller room that didn’t exceed the size limitations of the purifier (no more than 388 sqft) and could be closed off per the user manual’s suggestion.
In this smaller bedroom, I also happen to have a air quality monitor. This room is approximately 100 sqft in size and is used primarily as an office space. My fiancé uses it to work from home as well as personal projects. She has noted that the air quality monitor that’s in the room tends to alert her to rising CO2 levels after working in the room for a couple of hours. We hoped that maybe by placing the purifier in that room that the CO2 levels would decrease with continued use. When we first plugged in the purifier and turned it on AUTO, the unit took about 60 seconds to fully boot up. When it did, the sensor detected that the air wasn’t as clean as it could be and the fans kicked onto a moderate level. Noise-wise, it’s about what someone would expect from a purifier trying to actively clean the air. After just a few minutes, the fan speed/noise decreased and the indicator light turned blue. The specs on the unit indicate that it takes approximately 12 minutes to fully cycle the air in a larger room and I noticed that after less than 10 minutes the purifier had gone to a lower fan setting and the air quality had changed (according to the indicator on the purifier). As for the other air quality sensor in the room, its readings indicated that there were still higher levels of CO2 and other air particulates in the room, but its app indicated that overall levels had decreased after an hour of monitoring it.
I’ve been fortunate to work with this brand of air purifier before and I absolutely love how easy it is to work with. Sure, I would love to have advanced monitoring options available for it, but it does a great job and I can recommend it for homes and offices.
In this smaller bedroom, I also happen to have a air quality monitor. This room is approximately 100 sqft in size and is used primarily as an office space. My fiancé uses it to work from home as well as personal projects. She has noted that the air quality monitor that’s in the room tends to alert her to rising CO2 levels after working in the room for a couple of hours. We hoped that maybe by placing the purifier in that room that the CO2 levels would decrease with continued use. When we first plugged in the purifier and turned it on AUTO, the unit took about 60 seconds to fully boot up. When it did, the sensor detected that the air wasn’t as clean as it could be and the fans kicked onto a moderate level. Noise-wise, it’s about what someone would expect from a purifier trying to actively clean the air. After just a few minutes, the fan speed/noise decreased and the indicator light turned blue. The specs on the unit indicate that it takes approximately 12 minutes to fully cycle the air in a larger room and I noticed that after less than 10 minutes the purifier had gone to a lower fan setting and the air quality had changed (according to the indicator on the purifier). As for the other air quality sensor in the room, its readings indicated that there were still higher levels of CO2 and other air particulates in the room, but its app indicated that overall levels had decreased after an hour of monitoring it.
I’ve been fortunate to work with this brand of air purifier before and I absolutely love how easy it is to work with. Sure, I would love to have advanced monitoring options available for it, but it does a great job and I can recommend it for homes and offices.
Mobile Submission: False
I would recommend this to a friend!


Share this review:


-2points
4of 10voted this as helpful.
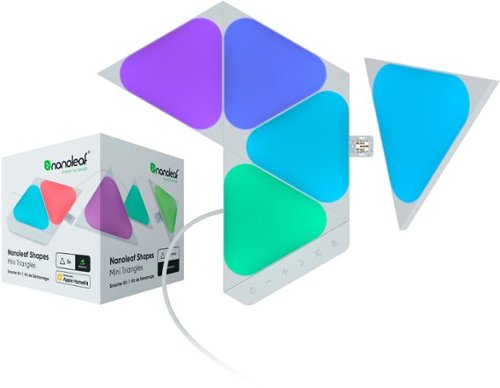
The Nanoleaf Shapes Mini Triangles elevate the concept of smart lighting into a creative journey of design. A combination of smart technology and sleek ultra-thin design, the modular LED light panels open limitless possibilities for you to explore, create, and play.
Customer Rating

5
Compact smart lighting makes design complete
on December 16, 2020
Posted by: nickcal
from Evansville, IN
A few years ago, I started amassing my smart lighting collection. I started with LED RGB bulbs and then moved on to more advanced equipment like the panels from Nanoleaf. At the time, the company only had light panels, but in the three years since then, Nanoleaf has increased its line of smart lighting products to include Shapes and the Canvas. I’ve been fortunate enough to be able to add the Canvas to our collection, but not Shapes - until now.
Shapes are designed to allow the user to create a more flexible lighting design with the use of multiple light panel geometric shapes. These include Triangles, Hexagons, and Mini Triangles. The Mini-Triangles are the version I added. One thing to note here is that the Shapes work with other Shapes, but not with the standard Light Panels or the Canvas. They each have their own method of connecting between the individual light panels.
The Mini Triangle light panels arrived in a very informative package. The box had illustrations, photos, and main features outlined on the sides. When I opened the box I found the light panels (5), linkers (6), mounting tape (6), controller (1), mounting plate (5), and the power supply. One of the things that caught me by surprise as I was removing everything from the box was just how small the mini triangles are. They are about one-third of the size of the standard Light Panels from Nanoleaf, which are also triangular in shape. The packing list for the box states that there are mounting plates included. These plates are already pre-installed on the backs of the light panels and are designed to breakaway should you need to remove the panels from their installation site. Because the mounting plates breakaway, you should be able to remove the adhesive tape much easier than previous models of Nanoleaf’s smart lighting and thus protect your walls from unwanted damage.
Setting up the light panels is pretty easy. One thing that should be remembered is that they can’t be used with a 5Ghz Wi-Fi network. Our home network is dual-band so I didn’t have any issues with connecting. The part of this process I wasn’t thrilled about was that I had to go to Nanoleaf’s website in order to have the installation instructions. A quick start guide is included in the box, but it doesn’t actually give you the startup instructions. You will want to download the Nanoleaf app and install it from there. Yes, they are compatible with HomeKit, which I did include in the installation process, but the pairing process goes much more smoothly if you start in the Nanoleaf app.
Aside from the app, the only thing you need to get started is for one of the Mini Triangles to be mounted to the control panel and for power to be connected. Then, you only have to go to + in the My Devices menu of the app. You will select ’Shapes’ as the product and then ‘Start Pairing.’ You’ll be asked to enter or scan the pairing code and then you’ll be connected and ready to go.
The light panels are very bright, but give off a soft, smooth light. They are designed to be touch-sensitive and to react to sound - as long as they are on the right mode. They come preloaded with several scene programs, but the beauty of these lights is that you can create your own, too. I have not gone through that process yet, but I did turn on some music to see how well they reacted to sound and was impressed with how sensitive they are. I’ve seen some lights that just bounce with music, but these light panels end up dancing with music and sound. I’m thrilled with the addition of the Mini Triangles to our home. I do wish I could connect them to our existing Canvas or original Light Panels, but for now, these tiny smart lights will live on their own.
Mobile Submission: False
I would recommend this to a friend!


Share this review:


0points
0of 0voted this as helpful.
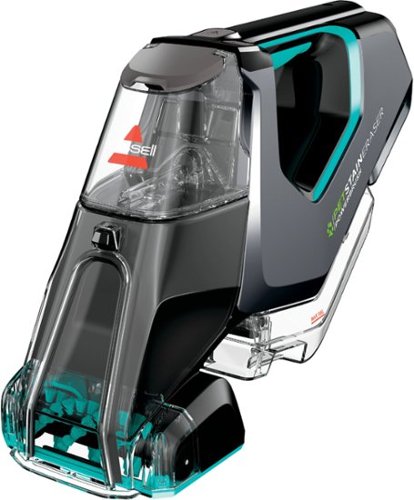
BISSELL Pet Stain Eraser PowerBrush Plus cordless portable carpet cleaner is always ready to remove tough pet messes on the go, making it perfect for families in the little mess maker phase of pet parenthood and beyond. The powerful rotating DirtLifter PowerBrush helps loosen, lift and remove tough pet stains while the lithium-ion battery provides an extended run time for cordless cleaning. Unlike many other portable carpet cleaners, this machine allows you to store the formula in the tank when it's not in use, so there's no water, no mixing and no hassle. Get instant pet stain removal with the included OXY formula and enjoy grab-and-go cleaning for pet messes and other stains on carpet, stairs, upholstery, area rugs, car interiors, and more, right when they happen. BISSELL has products that make cleaning messes in any stage of pet parenthood easy. Plus, every purchase helps save pets. BISSELL proudly supports BISSELL Pet Foundation and its mission to help save homeless pets. When you buy a BISSELL product, you help save pets, too. We~re proud to design products that help make pet messes, odors and pet homelessness disappear.
Posted by: nickcal
from Evansville, IN
When you own pets, you inevitably have messes to clean up. We’ve had our little terrier for a year and half now and while he is housebroken, he still has the occasional accident. When that happens, we do our best to clean it up as quickly as possible, but even after using a stain remover and scrubbing with rags, sometimes that’s just not enough to thoroughly clean the carpet. For times like that, you need a machine like the Bissell Pet Stain Eraser.
The device is a portable carpet cleaner that is designed specifically to clean up pet messes. It has a rotating brush and it’s rechargeable. The cleaner is reminiscent of old hand-held vacuums that I used to use to clean my car out. Its compact size makes it ideal for picking up at a moment’s notice to clean up accidental spills. I’ve actually had small carpet cleaners that are meant to serve a similar cleaning purpose, but they are much larger and not as easy to handle.
The cleaner comes with a power cord to recharge the unit, two bottles of cleaner, and a pet tool that can be swapped out with the rotating brush. Out of the box, the cleaner has some charge to it so you could potentially use it right away. It is suggested that all instructions are read before using the cleaner for the first time. The first step is to charge the cleaner. According to the manual, it takes up to 4.5 hours to fully charge the battery. Also according to the manual, a fully charged battery will get a user approximately 20 minutes of continuous cleaning time. I think I might have got right under the 20-minute mark. There is an LED indicator on the handle just beneath the power button that shows how much power is available.
I do want to note that this cleaner is designed as a ‘spot’ cleaner. It’s not meant for cleaning full rooms - just spots on carpets and furniture. This cleaner has a multi-step process. The first step is to spray the spot with the cleaner and then you place the nose of the cleaner on the spot and move the cleaner back and forth over the spot allowing the brush to scrub the area. Once it’s been thoroughly scrubbed out, you will move the suction channel over the area to remove the cleaning solution from the carpet.
After the cleaner was charged, I opened one of the bottles of solution and poured it into the formula tank. One bottle completely fills the tank. The cleaning solution is premixed so there is no need to add water into the formula tank. The first place I tested the cleaner was in our office. We have a spot where there is some carpet tape residue leftover from an old chair mat. The spot has collected dirt thanks to the residue so it seemed like the perfect opportunity. I first sprayed the spot with the solution and then used the rotating brush to loosen the dirt in the area. The suction channel showed the foaming solution being sucked into the dirty water reservoir.
While I believe the suction of the cleaner did a good job pulling the surface foam off the top of the carpet really well, but as far as the carpet being dry after cleaning it, that wasn’t the case. The carpet was still very damp. And while it seemed as though a lot of the dirt was cleared away, unfortunately, the sticky residue was still stuck to the carpet. Next, I moved to a spot that was on the arm of our couch. The instructions tell you not to use the machine on its side. The spot on our couch was in a strange place and I ended up having to clean at an angle. The spray and the rotating brush still worked to clean up the spot, but the suction wasn’t able to pull up any of the solution.
As luck would have it, while I was in the process of completing these two tests, our dog snuck off and urinated behind a chair. Thankfully, because the cleaner is so compact, I was able to get behind the chair with it. First, I used paper towels to soak up the bulk of the urine and then I used the cleaner to remove any leftover odor and residue that might have been left behind. It seemed that the cleaner did a good job of that, but once again, the carpet was still damp even after several passes of the suction.
As luck would have it, while I was in the process of completing these two tests, our dog snuck off and urinated behind a chair. Thankfully, because the cleaner is so compact, I was able to get behind the chair with it. First, I used paper towels to soak up the bulk of the urine and then I used the cleaner to remove any leftover odor and residue that might have been left behind. It seemed that the cleaner did a good job of that, but once again, the carpet was still damp even after several passes of the suction.
For years I’ve had the unfortunate job of cleaning up after animals in our home. It’s been a difficult job, but that’s now been made easier with this cleaner. I’ve been happy with how it has performed even though I wish that it would suck up more of the cleaning solution so that the carpet wasn’t as damp after a cleaning.
Mobile Submission: False
I would recommend this to a friend!


Share this review:


+10points
12of 14voted this as helpful.

Cutting edge protection, picture perfect. Zoom in to see and record video in 4K with HDR for a clearer, undistorted picture, day or night. Spend less time recharging with 6 months of battery life.~ With free local storage, remotely access your locally stored videos from the included Arlo SmartHub~. The Arlo Ultra 2 Spotlight Camera is wire-free and weather-resistant to deliver fast, easy installation and flexibility to get the perfect camera view, year-round. With the integrated spotlight, see important features like faces and licenses plates in full color, at night with color night vision. Get the big picture with the 180~ diagonal view. Receive smarter alerts for quicker action. Receive notifications for people, vehicles and packages and take quicker action like sound the siren, call a friend or dial emergency services with the included 3-month trial of Arlo Secure.~ Ward off unwanted guests by triggering the siren or integrated spotlight automatically or manually from the Arlo App. Works with Amazon Alexa, Google Assistant, Apple HomeKit and Samsung SmartThings.
Customer Rating
5
Great for home security
on November 23, 2020
Posted by: nickcal
from Evansville, IN
I’ve always liked to keep my property safe by monitoring it with local Wi-Fi security cameras. Over the years, I’ve tried many different types and brands, but I keep coming back to Arlo. They make solid cameras with easily integrated systems. So, when Arlo released new cameras, I jumped at the chance to add them to my system. One of the best features of these cameras is that if you have an existing SmartHub, you can add up to 15 cameras to one hub. So, when these recent additions arrived, I was able to just add them to our existing hub. That said, if you are new to the Arlo ecosystem, getting started couldn’t be easier.
You plug the SmartHub into your router and power, download the app, and get your account set-up. Adding devices is quite easy as well. You simply select ‘add a new device’ at the bottom of the home screen. The SmartHub and app will automatically detect any cameras. If it doesn’t, then you can press the sync button on the bottom of the camera and then the hub will pick it up. The app will direct you to name the camera - I suggest you name it according to the location of where the camera will live once it’s installed - and then you can start viewing the video feed.
The Ultra 2 cameras feature 4K video. Before now, the highest quality security video we had was 2K. We were pretty happy with that quality, but the 4K video feed completely blows the other camera video feeds away. Even though these cameras can be used indoors or outdoors, we opted to keep them as outdoor cameras due to the spotlight feature on them. The integrated spotlight is helping to brighten our darkened patio at night and it has even captured some of our critters (possum, cats, etc.) wandering around. In fact, my fiancé took our dog outside, and right when the door from our garage opened onto the patio, the spotlight kicked on. Even if they didn’t have the spotlight feature, these cameras have color night vision, too.
The viewing angle of these cameras is also quite impressive. There is a 180-degree viewing angle which is a 20-degree increase from other Arlo cameras. With it, we can see our entire patio - from our screen door to the edge of our backyard. It’s very helpful because it allows us to see all the entry points to that area without needing multiple cameras. Another great safety feature of this camera is the custom mode option. While there are preset options for motion and audio detection (armed, disarmed, and schedule), you can also create your own modes based on your camera coverage. For example, I created a mode called ‘outdoor motion’ that includes our doorbell camera and the two outside Ultra 2 cameras. Anytime motion is detected from any of those cameras, I get a push notification from the camera. You do have the option of setting the built-in alarm siren to trigger if you wish. I’ve found that the motion detection is fairly accurate and mostly responsive. There have been times that the camera was triggered easily with a human walking through the selected area for the camera (you can map out the area in the app), but not an animal. And other times, it caught the motion from the animal just fine.
We were slightly concerned about the placement of our Ultra 2 camera because it had the potential of being in direct sunlight part of the day and in our area, it can get quite hot during the summer. Thankfully, these cameras are designed to withstand heat, cold, rain, or sun. They can handle temperatures between -4 F and 113 F. And, since they are wire-free and have an enhanced range, they are perfect to mount around your property. I love the Arlo brand so these are an awesome improvement that makes the system even better.
Mobile Submission: False
I would recommend this to a friend!


Share this review:


+2points
3of 4voted this as helpful.
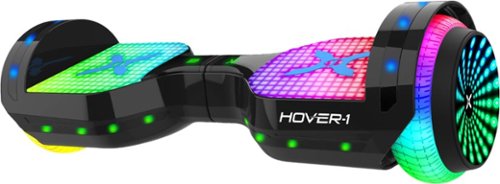
Bring your Astro dreams to life with the Hover-1 Astro Hoverboard. This exciting rideable is an all-out color experience. Available in three different finishes, the LED lights along the wheels, the board and the foot pads will shine bright during your entire ride. The vibrant RGB color scheme will bring your board to life. Bright, bold, and beautiful, Astro brings out our love for color with every mile you ride. Loaded with a massive 400W motor that lets you hit speeds of up to 7mph, you can cruise for up to 6 miles on a single charge. The purchaser and rider of this product are responsible for knowing and obeying all state and local regulations regarding the use of this product, including whether licensing is required and the rules concerning where it may be operated. It is highly encouraged that you read and follow the product instructions including all safety precautions and use protective gear.
Customer Rating
5
A fun way to get around
on November 21, 2020
Posted by: nickcal
from Evansville, IN
I’ve always enjoyed fun ways to get around. When I was younger, I used to skateboard and use roller blades and as I’ve gotten older, I have really liked electric scooters and bicycles. In fact, the only personal mobility vehicle I haven’t really gotten into has been the hoverboard. Hoverboards became popular a few years ago and were ‘the’ thing to get for Christmas. Unfortunately, there were some faulty ones out there that ended up overheating and subsequently catching fire. I believe the manufacturers learned from their mistakes though because since that time, there have been far fewer reports of malfunctioning hoverboards. My daughter got one a couple of years ago when we traveled to Florida and she loves it. She will ride around the halls of our house with it instead of walking from room to room. Because of that experience, we decided to get this Hover 1 Astro hoverboard as an upgrade.
The hoverboard comes in a large box and let’s face it -- this thing is heavy. Even though it’s ‘portable’, it still weighs almost 19 pounds. That’s an improvement over my daughter’s original hoverboard, which was 24 pounds. The vehicle has 6.5 inch wheels which are slightly smaller than our other board, which has 8-inch wheels. I haven’t found that this hinders the movement of the board, too much though. It still provides a smooth ride no matter what surface you are riding on.
The one thing that is important to remember with this or any hoverboard is patience. It takes time and effort to balance and learn how to move properly on the board to get the most out of your experience. I recommend starting by riding the board down a hallway so that you can position yourself correctly on the board and be able to hold yourself in place at the same time using the walls around you.
This hoverboard can connect to an app, which is a nice addition to the experience. It allows you to customize your experience and do things like change colors on the board, track your speed, and battery life. One really cool feature of this particular board is its built-in Bluetooth speaker. You have the option to connect your phone to the speaker in the hoverboard and then listen to music through the board while you ride. Some people may not like this feature, but I thought it was pretty cool.
The biggest draw to me with this new hoverboard is its lighting effects. My daughter’s hoverboard had lights on the back of it, while this one has lights on the board where you stand as well as around the base. If you were riding it at night, there is no way that someone wouldn’t see you coming down the street.
While there are always risks to using a personal vehicle like this, this hoverboard has brought a lot of fun to our family and as long as you are cautious and careful about where you ride and your surroundings, it can be a really excellent option for entertainment.
Mobile Submission: False
I would recommend this to a friend!


Share this review:


+6points
8of 10voted this as helpful.
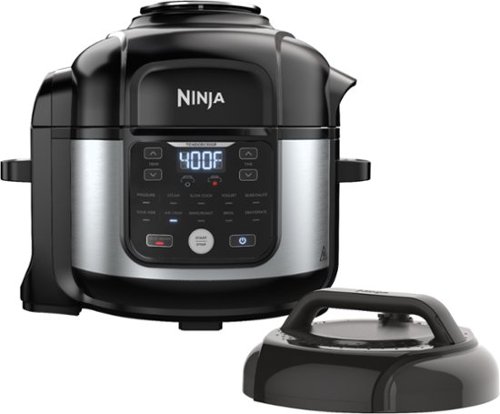
The PRO pressure cooker that crisps. 11 programmable cooking functions provide endless recipe options inside the nonstick 6.5-qt cooking pot and 4.6-qt Cook & Crisp Plate. TenderCrisp Technology lets you pressure cook then air fry finish.
Customer Rating
5
A great space-saver in the kitchen
on November 9, 2020
Posted by: nickcal
from Evansville, IN
If there is one thing that I truly value in our kitchen, it’s counter space. While I love our home, the kitchen is kind of an odd design, and therefore, it doesn’t have a lot of counter space. The house was designed more than 50 years ago so, at the time, counter space wasn’t taken up primarily by gadgets and electronics like what we have now. That said, in the present time that leaves me with limited countertop real estate to work with. I love all the modern cooking devices that are coming out these days like pressure cookers and air fryers - but I don’t have the space to have all the individual products stored in my kitchen. Fortunately, The Ninja Foodi 11-in-1 6.5-qt Pro Pressure Cooker + Air Fryer is a possible solution for my conundrum.
The idea behind this device is remarkable. It combines 11 different products into one succinct pot. The product looks a lot like a standard pressure cooker or slow cooker, but the controls on the side show the special features of this all-in-one device.
The cooker can complete the following functions - air fry/crisp, bake/roast, broil, dehydrator, pressure cooker, sear/saute, slow cooker, sous vide, steamer, yogurt, and food warmer. While it can do all of these functions, the Foodi really excels at pressure cooking. I primarily use it for that purpose as well as air frying. I have noticed that the air frying function does take a bit longer than some stand-alone air fryers, but when you consider the fact that you don’t have two devices fighting for storage space, I don’t mind waiting a little longer for food to be air fried in the Foodi.
The cooker comes with a pressure cooking lid, 6.5-qt nonstick cooking pot, 4.6-qt nonstick cook & crisp plate, and a stainless steel nesting broil rack. One thing I found odd was that the air frying portion of the product only came with a nonstick plate. I’ve used another all-in-1 device of the same brand that had a nonstick basket with it. This made it easier to get food out when it was done cooking. If you only have the plate, you end up having to use tongs to reach in and get your food items. That said, the nonstick cooking pot - as well as the other accessories - are super easy to clean.
So far I’ve cooked frozen egg rolls, tater tots, hot dogs, bacon, and chicken in the pot. Everything came out delicious. While there are some settings on this device that I may never use, it’s really nice to have them available in case I do ever need them.
Mobile Submission: False
I would recommend this to a friend!


Share this review:


+4points
4of 4voted this as helpful.
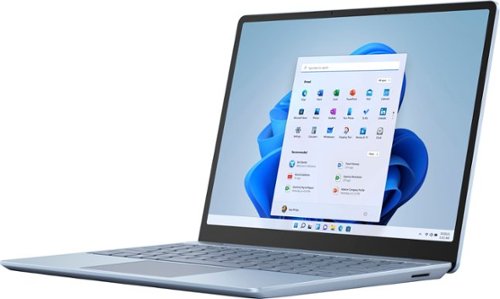
Make the most of every day with the sleek style, performance, and all-day battery life~ you need in the lightest Surface Laptop, all at an exceptional value. Ultra-light and portable profile, the apps* you use every day, premium materials, and a choice of must-have colors will make this your go-to laptop. ~Up to 13 hours of battery life based on typical Surface device usage. Testing conducted by Microsoft in September 2020 using preproduction software and preproduction configurations of Surface Laptop Go Testing consisted of full battery discharge with a mixture of active use and modern standby. The active use portion consists of (1) a web browsing test accessing 8 popular websites over multiple open tabs, (2) a productivity test utilizing Microsoft Word, PowerPoint, Excel and Outlook, and (3) a portion of time with the device in use with idle applications. All settings were default except screen brightness was set to 150nits with Auto-Brightness disabled. Wi-Fi was connected to a network. Battery life varies significantly with settings, usage and other factors.
Customer Rating
5
Ultra-portable and ready for work
on October 25, 2020
Posted by: nickcal
from Evansville, IN
Disclosure: Reviewers in this invitation-only program are provided products for the purpose of writing honest, unbiased reviews. This review is based on my own personal experiences with this product.
Technology is always changing and now more than ever before, people find themselves in need of better computers. This amazing laptop from Microsoft has the power to provide support for students as well as business people while staying compact and having a sleek design.
I want to start this review by saying that this computer is designed for basic productivity-style performance. It does have 8GB of RAM, which is enough to support video chatting and standard office-style tasks like word processing and mild design work, but it’s not enough to be efficient for a video editor or heavy graphic designer. That said, I found the Surface Laptop Go to be a very capable machine for basic activities.
The design of this laptop is stunning. There are three color options for this laptop model - sandstone, platinum, and ice blue. I have the ice blue version. It’s a cool, sleek color that is subtle while still drawing attention. When its lid is closed, the laptop is very thin and compact. I’m used to a 15-inch laptop, but I frequently use a 12-inch tablet and my fiance uses a 13-inch laptop as her daily driver. At first glance, my initial response to its size was, “Wow, this is a small computer.” Once my fiance had it open and working on it, she didn’t have any complaints about its size. And again, if you are doing standard productivity-style tasks like answering emails, word processing, and even spreadsheet editing, the size is somewhat irrelevant. The keyboard has a very soft feel to it and it’s a joy to use. Keys are very well spaced out and I didn’t find myself mistyping much.
This laptop was designed to be minimalistic. There are only four ports on it -- the charging port, one USB-C port, one USB-A port, and a headphone jack. Now even though the headphone jack is included, the laptop is Bluetooth capable so you can connect headphones in that way, too. The laptop is touch-screen compatible so you can operate it as a hybrid machine (tablet/laptop), but the screen does not fold flat against the back of the laptop. I find the hybrid operation quite helpful.
The screen resolution is 1536 x 1024. It’s not a premium screen, but with this being a ‘basic’ level laptop, it’s more than ideal for this machine. I did quite a bit of typing and regular tasks on the laptop and never had a problem with clarity or visibility. One thing I’m not a big fan of with this laptop design-wise is the charger. It’s a two-part power cable and adapter. The cable has a proprietary connector that plugs into the laptop and it’s connected to a brick, which is similar in size to other laptop power adapters. Now, even though it comes with an enormous power adapter/cable since the laptop has a USB-C port, it can receive power through that port as well. I tested this out with a USB-C cable and wall adapter I had available and was able to charge the laptop.
As far as performance goes, the laptop starts up very quickly and registers my fingerprint within about a second. I opted to work through a cloud-based word processor and didn’t have any issues with the laptop slowing down or being tripped up by that process. I opened up 9 tabs in my browser and had 9 streams of 4K video playing simultaneously while I was working on a document in another tab and I had my cloud-storage drive open in an 11th tab. The laptop did not seem to slow down at all. The Surface Laptop Go does come with Windows 10 installed in “S Mode.” This is really a sandboxed version of Windows 10 in my opinion. It gives you the operating system with limited functionality. It does not allow for external applications to be able to be installed. While this mode might be good for someone who does not understand the basics of how to keep your computer safe from outside downloads, it’s a little bit of a hassle to work with if you want to customize your experience at all. I wanted to download an alternative browser. I had to take the computer out of S Mode, which is a free process, but irreversible, in order to download that one program. This is just a feature that users should be aware of as they set-up their laptop.
Battery life seems to be pretty strong. The specs of the machine state that a user should be able to get approximately 13 hours of activity out of the laptop when it’s got a full charge. I did not use the laptop for 13 hours straight, but after I made sure it had a full charge, I did find that after about 30 minutes, only 4% of the battery had been drained. That means that I was getting an average charging rate of around 0.13% per minute. When you use that charging rate and multiply it by 780 (13 hours converted to minutes), you get a total of 101.4. Now, that is of course slightly more than 100%, but it’s a close enough average that I can say that the 13-hour estimated battery life is accurate.
One other thing I noticed while using the laptop was the heat collection on the bottom. I was using it on a flat surface and I noticed that while the laptop was plugged into a power source (either using the provided power cable/adapter or the USB-C cable), the bottom of the laptop near the hinge did get quite hot. The power button also gets quite warm. I think this is a charging issue though because when I started using the laptop unplugged, it was much cooler.
The Surface Laptop Go is a very strong laptop for someone who needs an ultra-portable, performance-driven machine. It’s lightweight, very easy to travel with, and it has the power to complete most standard tasks. I can recommend this for most types of users (business, educational, or personal), but wouldn’t recommend it for creative professionals.
Mobile Submission: False
I would recommend this to a friend!


Share this review:


+4points
5of 6voted this as helpful.
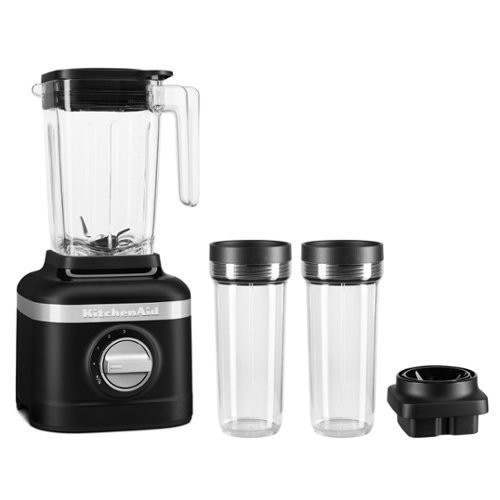
Crush ice in less than 10 seconds.* Discover a world of new tastes and healthy possibilities with the perfect ice-crushing blender for your best tasting smoothie. This blender features an optimally-designed ice-crush setting, or choose any one of the 3 speed options, for your perfect blend no matter the ingredients. In addition to the 48-oz blender jar, this blender comes equipped with 2 dual-purpose personal blender jars, to first blend your smoothie, and then convert to an on-the-go container. *Half tray of ice.
Posted by: nickcal
from Evansville, IN
Last summer, I went to a local fair with my family and experienced a sweet tea slushy. It was essentially just sweet tea blended with finely crushed ice, but it was an incredibly refreshing treat on a hot summer day. Ever since then, I’ve attempted to recreate the concoction with my blenders at home, but they just haven’t been able to cut it. While most blenders can make smoothies and crush ice, they can’t shave the ice like what you would find with a snow cone vendor or a slushy. The Kitchen Aid 3-speed Ice Crushing Blender is the answer to this query.
The blender looks like it is a standard blender, but the asymmetric blade ensures that ice is crushed in a way to achieve that snowy texture. The blade design cuts the ice in four distinct angles so that it pulls the ice into the center as it blends. There are three-speed options as well as the Ice-Crush setting. This makes it possible for you to not only crush up ice for your perfect frozen drink treat but also be able to crush up certain foods. My grandmother lives with me and she has trouble eating solid foods sometimes. So, we end up pulling out a huge blender that is designed to chop up different foods for that purpose. This Kitchen Aid blender gets that same job done, but isn’t quite as large as the other one we’ve been using so it’s much easier to work with.
One of the other things I like about this blender is its simplicity. It has three speeds and an ice setting. That’s it. Again, this is something that is easy enough for my grandmother to work with. Some of the other blenders we have employed a digital display and they have multiple settings that she frankly doesn’t need and those settings just confuse her. The knob control on this blender is easy to turn and you can feel a stopping point when you reach each setting. This is very helpful for people who just need a simple blender. It’s powerful, but not complicated.
The only real issue I had with the blender was that it didn’t cut up all the ice I placed in the blender. For the first test I ran, I put two scoops of ice from our ice maker into one of the personal blender jars. Then, I used both speed setting 2 and the ice-crush setting to chop up the ice. When you just put ice in the blender jar, it gets stuck to the inside of the blade element and on the sides of the jar as it is processed. I had to tap on the sides of the jar and bottom of the cup in order to loosen it up and get the remaining ice cubes blended. As it turned out, I still had 3 almost whole ice cubes in the jar after blending the ice off and on for about 30 seconds. Now, after this initial test, I placed the same amount of ice in the personal blending jar and added some fruit-flavored drink. By adding the liquid, it kept the ice from sticking and I got a much better blend.
This blender could potentially serve as a snow cone maker, but given the fact that ice sticks pretty badly when there is no other liquid in the blender with it, I would recommend this for smoothie mixes over snow cones. The Kitchen Aid blender works really well and for its price, I would recommend it to others looking for a simple, but powerful blender.
Mobile Submission: False
I would recommend this to a friend!


Share this review:


+1point
1of 1voted this as helpful.
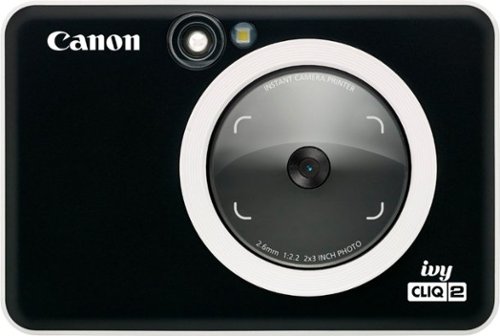
Instantly shoot, print, and stick photos, from the IVY CLIQ2. The Canon IVY CLIQ2 is a simple and fun Instant Camera printer that is pocket-sized so you can take it with you on-the-go. Easily shoot and print 2~x3~ photo stickers instantly, and place them almost anywhere thanks to a peel and stick backing. You can even get creative and print with a white border or filters with Built-in Frame & Filters. The IVY CLIQ2 also has a Large Selfie Mirror so you can take the perfect selfie and even a memory card slot to save your photos!1
Posted by: nickcal
from Evansville, IN
Growing up in the 1980s, we didn’t have the luxury of having a digital camera to carry around in our pockets. In fact, most photos we took had to be processed and we wouldn’t know for sure if the pictures turned out for about a week after we dropped them off. We did, however, have an instant camera that would print photos out from the camera and within about 10 seconds after the photo was pushed out, it was developed. That is what the Canon Ivy Cliq2 reminds me of.
The design of the camera is very similar to a slim point and shoot digital camera, but it’s not as heavy. I have to admit that when you hold the camera, it almost feels like a toy. It has a simple layout and only has four buttons (five including the reset button) for operation. To use the camera, you turn it on, snap a photo, and then it prints out automatically. The printer is audible, but not ‘loud’.
The camera is rechargeable and uses a Micro USB connection to gain power. This was one of the things I didn’t care for about the camera. I personally feel that Micro USB is ‘old tech’ and that devices should be moving more toward USB-C as a charging option. That said, the port for the Micro USB cable is a bit on the large side. At first glance, I actually thought it was a Mini USB port. Next to that port is a Micro SD Card slot, which can be used to store photos.
The camera is only a 5MP camera. Therefore it takes decent photos to capture the moment, but in all honesty, most people’s smartphones have a higher megapixel count than this camera. It’s a fully automatic camera so you don’t really have any control over focus or lighting effects. You can change the photo to black and white or upgrade its basic look by changing the vivid filter settings. You also have the option to add a border if you like. But, since there is no preview option for the photo, you cannot see what the filters might do to the picture before it prints out. Once you print out your photos you can peal to stick the photos with its sticky back. I can see a quick family photo for fun and sticking it to the fridge. My daughter will love this but for me, I am a bit more on the high-end of photography. I shoot with a Canon 5D Mark IV. So it was a bit getting used to when playing with the Ivy
The printer portion of the camera can hold up to 10 sheets of its specialty paper (Zink Photo Paper). One set is shipped with the camera, but you can purchase additional packets of the paper. This is the major downside to this camera - the specialty paper.
All in all, the Ivy Cliq2 is a fun instant camera to play around with. I could see using this for a variety of things including as a party favor or holiday gift. It’s almost a novelty-style product.
Mobile Submission: False
I would recommend this to a friend!


Share this review:


+6points
7of 8voted this as helpful.
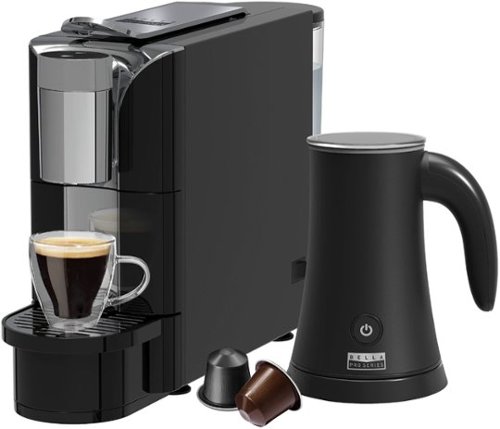
Caf~ quality beverages at home with the Bella Pro Series Capsule Coffee Maker and Milk Frother. Save time, money and customize your morning experience. Easy to use with programmable buttons to brew a single or double shot. Enhance your espresso and make a latte or cappuccino with perfectly textured milk ready in 90 seconds, hot or cold. Powerful 19 bars of pressure with a 1050-watt heating system provides rich and aromatic flavors. Quick 40-second preheat time so you can go about your day. Large 22-oz. removable water reservoir for added convenience and removable drip tray for a variety of cup sizes.
Customer Rating
4
Machine makes good coffee drinks
on October 12, 2020
Posted by: nickcal
from Evansville, IN
I’m not much into fancy coffee, but my fiancé is. She loves getting lattes and iced coffee from coffee shops. Lately, though, she hasn’t wanted to spend the extra money on those luxury drinks or put herself at risk by visiting one in person given the community health situation. So when we were presented with the option to get a new coffee maker with milk frother, we jumped at it.
Getting started with the coffee maker is pretty easy. Out of the box, it doesn’t have any assembly that’s required other than pulling packaging tape off the parts that open up. The coffee maker is one large, narrow machine that has a removable water tank at the back, used capsule storage, and a removable drip tray to accommodate different cup sizes. Now, at this point, I want to point out that even though the name of this product is ‘coffee maker’ it really makes espresso sized drinks. There is a large and small drink size indicator on the maker that you select to start the coffee processing. The manual indicates that the small size is 1-1.5 ounces while the large size is closer to 2-3 ounces. The product description also says, “enhance your espresso,” in reference to adding the frothed milk to it. With this in mind, I feel that this product shouldn’t be called a ‘coffee maker.’ It should be referred to as an espresso maker.
This brings me to the one real issue I have with this coffee maker. There are no capsules included with it. I’ve used other systems that are similar to this one and they usually ship with a sampler pack of the pods or capsules that work with that coffee maker. This machine did not come with any. In addition to that, the only information I could find about the compatible capsules was a line in the manual that states, “This appliance is designed for Williams Sonoma Coffee Capsules, available exclusively at Williams Sonoma store or online. That is all the information given about the capsules. I did some research and discovered that a different brand will work as it's the same style/size capsules. This style capsule can be found more readily at local grocery stores than the Williams Sonoma brand. I would suggest that the manufacturer consider either specifying what coffee capsules will fit this machine or include a sampling of them in the kit so that consumers know what will work with it.
The milk frother is a separate device and it sort of looks like an electric kettle. You can froth and warm milk or just use it as a warmer or frother. There are two different attachments that come with it that either help with frothing or warming. The frother doesn’t hold much milk and the ‘max’ line that’s marked is designated that way so that it doesn’t overflow when it’s frothing the milk. I have used the frother several times now and each time I have never added more milk than is recommended and each time I’ve used the frothing tool, the milk has spilled out of the frother. I’m not sure what to do to prevent this since I’m using the recommended amounts and following the instructions.
Even though I found a couple of imperfections in the design of the coffee machine, I do want to say that it makes a very smooth coffee drink. I haven’t found any water leaking out of the reservoir, which has been an issue for me in the past with other coffee machines and it’s very easy to refill. I love that the machine comes with a capsule container so that you don’t have to empty the capsule with every drink you make. I also like the convenience of the milk frother even though it overflows.
While I think some improvements could be made to the system overall, I like the slim design of it and it’s very simple operation. I’ve used other coffee drink makers that require a lot more steps from beginning to end and this is much easier to use.
Mobile Submission: False
I would recommend this to a friend!


Share this review:


+17points
19of 21voted this as helpful.
nickcal's Review Comments
nickcal has not submitted comments on any reviews.
nickcal's Questions
nickcal has not submitted any questions.
nickcal's Answers
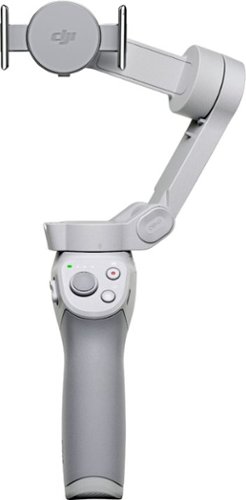
Life~s extraordinary moments deserve to be captured with smooth video. DJI OM 4 is a magnetic gimbal designed to complement your smartphone, allowing you to start recording right away. Ultra-compact, easy to use, and bursting with intelligent features, OM 4 is the ultimate solution for capturing and sharing your world.
Does the magnetic sticker phone attachment interfere with wireless phone charging?
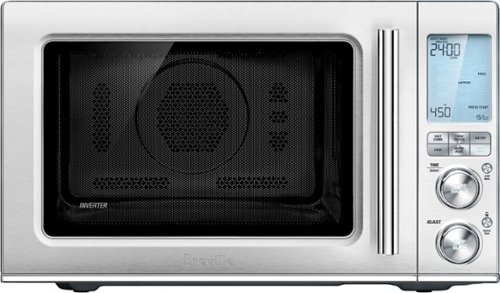
Ensure meals are cooked evenly with this Breville the Combi Wave 3-in-1e microwave. The grill, convection oven and microwave functions provide a variety of cooking options, while the Element IQ technology precisely delivers the right cooking temperature for optimal results. This Breville the Combi Wave 3-in-1 microwave features a Power Smoothing inverter for automatic adjustment of power to enable even heat distribution.
Is this an air fryer, microwave and convection oven
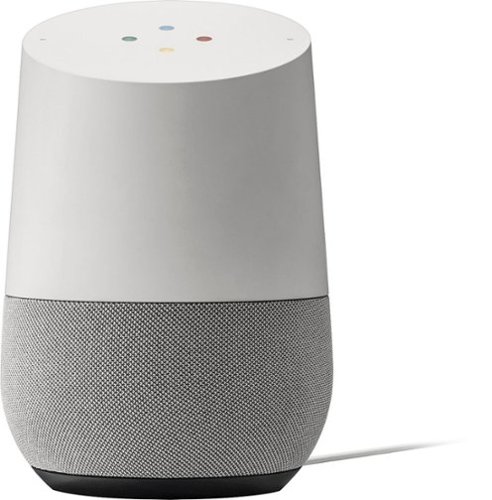
Simplify your everyday life with the Google Home, a voice-activated speaker powered by the Google Assistant. Use voice commands to enjoy music, get answers from Google and manage everyday tasks. Google Home is compatible with Android and iOS operating systems, and can control compatible smart devices such as Chromecast or Nest."
Will Google Home work with ECOBEE Thermostat?
No. Unfortunately, Google has limited functionality to only the Nest thermostat. At this time, I don't see them opening up support for third parties as they are probably trying to push it with their own hardware, but that could always change.
9 years, 10 months ago
by
nickcal
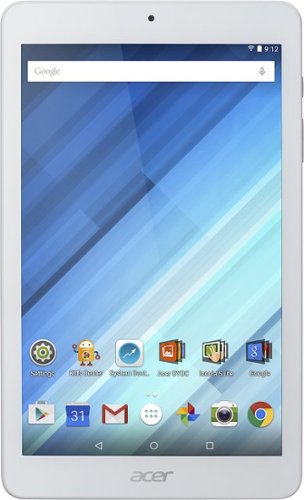
Enjoy a compact tablet that fits neatly in your pocket with this Acer Iconia One 8-inch tablet. It includes a quad-core processor and 1GB of RAM that deliver powerful processing to play all your games and apps, and the 16GB of flash memory ensure this Acer Iconia One 8-inch tablet and store your files.
can i download skype
Depends on the Google Play store. If Microsoft has a version of Skype for Android then yes.
10 years, 4 months ago
by
nickcal