PG460's stats
- Review count122
- Helpfulness votes539
- First reviewJanuary 24, 2014
- Last reviewMarch 17, 2024
- Featured reviews0
- Average rating4.6
Reviews comments
- Review comment count0
- Helpfulness votes0
- First review commentNone
- Last review commentNone
- Featured review comments0
Questions
- Question count0
- Helpfulness votes0
- First questionNone
- Last questionNone
- Featured questions0
Answers
- Answer count0
- Helpfulness votes0
- First answerNone
- Last answerNone
- Featured answers0
- Best answers0
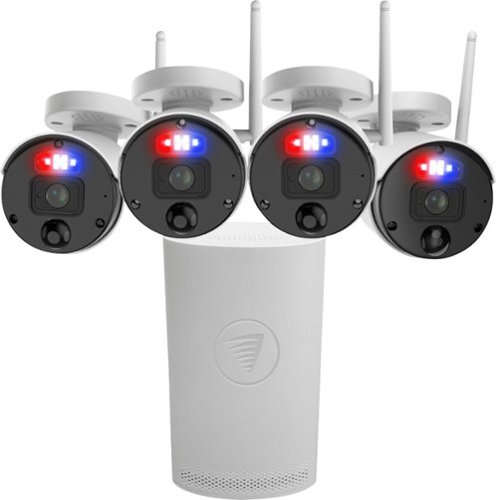
The SecureAlert Wi-Fi NVR Security System has crime-fighting features other systems dream about. With red and blue flashing lights, bright spotlights, two-way audio, and loud sirens, you can intimidate intruders and prevent crime from happening, and these features are controllable remotely in the Swann Security app. You get free local recording for up to 180 days+ onto the massive 1TB hard drive and the option to backup video to your Dropbox account. Know what’s happening at any hour with powerful infrared night vision up to 115’/35m and Night2Day™ gives you amazing color video at night up to 32’/10m. Swann’s True Detect™ heat and motion detection senses people and cars for more reliable monitoring and fewer false alarms. The 4K Ultra HD video and powerful digital zoom, the cameras let you actively watch over entrances, yards, driveways, parking lots, shop floors, storerooms, and customer service areas. With the Swann Security app, push notifications let you know what’s happening and you can even watch live or playback video on your smartphone from anywhere in the world. In fact, you can view any of the cameras on your smart TV, and speak to see hands-free via Hey Google and Alexa devices. The cameras plug into power while their video signal back to the NVR is transmitted wirelessly, so you don’t have to worry about drilling into walls and running cables anywhere. The NVR connects to your internet router via the included network cable or Wi-Fi, while the new SwannNet™ technology allows you to select whether each camera connects to the NVR or your home Wi-Fi, meaning you can choose whichever network has a stronger Wi-Fi signal. This gives you greater flexibility to place the cameras where they need to be, and their robust indoor/outdoor design is built to withstand rain, snow and heat, all year round. That’s the SecureAlert Wi-Fi NVR Security System – it’s another example of security made smarter from Swann.
Customer Rating

4
Full Featured WiFi NVR Camera System
on June 2, 2021
Posted by: PG460
from Pennsylvania
I own several brands of WiFi cameras which are wonderful for home security and remote household monitoring. These systems record briefly when motion is detected but to record constantly these systems require an expensive monthly cloud based recording subscription. On the other hand I have used a NVR (network video recorder) based camera surveillance system at work for many years. A NVR system records all the action nonstop on a hard drive for later reference but uses wired cameras. While I’ve considered a NVR camera system for home use I was tuned off by the prospect of running cables throughout my home to multiple cameras just so I could have an nonstop on-site recording solution. I was thrilled to learn that Swann was offering camera system that blends the best of both of these options with the Swann Enforce 4-Channel, 4- camera indoor outdoor Wi-Fi NVR security surveillance system. I was quite excited to try a WiFi NVR system.
Unboxing revealed 2 interior boxes. The first box contained the NVR and the second box contained the 4 wireless cameras. Inside you’ll also find 5 power adapters, 4 forty foot camera power cables, an HDMI cable, a mouse, an ethernet cable, camera mounting screws, and some manuals and Swann security stickers. My first impression on the NVR was that of being pleasantly surprised. I expected a boxlike piece of equipment and instead the NVR was a sleek white tower like device which would blend nicely into home furnishings. My first impression of the cameras on the other hand was one of disappointment. The cameras are very well made and have a substantial and quality feel to them but really aren’t particularly attractive. While it seems that Swann designed the NVR to fit stylishly into your home they made no such consideration for the cameras. They look like commercial surveillance cameras. Remember these are indoor outdoor cameras but I would never mount one inside my home. What a design disappointment.
I next moved on to setup as I was eager to see these cameras in action. I referenced the 3 part manuals included in the box. You start with the NVR hardware setup which was a breeze. You simply connect the NVR to a tv or monitor with the HDMI cable. Connect it to the internet using the included ethernet cable and connect the included mouse. Next you attach the power adapter and plug it in. As the NVR boots up you’re prompted with a setup wizard which involved setting a system password, setting the resolution, time zone, date format, and naming your device. You’re then prompted to get the Swann app to continue setup. You need to register an account then you can start adding your NVR to your account by simply scanning a QR code on the NVR. I then started setting up my cameras. The cameras are WiFi cameras but do require a power source so they are not entirely wireless. I decided to use all my cameras outside so I selected my camera placement and then ran the 40 foot power cable to them. As I powered cameras on they quickly appeared in the NVR. What a breeze.
I then turned my attention to the NVR settings. I quickly felt familiar with the NVR since I have extensive experience using a commercial video surveillance system. The Swann Enforcer did not disappoint in that it has a full range of settings and options. I did notice that the system isn’t automatically setup to record constantly. Setting it up just required setting up a recording schedule. Here you are free to select when you want to record or not. You have 1TB of storage onboard the NVR for your recording needs. One option I found absent was geofencing which would disarm the system automatically when home. Maybe I’m just accustomed to this option from my other WiFi camera systems. I next checked the video quality. For a 4k system I was somewhat disappointed with the video quality. I will say the night vision is excellent. You can view live video on your NVR or remotely using the Swann app. The app is decent but I did experience some significant lag while viewing live view video. This was surprising considering I have a fast and rock solid internet connection. I must say the Swann Enforcer is a full featured surveillance security system options like 2 way audio, motion activated spotlight and siren, and even includes flashing red & blue lights to scare off intruders if need be. I did find the 2 way audio a disappointment as it was very laggy. One particularly interesting feature is the use of what Swann call True Detect which uses heat from people or vehicles to provide more reliable alerts. Pretty cool.
Ultimately I would recommend the Swann Enforcer as a full featured WiFi NVR surveillance camera system with a few reservations and disappointments.
Mobile Submission: False
I would recommend this to a friend!
Share this review:
+5points
5of 5voted this as helpful.

Keep the competition in your kill zone, as you enter your comfort zone with the Razer Iskur—an ergonomic gaming chair designed for posture-perfect hardcore gaming. Fitted with an adjustable, ergonomic lumbar support system, we’ve got your back when it comes to keeping you in prime gaming form.
Customer Rating

3
Not Designed For Larger Gamers
on May 14, 2021
Posted by: PG460
from Pennsylvania
I have been a PC gamer for over 22 years and I have owned various Razer products along the way including mice, headphones, and keyboards. All have been high quality gaming accessories. I must say I was somewhat surprised to learn that one of Razer’s newest accessories is a gaming chair called the Iskur. I’m a professional who games in the evenings and on weekends to unwind and I must say that after hours of extended gameplay I can feel it physically. I really never gave much thought to the chair I use for gaming but being an older gamer maybe I should have. I feel it in my back, shoulders, and butt so a proper gaming chair could be a game changer.
The Razer Iskur arrived in a larger box that weighed in at roughly 85 pounds. Unboxing revealed the largest setup instruction sheet I’ve ever seen and the various chair parts, hardware, and assembly tool. The assembly instructions are brief with only 9 steps. You can scan a QR code to launch an assembly video but I just jumped right in. Assembly was a breeze with only 9 screws required to attach all the parts. A hand tool is included. Total assembly time took me roughly 20 minutes. Another set of hands came in handy but is definitely not required.
Once assembled, the Razer Iskur is quite stunning as a piece of furniture. The design and sleek and makes a statement. The materials used high quality and rich feeling to the touch. Stitching is precise. I was impressed that metal was used for the base and arm rests. Great touch. The overall design is understated in the world of gaming chairs which generally seem a bit over the top and often aimed at teen boy gamers. This is a classy gaming chair perfect for a mature gamer or someone simply wanting a gaming chair that is an elegant addition to your home office furniture. My Iskur is the green version which is a black chair with green Razer logo and green stitching. The black version is even more understated.
I was ready to try the Iskur out. Initially I was interested in simply adjusting the height, lumbar support, recline, and arm rests to my liking. A few adjustments and I felt comfortable. I knew I could make fine tuned adjustments with ease while gaming. I was quickly impressed with the Iskur’s lumbar support option but I do wish this was more adjustable, particularly up and down. The seat is made of high density foam cushions. I would say they’re overly firm. I am hopeful they will soften after more use. The Razer 4D armrests pivot in a multitude of directions to adjust to your preference.
I was now ready to play some games in Iskur comfort. Here my disappointment became quickly evident. Not long into a multiplayer match I realized I was horribly uncomfortable as I noticed that my larger frame didn’t really fit in the Iskur’s seat. Uncomfortable is an understatement. I was in pain. The Iskur has these raised ridges running along the edge of seat which cut into my hips and thighs. I was astonished to make the troubling discovery that I didn’t fit in this chair. I remembered noticing something about height in the Iskur’s description so I doubled checked the specifications. The recommended size specs say “this ergonomic gaming chair can support a weight of up to 299lbs/136kg, and is ideal for gamers with a height of 5’6”–6’2”/170–190cm. It also features angled seat edges to maximize resting surface area”. So I found myself even more confused. Im 6’2” and weigh 250. I’d say I am well within those specs but I was horribly uncomfortable nonetheless. These recommended size specs are clearly inaccurate. Next I found myself baffled why this seat is even designed like this. Why are these confining angled edges which rise up from the seat even there? What is the purpose? Support? Why do my thighs need support while gaming? They seem to me to be an unnecessary design element which amounts to a flaw that limits the number of gamers that can use this chair.
I would point out that smaller framed gamers would have a much more positive experience with the Iskur. Unfortunately this chair was not designed with bigger gamers in mind. I’m not a fan of a gaming chair that serves as a constant reminder to lose weight in order to comfortably use it.
Mobile Submission: False
No, I would not recommend this to a friend.
Share this review:
+4points
5of 6voted this as helpful.
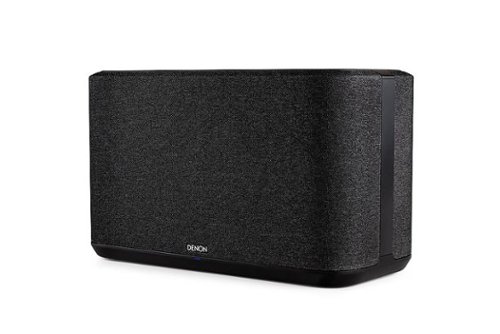
The new Denon Home 350 plays all your music wirelessly with the great sound you expect from Denon. Enjoy your music in any room of your house, and group other products with HEOS Built-in such as AV receivers, Hi-Fi systems, sound bars and speakers to fill your whole home with music. With a dynamic tweeter and powerful mid-bass driver, enjoy accurate, room-filling sound, without sacrificing the space needed for a full Hi-Fi system. Play music from your favorite online streaming services like Spotify, Apple Music, Amazon Music HD, Pandora, TIDAL and more, or play music stored on your phone or network via Wi-Fi, AirPlay 2 or Bluetooth.
Customer Rating

5
Impressive Wireless Speaker
on March 20, 2021
Posted by: PG460
from Pennsylvania
I have owned many Denon products over the years. I’ve always considered Denon synonymous with high quality audio components. Consequently I was very excited to try the Denon Home 350 Wireless Speaker with HEOS to see if it measured up. Upon delivery the Home 350 box was a bit of a surprise in itself. I’m not sure I expected the 350 to be quite so big and heavy. Unboxing revealed a quick start guide, the Home 350 and a power cable. I loved that Denon had considered the ease of removing the speaker from its box by placing it in a bag with handles. Unwrapping revealed the 350. I got the black model and I was quickly impressed with the look and feel of the 350. It’s wrapped in a nice mesh like fabric with the motion sensitive touch controls on the top which seems to be glass. Nice touch. The 350 measures in at about 15x9x7 inches and weighs in at about 14 pounds.
I jumped right in to setup by consulting the quick start guide. You’re instructed to plug it in and then download the HEOS app to complete setup. You select add a device and the 350 was quickly detected. Next you connect the 350 to your WiFi connection. The 350 has an ethernet port if you prefer a wired connection. Along the way I signed up for a HEOS account. I also noticed that there was an update available which took longer than expected to install.
Spec wise the Denon Home 350 is impressive all around. In terms of connectivity you’re covered. The 350 supports 2.4 ghz & 5 ghz WiFi, Bluetooth, ethernet, AirPlay 2, plus there is a 3.5 audio input and usb. You can also use the Denon Home 350 with Google Assistant and Amazon Alexa. You can’t beat that. There is also Denon’s HEOS connectivity which is their multi-room sound system capability which connect multiple Denon HEOS devices wirelessly. I don’t have another device so I was unable to test this feature. In the HEOS app you can connect to a bunch of music streaming services including Pandora, Spotify, deezer, Amazon Music, TuneIn, Napster, iHeartRadio, SiriusXM, SoundCloud, TIDAL, and Rhapsody. Talk about options! I use Pandora and Spotify so I started there. Clicking on Spotify in the HEOS app launches your Spotify app after you login to your account. I like this seamless integration of the two apps. On the other hand when you click on Pandora in HEOS you instead get a dumbed down Pandora interface within HEOS. Not sure why here the Pandora app isn’t launched like Spotify. It’s functional but barely. I’m not a fan. I’m an Ipad and iPhone user so I intend to primarily use Apple Music over AirPlay 2. I had a heck of a time setting up AirPlay. When trying to add the Home 350 to Apple HomeKit I kept getting a prompt for an AirPlay password. I couldn’t figure out what password it wanted until I thought I’d try my WiFi password. Bingo!
With AirPlay up and running I was eager to blast some music. Wow! Instantly impressive, room filling, rich, warm sound emanated from the Denon Home 350. The 350 has two 3/4 inch dynamic tweeters, two 2 inch mid bass drivers, and two 6 1/2 inch woofers. That’s a lot of speakers packed into the 350. The bass is impressive and the mid range and high end are sublime. Powering all this are 6 class D digital amplifiers. The 350 supports high resolution audio files 192kHz/24-bit using files in FLAC, WAV, ALAC, and DSD 2.8 and 5.6 MHz formats, either through a network connection or via the rear USB port. You can also stream high quality music from Amazon Music HD and TIDAL. I’ll be getting one or the other, The control panel on the top of the Home 350 is also very nice. The panel has a proximity sensor which detects your hand and lights up revealing 6 music presets. You can add streaming music station in the HEOS app and simply and conveniently select them with a touch. Also on the panel are a play button and volume up and down controls.
The Denon Home 350 is an impressive wireless high quality audio entertainment system. My only disappointment is the HEOS app but I am hopeful that future updates will improve its functionality. Highly recommended.
Mobile Submission: False
I would recommend this to a friend!
Share this review:
+1point
1of 1voted this as helpful.
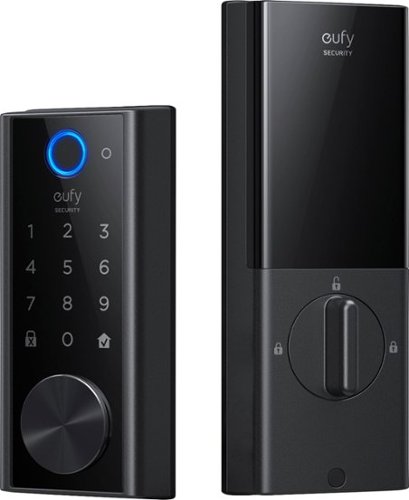
By installing eufy Security Smart Lock Touch & Wi-Fi, you will never have to worry about losing your key again and always have secure access to your home. The Smart Lock is powered by a Mabuchi motor that allows you to unlock your front door in less than a second. With a sensor area that is two times larger than on a smartphone, the Smart Lock is less likely to miss your fingerprint. Every time you unlock Smart Lock, the recognition rate improves because of the self-learning AI chip. This Smart Lock is weatherproof with an IP65 rating, so you can rest assured that your home is always secure. The Smart Lock is tested to last for 250,000 unlocks and is designed to still function after 30 years of use.
Customer Rating
5
The Smartest Smart Lock Available
on March 11, 2021
Posted by: PG460
from Pennsylvania
I have used numerous smart home devices over the last few years including three different brands of smart locks. Each had their strengths and weaknesses so I was curious to see what the new Eufy Smart Lock Touch & Wi-Fi had to offer.
Upon receiving the box its weight alone was impressive and surprising. The actual lock is well made and has a high quality feel and look. The parts are made of drill proof and magnet proof steel. Unboxing revealed a plethora of parts and boxes. I was initially thought this installation appeared like it may be confusing and laborious. Not so. This feeling faded quickly as each box is clearly labeled with what step of the installation process the parts are needed for. The included installation manual is very simple to follow and is quite detailed. The manual first instructs you to download the Eufy security app to your mobile device. You’ll need it later during the installation.
I jumped right in with the first step being the removal of your existing lock. Please note that the only tool required for installation is a screwdriver. This took moments but you sure sense at that point that there’s no turning back. Following the instructions I next installed the included deadbolt. You’re then ready to the begin the Eufy hardware installation. You start with the exterior assembly. The exterior assembly is the part with the fingerprint reader and keypad. You then attach the interior mounting plate to the inside of your door. The mounting plate attaches using screws that pass through the existing hole in your door. You next thread a cable from the exterior assembly through the mounting plate to the interior assembly. The cable only attaches one way so you can’t mess it up. You next simply attach the interior assembly to the mounting plate using a few screws. The interior assembly is the inside part of the lock with the battery compartment and the thumb toggle to lock the door. You next install the included 10,000 mAh rechargeable battery and then the Eufy came to life. This completed the extent of the actual hardware installation. What a breeze. The entire installation may have taken me 15 minutes.
At this point you move on to the setup part of the installation. Here you now need the Eufy security app. Using the app you simply select add a device in the app and select the Eufy Smart Lock Touch & Wi-Fi. You’re prompted to scan a QR code located on the interior assembly. Next you push the setup button below the battery pack and you’re ready to connect the Eufy to your WiFi network. Upon completion you can calibrate the locking function and then setup an access code and register your fingerprint so you can unlock your door with either the code using the keypad or by scanning your fingerprint. This is pretty much the extent of the setup process and you’re ready to use the lock. I did notice within the app that there was a firmware update available which quickly installed.
I immediately wanted to test how well the Eufy Smart Lock Touch & Wi-Fi worked. I started with the fingerprint reader. I was immediately impressed with it accuracy, speed, and its quiet operation. You can add several fingerprints if you like. This sure comes in handy so you are set to scan either hand if one hand is full. I love the fact that there are 6 ways to unlock your door including using your phone with WiFi or Bluetooth, using your passcode entered on the keypad, using the fingerprint reader, using an included physical key, 5 are included, or by using Google or Alexa voice assistant. Additionally the same 6 options also lock the door. There is also an auto lock feature that will detect when you close your door and will lock it automatically after a delay that you set in the app from 1 second to 3 minutes. A great feature so you never forget to lock your door. I quickly found the fingerprint locking and unlocking to be easiest method for me but I’m sure I will use the other methods depending on circumstances. It’s great to have all these options. Other smart locks I’ve owned were not this smart! In fact one great advantage the Eufy has is that it uses WiFi. My other locks were Bluetooth only and that made them much more limited in functionality. With WiFi you can lock or unlock your door from anywhere and you get instant notifications anytime your door is locked or unlocked. You can also check a list of lock events that show you when the Eufy is locked or unlocked and by which user. That’s right you can add users, assign passcodes or register their fingerprints. That way every family member can have their own access. Great way to monitor when the kids are coming and going. Another fantastic feature is the ability to add guest access. I imagine this coming in handy when having family or friends visit. You give them access within the app and they will receive an email notification to install the app and gain access to your Eufy. No need to worry about handing out keys or having to be present to let a house guest into your home.
I own other Eufy smart home products and the Eufy Smart Lock Touch & Wi-Fi is a great addition. This smart lock is by far the smartest and most full featured smart lock I’ve owned. The design is attractive and the build quality is fantastic. The Eufy is in fact rated to last 30 years. Now that is a well made product. I have zero complaints about this product. Highly recommended.
Mobile Submission: False
I would recommend this to a friend!
Share this review:
+2points
2of 2voted this as helpful.
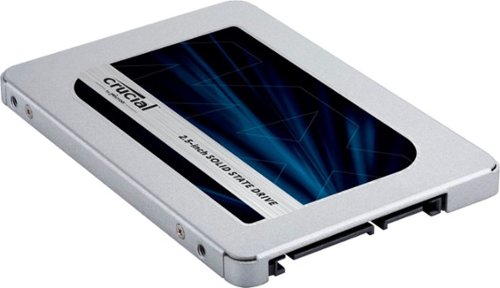
Start your system in seconds, store up to 2TB of your irreplaceable files, and upgrade with a drive you can count on. Improve your system with the Crucial® MX500 1TB 3D NAND SATA 2.5 Inch Internal SSD, an SSD built on quality, speed, and security that’s all backed by helpful service and support. It’s worth it.
Posted by: PG460
from Pennsylvania
Crucial MX500 1TB 3D NAND SATA 2.5 Inch Internal SSD
If you’re like me and have an older laptop with a mechanical hard drive then this Crucial MX500 1TB 3D NAND SATA 2.5 Inch Internal SSD is a perfect upgrade. My laptop has decent specs but is just sluggish with a painfully slow boot time and programs that take forever to launch. I was confident the MX500 SSD with would make this old machine fly.
In the box you find only the MX500, a spacer, and a guide. The guide simply directs you to visit the Crucial website. There you can view the installation guide and download the hard drive cloning software. Not just any software. Crucial provides the best software available with a copy of Acronis True Image. You need this software only if you want to copy your existing hard drive so you can keep all your laptops existing files and programs. You can also just go the route of replacing your existing drive with the MX500 and start from scratch with a fresh install of Windows 10. I opted to clone my drive. Download and install True Image on your laptop. I then used a USB to SATA adapter to attach the MX500 to my laptop. The cloning process is a breeze. In the software you simply select your source original drive and your target drive is the MX500 and start the cloning process. In my case the process took less than ten minutes but I didn’t have a ton of data on my original drive. Next you have to actually install the MX500. Don’t be intimidated. Anyone can do this. Unplug your laptop and remove the battery first. In most cases this installation involves simply removing a few screws and popping in the new drive.
The entire cloning and hard drive installation process took me just over thirty minutes. It was now time to boot up my new improved laptop. As expected my boot time was dramatically reduced from minutes to about ten seconds. As I used my laptop through the course of a work day it was like a transformed machine. Programs snapped open instantly and saving files from USB drives was substantially faster. I knew the Crucial website stated the MX500 read specification was 580 MB/s and the write specification was 510 MB/s but I wanted to test my personal performance. Using an SSD speed test utility that I downloaded I was thrilled to see that these specifications were spot on. My results from running repeated sequential read was about 560 MB/s and my sequential write tests were in the ballpark of 510 MB/s. Impressive! Right where they should be.
The Crucial MX500 is a simple and cost effective way to breath new life into your old laptop. Highly recommended performance booster.
Mobile Submission: False
I would recommend this to a friend!
Share this review:
0points
0of 0voted this as helpful.

The Live Streamer CAM 513 captures astonishing 4Kp30 video that elevates content to a professional level. With Sony®️ Exmor™️ technology and AVerMedia’s precision adjustments, this plug-and-play webcam is all about the details, featuring 4K Ultra HD crystal-clear video for recording, streaming, and more. For work conferences, school lessons, live streaming, and more.
Customer Rating
5
Professional Webcam Results
on January 17, 2021
Posted by: PG460
from Pennsylvania
The pandemic continues to impact how all of us work. In my case, videoconferencing is a daily event. I have tried several webcams over the last year but I have been particularly disappointed with their lackluster performance in terms of video quality. As a result I looked forward to trying the AVerMedia Live Streamer 4K PW513 webcam. Spec wise I knew I was entering previously uncharted webcam territory. The PW513 uses Sony Exmor 4K lens technology to support 4K UHD at 3840x2160@30fps and 1920x1080@60fps. The lens is 8 megapixel f2.8 with a 94 degree field of view.
Upon receiving the PW513 I was both surprised and pleased by the size of the packaging. The PW513 is big for a webcam at 5 x 2 inches. But no wasteful excessive sized package here as the box is barely larger than the cam. Inside you find it nicely secured and padded with the only contents being the webcam, a usb C cable, and a quick guide. The quick guide information simply amounts to telling you that the PW513 doesn’t require drivers and to visit the AVerMedia website. So I simply connected the usb C cable to the back of the webcam and then to a USB port on my pc. You’ll need a usb 3.0 port. Being plug and play it was ready in seconds. I positioned the PW513 on my monitor using the clip base. It sits very securely and I do appreciate that you can pivot the cam in all directions. I also like that the PW513 has a tripod attachment option as well. This will definitely come in handy. I also noticed the privacy arm that you can lower to obstruct the lens. Nice touch.
I then started up Zoom to get a sense of how the cam looked right out of the box. Frankly I was disappointed but I wasn’t totally surprised. Image was somewhat dark and grainy. Don’t panic! Your next step should be to visit the the AVerMedia PW513 product page. There you will find a firmware update. This was a quick download and install. Included with the firmware update is the AVerMedia CamEngine software. This requires a separate installation. CamEngine includes a multitude of settings to fully tweak your image quality. I would note that you should additionally pay close attention to the FAQ section at the product page. Here you will find a brief step by step guide to optimizing the PW513 video quality. As mentioned there the key is proper lighting. I used an LED light source positioned behind the PW513. Wow! Proper lighting is truly the game changer where the PW513 is concerned. Next you should tweak the CamEngine settings for brightness, contrast, hue, saturation, and sharpness. With a few slight adjustments I now had stunning video quality. There are advanced options too which control white balance, backlight, zoom, pan, tilt, exposure, and gain. By manipulating all these settings one has full control over image quality. Additionally there is a filter tab where one can adjust skin tone and smoothing. I personally found these too severe. Also on the effects tab AVerMedia includes some video overlay effects which in my opinion are limited and pretty cheesy but I can certainly imagine kids enjoying them. There is one more tab in CamEngine called ePTZ. This stands for electronic pan tilt zoom. I look forward to using this feature for videoconference presentations. Here you can manipulate video zoom, rotate, and mirror settings and then save the changes to up to 15 different buttons which can then activate at will by clicking on them or by using a hot key. For instance, you could set a zoom level then save it and utilize it for a emphasis on the speaker during a streaming presentation. Also on the ePTZ tab is a great setting called AI Framing. When enabled you have two selections for the cam software to automatically zoom the video frame to everyone on cam or to adjust the frame to zoom and pan to who is talking. I really like these settings as they give a very professional appearance that someone is manually reframing and zooming the camera. I should also note that mic quality is quite good. Although I would think most users who opt for the PW513 would also opt for a high quality microphone.
After using the AVerMedia Live Streamer 4K PW513 webcam for videoconference meetings and presentations I had participants comment about the video quality and AI Framing. What a game changer. Whether you’re using the PW513 for Zoom, Twitch, or your YouTube channel you can expect impressive professional results.
Mobile Submission: False
I would recommend this to a friend!
Share this review:
0points
0of 0voted this as helpful.
Linksys Velop WiFi 6 Whole Home Mesh System MX12600 is a router that delivers next-level streaming and gaming to more than 120 devices on your network. It offers a reliable connection for everyone to stream, game, and video chat without interruption. Intelligent Mesh™ Technology offers whole home coverage that’s easily expandable by adding additional nodes. With easy set up, advanced security and parental controls, MX12600 is an essential upgrade to any home.
Customer Rating
5
Full Featured 3 Node WiFi 6 Mesh Bargain
on November 1, 2020
Posted by: PG460
from Pennsylvania
I have been using Linksys routers for close to 20 years but along the way I have strayed a few times. One of those times was recently when I used a competitors WiFi 6 mesh router system. I’ve had some issues with that setup so I’m happy to return to Linksys yet again. What keeps me coming back are the high quality and and full featured Linksys products. I have owned a previous Velop wireless AC generation so I was familiar with the product line. I was looking forward to see how the Linksys Velop AX4200 MX12600 Wifi 6 system performed. After all wifi 6 is the latest and fastest wifi standard.
In the box you find 3 Velop nodes, 3 power adapters, an ethernet cable, and a setup guide. The guide simply directs you to download the Linksys app to begin setup. Having owned Velop before I was immediately surprised by the the much larger size of the AX4200 nodes compared to my older Velop. I’m already pretty confident that bigger means better. I fired up the Linksys app and jumped into setup. This simply amount to plugging in the first node, connecting it to your modem via Ethernet cable, and letting the app detect the node. You are prompted to setup a Linksys account. Next you need to name your wifi network and select a password. If you have a ton of devices connected to your current network then I would strongly suggest using the identical wifi name and password combination for Velop. This will save you the agony of having to change the password on every device. I have over 40 devices connected to my network so this is a definite time saver. I feel future proofed since the AX4200 can accommodate 120 devices. I had the first node connected within five minutes and then I proceeded to add the additional two modes. I moved to my second floor and selected a location. As you add the nodes the app tests the nodes connectivity and lets you know if your placement is good. I was glad to know that I selected wisely. My home is about 2,000 square feet so the AX4200 is some impressive overkill since it offers wifi mesh coverage up to 8,100 square feet. Impressive. I utilize wireless security cameras on my property so this increased range of wireless coverage will prove beneficial for camera connectivity. Total Velop setup time was about twenty minutes and was a breeze. No one would be intimidated by the process. I’d say my only con to the experience was that the power adapter cable lengths were inconveniently on the short side. Weird. I like that each node has 3 gigabit lan ports and 1 gigabit wan port. You also get a USB 3.0 port on each node.
Prior to setting up the Velop MX12600 I took speed tests on my prior wifi 6 mesh router setup. I was now curious to see how Velop compared. On my wireless AC devices I noticed a speed increase of about 20 percent with Velop with speeds in the 540 Mbps range. Speeds on my wireless AX laptop were blazing at 840 Mbps. Linksys packs some serious technology into the MX12600 with its Triband Dynamic Backhaul, MU-MIMO, and OFDMA which combined provide solid connectivity and excellent streaming speeds to more devices at the same time throughout your entire home.
The Linksys Velop MX12600 is one powerful mesh network system with state of the art wifi 6 features at a fantastic price point for a 3 node system. You won’t be disappointed.
Mobile Submission: False
I would recommend this to a friend!
Share this review:
-2points
0of 2voted this as helpful.
Make the most of every day with the sleek style, performance, and all-day battery life² you need in the lightest Surface Laptop, all at an exceptional value. Ultra-light and portable profile, the apps* you use every day, premium materials, and a choice of must-have colors will make this your go-to laptop. ²Up to 13 hours of battery life based on typical Surface device usage. Testing conducted by Microsoft in September 2020 using preproduction software and preproduction configurations of Surface Laptop Go Testing consisted of full battery discharge with a mixture of active use and modern standby. The active use portion consists of (1) a web browsing test accessing 8 popular websites over multiple open tabs, (2) a productivity test utilizing Microsoft Word, PowerPoint, Excel and Outlook, and (3) a portion of time with the device in use with idle applications. All settings were default except screen brightness was set to 150nits with Auto-Brightness disabled. Wi-Fi was connected to a network. Battery life varies significantly with settings, usage and other factors.
Customer Rating
5
Sleek Speedy Sophisticated
on October 25, 2020
Posted by: PG460
from Pennsylvania
I received this product for free from Best Buy as a member of Best Buy’s Tech Insider Network Program for my unbiased review.
I’m a sucker for nice packaging so I was pleased to see that Microsoft rose to the occasion. Inside the box is the Surface Laptop Go, the 39 watt power supply, and a quick start guide. The Surface Laptop Go appearance made a very positive first impression with its sleek angular aluminum lines. I’m fine with the fact that the bottom is a polycarbonate resin. This Surface Laptop Go has a 12.4 inch screen. The laptop measures 8.1 inches by 10.95 inches and weighs in at 2.45 lbs. overall this makes for a comfortably portable device. I received the ice blue color and I love it. There is not much of a distraction in terms of ports. The Surface Laptop Laptop Go sports a USB A port, a USB C port, a headphone port, and the Surface Connect port. The connect port is for the power supply and also works with some Microsoft accessories like the Surface Dock.
I was eager to get up and running so I started setup. This was pretty much the typical Windows 10 setup which is guided by the Microsoft personal assistant Cortana. Here you can answer verbally to Cortana’s prompts as you progress through the setup or you can bypass her and simply click your way through. Along the way you connect to WiFi and enter your Microsoft user account information. Less typical but very welcome is the step where you add a fingerprint so you can logon to the Surface Laptop Go using the built in finger print reader which is located on the power button. What a great feature which makes logging on fast and easy. The power key finger print reader lights up upon startup which prevents fumbling around for the right key. I would say startup took no more than ten minutes and is a straightforward process.
Upon reaching the desktop I did some windows updates and then proceeded to install and setup Office 365. Throughout these installs I was happy to recognize that the Surface Laptop Go was a perky machine with its 10th generation i5-1035G1 processor, its 8gb of ram, and its 256gb SSD hard drive. In combination I was very pleased with overall system performance. Boot up speed is impressively fast at about 9 seconds. Also onboard is the newest WiFi specification WiFi 6 / 802.11ax. I have a WiFi 6 router and gigabit internet service but the Surface Laptop Go is my first WiFi 6 compatible device. Speed tests revealed blazing download speeds in the ballpark of 840 Mbps. That is over WiFi! Amazing. The Surface Laptop Go 10 point multi touch screen is a 12.4 inch PixelSense Display with a 1536 x 1024 resolution. Pixel per inch density is 148 and an aspect ration is 3:2. I’m perfectly happy with the screen resolution. I will mainly use the Surface Laptop Go for work and with video conferencing the new work norm I was also happy with the 720p HD f2.0 camera and its dual far field microphones. For your listening pleasure you’ll also find Omnisonic Speakers with Dolby Audio.
You should know that the Surface Laptop Go comes loaded with Windows 10 S mode activated. S mode looks identical to Windows 10 but is limited only to apps found on the Microsoft app store. This means you cannot install just any program you want. For instance you can’t even install Google’s Chrome browser in S mode. Microsoft S mode is promoted as a more secure, stable, and speedier version of Windows 10. Don’t worry though. If you find this too limiting for your needs you can easily opt to leave S mode and use Windows normally. This however is a one way journey in that you can’t then go back to S mode after the transition.
My overall impression of the Microsoft Surface Laptop Go is overwhelmingly positive. I frankly think that specification wise that this version hits every sweet spot in terms of a performance standpoint. Sure it could have a better processor, more ram, a bigger SSD, higher screen resolution but that would all cost significantly more. Microsoft makes those versions too but I think that specification wise and design wise that this Surface Laptop Go is a remarkably sleek, speedy, and sophisticated laptop.
Mobile Submission: False
I would recommend this to a friend!
Share this review:
+1point
1of 1voted this as helpful.
See exactly what’s happening in and around your home in full 1080p HD, day or night with this eufyCam 2C Camera. The IP67 weatherproof-rating ensures that eufyCam 2C Camera is built to withstand the elements. Every eufy Security product is engineered to ensure your security data is kept private. Have peace of mind that you will have a secure record of everything that happens around your home.
Customer Rating
5
Quality Camera System / Exceptional Value
on October 13, 2020
Posted by: PG460
from Pennsylvania
The Eufy eufyCam 2C 2-Cam Kit came nicely packaged. In the box you find 2 cams, the 16gb base station, 2 cam mounts, power adapter, usb cable, some Eufy security stickers, QuickStart guide, and a HomeKit setup guide. I immediately recognize that for the price this is an incredible value compared to Eufy’s main competitor. The build quality of the cameras is excellent.
Setup is so simple that anyone can do it with ease. No need to be intimidated here. The process amounts to connecting the base station to the internet, downloading the app, signing up for a free account, add the cameras, and mount them where you want them. Eufy suggests fully charging the cameras before placing them. Setup literally took me under 10 minutes. Placement and mounting takes additional time but that’s just due to getting the right positioning. The Eufy app assists you in placing the cameras so your WiFi signal is strong and it presents you with a live video preview while your placing it. Another great value with Eufy are the included 2 screw on camera mounts. The competition charges extra for these. The Eufy mounts are also well made. The 16gb base station is yet another great reason to chose this camera system. It provides your own free storage for your captured videos on the base station instead of uploading it to the cloud like the competition. No monthly fee here. The videos are also encrypted with AES-128 data encryption that makes sure they are secure.
Upon getting my cameras into position it was time to really explore the app. Here you find a multitude of settings and features. First I set my cams up to use Apple HomeKit. This was a breeze. You can also opt to use Amazon Alexa and the Google Assistant. Next I set the cams to use geofencing which uses your phone to activate recording when your away from home and deactivate it when you return home. You can also chose to set a schedule or manually arm and disarm your cameras. The app also is where you go to remotely view your live cameras. I love checking in on my property, sometimes just to see what the weather is at home. These cameras do give you a definite sense of home security. You get instant notifications when motion is detected.
The video quality is very good. I like that the Eufy 2C cameras have LED spotlights on them too which provide color night vision. You can opt to activate the spotlight automatically if motion is detected. You can also turn on the spotlights manually within the app while viewing live video. You can also opt to just use infrared night vision instead.
I highly recommend the Eufy eufyCam 2C 2-Cam kit.
Mobile Submission: False
I would recommend this to a friend!
Share this review:
+1point
1of 1voted this as helpful.

The Shark Vertex Corded Stick Vacuum is Shark’s ultimate cleaning experience. DuoClean PowerFin features a PowerFin roller and a soft roller combine on all floors for continuous cleaning contact to dig deep into carpets, directly engage floors, and pick up more in every pass. (vs. original DuoClean).
Posted by: PG460
from Pennsylvania
The Shark Vertex corded ultralight is a well built and attractive looking vacuum with loads of nice features. First of all I love the Shark duoclean technology which includes 2 rollers. The first is a soft roller which does an amazing job of cleaning the floor with truly an almost polished look. It does a great job of picking up dust that a regular brush would simply leave behind. The second roller is what Shark calls the PowerFins roller which makes constant contact with your floor with a combination of small brushes and soft fins and wrap the length of the roller. You can hear this roller in action as it almost sounds like it somewhat beats your carpet or rug while you vacuum effectively loosening particles. The rollers are also self cleaning so hair or put fur doesn’t get wrapped around the rollers like a regular brush. In the box with the Vertex are 3 attachments including a crevice tool, a dusting brush, and the self cleaning pet power brush. The pet power brush is very similar in design to the PowerFins roller. Just smaller but equally effective. I’m glad it was included since I do have pets.
There are really 4 configurations to use the Shark Vertex. The regular upright mode. The above floor reach mode using the tube and attachments. The handheld mode with no tube and just attachments. Then there is the stair cleaning mode where you can remove the tube and attach the handheld part of the vacuum directly to the duoclean base. It’s like a lightweight condensed mini vacuum mode to easily maneuver up and down stairs as you clean them. I love this flexibility because to clean effectively you can’t really just use one tool in one configuration. I love the power of the unit too. It really cleans. You can hear and see the power in action. I like the size of this ultralight too. It is very convenient for getting around and under furniture. The LED headlamps make it easy to see what you’re doing too. There are two floor type settings. When you turn on the Vertex the vacuum it is always in bare floor mode which is a slower roller speed mode and there is a button to change it to carpet mode which really increases the power and roller speed to more effectively clean deep down. I like this ability to switch between floor types.
I must say there is one design choice that I find awkward. The Vertex cannot stand upright when not in use so if you need to pause while vacuuming you have to lay the vacuum down. This presents an additional issue when storing the vacuum. Since it doesn’t stand when you store the Vertex you must disassemble the handheld part of the vacuum from the tube. You then hang the handheld part on a small hook on the front of the tube. It’s kind of weird and awkward but I suppose it does allow for storage in smaller spaces. I would also point out that the dust cup is on the small side and is a bit confusing to connect back onto the Vertex. Maybe over time I’ll find it less puzzling. I think I can live with these few issues so I would recommend the Shark Vertex.
Mobile Submission: False
I would recommend this to a friend!
Share this review:
+1point
1of 1voted this as helpful.
PG460's Review Comments
PG460 has not submitted comments on any reviews.
PG460's Questions
PG460 has not submitted any questions.
PG460's Answers
PG460 has not submitted any answers.