SamG's stats
- Review count149
- Helpfulness votes862
- First reviewOctober 20, 2016
- Last reviewApril 21, 2024
- Featured reviews0
- Average rating4.4
Reviews comments
- Review comment count0
- Helpfulness votes0
- First review commentNone
- Last review commentNone
- Featured review comments0
Questions
- Question count0
- Helpfulness votes0
- First questionNone
- Last questionNone
- Featured questions0
- Answer count3
- Helpfulness votes1
- First answerOctober 20, 2016
- Last answerMay 20, 2018
- Featured answers0
- Best answers0
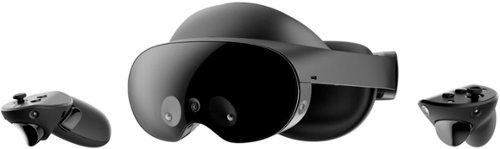
Meta Quest Pro is a virtual reality system that unlocks new perspectives into how we work, create, and collaborate, so you can go beyond what was previously possible. A completely reimagined headset is slimmer and more well-balanced for long-lasting comfort. Breakthrough high resolution mixed reality passthrough uses full-color sensors to let you see and engage with the physical world around you–even as you connect, work and play in virtual spaces. Multiple room-sized displays let you skip between tasks to get more done, more easily. Connect better with friends or collaborate with peers like never before with real-time avatar expressions that mirror your authentic facial reactions. Intuitive, redesigned controllers dispense with tracking rings, using self-tracking cameras to capture a greater range of motion and fine motor controls to translate detailed finger operations like writing and drawing into VR. Advanced multi-point haptic feedback makes virtual interactions feel more real. Meta Quest is for ages 13+. Certain apps, games, and experiences may be higher.
Customer Rating

4
It’s the Future! But Maybe Not Yet
on November 2, 2022
Posted by: SamG
I was skeptical about the Quest Pro. My experience thus far with VR/AR has mostly been limited to the few times I’ve gotten to use my sister’s Quest 2 and my now very neglected Oculus Go that never really impressed me that much. Right away though I noticed the difference in clarity on the screens and the much better comfort wearing and adjusting the headset. Add in the improved hardware, eye/facial tracking, and color passthrough among other features and it really does elevate the VR experience in a noticeable way. The Quest Pro is geared more for productivity and work than gaming and entertainment on the older Quest 2 and I think it has a lot of good ideas that it executes on really well, but it doesn’t get all the way there with everything and it feels like it might not quite be its time just yet, at least not for $1500, but the potential for what this could mean for future headsets like the Quest 3 is really exciting.
Meta packs in a LOT of accessories with the Quest Pro, which given its price is appreciated, but a lot of them like the stylus tips are easy to miss, so I’d recommend thoroughly going through all the packaging and lifting everything up to make sure you’ve got everything. I won’t give a play-by-play of every accessory, but besides the headset the big one that jumped out at me was the charging dock that comes with it, which charges the headset and both controllers. It’s nice to have one place and one power cord to store and charge everything and it looks really great, though the controllers are a bit hard to position intuitively at first if you are just trying to line the pins up. Speaking of the controllers, they’re very comfortable to hold and the buttons are easy to reach, but they’re just a bit on the hefty side and I’d recommend keeping the wrist straps on just for safety, though personally I found the wrist straps to be annoying to adjust.
Getting the head headset on was instantly a much better experience than the Quest 2 I’ve previously worn. The weight of the headset is spread out between the front and the back so it doesn’t feel like it’s pulling down on your face as much. There is a wheel on the back that adjusts the length and lets you fit it securely on your head without messing with velcro and straps and it works really well. It’s a lot like the Elite Strap for the Quest 2. I wouldn’t exactly call the Quest Pro light, but after several hours of wearing it now I can say that I never felt burdened by it and besides the sweat factor with the more intense activities like Beat Saber it has remained comfortable on my head. The headset doesn’t completely envelop the field of view and you can always kind of see the outside world on the sides and bottom of your vision and I’m guessing it was designed that way for AR applications. The included light blockers help with the sides, but the full light blocker is a separate accessory. The side light blockers attach magnetically though, which is a nice touch.
Another difference I noticed right away was the quality of the displays built-in to the Quest Pro. Not that the Quest 2 is bad by any stretch, but the clarity and resolution feels like it’s on another level here. I didn’t notice any screen door effect or distortion while I was using it and the built-in fit guide helped me get the lenses adjusted where they needed to be with minimal effort. I did end up wearing the headset a bit higher on my head than I would have expected thanks to the guide, but it was still very comfortable. The setup process was pretty straightforward, though I found myself swapping between my headset and my phone a lot to get everything connected and logged in. Setting my room boundaries and play areas was also super intuitive and I was able easily identify furniture like desks and shelves and haven’t had to go back and redraw it since my initial setup.
Navigating the interface and the world with the controllers works well and besides one time when I had too many lights turned off I never had an issue with tracking at all. You can also navigate with just your hands using the headset, which was not quite as precise and I had some problems with the finger gestures to activate the Oculus and start buttons, but it was still a convenient way to work when I didn’t feel like holding onto the controllers. The cameras on the outside of the headset have full color passthrough, which is good for AR stuff and moving around the room without having to take the headset off, but the image is a bit grainy - too grainy for me to see my phone screen even, which was a bummer. The internal cameras also track your eyes and face to great effect and I was really impressed with the amount of expression it can convey on my avatar through this tracking.
The Quest Pro is fully compatible with all the apps the Quest 2 supported and I spent some time with I Expect You to Die and Beat Saber and they were as fun as ever, though playing Beat Saber quickly accumulated a lot of sweat on the forehead pad that I needed to clean up every 10-15 minutes, though it rarely got into the lenses which was nice. The built-in speakers on the headset are also pretty good, though for immersive apps you’ll want to hook up some headphones. I spent some time with the built-in browser navigating websites and the level of clarity with smaller text was great, and I think there are real applications for getting actual work done on this, especially with the ability to setup virtual desktops and spread your work across a bunch of VR monitors. The concept of having virtual meetings with different expressive avatars is cool too, but I don’t think it will be a regular part of anybody’s life unless/until VR really takes off into the mainstream and I think for that to happen there needs to be a less expensive version of what’s on display with the Quest Pro. The other limiting factor to using the headset full time was the battery life, which in my usage averaged around 1.5-2 hours. This means you either have to be prepared to take the headset off and charge it between uses/sessions or tether yourself to a PC or a wall outlet.
Overall I think the Quest Pro is very good VR headset, but $1500 is a big ask for what it can do right now. It feels like it’s more of a showcase for where things are heading and I don’t necessarily think that’s a bad thing - it just means it’s not the one for most people. The Quest 2 is still a very good headset and I can definitely see the Quest 3 incorporating a lot of the tech the Pro has.
I would recommend this to a friend!


Share this review:
+8points
9of 10voted this as helpful.
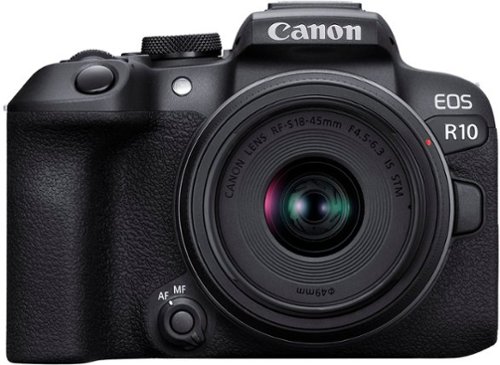
The EOS R10 is perfect for content creators looking to take their creativity to the next level. Featuring a high-speed shooting 15 FPS mechanical shutter^,~ a 24.2 Megapixel CMOS (APS-C) sensor, and lightning-fast auto-focus, all in a sleek, lightweight design.
Customer Rating

5
Great Camera with Advanced Features
on November 1, 2022
Posted by: SamG
I really like the EOS R10. It’s a great upgrade from my EOS M6 Mk II and it takes great photos and videos without a lot of work and it offers most of the advanced features I’d want to take things to the next level. The included kit lens is just okay and I’m hoping Canon comes out with some good affordable options soon, but overall if you’re looking for a good camera option that’s a step above smartphone photography this is one to look at for sure.
In the box you get the R10 body, a battery, charger, a strap, and an 18-45mm kit lens. My first impression handling the R10 was it was a lot lighter than I expected it to be. I really like the grip on it a lot and I never feel like I’m in any danger of dropping the camera when I’m handling it. The body is mostly plastic, but feels pretty solid, as do all the dials and buttons. The kit lens is also mostly plastic. The battery is an LP-E17, which is one Canon has had around for a while and doesn’t have the largest capacity, but it’s the same type my M6 Mk II used, so I have the benefit of already owning some extras which is nice.
The R10 uses a 24MP APS-C image sensor and does not have in-body image stabilization, though the included kit lens does include that. It technically uses a new RF-S lens mount, but is compatible with all of the RF lenses used on the R10’s more expensive siblings, though these lenses themselves are pretty spendy. At this point the only RF-S lenses available are the 18-45mm included with this package and the long 18-150mm kit lens available in a different package. I’m really hoping Canon expands on the RF-S line, especially coming from the M-mount lenses that were themselves pretty neglected by Canon.
The controls on the camera are pretty easy to use. There are 2 primary dials for adjusting functions in various modes and an array of buttons that in general I have no problems reaching. The camera has a touchscreen that flips out and a built-in electronic viewfinder. There’s also a pop-up flash. Along the side you’ll find ports for an external microphone, remote input, HDMI, and a USB-C port for data transfer and charging.
Getting into using the camera is super simple and there’s a lot of modes and options that I haven’t even begun to scratch the surface of yet. I consistently got great great results in photos with the auto mode and one thing I especially noticed coming from my M6 Mk II was how great the autofocus is in the R10. Once you’ve focused on your subject it stays locked in, even with fast moving subjects like my dogs. Photos look really great and sharp, even at higher ISO levels. I do wish Canon had included a better kit lens as the one that comes with this one here has a minimum F-stop of 4.5, which isn’t great even for a kit lens. Still, except in very low light I was in general pretty happy with its performance, but I’m hoping Canon comes out with some RF-S prime lenses pretty soon. Video quality is also excellent and you can do up to 4K 60FPS on the R10, though above 30FPS it does crop in on the sensor. The onboard microphone actually isn’t bad either. Battery life in my time with the camera was okay, but I’d definitely recommend having an extra battery or two if you’re going out for the day. The Canon camera app lets you use your phone as a remote, record location data, and view and pull photos from the camera. The app is okay, but it hasn’t changed a whole lot over the years and I wish it was a bit more seamless to use.
Overall I’m really happy with the R10. It feels like all the camera I could ever want as a casual photographer and I hope Canon continues to grow this line of products.
I would recommend this to a friend!


Share this review:
0points
0of 0voted this as helpful.
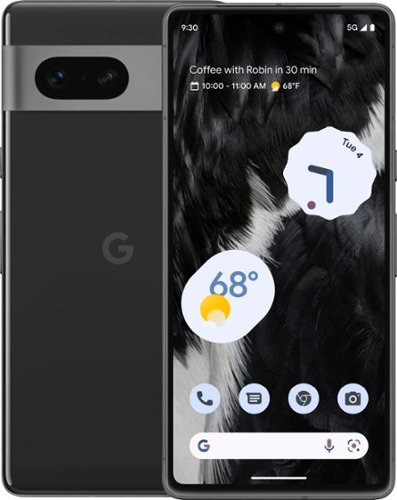
Meet Pixel 7. Powered by Google Tensor G2, it’s fast and secure, with amazing battery life and the advanced Pixel Camera. Take beautifully authentic, accurate photos with Real Tone and stunning video with Cinematic Blur. And with the certified Titan M2 security chip and a built-in VPN, Pixel helps protect your personal data.₁
Posted by: SamG
I’ve been on the Google phone train going back to the Nexus days. In the beginning it was about getting the pure, unbloated Google experience with fast software updates. I’ve always just sort of accepted that I would never have the ‘best’ phone, but I would have the best experience. The Pixel 6 Pro last year felt like it was finally going to be the phone to have both, but some rough edges and bugginess that came a bit after its release put a damper on the ‘experience’ part. Software updates improved things a bit, but it feels like Google really went in and fixed everything with the Pixel 7 Pro. It feels a lot like the phone that maybe should have come out last year and while not everything is perfect, the Pixel 7 Pro is still a fantastic phone and a great value if you’re looking for a high-but-not-quite-highest end Google experience.
Getting the phone unboxed I immediately noticed the difference in build quality. The 6 Pro wasn’t a badly built phone by any means, but it had some funky bits like the bolted-on camera bar and large plastic antenna bar. The 7 Pro changes the glass camera bar to aluminum and seamlessly blends the camera part into the frame of the phone. I’ve seen reviews where that aluminum bar seems to scratch easily though and will be keeping mine in its case 99% of the time to avoid that. The antenna cutout at the top is significantly reduced and it’s a lot less noticeable now. The screen is still curved, which is not my favorite, but the curve has been reduced and is not so aggressive on the 7 Pro. The buttons feel as good as ever and have been lowered slightly from the 6 Pro so they’re easier to reach now.
Setup was straightforward. I transferred everything over from my Pixel 6 Pro via USB and was up and running in under an hour. One thing I’ve always enjoyed about Google phones is they don’t load them up with bloat and I can happily say that is the case here as well. Carrier versions may preload a couple carrier apps like MyVerizon, but those are easy to remove if you don’t use them. Android 13 isn’t a huge change over Android 12 from last year, but it’s had the benefit of time to sort out all of Android 12’s associate bugs. So far I can’t recall encountering any bugs with the 7 Pro, at least none that have stuck in my mind. I’ll be keep my eye on this though as the experience with my 6 Pro was initially very good and it wasn’t until a month or so later when the bugs really set in.
Performance so far has been excellent on the 7 Pro. The Tensor G2 isn’t the highest end processor you can get on an Android phone, but I couldn’t really tell from my usage. Everything loads quickly and all the animations are very snappy. I’ve also noticed a big improvement with image processing on the camera. It’s not a huge jump over the original Tensor from last year, but I don’t think it really needed to be. Wireless connectivity is also much improved this time around. It was never an outright hindrance for me on the 6 Pro, but I’ve definitely noticed stronger cellular signals. The screen is a 6.7” 120Hz OLED like last year and looks great. Supposedly it does get brighter than the 6 Pro, but in general it looks fairly similar. Screen resolution is QHD, but out of the box it’s set to FHD. I assume this is for battery reasons, but I went ahead and set mine to full resolution and so far I am not regretting that decision. The 7 Pro has a similar stereo speaker setup to last year’s Pixel and they sound good for both calls and watching videos.
The fingerprint reader on the 6 Pro was definitely my biggest gripe with that phone. It was just far too inconsistent for me and I never felt like I could trust I’d get my phone unlocked on the first try. Unfortunately I can’t say if the fingerprint reader on the 7 Pro is that much better, but Google added face unlock this year and that’s helped the general usability for me a lot. Face unlock uses the front camera and there’s no special IR hardware involved. It works really well in good lighting, but tends to fall apart as soon as the lights dim. I would classify as ‘okay’ along with the fingerprint reader, but the nice thing is you can use both together and typically when one of them misses, the other one hits, so despite neither of them being great, together it creates a much better unlocking situation.
The main camera has the same sensor, but Google brought improvements to the ultrawide and telephoto lenses and added some extra software tricks to make it even better. The 50MP camera now has a trick similar to what Apple has done on the new iPhones that lets you do a 2x zoom using just the center portion of the image sensor. This effectively gives you a native 2x zoom, albeit using smaller pixels. They’ve done the same thing with the now 5x telephoto, so with 3 cameras you now have an ultrawide, 1x, 2x, 5x, and 10x zooms with no digital upsampling. The ultrawide camera also gets a macro mode, which is pretty cool. Photos from the main camera still look the best of the 3, but I’ve gotten pictures from each of the lenses at multiple zoom levels that I’m really happy with. Pictures still have that signature very contrasty Pixel look that sometimes feels just a tad over processed and I do wish there was a way to back that off just a bit. The video quality has also improved and you can now record in 10-bit HDR, which looks great, but is limited to 30fps. I do wish Google’s camera app had a 24fps selection for video for a more cinematic look.
The battery life so far for me has not been top class, but still very good. Starting at 4am and ending around 9pm-10pm I’m usually at 30-40%. It’s not quite the full 2-day experience that I’ve been able to get with my iPhone 13 Pro Max, but it’s nothing I’m ever concerned about.
In the week I’ve spent with the Pixel 7 Pro, I’ve often forgotten I’m not carrying my 6 Pro around anymore, but the subtle improvements have added up to an overall much better experience for me. If you already have the 6 Pro I don’t necessarily think you need to rush out and upgrade, but if you were wary of jumping on the Pixel train last year because of all the software issues so far I can say they appear to be a thing of the past. I still recommend the Pixel series to anybody looking for an Android phone and the Pixel 7 Pro hasn’t given me any reason to change my mind.
I would recommend this to a friend!


Share this review:
+2points
2of 2voted this as helpful.
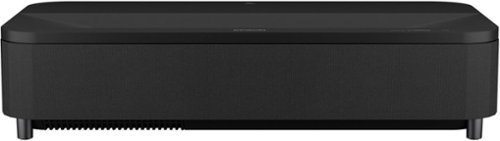
Go Epic with a Courtside View! The best way to watch sports, the Epson EpiqVision Ultra LS800 3-Chip 3LCD Smart Streaming Laser Projector produces a larger-than-life picture up to 150" for an astounding 4K HDR1 experience. Equipped with proprietary 4K PRO-UHD2, 3-chip 3LCD technology and an incredible 4,000 lumens of color and white brightness3, the LS800 Laser Projector combines an advanced ultra short-throw lens with a laser-array light source—along with an optional Epson SilverFlex® high-resolution ambient light rejecting screen4—to produce vivid colors and deep blacks for an exceptionally bright, colorful and sharp picture in virtually any viewing environment—even in brightly lit rooms. Featuring a sleek, modern design, the LS800 Laser Projector seamlessly fits within a variety of décor styles and complements the full range of audio/video furniture to create an amazing-looking system. Plus, with its unique ultra short-throw lens, the LS800 Laser Projector can be placed mere inches from the wall for easy, obstruction-free viewing. Whether you’re watching a live sporting event, streaming your favorite series, gaming on the latest generation of consoles or watching a blockbuster movie, the Epson EpiqVision Ultra LS800 Smart Streaming Laser Projector will simply amaze you.
Customer Rating
4
Beautiful Projector, Some Missing Features
on October 21, 2022
Posted by: SamG
There’s a lot to like about the Epson LS800. It’s an ultra short throw projector that gives you a huge, bright, and crisp screen without the hassle of mounting and running long cords. It doesn’t eliminate all of the hassles associated with going with a projector and it’s missing some features I really wish Epson would have included for the price, but overall I’m happy with it as a home cinema solution for my basement.
Getting the LS800 unboxed, it was a lot bigger than I was expecting, or at least a lot bigger than Epson’s marketing material makes it look. At 27.4” wide x 6.2” tall x 13.4” deep it fits on my IKEA BESTA stand, but takes up a good amount of the top space. I set it up in my basement, whose ceilings are around 90” high, and ended up having to take the legs off my stand so I could put my screen at a reasonable height. Something to keep in mind when you’re planning for this. Getting my soundbar setup with this was also a challenge as there was not enough room on my TV stand for both the soundbar and the projector to sit. I ended up mounting the soundbar on the wall underneath the screen and while it can interfere slightly with the projector beam, it can be corrected using the software.
Epson offers ALR screens to pair with the LS800, but they start at $2K for a 100” screen, making the cost of a complete setup from Epson around $5500. Since I was setting this up in my basement where I could control the lighting I chose to go with a more basic screen from Silver Ticket Products using a gray material instead of white for better contrast, though I found while getting the projector setup that the large bezels prevented the projector from hitting the bottom half inch of the screen material. Not a huge deal, but if you’re looking at screens for this I’d recommend looking for something with a low profile frame.
Once I had the projector and my screen placed I turned it on and started adjusting the image. The projector has a knob at the front that allows you to adjust the angle of the image to raise it up if needed and the front feet are adjustable to correct any tilt in the image. It’s best if you can keep the projector as flat as possible on your surface and position your screen accordingly as using the knob to increase the angle introduces a keystone effect that needs to be corrected in software. The lens zoom adjustments are all digital rather than mechanical on other traditional projectors, so correcting a bad image does mean you’re throwing away some of your resolution. I used Epson’s onscreen menu to correct my screen corners and ended up pulling the projector far enough away from the wall that the screen went slightly beyond all 4 corners per Epson’s instructions. There was also another way to correct the screen with an app, but I didn’t use that. The onscreen method works really well and is very intuitive to use. I was able to get a nice square image with very little effort.
The LS800 advertises “4K PRO-UHD Resolution”, but the native resolution is 1080p and Epson uses a pixel shifting technology to achieve a 4K output from there. I know this has its detractors and you’ll often hear it referred to as “faux-K”, but on my 100” screen everything looked plenty sharp to me and 4K content looks suitably high-res. Watching higher resolution streaming shows and lower resolution TV broadcasts was a great experience on the LS800.The image on my gray screen material is very bright and looks great even with some lights on. Both SDR and HDR content look fantastic You get 3 HDMI ports, one of which supports ARC and another is a dedicated gaming input. The HDMI inputs are only 2.0, so no 4K/120, VRR, or ALLM, though 1080p/120 is on the table. The ARC port is also NOT eARC, which is another disappointing omission. I wish Epson had found a way to include this and the more gaming-centric features in the LS800 especially because its gaming capabilities are one of the selling points. Despite the omission of those items, gaming on my Xbox Series X was a good experience and I didn’t notice any input lag while playing on it.
The LS800 comes with Android TV built in, which was exciting to me since I regularly use a Chromecast with Google TV on my other TV, but it’s an older version of the software. Frustratingly, Netflix is not available to download on Epson’s implementation of Android TV. I don’t know why this is, maybe some kind of licensing issue, but it’s annoying for sure. On top of that, Android TV will only output 2 channel stereo sound even if you have a 5.1 system hooked up to the ARC port, so I would recommend bringing your own streaming device. I have primarily been using my Xbox.
I was excited to test the built-in speaker on the LS800 as it looks very substantial and the Yamaha branding was promising, but I came away disappointed. It certainly sounds better than most TV speakers do, but given the size of the front speaker grill I was expecting something approaching a compact soundbar in quality and it doesn’t get there. I was going to stick with my Samsung soundbar setup regardless and I imagine most people considering this projector will also have a dedicated sound setup.
I think the LS800 is a great short throw projector with just a few disappointing omissions. Most of the worst qualities can be solved by adding an external receiver/sound system and a separate streaming device. A projector is still the most economical way to get a screen larger than 85” and this is a great option if you don’t want to mess around with ceiling brackets, junction boxes, and long HDMI cables and still want a high quality image.
I would recommend this to a friend!

Share this review:
0points
0of 0voted this as helpful.
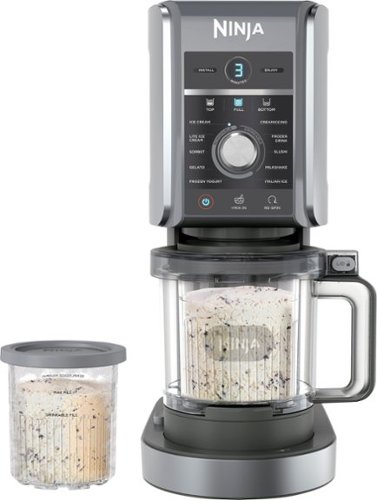
With the Ninja CREAMi Deluxe, you can turn almost anything into ice cream and so much more. Make classic CREAMi treats like ice cream, sorbet, and gelato, and mix-in masterpieces. And now, make new CREAMi scoopable and drinkable treats like Italian Ice, Slushi, Creamiccino, frozen yogurt, and frozen drinks right at home. With two new 24 oz. CREAMi Deluxe Pints, you can utilize the half-pint processing feature to get two finished flavors out of the same Deluxe Pint. These new functions and features make the Ninja CREAMi Deluxe truly the next level in frozen treat and drink making.
Customer Rating
5
Yes It Works, Yes It’s Awesome
on October 16, 2022
Posted by: SamG
We’ve owned a lot of Ninja products over the years and we use a couple almost every day, but I don’t think I’ve been more delighted with any of them like I am with their new ice cream maker. The best description I can give for it is that it’s basically a consumer-grade Pacojet that doesn’t cost $6000. It does pretty much all the work for you and once you’ve frozen your ingredients you can have ice cream or some other variety of frozen treat in 2 minutes with perfect consistency and my wife has already convinced 4 people to buy this thing
In the box there’s the machine and 2 pint containers. Everything assembles and locks in in an intuitive way and everything is dishwasher safe, which is awesome and makes cleaning and maintaining it really simple. In terms of overall footprint I’d compare the size to a coffee machine. Most of the parts are plastic, but they feel pretty durable and have so far stood up very well to a week or so of use.
The basic gist of operation is that you take your ingredients, freeze them for 24 hours, then run them through the machine at the appropriate setting. So far we’ve made:
Brown Sugar Cinnamon Gelato (mixed in Cinnamon Toast Crunch)
Sorbet out of canned pineapple (essentially Dole Whip)
Chocolate Oat Milk Ice Cream
Sorbet out of canned pineapple (essentially Dole Whip)
Chocolate Oat Milk Ice Cream
The machine takes about 2-4 minutes, depending on what you are making. It’s quite loud while it’s running, but no louder than something like a blender. One thing that we’ve learned from using the Creami is that our freezer runs a bit colder than what the machine calls for, so if that is the case for you I’d recommend leaving your container out for a few minutes before running them to soften them up a bit. Still, if the consistency was off a re-spin usually got it to the right place for us. The whole process is so much easier and simpler than the giant ice cream machine we’ve had for years and hardly ever used.
Overall we’re really pleased with the Ninja Creami. An ice cream maker seems like a silly thing to own and I always felt that way about the one we had before, but this one really does work and it's actually something we can use on a regular basis. I guess whether or not it’s worth it to you will depend on how much you like ice cream, but I don’t think you’ll be disappointed.
I would recommend this to a friend!


Share this review:
+1point
1of 1voted this as helpful.
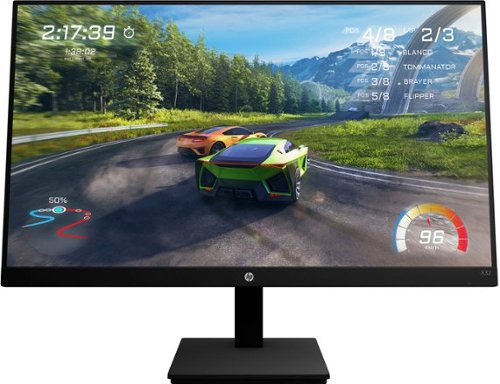
Take on the competition and explore open worlds in comfort with the HP X32 31.5" 16:9 FreeSync 165 Hz QHD IPS Gaming Monitor. This 2560 x 1440 QHD monitor supports a 165 Hz overclocked refresh rate, which works with the 1 ms response time to reduce motion blur and to deliver liquid-smooth gaming experiences. At the same time, AMD FreeSync Premium technology helps to reduce stuttering and screen tearing when connected to a compatible graphics card.
Customer Rating
4
Good Entry-Level 1440p Gaming Monitor
on September 4, 2022
Posted by: SamG
I’m liking the X32 monitor so far. It’s not perfect, but for the price (especially what it’s been on sale for lately) it’s a good 1440p monitor for anyone looking to game on a bigger screen.
Unboxing the monitor is pretty straightforward. The stand and cables come out first and the base assembles to the neck via a thumbscrew. You get a power cable and no brick to contend with, which is nice for cabler management. You also get a DisplayPort cable in the box, but no HDMI. The box actually has a little cutout that lets you attach the monitor to the stand before you take it out, which is neat. The stand gives you height adjustment and swivel. There is a graphic on the box that shows you are able to orient the display vertically, but I was not able to accomplish that and I think it’s just a mistake with HP’s packaging. Ultimately I ended up putting this on my existing monitor arm anyway, but the stand is not bad. The monitor has a nice basic look to it. The bezels around the display are pretty thin on the top and sides, though it’s got a bit of a chin on the bottom that isn’t too attractive to me.
I connected to my PC via DisplayPort and the refresh rate was automatically set to 165Hz. The monitor is not listed as G-SYNC compatible, but I have been able to enable and use it without any issues. I had a hard time choosing a color profile; the differences between them seemed pretty subtle but ultimately I settled on ‘Native’ as that one seemed to look the best to my eye. One thing I noticed while doing all of this was that navigating the monitors menus is a big chore with the way HP has it setup. There are 5 buttons on the back that are supposed to line up with the onscreen displays to help you navigate the menus. The problem is one of them is the power button and one of them is a source switch, so it’s really easy to accidentally change the source or turn the monitor off in the course of trying to navigate the menus. The buttons don’t seem to have any tactile feel to help you differentiate them either. I found out that the HP Omen Gaming Hub app can control the monitor settings and though that app is saddled with its own garbage it’s a much easier way to get everything where you want it and you can uninstall it when you’re done with it.
1440p on a 31.5” screen is pushing the limits of sharpness and I do notice the difference from the 27” 4K monitor I was using before, but that is coupling both a decrease in screen resolution and an increase in screen size, so I’m not surprised I’m noticing it. Still, images and text look pretty sharp to me and if you are coming from something like a 27” 1080p display the pixel density will be similar. The colors look very good in SDR. The monitor does technically support HDR, but it’s only HDR400 and it’s an 8-bit panel. HDR content does still look pretty good, but the effect is subtle and the way Windows handles HDR means you have to manually turn it off and on for games you want to use it on or else you get a worse experience with SDR content. I’ve mostly gamed on 60Hz displays in the past and playing something like Halo Infinite at 120+ FPS has been a fantastic experience. Response times seem very good and I have not noticed any ghosting in my usage. I’m also enjoying the experience of having a larger screen in general.
Overall I’m happy with this display and though it doesn’t have all the features of higher end models it’s a good budget choice for anyone looking for a bigger screen to game on.
I would recommend this to a friend!


Share this review:
+3points
4of 5voted this as helpful.

The Homedics 21" drift sandscape elevates your space and mind, leaving you free to daydream, focus, and create. The metal sphere takes your eyes on a soothing journey through hundreds of ever changing patterns and colors. Customize your ambience with mesmerizing LED mood-lights that you can control from the app. The shifting sands allow you to drift whenever and wherever, to increase relaxation, inspire creativity, boost your mood, and enhance focus. Start to drift in 4 easy steps. After a quick and easy assembly, power up your sandscape by plugging it into an outlet near a desk or side table. Download the app and follow the simple setup instructions, then turn on your sandscape to drift and invite calm in.
Customer Rating
4
Beautiful Table, Expensive
on August 24, 2022
Posted by: SamG
I really wasn’t sure how I was going to feel about this sand table. I was intrigued by the concept of it, but the price seemed a bit extravagant for what it was. After using it for a couple of weeks I have to say I’m surprised by how enamored I am with this thing. It really is mesmerizing and it’s a beautiful piece of decor. I’m still not sure it’s worth the high price tag and I wish the lighting had smart connectivity, but it’s a very unique piece of decor.
I thought the unboxing and setup experience would be a bit daunting, but overall it was pretty simple. In the box you get the table, a glass cover, the sand, a rake, a power adapter, and the metal ball. The instructions say to empty the sand out of their packets and spread them around the bowl as evenly as possible, but not to worry about getting it perfect. I of course did worry about getting it perfect and the amount of sand seemed like it wasn’t enough for the bowl, but I can tell you now that it absolutely is enough and it does not have to be perfectly spread around the bowl; the metal ball naturally pushes the sand into an even position after the first run. The table has built-in RGB lighting and has a clean and modern look that would look just as much at home on the USS Enterprise as it does in my home. I’m now on the hunt for the best stand for it and I know there’s a lot of options out there, but I sort of wish HoMedics offered some kind of stand that fits the curvature of the bowl.
There are two buttons on the bowl itself for power and lighting, but most of the actual control is through the app, which connects to the bowl via Bluetooth. The app is well designed and offers a lot of functionality in terms of setting the speed of the ball, ‘playlists’ for patterns, scheduling, and lighting scenes, but that functionality is strictly limited to the interaction between your phone and the table while they are connected via Bluetooth. I wish the table had WiFi connectivity and even more so I wish I had the ability to integrate the lighting functionality with my other smart lighting via Google Home. It feels like a whiff for something this expensive to not include that for such an expensive device.
Getting the table set and placed, I started running some patterns. The app has a ton to select from and I swear I could watch this thing for hours. It’s just that enthralling to me. The ball is controlled magnetically and pushes lines into the sand as it travels around the bowl. The patterns are really impressive and quite intricate. It’s pretty cool to see it all come together and the RGB lighting adds a cool accent without turning the table into a lamp.
Overall I’m happy with the drift table. It’s a really unique item and and it sparks a lot of fun conversations. I do think it’s too expensive though, especially since it lacks the smart functionality to really make it a part of my decor. If you’re considering this I’d recommend looking at the 16” version as it’s plenty large enough.
I would recommend this to a friend!
Share this review:
0points
0of 0voted this as helpful.
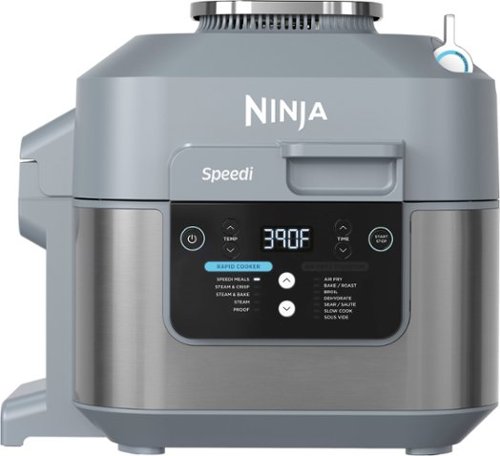
The Ninja Speedi Rapid Cooker & Air Fryer unlocks the ability to cook a complete, multi-textured meal in as little as 15 minutes, all in one pot. With 12-in-1 functionality and Ninja’s Rapid Cooking System, steam and air fry at the same time and create restaurant-quality meals from the comfort of your own home. With 6-qt. capacity, create thousands of recipes for a family of up to 4, all in one pot. Choose your base, your vegetables, and your protein to create an entire meal in one pot in as little as 15 minutes with the Speedi Meals function. Recreate your favorite meals, such as broccoli chicken alfredo meals, burrito bowls, Mediterranean bowls, and more. With 6-qt. capacity, fit up to 4 chicken breasts and 1 lb. of pasta to create a whole family meal in one pot. Choose from Speedi Meals, Steam & Crisp, Steam & Bake, Steam, or Proof in Rapid Cooker mode and unlock Air Fry, Bake/Roast, Air Broil, Dehydrate, Sear & Sauté, Slow Cook, and Sous Vide functions in Air Fry mode. Quickly create moisture with steam while caramelizing and crisping with air fry technology at the same time in one pot when in Rapid Cooker mode to get restaurant-worthy results. Cook fluffy rice, tender vegetables, and juicy chicken, all at the same time. Easily switch between Air Fry mode and Rapid Cooker mode to unlock endless possibilities. Cook your air fried favorites such as fries or chicken wings, or switch to cook an entire meal in as little as 15 minutes. Ninja’s Speedi Meal Builder unlocks thousands of customizable recipes with ingredients that are already in your fridge or pantry. Up to 75% less fat when using the air fry function vs. traditional deep frying. Tested against hand-cut, deep fried French fries. Nonstick pot and crisper tray are dishwasher-safe, making cleanup quick and easy.
Customer Rating
5
Great Rapid Cooker for Quick Meals
on August 17, 2022
Posted by: SamG
We’ve had a Ninja Foodi multicooker for a few years now and we use it at least a couple of times a week and love it. After seeing the Speedi I knew we had to try it. It’s great for cooking a huge variety of meals and the results for us so far have been great. It’s a bit smaller than our Foodi, but a lot easier to move around and put away. I also like the silver/blue color as well. It's a bit different from the black and chrome of other Ninja appliances and I appreciate that. I do wish the power cord was a bit longer since the manual indicates you’re not supposed to put this directly under cabinets or use extension cords, which makes it tricky for our kitchen. The cooking pot and crisper tray are the only parts of the machine that require cleaning and don’t take up a ton of room in the dishwasher. I do think with this the same as our Foodi that your do have to finesse the recipes a little bit to get them just right, but it’s all pretty intuitive. For me and my wife it more than takes care of both of us and the advertising says it can serve up to 4, which does seem about right for smaller portions. Air frying performance is similar to the Foodi in that it gives everything a nice crispiness, but you won’t mistake it for actual fried food. Overall I’m really happy with the Speedi I think it’s going to replace our Foodi for a lot of our day-to-day meals and it’s just the right size for us.
I would recommend this to a friend!

Share this review:
+1point
1of 1voted this as helpful.
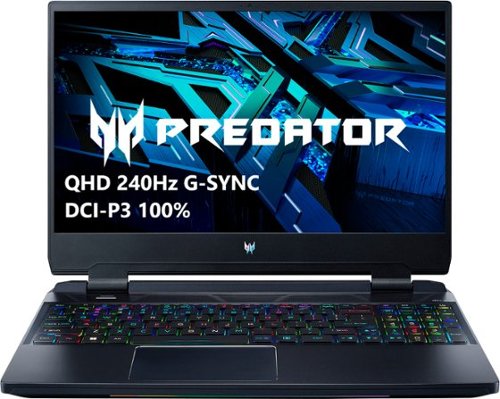
Suit up, strap in – and let Helios pave the way. Equipped with superior cooling technology and a trove of performance like NVIDIA GeForce RTX 3070 Ti laptop graphics and the latest 12th Gen Intel Core i7 processor – this gaming laptop will be your guide to gaming bliss. With the 240Hz QHD IPS panel, NVIDIA G-SYNC technology and 3ms Overdrive response time you can say farewell to blur and hello clear, crisp, high-octane gameplay.
Posted by: SamG
For the price and the performance it offers, it’s hard to beat this thing. You get a high wattage i7 and 3070 Ti, and a great QHD display all in one attractive build. It’s not hits all around, but where it matters (gaming performance) it comes through. It performs more than well enough to use as a replacement for my RTX 2080 desktop.
Looking at the device, the build is a mix of metal and plastic. You won’t mistake this for an ultrabook, but the design is attractive and understated and I appreciate that. You could easily use this in a professional environment and most people wouldn’t bat an eye. I like the dark brushed metal look. The vents around back give sort of a sports car vibe; if it were me I would have squared them off, but they don’t look bad. Overall the build feels extremely solid and not budget at all. It is not a light machine at nearly 6 lbs. though, so if it is not going to live on your desk make sure you’ve got a good backpack for it. The 280W power supply brick is a big rectangle, though it’s relatively thin, so it shouldn’t bulk out your bag too much as long as you have room for the x and y dimensions. I did notice that it tends to collect fingerprints, so keep a microfiber cloth handy if that’s something that bugs you like it does me. For ports there are 3 USB-A, 1 USB-C (Thunderbolt 4 supporting up to 100W PD charging), a headphone jack, Ethernet, HDMI (2.1) and mini-DisplayPort (1.4). It’s a good port selection overall, though I am a little perplexed by the mini-DisplayPort; I feel like this would have been better as a full size DisplayPort or even a USB-C display output. It’s a minor quibble, but it’s one more adapter I’ll need for connecting to my monitor.
Opening up the back of the laptop, I found the plastic bottom panel to be pretty easy to remove, although the first time I opened it up it did require a little extra prying. I’m happy to report neither the memory nor the storage are soldered in and can be upgraded. The 16GB of memory consists of (2) 8GB DDR5 modules, so if you are looking to upgrade to 32GB in the future you’ll have to replace them both. The memory is hiding behind a metal shield, so you will need to remove that before getting access to it. There’s also an extra PCIe Gen 4 slot for another SSD and I can confirm it operates at those speeds using my WD_Black SN770.
I won’t rehash all the specs because you can read the Best Buy and Acer page for that, but I would point out that for the RTX 3070 Ti, you are getting something that can run at up to 150W (runs at 140W in default mode), which not a lot of smaller gaming laptops do. You could get another laptop with an RTX 3080, but if it’s only running at 80W you are not going to see the same level of performance. It’s definitely something to watch out for as just going off the name alone can unfortunately be misleading.
Getting into actually using the computer, I was pleasantly surprised to find it doesn’t come preinstalled with an obscene amount of bloatware. There is some, but what is there is easy to remove. I was able to get up and running in under 20 minutes and begint the task of installing games. The keyboard is full size with a number pad, which I appreciate as that is my preferred method of keying in numbers and the laptop does not have a fingerprint scanner or Windows Hello, so I’m entering my PIN in a lot. The keyboard is also RGB and the key colors can be programmed individually, but I just went with static white for the whole thing - RGB isn’t really my thing. The QHD 240Hz display looks fantastic; the colors look accurate and I did not see any kind of ghosting in my time with it. I do wish the display was a 16:10 aspect ratio; there’s a big chin underneath the screen just begging for more screen to fill it out.
Gaming on this is a dream. I tend to lean towards quality when it comes to my settings and most games I can run at 1440p max settings at 60+fps no problem at all. For more demanding games like Control and Cyberpunk I was able to run those at or near max settings (with ray tracing) with the help of DLSS and even when those games took minor dips below 60fps G-SYNC eliminated any stutter or lack of smoothness I may have noticed. For my gaming I had the laptop at the default power profile, which runs the GPU at 140W. Turbo and Extreme power modes will allow the full 150W of performance, but the fans get crazy loud in those modes and the performance gain of maybe 5% or so was not enough to warrant using those modes most of the time. Even in the default mode the fans can get pretty noisy, but the sound isn’t too harsh and did not break through my headset or distract from my game. In addition to running noisy it can also get pretty warm, though internally it never got hot enough to hit any thermal throttling limits and it did not feel overly warm at the keyboard deck where my hands were. Overall the system performance was really snappy.
Some final things I noticed. The speakers are pretty good and the webcam is bad, though I imagine most people will have their headset connected and if you are doing any kind of streaming have already invested in a better webcam. The keyboard and trackpad are both fine; they didn’t blow me away but at the same time there is nothing wrong with them. The battery life off of the charger is also not great; I did some basic web browsing and YouTube watching and I would not seeing this making it much further past 3 hours in most cases. In reality though this is a machine that’s meant to be used plugged in to unlock its full potential.
Overall I’m so happy with this laptop. As a gaming or even a higher-end media device it just hits everything it needs to. I think this system has an excellent price to performance ratio - going for specs beyond this feels a bit like diminishing returns. If you’re in the market for a higher-end gaming laptop I can absolutely recommend this.
I would recommend this to a friend!


Share this review:
+14points
21of 28voted this as helpful.
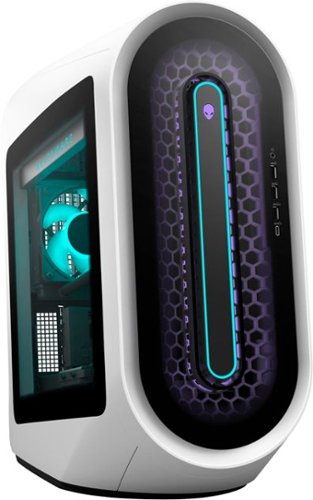
Introducing Alienware Aurora R13 - our new gaming desktop with an evolved chassis, enhanced airflow and quieter acoustics. Enjoy the freedom of gaming, streaming and creating on a multi-threaded capacity desktop with the latest 12th Gen Intel® Core™ processors and NVIDIA GeForce 30-series graphics.
Customer Rating
4
Great High-End PC, Restrictions on Upgradability
on August 7, 2022
Posted by: SamG
Besides a few issues I’m loving the R13. It’s a great high-end gaming PC and performs exactly as I’d expect something with its specifications. The design won’t be to everyone’s liking and Dell made some weird decisions with the power supply and motherboard, but overall I’d recommend it if you’re looking for a prebuilt gaming PC with a little extra flair.
The first thing to get out of the way straight off the bat is this thing has a look to it. I did not think I would be into it, but I think it looks a lot better in person than it does in pictures and videos. Still, it’s a bold look and if the minimalist look is what you are going for this is not it. The case is hilariously large due to the fact that the whole thing has this upward tilt going on and it’s probably 30% bigger than it actually needs to be. The pictures even show it with an additional rear cover for the I/O to make it even bigger, but mine did not come with that. The case has a ton of RGB 6 customizable zones. At full brightness, this thing lights up my basement no problem. I’m personally not big on RGB myself, but I do like the arrangement Dell has gone for here and you can come up with some pretty cool looks.
The specs in general are excellent. For gaming I think I’d get by with an i7 no problem, but the i9 is nice to have. I’ve heard it can have cooling issues, though I did not notice it in my usage and admittedly for gaming it’s probably not pushing the i9 to its limits anway. The RTX 3080 is still one of the best GPUs you can get today, though the 4000 series is probably just around the corner. The 1TB is a fast WD SN810 and I added another 1TB SN770 that I had to the second M.2 slot. The motherboard, which uses the Z690 chipset, is not a standard design. The I/O on the front of the case is actually part of the motherboard itself like rear I/O. I have no idea why Dell would use a design like this. Realistically I couldn’t see myself upgrading the motherboard even if it was a standard design, but this seems very odd. The motherboard also does not use standard power connectors, which means the PSU is not standard as well. This bothers me a bit more because if I ever want to upgrade to a more power hungry GPU down the line I have to hope that Dell is going to offer a larger power supply that is compatible with the board. The 32GB of RAM is DDR5, but it’s limited to 4400 MHz by the motherboard. The RAM sticks themselves are 4800 MHz though. The modules are also green against the black PCB of the motherboard and it stands out in a bad way. I almost want to buy new RAM just so the color matches. For the size of this case these components are actually packed into a relatively small area within it, owing again to the fact that it has this upward tilting design. The I/O selection is pretty solid. You get 4 USB 2.0, 5 USB-A 3.2 ports, and 3 USB-C 3.2 ports (2 support 10 Gbps and 1 supports 20 Gbps; none are Thunderbolt).The Ethernet port is 2.5 Gbps capable.
Getting logged in and booted up the first time, besides the normal driver and Windows updates, I was shocked at the lack of bloatware. Windows comes with its assortment of junk apps (Facebook, Instagram, etc.) and those are easy to remove with a single click, but Dell didn’t bundle anything unnecessary; not even antivirus! All of the preinstalled apps I found like Alienware Command Center and Dell SupportAssist were actually useful, though Command Center is constantly popping up notifications about warranty, which is annoying. I liked the Command Center application for customizing the lighting and it offers a few preset ‘overclock’ profiles, though the overclocking options are pretty limited. Gaming performance is about what I expected for the RTX 3080, in that it is great. The monitor I use right now is 4K and most every game I played had no issues running at 60+ FPS at high or max settings. I can run Cyberpunk with all the ray-tracing settings turned on (aided by DLSS). I ran through a bunch of other games like Control, RDR2, Halo Infinite, and Alan Wake Remastered. For the most part, even at 4K, most every game I ran I could just push all the sliders to max and everything runs just fine, though I did use DLSS where it was available. I had the ‘Overclock 1’ profile turned on most of the time, and that seemed to do fine. The fans occasionally spun up to a level that would be bothersome, but with my headset it barely registered for me.
Overall, besides a few minor gripes and some upgradeability concerns, I’m very happy with this PC. It’s got the specs to handle all of today’s games and I think it’s going to last me a long time. It’s certainly not a budget PC and you can do these specs for less money, but it’s still a pretty good prebuilt option if you can appreciate the aesthetic.
I would recommend this to a friend!

Share this review:
+3points
3of 3voted this as helpful.
SamG's Review Comments
SamG has not submitted comments on any reviews.
SamG's Questions
SamG has not submitted any questions.
SamG's Answers
Complete your HT-Z9F surround system with this Sony rear speaker. Place it on a stand or shelf, or mount it to your wall for unobtrusive performance, and connect to other components wirelessly to keep unsightly cables out of your space. This Sony rear speaker's S-Master amp outputs 50W for powerful rear audio.
Will these work well with the ht-nt5?
They're only listed to be compatible with the HT-Z9F.
5 years, 11 months ago
by
SamG

Leave no dirt behind with this Shark APEX vacuum. Its DuoClean operation uses a soft brush roll and powerful suction to pick up large debris and stuck-in dust, and its Powered Lift-Away technology provides extended reach underneath furniture. This Shark APEX vacuum prevents captured irritant particles from escaping thanks to its Anti-Allergen Complete Seal technology.BR>
How much does it weigh?
Work and play online with less interruption. This Linksys router comes equipped with technology that zeroes in on each laptop, tablet, smartphone and computer in your home, for a clearer, faster Wi-Fi signal every time you log on.