callmeageeth's stats
- Review count374
- Helpfulness votes1,294
- First reviewJune 23, 2014
- Last reviewJanuary 30, 2026
- Featured reviews0
- Average rating4.4
Reviews comments
- Review comment count0
- Helpfulness votes0
- First review commentNone
- Last review commentNone
- Featured review comments0
Questions
- Question count0
- Helpfulness votes0
- First questionNone
- Last questionNone
- Featured questions0
- Answer count27
- Helpfulness votes50
- First answerOctober 20, 2014
- Last answerDecember 15, 2021
- Featured answers0
- Best answers7
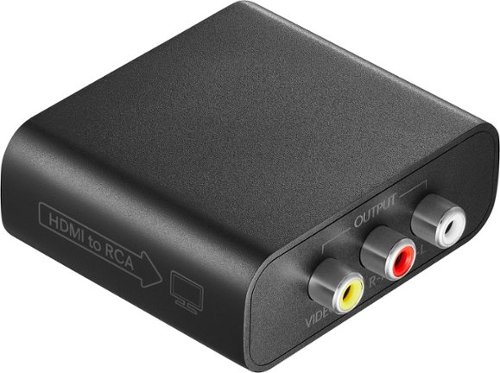
Experience your favorite content on analog displays with the help of this Insignia HDMI to RCA Converter. The unidirectional converter sends HDMI input signals to an RCA output, allowing you to watch modern movies or play video games on an older TV screen.
Customer Rating

4
Does its job, but limited use cases
on January 30, 2026
Posted by: callmeageeth
As a fan of legacy video game consoles, I love the idea of connecting old consoles to my new TVs to play. This converter however, is NOT that. This is a one way street to connect NEW devices (i.e. PS5, Xbox, etc.) to legacy displays (such as CRT TVs, or older projectors). SO DOUBLE CHECK YOUR NEEDS.
This device takes a modern HDMI signal that converts to the old RCA (red, white and yellow) inputs (the younger generation just doesn’t know). So think, connecting a PS5, or Amazon Fire Stick which all use HDMI to an older TV or projector. This does not connect, say your old Xbox one to a brand new TV.
If you have an older CRT or legacy monitor or projector, this device can breathe new life into it. It is simple plug and play. You run an HDMI cable into the convertor, and then plug your RCA cable into the other side and then connect to your display device. It does require USB power, so keep that in mind. It comes with a USB-C cable and power brick, and I found the USB-C cable to be plenty long, but luckily you can bring your own longer one if need be.
The converter itself, while made of plastic, is plenty sturdy. And I very much appreciate the rubber feet on the bottom that do a pretty good job of keeping it in place (when there’s slack in the cable). The converter keeps a strong signal and I experienced no flicker.
I was disappointed that it did not come with an RCA cable. Simply because most of us don’t keep them any more. Luckily for me, I keep one set of old legacy cables just in case. For me, I had an old projector that utilizes RCA cables. It allows me to play my games on a large screen. But keep in mind, you are sacrificing a lot of image quality when using this convertor. Text was blurry, but readable. Some people might enjoy the “older feel” of new games on old display tech, but I’m not one of those people. I prefer the highest resolution. But, for those with older display tech, or recipients of a hand me down, it’s a great way to keep those in service. I think the best use case scenario is watching a streaming stick on an older projector. The image quality won’t be 4K by any stretch, but it’s certainly passable - especially if you’re watching on a big projector.
Bottom line is that it does what it’s set out to do, and does it in a simple and straightforward manner. This might be a little more expensive than no name brands on Amazon, but you get peace of mind getting it from Best Buy should something happen to it. Just please double check the ports to make sure you’re getting what you need.
I would recommend this to a friend!


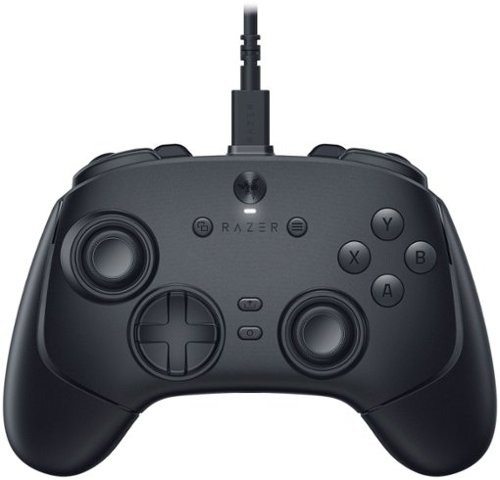
Stay light years ahead of the competition with the Razer Wolverine V3 Tournament Edition 8K PC. Supercharged with native 8000 Hz polling, blitz through every opponent with speed, control, and precision that~s second to none.
Customer Rating

4
Fast and responsive, but geared to competition
on November 27, 2025
Posted by: callmeageeth
IN THE BOX
You get the controller, two caps for the thumbsticks and a USB cable. The USB cable is type C on the end that plugs into the controller, the other is type A that plugs into a typical USB port. There’s no case, no travel bag or anything like that. While most controllers don’t come with one, and you might not travel with yours, at this price point, I do expect a few extras. A storage case would be nice if for no other reason than to store the thumbstick caps.
You get the controller, two caps for the thumbsticks and a USB cable. The USB cable is type C on the end that plugs into the controller, the other is type A that plugs into a typical USB port. There’s no case, no travel bag or anything like that. While most controllers don’t come with one, and you might not travel with yours, at this price point, I do expect a few extras. A storage case would be nice if for no other reason than to store the thumbstick caps.
THE “FEEL” AND BUILD QUALITY
Like all Razer products, this controller is extremely well built. It feels good in the hand. But the first thing you will notice is how incredibly light it is. Primarily because there’s no battery.. I’ve never been one to think a heavier controller is a bad thing or otherwise causes fatigue, so the lightness of the controller is a matter of personal preference.
Like all Razer products, this controller is extremely well built. It feels good in the hand. But the first thing you will notice is how incredibly light it is. Primarily because there’s no battery.. I’ve never been one to think a heavier controller is a bad thing or otherwise causes fatigue, so the lightness of the controller is a matter of personal preference.
The buttons all feel extremely responsive and clicky. The back paddles are appropriately placed and when using a standard grip, I never hit them accidentally.
There’s quite frankly, an obscene amount of buttons when compared to a traditional Xbox or PS controller. If you aren’t used to them, it can take some time to train your mind to use them. I’ve only recently gotten used to using two back paddles on a PS5 Edge controller. The extra buttons, which are entirely customizable, are really nice insomuch as they’re there for those who are used to them or want to learn how to use them, and if you don’t want to, you don’t have to. There’s your standard 4 bumpers on the top for your pointer fingers, as well as two additional buttons (one on each side) and on the back, you have four paddle buttons (2 on each side).
THE TMR THUMBSTICKS
This controller has TMR or tunneling magnetoresistance thumbsticks. This is newer technology then the famous Hall Effect joysticks. I can’t speak to the technology itself, other than to say the thumbsticks are extremely smooth in all directions. They are extremely precise (something you can test within the Razer app). There is absolutely no friction. They are really precise, especially in shooters like Call of Duty. I can’t say it made me a better player, but I could honestly tell the difference in playing with this controller. I didn’t have to adjust any deadzone, out of the box it worked phenomenally.
This controller has TMR or tunneling magnetoresistance thumbsticks. This is newer technology then the famous Hall Effect joysticks. I can’t speak to the technology itself, other than to say the thumbsticks are extremely smooth in all directions. They are extremely precise (something you can test within the Razer app). There is absolutely no friction. They are really precise, especially in shooters like Call of Duty. I can’t say it made me a better player, but I could honestly tell the difference in playing with this controller. I didn’t have to adjust any deadzone, out of the box it worked phenomenally.
PERFORMANCE
This controller is advertised as having 8K polling. That means the controller reports its position 8,000 times a second (vs. the standard 1,000). I’ll be honest, I couldn’t tell the difference. It’s supposed to mean that the controller is “snappier” and might move more smoothly, but in fast pace games I couldn’t really tell the difference. That’s not to say it doesn’t present benefits over the standard controller, I just think for casual players, it’s not something you will necessarily notice.
This controller is advertised as having 8K polling. That means the controller reports its position 8,000 times a second (vs. the standard 1,000). I’ll be honest, I couldn’t tell the difference. It’s supposed to mean that the controller is “snappier” and might move more smoothly, but in fast pace games I couldn’t really tell the difference. That’s not to say it doesn’t present benefits over the standard controller, I just think for casual players, it’s not something you will necessarily notice.
The buttons all very tactile and clicky like a computer mouse would be. This makes shooting ina FPS for example, really quick and can make the difference between getting defeated and winning a one on one. I honestly prefer the squishy-ness of the standard controller, but at the same time, these clicky buttons are better performers in the sense of taking actions quicker.
WIRED FACTOR
The big downside of this controller in my opinion, is the fact that it’s wired. If you are gaming on a PC and the tower is close to where you sit, this probably isn’t an issue. The 10ft cable is plenty long enough for most applications. But you never have to worry about batteries dying. After a while, you don’t even notice it.
The big downside of this controller in my opinion, is the fact that it’s wired. If you are gaming on a PC and the tower is close to where you sit, this probably isn’t an issue. The 10ft cable is plenty long enough for most applications. But you never have to worry about batteries dying. After a while, you don’t even notice it.
CUSTOMIZATION
This controller’s flexibility and customization options are its big benefit. I’m not one to really dig in and mess with the default settings, mostly because I have little time to game and just want to game (vs. messing with controller settings). But for those that want to customize their controller, the options are there and it’s pretty easy and straightforward to do. The Synapse app is where you can monitor all your Razer devices and the app you would download on your PC to adjust the settings. Once you plug your controller in, you’ll be prompted to download the app unless you already have it. Once it’s downloaded, you’ll see the controller in your devices and you can easily adjust all your settings. You can map certain buttons and actions to specific games. And you have the ability to create profiles (i.e. FPS shooters, driving games, etc.).
This controller’s flexibility and customization options are its big benefit. I’m not one to really dig in and mess with the default settings, mostly because I have little time to game and just want to game (vs. messing with controller settings). But for those that want to customize their controller, the options are there and it’s pretty easy and straightforward to do. The Synapse app is where you can monitor all your Razer devices and the app you would download on your PC to adjust the settings. Once you plug your controller in, you’ll be prompted to download the app unless you already have it. Once it’s downloaded, you’ll see the controller in your devices and you can easily adjust all your settings. You can map certain buttons and actions to specific games. And you have the ability to create profiles (i.e. FPS shooters, driving games, etc.).
CONCLUSION
This is a quality controller that honestly, most casual gamers might not fully appreciate. If you’re not going to take advantage of all the customizable buttons, and aren’t interested in having the latest tech to give you a competitive online edge, it could be overkill. The price point is higher than most “normal” controllers, but competitively priced amongst the “competitive” controllers. It’s wired, which in my mind limits it to PC use, although you could use it for an Xbox (I simply don’t want to sit that close to my TV). Otherwise, it’s a great all around controller for virtually all games.
This is a quality controller that honestly, most casual gamers might not fully appreciate. If you’re not going to take advantage of all the customizable buttons, and aren’t interested in having the latest tech to give you a competitive online edge, it could be overkill. The price point is higher than most “normal” controllers, but competitively priced amongst the “competitive” controllers. It’s wired, which in my mind limits it to PC use, although you could use it for an Xbox (I simply don’t want to sit that close to my TV). Otherwise, it’s a great all around controller for virtually all games.
I would recommend this to a friend!


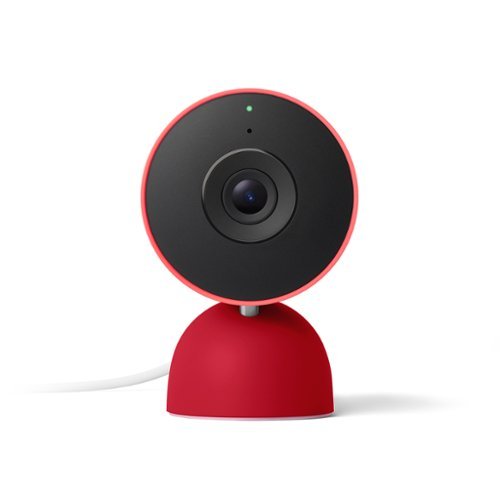
Meet the smarter, sharper wired Nest Cam Indoor with 2K video and Gemini. Get more peace of mind about the things that matter with the intelligence of Google Home. It provides more details, summarizes what happened, and lets you search video history simply by asking for something.~,~,~
Customer Rating

4
Great camera but best for Google Home Subscribers
on November 4, 2025
Posted by: callmeageeth
I’ve always thought that the best smart home devices depend on the user, their particular ecosystem, and what they’re willing to put up with in terms of different manufacturers’ devices working well together. I’m a Google user, but I’ve acquired a number of different devices over the years (Wemo, Hue, Arlo, Nest, etc.) and while Google Home does a great job of organizes all your devices, far and away, Nest devices work the best.
To be more direct, I have difficulties accessing my Arlo cameras within the Home app (they take forever to refresh and it’s inconsistent). Meanwhile, my Nest Floodlight camera works like a charm each and every time I look at it within the Home app.
I mention this because despite the features a particular device might have, the ease of use, management, and setup, is a critical component. A smart home device that becomes a burden to use becomes more trouble than it’s worth.
If you are a Google user, or at least willing to jump in, the Nest cameras are phenomenal. They work well and offer lots of smart and helpful features. And they’re relatively straightforward to adjust settings (which I can’t say for all smart home products as many features/settings are buried in a convoluted app).This is especially true if you have any Google Home smart devices. These items just work well together and almost without fail. But I might think twice if you have a a variety of smart home devices already. If you are heavily invested in say, Arlo, I’d stick with that same ecosystem. But if you’re starting fresh or wanting to transition, I think the Google Nest cameras are a terrific route - especially given the price point (although most smart home cameras have dropped in price substantially since they first hit the market en masse).
IN THE BOX AND DESIGN
Like most Google products, the camera is well designed and packaged. Inside the small box you’ll get the camera, a lengthy USB-C cable, an unnecessarily large USB charging brick and some mounting hardware. Basically all you need to get going and nothing else.
Like most Google products, the camera is well designed and packaged. Inside the small box you’ll get the camera, a lengthy USB-C cable, an unnecessarily large USB charging brick and some mounting hardware. Basically all you need to get going and nothing else.
I like the design of the camera, although it’s a little bulky. Don’t get me wrong, this is not a big camera, but I’ve seen smaller designs and the camera housing just seems bigger than it needs to be. But for those worried about privacy, it is something that’s noticeable and difficult to completely conceal, so maybe that’s a benefit. I love the red color and it’s very sturdy. It has some heft to it which prevents it from tipping over when placed on a flat surface. The power cord is plenty long for most circumstances. In fact, the bigger problem is concealing the extra cable but that’s all very subjective and depends on your circumstances. The USB charging brick, however, is awkwardly shaped and large. I wish it was a smaller brick that didn’t extend beyond the outlet which could, in some instances, make it difficult to use. But that’s a minor quibble.
SETUP
Setup is a breeze. There’s a QR code you scan that’s on a sticker attached to the lens. You scan that with your phone and your walked through the setup process through Google Home app. You can give it a name, and place it in any rooms you’ve already created within the app. The app is where you’ll make any adjustments to the settings.
Setup is a breeze. There’s a QR code you scan that’s on a sticker attached to the lens. You scan that with your phone and your walked through the setup process through Google Home app. You can give it a name, and place it in any rooms you’ve already created within the app. The app is where you’ll make any adjustments to the settings.
It’s easy to mount with the included screws and anchors, so no issues there, again, a lot depends on your house and where the outlets are in relation to where you want the camera and how much effort your willing to undergo to hide the cable.
PERFORMANCE
The video is 2K resolution with HDR images. It provides crystal clear images. When viewing it live, it may not be as sharp, but recorded portions are of really high quality that allow you to zoom in closely of your video without losing fidelity.
The video is 2K resolution with HDR images. It provides crystal clear images. When viewing it live, it may not be as sharp, but recorded portions are of really high quality that allow you to zoom in closely of your video without losing fidelity.
There are a lot of smart features, which are unfortunately, tied to a Google Home Premium subscription (this camera does come with a trial). The Google Home Premium subscription gives you historical event recording (which is in my opinion necessary since there’s no local storage). A premium subscription also gives you features such as familiar or unfamiliar face recognition. So if it detects a face that is familiar - generally determined by your Google Photos - it will let you know. And if it detects an unfamiliar face, it will alert you to that as well. I found the notifications to be smart and reliable and not too burdensome. For example, it won’t constantly ding your phone if one person is walking back and forth in the room. But if someone leaves for a little while and then comes back, it might alert you again. I found the notifications to be almost instantaneous with little delay (something I can’t say for Arlo cameras). My only concern was TV shows. I noticed that it will detect characters on the TV assuming a TV is in view of the camera and the camera is on.
Obviously, choosing your notifications is up to you, I have mine set up to where I’ll only get notifications when it detects that no one is home. What I’ve noticed is that when I’m gone for the house all day, it will give me one notification at the first detection of someone. If they’re familiar, then it won’t give me any more notifications because it’s detecting someone is home. But this feature is difficult to truly test out absent catching a burglar.
There is unfortunately no ability to pan and tilt the camera. You can manually adjust it obviously, but there’s no way to look around from the app which other competitors have. It’s also a bummer that there’s no local storage. It’s no big concern of mine since I’m a Google Home Premium subscriber, but for those that don’t want to purchase it, it really limits its utility/value.
PRIVACY
I’m very concerned about having indoor cameras. I don’t like the idea of spying on anyone in my house. I use mine as a quasi security camera, but primarily to keep tabs on my little ones. There is a setting to turn off the microphone which is beneficial as I don’t want to be storing all my audio with Google. There is a green light on the camera that lights up whenever the microphone is active, but for those that are way more conscious about their privacy and data than I, you’d have to take Google’s word at that…
I’m very concerned about having indoor cameras. I don’t like the idea of spying on anyone in my house. I use mine as a quasi security camera, but primarily to keep tabs on my little ones. There is a setting to turn off the microphone which is beneficial as I don’t want to be storing all my audio with Google. There is a green light on the camera that lights up whenever the microphone is active, but for those that are way more conscious about their privacy and data than I, you’d have to take Google’s word at that…
CONCLUSION
This is a terrific performing camera for a certain subset of people. Those are Google users/adopters and those that have or are willing to pay for the subscription service. Absent that, it’s tough to recommend to the broader public as the full features of what makes this camera one of the better performers is tied to a subscription. But it does get points for ease of setup and the quality of the image.
This is a terrific performing camera for a certain subset of people. Those are Google users/adopters and those that have or are willing to pay for the subscription service. Absent that, it’s tough to recommend to the broader public as the full features of what makes this camera one of the better performers is tied to a subscription. But it does get points for ease of setup and the quality of the image.
I would recommend this to a friend!


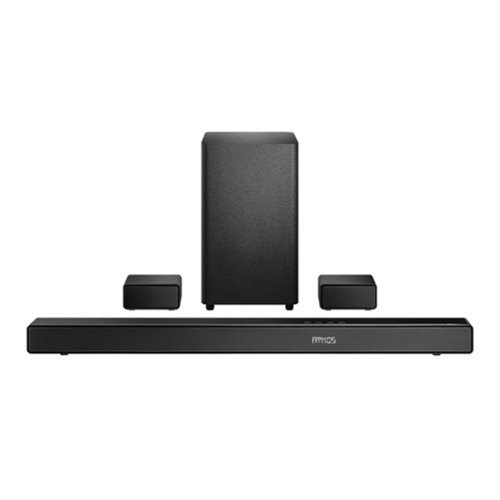
Immerse yourself in every scene with this 5.1.2 channel soundbar system, designed to deliver true surround sound. Featuring dedicated rear speakers, a powerful subwoofer, and up-firing drivers for overhead audio, it brings every detail to life with stunning clarity. With Dolby Atmos~ and DTS:X~ support, you'll experience sound that flows above and around you for a truly cinematic experience. And thanks to wireless speaker connectivity, setup is quick and hassle-free~so you can spend less time installing and more time enjoying.
Customer Rating

5
Great Value, Significant Audio Upgrade
on October 31, 2025
Posted by: callmeageeth
Insignia is Best Buy’s brand is often associated as “budget,” which can be thought of as “cheap.” I’ve owned Insignia products in the past and found them to be pretty reliable. I think the better descriptor is great value. So far, I’ve been pretty impressed with the Insignia 5.1.2 soundbar. The setup is dead simple - although I have a few qualms with hiding wires - and the sound is a terrific upgrade from a TV’s speakers.
IN THE BOX
As you can see in the photos, inside the box is the soundbar (which is about 40 inches long) a subwoofer, which is about 17 inches high and 8 inches in width, two smaller satellite (rear speakers) which are pretty tiny (about 3-4 inches tall and 6 inches wide), 4 power cables (one for each item), a remote, and wall mounting hardware. One small omission, I didn’t see AAA batteries for the remote in the box.
As you can see in the photos, inside the box is the soundbar (which is about 40 inches long) a subwoofer, which is about 17 inches high and 8 inches in width, two smaller satellite (rear speakers) which are pretty tiny (about 3-4 inches tall and 6 inches wide), 4 power cables (one for each item), a remote, and wall mounting hardware. One small omission, I didn’t see AAA batteries for the remote in the box.
SETUP
You have several options to connect your soundbar to your source. There’s HDMI, which requires eARC on your TV (most newer TVs support it), optical audio, and a headphone jack. There’s not multiple HDMI ports like you’d find in a receiver. So if you had a gaming system or HDMI stick you wanted to watch/play from, you’d need to plug that into the TV itself and not the soundbar. I have a small room with a projector, and the projector doesn’t support eARC HDMI, so I had to take the auxiliary route.
You have several options to connect your soundbar to your source. There’s HDMI, which requires eARC on your TV (most newer TVs support it), optical audio, and a headphone jack. There’s not multiple HDMI ports like you’d find in a receiver. So if you had a gaming system or HDMI stick you wanted to watch/play from, you’d need to plug that into the TV itself and not the soundbar. I have a small room with a projector, and the projector doesn’t support eARC HDMI, so I had to take the auxiliary route.
Setup is dead simple, so long as you have nearby power outlets. Each device, as you would expect, requires to be plugged in. And for the most part, they’ll be plugged in at different spots in the room. So you will need to keep in mind what outlets you have as you’ll likely be using 4 separate outlets. Of course, you can always utilize extension cords where needed, just something to keep in mind. The three of the power cords are the same, the plug that goes into the speaker is bent, while the 4th is straight. The straight one goes into the soundbar while the others go into the other speakers.
Set up is truly as easy as plugging everything in. There’s a pair button on the back of the satellite speakers (the only button on the back) but I didn’t need to push it. Once I had everything plugged in and turned on the soundbar, everything just worked. No pairing needed. Really, it doesn’t get any easier than that. Of course, if you were to mount any of the speakers - which you’ll likely want to - that will complicate the installation but that’s something you’d have to do with any soundbar. There is an installation template that you can use to help place the screws on the wall to mount the soundbar.
SOUND QUALITY
I have to mention that this is a Dolby Atmos soundbar with satellite speakers. Atmos gives you some terrific surround sound with a minimal number of speakers. That’s because there’s additional speakers in the soundbar itself that fires sound upwards and to the sides that bounce off the wall, mimicking surround. I should note that not all TV shows or sports have Dolby Atmos, is typically (at least in my experience) reserved for movies.
I have to mention that this is a Dolby Atmos soundbar with satellite speakers. Atmos gives you some terrific surround sound with a minimal number of speakers. That’s because there’s additional speakers in the soundbar itself that fires sound upwards and to the sides that bounce off the wall, mimicking surround. I should note that not all TV shows or sports have Dolby Atmos, is typically (at least in my experience) reserved for movies.
I found the audio to be extremely crisp and clear. The sound quality is really well balanced and there’s depth. Characters further away on screen sound further away and vice versa. It really filled the room especially with background scores playing but again, the dialogue would come through really clear and understandable. The bass is pretty good, it’s rich and punchy but could resonate a little deeper. Explosions and gunfire however, sounded pretty darn good. I could hear bullets whizzing behind me in war scenes which really helps create an immersive effect.
Again, my room is a medium to small sized room. I thought the audio was plenty loud, balanced and clear. It was a pretty immersive experience watching football as well as movies. It absolutely beats the socks off any TV speaker, but if you have a larger room you might want to consider a more powerful option.
CONCLUSION
Surround setups can get extremely complicated and extremely expensive. This Insignia model is a terrific value. It looks very streamlined and professional. The build quality is great and the setup is dead simple. The only minor downside is the need for 4 separate plug outlets and extra work needed to hide power cables when mounting on the walls (if you so choose).
Surround setups can get extremely complicated and extremely expensive. This Insignia model is a terrific value. It looks very streamlined and professional. The build quality is great and the setup is dead simple. The only minor downside is the need for 4 separate plug outlets and extra work needed to hide power cables when mounting on the walls (if you so choose).
I would recommend this to a friend!


Designed for both rising gamers and those upgrading from entry-level gear, the HyperX Cloud Jet dual wireless headset offers a seamless experience with 2.4GHz and Bluetooth 5.3 connectivity. Effortlessly switch between PC, console, and mobile devices while enjoying rich audio delivered by 40mm drivers for an immersive gaming experience. Stay connected with a swivel-to-mute boom mic that ensures clear communication with your squad. With up to 25 hours of battery life, you can dive into longer gaming sessions without interruptions. The onboard controls make it easy to adjust volume, mute the mic, and toggle between connections. Plus, its lightweight design, breathable mesh earpads, and elastic suspension headband provide ultimate comfort for marathon gaming. Elevate your gaming experience with the HyperX Cloud Jet!
Customer Rating

4
Solid, affordable headset
on August 11, 2025
Posted by: callmeageeth
The HyperX Cloud Jet Dual is a decent headset for casual gamers that are looking to upgrade an older headset. It’s nowhere close to the best headset on the market - but it’s not trying to be. It works with a variety of gaming systems which is convenient, but the sound quality can be inconsistent.
In the box you’ll get the headset and a USB dongle and short charging cable. The controls and design are pretty straightforward. The buttons are easy to use and locate when wearing it. On the left cup is a switch between 2.4GHz connection (for low latency) and Bluetooth. There’s also the volume rocker, USB-C charging port and power button. The headset itself is relatively bulky with a closed-back over the ear design. Frankly, I prefer the larger headsets that go over the ear because it’s more comfortable to me than any headset that sits on parts of my ear. There’s an elastic suspension band that helps comfortably hold the headset to your head while in use. Note that the plastic headset is not adjustable, but that’s what the suspension band is for. The mesh foam earpads are some of the most comfortable I’ve used. They’re breathable and lightweight.
The boom microphone rotates up to mute. It doesn’t hide inside the headset like some premium headsets. But when you don’t need it, it’s certainly out of the way. The arm on the mic is very flexible and holds itself in place.
This headset has 40mm drivers that gives balanced audio with a decent amount of bass. When connecting via Bluetooth on my phone, I found the audio quality to be okay. Music was a little hollow and the bass wasn’t as deep as my other premium Bluetooth headsets. There’s no noise canceling, but the over the ear design helps keep noise out so it isn’t too much of an issue unless you’re in a really crowded/loud room.
I’ve used this on my Switch 2, PS5, and computer which are my primary gaming devices. I connected it easily to my Switch 2 over Bluetooth and thought the sound was pretty good. I played a good amount of Donkey Kong Bananza and felt immersed with the sound quality. It was the same experience for my PC, which I connected via the USB dongle. I played Mafia Definitive Edition and enjoyed listening to the sounds of the city. It was much better than listening to the laptop’s speakers. It was just as easy switching to the PS5 where I played some Call of Duty with friends. The only downside on the PS5 is that it doesn’t have the 3D audio that’s built into the PS5 branded headsets and some other premium headsets. While I had 3D audio hearing sounds from behind me and to the sides were a little more muted. It’s tough to describe other than to say that when specifically playing multiplayer shooter games where sound context is key, I preferred my Turtle Beach Atlas headset. My friends reported hearing me just fine although they described my voice as sounding like I was in a can. They could hear me just fine and we had no issues communicating, so it’s more of a personal preference.
The battery life has been surprisingly good. It’s rated to get about 25 hours on Bluetooth and 20 hours when using the 2.4GHz dongle. My sons and I have been using it off and on for the better part of a week and haven’t had to recharge it yet. For me, I look for a headset to last 1-2 weeks of a few hour gaming sessions before having to recharge.
While $80 isn’t nothing, I consider this to be a high quality entry level headset. You miss out on some of the better features, but again, you aren’t paying for them. The sound quality isn’t the best, but is more than adequate for gaming and will certainly suffice if you wanted to listen to music.
I would recommend this to a friend!


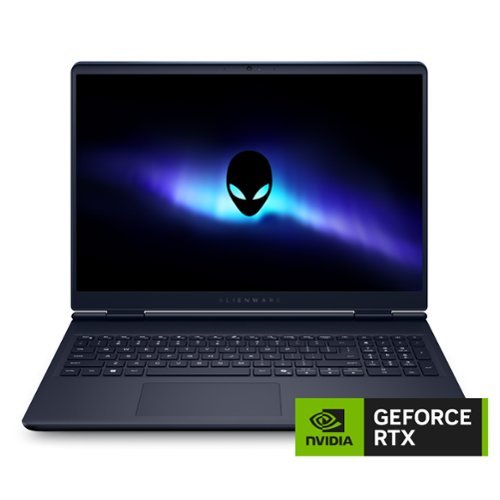
Alienware 16 Aurora Gaming Laptop. Pure performance. No distractions. Optimized performance in a sleek design, featuring a WQXGA 120Hz 300 nits display, stylish anodized aluminum lid and Intel Core processors (Series 2).
Customer Rating

5
A good value for a beastly gaming laptop
on July 26, 2025
Posted by: callmeageeth
I’m a legal professional who loves to game and needs a powerful computer to manage all the various tasks I need to perform - including video editing. This Alienware laptop is close to a perfect device to me, absent a few drawbacks that are inherent in any laptop with this much power. This is clearly built for gamers and/or content creators. It’s intended - IMO - to be a desktop replacement. It’s not something I personally would like to lug around on a daily basis, but being that it’s a laptop, it’s convenient to take desktop-ish power on the go when you need to.
To me, the big selling points are the screen, GPU and processor (although there’s a lot to like). My work desktop is a large ultra widescreen monitor, so going to a 13 inch laptop is just something I don’t enjoy. But the 16 inch screen is a nice balance of size (but again, you sacrifice some portability). And the WQXGA display is nice. The pixel count is 2560X1600 and its widescreen, meaning the ratio is 16:10. It’s more of a box than your typical HD tv for example. The refresh rate is 120 hz, which isn’t quite as high as some premium laptops or gaming monitors, but in my opinion, 120 hz is a nice sweet spot. It delivers smooth visuals handling day to day tasks, and gaming is smooth.
The GPU is a NVIDIA RTX 5060. I’m not one to get into the nuances between the 50 series GPUs, but I can speak in general, practical terms, between the generational upgrades. It supports DLSS 4 and mult-frame generation which offers significant frame rate boosts from previous generations. It creates a strong gaming performer in 1080p and 1440p. In other words, perfect for the display.
The processor is the new Intel Core Ultra Series 2 processor. It has terrific multi-core performance in benchmark and practical applications. It handles games and for me, is really good at processing video for editing. I find very little hiccups or slowdown in anything I typically do.
SETUP
While the setup process is similar to any Windows laptop, and I wouldn’t say anything about it but for the quirks I ran into. I had a difficult time getting it updated and connecting to Wi-Fi. I’m not sure if it was a fluke or not, but it took longer than expected. After a few tries and once the laptop was setup and updated, I haven’t encountered any issues.
While the setup process is similar to any Windows laptop, and I wouldn’t say anything about it but for the quirks I ran into. I had a difficult time getting it updated and connecting to Wi-Fi. I’m not sure if it was a fluke or not, but it took longer than expected. After a few tries and once the laptop was setup and updated, I haven’t encountered any issues.
SPECS
I mentioned what I thought was the most important but this Alienware has lots of other features:
1 TB solid state hard drive. Great news, it has two upgradeable PCI GEN 4 SSD slots
32 GB or DDR5 RAM. This is blazing fast RAM. And like the SSDs, it includes two user upgradeable slots
Connectivity. It’s rocking Wi-Fi 7 (assuming your router supports it) as well as Bluetooth
2 USB 3.2 Gen 1 (5 Gbps) ports
1 USB 3.2 Gen 2 (10 Gpbs) type-C port with power Display Port; it also includes power delivery
1 HDMI 2.1 port. This allows connectivity to larger monitors that support high refresh rates and VRR (for screen tearing)
Audio jack. These are less of a necessity in the age of Bluetooth, but it’s nice to have in a pinch
Ethernet port. You don’t see it much anymore, but a built in Ethernet port. Again, there are certain situations where this will come in handy
NO SD card slot. This isn’t a big deal with me, as I carry an adapter, but might be a bummer to some.
Camera. The selfie camera is only 720p at 30 fps. It does have dual array microphones. Unfortunately, no Windows Hello support.
DESIGN
I both like and dislike portions of the design. It’s made of plastic - probably for specific reasons - so it’s not as premium as other metal chassis laptops. But i like the soft touch plastic and I really dig the “indigo” color. It’s not as bland as a simple black laptop. One of the surprising things to me was the absence of RGB lights. RGB lights seem to be all the rage and what you’d expect from Alienware, but they’re entirely absent here. I don’t mind it, but some might want it. The keyboard is backlit (awesome) but there’s no customizable colors.
I both like and dislike portions of the design. It’s made of plastic - probably for specific reasons - so it’s not as premium as other metal chassis laptops. But i like the soft touch plastic and I really dig the “indigo” color. It’s not as bland as a simple black laptop. One of the surprising things to me was the absence of RGB lights. RGB lights seem to be all the rage and what you’d expect from Alienware, but they’re entirely absent here. I don’t mind it, but some might want it. The keyboard is backlit (awesome) but there’s no customizable colors.
The laptop is big and bulky what you might expect. It’s HEAVY and thick. It’s not a negative, and is what you should expect when getting a large laptop with this much power. Having said, it still maintains a smaller profile that somehow makes it portable. Just heavier than the average laptop.
DAILY USE
As a laptop for general purpose tasks, it’s overbuilt. If all you plan to do is perform some word processing and emails, look elsewhere. But given those tasks are essential for even gamers, this machine performs mightily. The large screen and specs allow for multiple programs mean that multitasking is a breeze. It’s a pleasure to use. The keyboard is very comfortable and I enjoy typing on it. And I absolutely love the 9 number keypad to the side. The only downside is getting used to typing on a keyboard to the side. This just means that I had a few keystroke misses and trackpad misses because it’s off center (which is standard for all keyboards with a separate number keypad).
As a laptop for general purpose tasks, it’s overbuilt. If all you plan to do is perform some word processing and emails, look elsewhere. But given those tasks are essential for even gamers, this machine performs mightily. The large screen and specs allow for multiple programs mean that multitasking is a breeze. It’s a pleasure to use. The keyboard is very comfortable and I enjoy typing on it. And I absolutely love the 9 number keypad to the side. The only downside is getting used to typing on a keyboard to the side. This just means that I had a few keystroke misses and trackpad misses because it’s off center (which is standard for all keyboards with a separate number keypad).
The speakers are great for a laptop. I typically use headphones when I’m gaming or watching shows, etc. but these speakers are pretty good. I wouldn’t call it a selling point, but there definitely not a downside.
Speaking of the keyboard, I love the shortcuts built in. It’s a small touch, but there’s an entire row of buttons (including 3 you can program) that includes display brightness, speaker volume, and putting the computer in performance or silent mode. During daily use it runs very silent and pretty cool - which can’t be said when gaming…
GAMING PERFORMANCE
I was seriously impressed with the gaming prowess. I played a few AAA game and some indies and this laptop handled them all like a champ. I was able to put the graphics settings really high all while maintaining consistently high frame rates in the 100s. The graphics are clear and smooth. I had no performance issues. I had ray tracing enabled and with DLSS 4, I was able to maintain high refresh rates. It truly was a pleasure to game on.
I was seriously impressed with the gaming prowess. I played a few AAA game and some indies and this laptop handled them all like a champ. I was able to put the graphics settings really high all while maintaining consistently high frame rates in the 100s. The graphics are clear and smooth. I had no performance issues. I had ray tracing enabled and with DLSS 4, I was able to maintain high refresh rates. It truly was a pleasure to game on.
The only downside was the jet engines of the laptop when gaming. This beast gets LOUD. It puts the infamous PS4 jet engine sounds to shame. It almost necessitates headphones to drown the noise out. It has lots of air vents, both on the bottom and the top. And while it does a good job of keeping the internals cool, it definitely means the laptop gets hot. I would not keep this on my lap when I’m gaming, the bottom gets too hot. But I didn’t find any of the keys too hot to game which is what matters.
WEBCAM and BATTERY LIFE
I do have to use the webcam for work sometimes, and I was underwhelmed. I would have appreciated a 1080p webcam with a privacy shutter and some better low light performance. But this wasn’t designed and engineered for that purpose so I kind of understand.
I do have to use the webcam for work sometimes, and I was underwhelmed. I would have appreciated a 1080p webcam with a privacy shutter and some better low light performance. But this wasn’t designed and engineered for that purpose so I kind of understand.
The only other thing to mention and this really should come as no surprise, but the battery life is absolutely abysmal. Fully charged I was only getting a little over 1 hour per charge. And that was for just everyday tasks, not gaming or editing videos. It’s just more proof that this was designed as a desktop replacement, something you will need a plug for whenever you want to really flex its muscles.
CONCLUSION
For what this is, a gaming PC, it checks a lot of boxes. It’s really difficult coming up with any negatives. The negatives it does have (battery life) is simply to be expected with a laptop with such power. But at the end of the day, it’s a great value for all the features you get and can run almost all (I haven’t tested all games obviously) games at QHD at high refresh rates and on high graphics settings. It’s easy to use and there’s a lot of little things that make the laptop more enjoyable to use.
For what this is, a gaming PC, it checks a lot of boxes. It’s really difficult coming up with any negatives. The negatives it does have (battery life) is simply to be expected with a laptop with such power. But at the end of the day, it’s a great value for all the features you get and can run almost all (I haven’t tested all games obviously) games at QHD at high refresh rates and on high graphics settings. It’s easy to use and there’s a lot of little things that make the laptop more enjoyable to use.
I would recommend this to a friend!


Designed for those who crave superior sound quality and ultimate comfort, the Epic Open Sport seamlessly blends immersive audio with open-air sound. Its innovative design rests comfortably in front of the ear, offering a safer listening experience while allowing you to stay aware of your surroundings. Whether you're conquering intense workouts, navigating busy workdays, or unwinding with your favorite tracks, the Epic Open Sport delivers an audio experience that adapts to your dynamic lifestyle without compromising awareness.
Customer Rating

5
My favorite work out headphones
on June 23, 2025
Posted by: callmeageeth
Admittedly, I primarily worked out with my Google Pixel Buds Pro. They're great earbuds, but I constantly struggle with keeping them in my ears when working out (mainly running). I missed having headphones with ear hooks to be held more secure to my ears. In comes JLab which once again delivers a quality, reasonable priced pair of earbuds specifically tailored to wearing during activities, like working out.
In the box you get the headphones inside the charging case and a short USB charging cable. Getting them up and running is as simple as any Bluetooth headphones nowadays. You will, however, also need to download the JLab app so you can update them and adjust the settings.
In the app you'll be prompted to download firmware, but you can also adjust the EQ settings (something I don't generally do, but I like the option). You can adjust the touch controls and button controls and turn on safe listening to limit the number of dBs.
The design is near perfect in my opinion. The earbuds have a nicely weighted hook that fits securely around your ear, while the speaker sits above your ear. They're open ear, so they don't fit inside your ear canal. This allows you to hear ambient sounds which is important to me when I'm running outside. They will NOT replace your noise cancelling headphones, but trust me, unless you are seeking complete noise isolation, it's not a problem, as it's not as if you can't hear your music or podcast, it gets plenty loud while still retaining the ability to hear nearby noises when you're out and about.
They're sweat and water resistant which is also important to me as I sweat a lot. Now, I will admit I've had a pair of JLabs go bad on me after long periods of sweating, but these appear to have nice shielding (for lack of a better descriptor) around the speaker. As long as you wipe them off after use, they should be perfectly fine.
The charging case charges via USB-C and it's also capable of charging wirelessly. The case gives you about 19 hours of battery while each earbud is rated to give you 7 hours of battery life. Honestly, you shouldn't have any issues with the earbuds dying on you so long as you periodically charge the case and keep the earbuds in there when not in use.
The case itself is relatively small, at least given the shape of the earbuds. It's relatively flat and light. It's made out of what feels like cheap plastic, and I'm not sure how it would fare after multiple drops, but the same can be said for most plastic earbud cases. The hinge opens up completely and the earbuds are easy to take out and put in. Although you will want to make sure you "click:" the earbuds into the case when not in use to ensure proper charging.
I was pretty impressed with the sound quality in light of the fact these are open earbuds and don't have a seal within your ear. The bass is lacking, as one might expect, but it's not as if it's non existent. But the audio is extremely clear, I enjoyed listening to podcasts and the dialogue came out nice and clear. I've made a few phone calls with them and I had no issues on my end, and no one complained about how I sounded. It has noise-canceling microphones which provides for crystal clear calls (and backed up by experience).
The only downside to me were the buttons. I had a hard time using them while working out. It has touch control and buttons. There's a complicated pattern that's pretty easy to memorize when you do it a few times, and while they're advertised as "accurate," I had a hard time getting a response when I was running. (it's easier when you're not moving). But I'm not one to change my audio when I'm running so this was less of a problem for me (I'm more of a pick a playlist and forget it type guy).
CONCLUSION
All-in-all, these are my absolute new favorite headphones for working out and just listening to podcasts around the house. The open design allows me to hear dangerous sounds (when running) and hear people talking to me when I'm in the zone listening to a podcase. It has a terrific sound quality and a great build quality, all at a reasonable price.
All-in-all, these are my absolute new favorite headphones for working out and just listening to podcasts around the house. The open design allows me to hear dangerous sounds (when running) and hear people talking to me when I'm in the zone listening to a podcase. It has a terrific sound quality and a great build quality, all at a reasonable price.
I would recommend this to a friend!


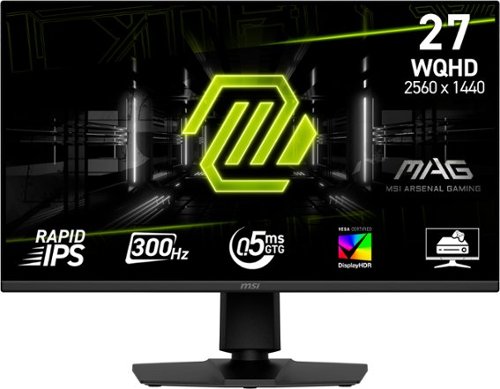
MAG 275QPF X30 design language that conveys ruggedness and toughness, embodying the very essence of the MAG style. For gamers who are determined to dominate their digital battlegrounds, the MAG series is here to stand with you, establishing the ultimate defense.
Customer Rating

5
Chunky bezels with high performance
on June 23, 2025
Posted by: callmeageeth
The MSI MAG is a 27 inch WQHD monitor with 300 hz refresh rate and rapid response time. It’s definitely geared for competitive gamers, or at least those that care about performance.
IN THE BOX
You’ll get the monitor, the stand, HDMI cable, and power cable. Installing the monitor to the stand was relatively simple, but it does require a Phillips screwdriver (no such tool inside the box).
You’ll get the monitor, the stand, HDMI cable, and power cable. Installing the monitor to the stand was relatively simple, but it does require a Phillips screwdriver (no such tool inside the box).
SPECS
You have one DisplayPort and 2 HDMI and a headphone out for your inputs. The HDMI ports are 2.1 so they handle increased bandwidth. This allows for HDR and higher resolutions and higher refresh rates. In short, HDMI 2.1 gets you many of the same features that DisplayPort provides. This is beneficial to me at least, because I game on a laptop that has an HDMI port.
You have one DisplayPort and 2 HDMI and a headphone out for your inputs. The HDMI ports are 2.1 so they handle increased bandwidth. This allows for HDR and higher resolutions and higher refresh rates. In short, HDMI 2.1 gets you many of the same features that DisplayPort provides. This is beneficial to me at least, because I game on a laptop that has an HDMI port.
As is obvious, the screen size is 27 inches, and the resolution is 2560X1440. This is a slight step up from your typical HD resolution and strikes a nice balance between HD and 4K. It takes a serious machine to output in 4K at high resolutions, and the WQHD panel generates a little sharper visuals than HD while allowing more modest machines to push higher textures at higher refresh rates. Although obviously your mileage will vary depending on your machine, I’m only speaking in the most general sense.
The panel is IPS, and it offers G-Sync and FreeSync (Nvidia and AMD’s variable refresh rate technology to minimize screen tearing). The screen is flat and the brightness gets up to 400 nits. It has standard VESA mounting 100 x 100 mm for those that want to attach it to a different arm/mount.
The built in stand has some adjustability which is a really nice feature. The height goes up and down, it has a slight tilt and swivels to the side. The adjustments are easy to make as it slides easily without the use of loosening/tightening any bolts/screws.
DESIGN AND BUILD QUALITY
The design is very pedestrian, which is neither good nor bad. It’s a simple black. The bezels are pretty thick and I wish it had a more sleek look. The stand itself is rather large and imposing and takes up a lot of space. I didn’t feel any creaks or flexing when moving or adjusting it, so I was pretty impressed with the build quality. It’s very sturdy.
The design is very pedestrian, which is neither good nor bad. It’s a simple black. The bezels are pretty thick and I wish it had a more sleek look. The stand itself is rather large and imposing and takes up a lot of space. I didn’t feel any creaks or flexing when moving or adjusting it, so I was pretty impressed with the build quality. It’s very sturdy.
The navigation via the joystick is a little bit cumbersome, at least not intuitive to me at first. But this is a small quirk. You hold the joystick in to turn it on and off, and I’m used to a different pattern with my LG monitor. The menus are fairly complex yet intuitive to navigate (once you figure out how to navigate with the joystick, point is, finding the settings you want is easy as the UI is approachable).
PERFORMANCE
I found the picture quality to be very sharp. While I didn’t perform any color calibration, I found the colors to be vivid for general desktop use, and it looked great while playing Cyberpunk. The panel has a wide color gamut and I thought the colors popped. There’s a little bit of backlight as it is an IPS panel (and not OLED) it was nothing that really stood out. I thought ti has pretty good contrast. The brightness was plenty good for a bright room, although some darker scenes in Cyberpunk were a little washed out - but again, I was playing in the middle of the day in a bright room. At night, it looked great.
I found the picture quality to be very sharp. While I didn’t perform any color calibration, I found the colors to be vivid for general desktop use, and it looked great while playing Cyberpunk. The panel has a wide color gamut and I thought the colors popped. There’s a little bit of backlight as it is an IPS panel (and not OLED) it was nothing that really stood out. I thought ti has pretty good contrast. The brightness was plenty good for a bright room, although some darker scenes in Cyberpunk were a little washed out - but again, I was playing in the middle of the day in a bright room. At night, it looked great.
While I’m generally playing directly in front of the monitor, the viewing angles were superb. The HDR performance was basic, but it definitely helped make the colors pop, especially when watching content.
While I couldn’t quite get my machine to push 300Hz with my laptop, I got to about 200 (I might have gotten it higher but I didn’t want to completely sacrifice image quality). I found gameplay to be super smooth and silky. The high response rate was also on full display as I had little to no ghosting or blur when moving frantically in action sequences in Cyberpunk.
There are additional features such as MSI’s “Smart Crosshair” where you can put an aimdot on your screen. I didn’t like this feature, mostly because I don’t play competitively for a living, but I can certainly see that as a benefit to some. You are essentially able to go into the monitor’s settings and put a crosshair in the middle of your screen.
CONCLUSION
I really like the high refresh rate and the fast response time. The screen is really crisp and I like the full ergonomic stand that you’re able to easily adjust. This is a monitor for those gaming professionals or those that want the best, but you will want to make sure you have a reasonably specced PC to take full advantage of the features. I could have used a smaller base for the stand and I wish it had a USB hub, but those are only small quirks. If you aren’t gaming, this monitor is probably overkill for casual gamers or those focused primarily on office work. But it is reasonably priced for what you get, and can serve as a nice upgrade with anyone still using an HD monitor.
I really like the high refresh rate and the fast response time. The screen is really crisp and I like the full ergonomic stand that you’re able to easily adjust. This is a monitor for those gaming professionals or those that want the best, but you will want to make sure you have a reasonably specced PC to take full advantage of the features. I could have used a smaller base for the stand and I wish it had a USB hub, but those are only small quirks. If you aren’t gaming, this monitor is probably overkill for casual gamers or those focused primarily on office work. But it is reasonably priced for what you get, and can serve as a nice upgrade with anyone still using an HD monitor.
I would recommend this to a friend!


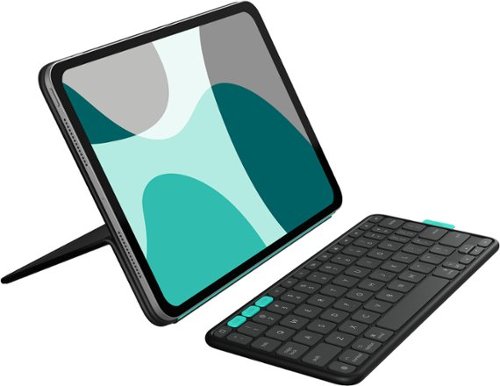
Flip into joy with Flip Folio, the iPad case featuring a stowable keyboard and front and back protection. You can type anywhere, any way you like~or stash the keyboard away and just relax. Find the right angle with adjustable viewing angles, plus portrait and landscape modes for iPad. Dock your iPhone, or connect to your TV for even more options. Now available for iPad Pro and iPad Air.
Customer Rating

4
Unique concept that’s fun to use
on June 20, 2025
Posted by: callmeageeth
I’m a huge fan of Logitech. I think they create quality products and push the mold when it comes to thinking about creative ways to work and protect your devices. The Logi Flip Folio melds several design aspects that we’re all familiar with into one. You have the origami like case that “folds” to make a stand, with a built in Bluetooth keyboard. At the outset, the biggest thing missing is a touchpad, which is offered in other Logi iPad products (Logi touch keyboard). Also, the iPad is “secured” in the case with magnets and there’s not cover to cover protection around the edges, so there is some concern that your iPad could get damaged or scratched if you were to drop it or otherwise mishandle it. And there’s no good solution, IMO, to secure the Apple Pen to your iPad (i.e. there’s no strap or anything like that securing it, it’s simply attached magnetically to the iPad). But all in all, it’s a nice little setup that offers flexibility when propping your iPad up and using a keyboard.
In the box you’ll find the cover/case, as well as a small keyboard. The case is made of sturdy material; it’s very firm. It has a large hinge and there’s a lip for your iPad to rest on when its folded out and it’s in use. I’ll be honest, I thought I was going to break the case when I tried to fold it into a stand. It’s somewhat difficult to manipulate, but the positive is that it’s very sturdy when open. There’s lots of magnets. Your iPad is held in place in the case by magnets. The lid stays shut via magnets, and the keyboard itself attaches to the outside of the case (upside down to protect the keys) via magnets. I found the magnets to be pretty strong. Things would certainly fall out if you dropped it, but when carrying it or placing it in your bag, everything is held together and closed tight with the magnets.
For the most part the case is pretty intuitive to use. But it took a little trial and error to figure out how the folio part of the case folded and held the iPad up. The “lip” that holds the iPad can display the iPad in either portrait or landscape mode which is nice. Functionally speaking, I really had no issues with it.
The keyboard is very compact and takes some adjustment to get used to. But that’s not unexpected and not dissimilar to any other keyboard layout for an iPad. THe keyboard connects to your iPad via Bluetooth. It’s charged by what I’ll call watch batteries (I don’t know how long the batteries are supposed to last). There’s a small power switch on the edge of the keyboard to save battery and prevent accidental input. Connecting to the iPad is dead simple and similar to the pairing of any Bluetooth device; I had no issues in that regard. The keyboard does pair to three different devices at once and you can quickly switch using the keys at the top (this feature is common in most Logitech keyboard, at least the ones I’ve seen). I don’t know how useful it is in this scenario as I’m typically going to only use this keyboard with the iPad (since it’s stored with the iPad and the Folio case) but I always like the flexibility. There are shortcuts on the keyboard to brighten the display, take screenshots, open the search bar and control your media. All very useful shortcuts to have. My only concern, as mentioned earlier, is the lack of a trackpad. I completely understand why it’s not there, and let’s not forget iPads were made for touchscreen, it’s just a bit cumbersome taking your hands off the keyboard to then use your finger on the screen (at least to me). But honestly, I find myself sitting down to type when I need to.
The part I honestly like most about the Folio is that the iPad is attached via magnets and can be easily taken out. Here’s what I mean. Other Logitech keyboard cases wraps the entire iPad in a case. While this offers great protection, it makes the iPad a heavier. When I’m reading (when watching movies, I typically use it on its stand) I like to hold the bare iPad. Here, the iPad easily pops out of the case when it’s open allowing me to grab it and hold it when I want to read. How I end up using it is placing the folio open when I’m using it, typing while it’s on the “lip” in display mode, then I just pick it up and hold the bare iPad when reading.
The biggest downside to this case is the lack of full blown protection and the pencil. As mentioned earlier, the edges of the iPad are exposed in the case. It’s not a big deal if you take good care of it, but if you drop the case with the iPad in it, I can’t imagine it wouldn’t fall out. Also, the pen is exposed. Not in the sense where I”m concerned that it would get damaged, but that it would easily get knocked off the iPad while it’s in your bag or while you’re holding it. I’m not sure what the solution would be with this particular case’s design, but I think having a place to secure your pencil to minimize losing it is a plus. But this issue isn’t limited to this case. (There’s a Spigen case that has a rubber insert to store the pencil).
All in all, this is a good option to get a keyboard and display stand for your iPad that is cheaper than some of the alternatives. I like the design although the keyboard being stored on the outside of the case does result in a pretty bulky case. It offers practical features and has the quality that Logitech is known for. I’ve had absolutely no concerns about the Folio keyboard’s performance.
I would recommend this to a friend!


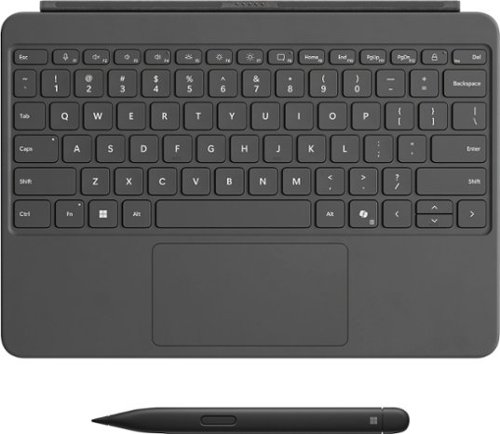
Level up your productivity in a click by easily attaching Surface Pro 12" Keyboard to Surface Pro 12" [1], transforming it into a powerful laptop. Designed by Microsoft, it features a stable and durable design, full size backlit keyboard, a dedicated Copilot key for instant AI access, and dynamic hinge that unlocks new postures. Perfect for your on-the-go lifestyle.
Customer Rating

4
Awesome, but should be included with the Surface
on June 16, 2025
Posted by: callmeageeth
Just getting the obvious out of the way, and that is, this should be included with the Surface (at least the keyboard). But given that will never change, I do appreciate Microsoft bundling the pen and keyboard together.
Pointing out the obvious, but the keyboard attaches to the bottom of your Surface (note, this only works for the new 12 inch model). It’s a strong magnet, you could hold the Surface upside down by the keyboard and it wouldn’t fall. For those who have never used one, it’s plug and play and is that simple to use.
The keyboard is well built and looks sharp. I like the suede back of the keyboard, it feels nice, although I do get concerned about stains and discoloration over time. The top of the keyboard has a rubber feel. It feels nice to the touch. The keyboard is passable, it’s the best 2 in 1 keyboard, but will never (and it doesn’t really try to) replace a mechanical keyboard. The depth is shallow. It has a nice satisfying click to it. I found it very responsive. The biggest drawback for me is the size, I’m just used to a full size keyboard and this feels cramped. Not complaining about it, it’s just something that I have to become accustomed to.
The touchpad’s surface is very responsive to single and multi touch gesture. The clicking of the touchpad feel satisfying as well. I was able to navigate the mousepad with ease using multiple fingers. It’s not something you’ll want to use in your lap, the keyboard is too flimsy IMO. It’s best suited setup flat on a table.
The pen is a nice touch. I’m not creative by trade so I don’t know what I would necessarily use it for, but I like using it for navigating while I’m holding the Surface in my hand. It uses Bluetooth to connect. I’m not sure how long the battery lasts, but it charges in the small charging cradle (more of an indention) on the backside of the Surface. I found a journal app that was seemingly built into Windows to be the most fun option. I found the pen to be highly accurate and responsive.
I find the keyboard to be an absolutely necessary accessory to the Surface. Unlike an iPad, I think the Microsoft and Windows platform demands a keyboard. The keyboard is minimal, looks good and types well given its size and thinness. I like the pen, and it works really well, it just feels gimmicky mostly because I don’t think of a Windows platform to draw and create. Not to mention it has an odd shape and doesn’t carry the heft of an iPad pencil. But kudos for Microsoft for having included it the keyboard. I think the pen can be a fun distraction, there when you need it, and I could see its utility in digitally signing things on the go.
I would recommend this to a friend!


callmeageeth's Review Comments
callmeageeth has not submitted comments on any reviews.
callmeageeth's Questions
callmeageeth has not submitted any questions.
The Lucyd Starman titanium frames weigh just over an ounce, and with their enhanced flexibility will fit most users out of the box. These patent-pending Bluetooth frames offer a unique mix of durable titanium, designer styling, optional vision correction, and smart features. All Lucyd frames include a 7-day moneyback guarantee and 1-year warranty against any defects in frame or lenses.
What are the glasses capable of?
That's a seemingly broad question, but they connect to any Bluetooth source device and can play music through the speakers embedded in the arms of the glasses. The sound is good based on the open speaker design, so the sound will bleed a little bit. But overall, I like them.
4 years, 1 month ago
by
callmeageeth
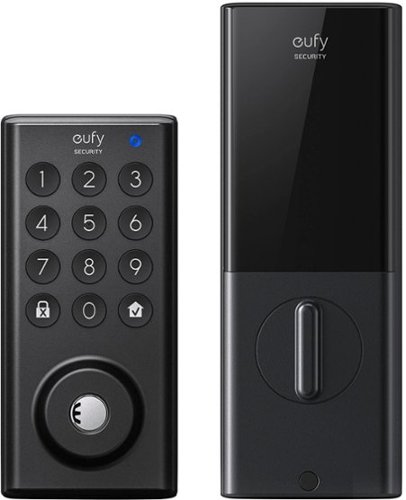
Feel safe and protected with eufySecurity Solo Smart Lock D20. Securely open your front door with built-in Wi-Fi to only let trusted friends and family enter your home when you allow it. And when you are outside your front door, connect with Bluetooth via the eufy Security app, so you don~t need to fumble for your keys. Solo Smart Lock is tough, too, with stainless steel construction that earned it a BMHA certification. Plus, the IPX3 weatherproof rating ensures it can endure wild temperature swings and heavy rain. Give yourself peace of mind with Solo Smart Lock, and you~ll always feel your home is secure.
Does it come with the lever handle? If not, how can one order the handle shown?
No, it does not come with a lever. You're stuck with what you have, or going to a home improvement store to get one.
4 years, 3 months ago
by
callmeageeth
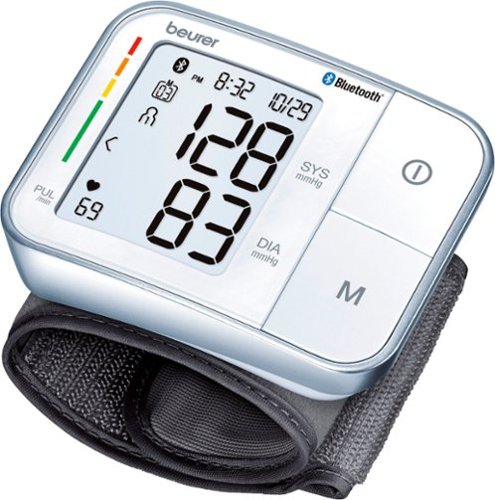
Easily track you and your children~s (pediatric use) well-being with the ability to store up to 60 measurements for up to 2 users. A universal cuff is wearable on any wrist large or small. The Beurer BC57 synchronizes with your smartphone via Bluetooth~ technology so you can see your readings over time and share with your doctor. It also identifies arrythmia and alerts you of any detections.
How do you change the battery?
Underneath the monitor itself, where it attaches to the wristband, there's a cover you can pop open to replace the AAA batteries.
4 years, 4 months ago
by
callmeageeth
Your SWFT journey starts here. Wherever you~re headed, FLEET will get you there with style, safety, and a fresh design that~ll turn heads as you turn corners. Move ahead of the pack with a SWFT e-bike with a detachable, rechargeable battery. Multiple modes allow you to use pedal-assist or your throttle to propel you forward. With a 19.8 mph max speed, you can travel up to 37.2 miles on a single charge of your battery alone. A built-in monitor display indicates your battery output and speed. Let the journey begin.
Do you have to pedal this bike to make it work?
You have to pedal it to get it going, once you turn the pedal maybe twice, the motor kicks in and it will either assist your pedaling or you can use the throttle
4 years, 4 months ago
by
callmeageeth
Your SWFT journey starts here. Wherever you~re headed, FLEET will get you there with style, safety, and a fresh design that~ll turn heads as you turn corners. Move ahead of the pack with a SWFT e-bike with a detachable, rechargeable battery. Multiple modes allow you to use pedal-assist or your throttle to propel you forward. With a 19.8 mph max speed, you can travel up to 37.2 miles on a single charge of your battery alone. A built-in monitor display indicates your battery output and speed. Let the journey begin.
What if I purchase this bike now and and later is cheaper on Black Friday. Do I get the different?
Depending on your membership status, you can get a refund of the difference so long as you're in the return period.
4 years, 4 months ago
by
callmeageeth
GeoBook 120 is a 12.5-inch Windows 10 laptop complete with a 1-year subscription to Microsoft 365 Personal. Powered by an Intel Celeron Dual Core Processor and 4GB RAM, this lightweight laptop makes easy work of essential tasks, browsing and more. 64GB eMMC storage is built in and can be expanded with the addition of a MicroSD card (up to 64GB). GeoBook 120 also features a 2MP webcam, dual microphones and integrated speakers, plus reliable AC Wi-FI.
Can I play Roblox and Minecraft?
My kid has played both on it, and they run just fine.
4 years, 4 months ago
by
callmeageeth
Pixel Buds A-Series bring you rich, high-quality sound for a lot less than you~d expect. Their beamforming mics help make calls crystal clear.*** The flush-to-ear design is stylish, and the stabilizer arc keeps them in place so you can wear them even during the sweatiest workout.**
Does it have Noise Cancellation feature ?
No they do not have active noise cancelling. One of the drawbacks of the Pixel Buds (IMHO) is that they let in a lot of ambient noise, even with a good seal/fit in your ears.
4 years, 7 months ago
by
callmeageeth
Pixel Buds A-Series bring you rich, high-quality sound for a lot less than you~d expect. Their beamforming mics help make calls crystal clear.*** The flush-to-ear design is stylish, and the stabilizer arc keeps them in place so you can wear them even during the sweatiest workout.**
Does Google pixel buds pair with iPhones?
I haven't specifically tried it, but it's my understanding they do, but I do know you'll lose the ability to use/activate the Google Assistant through the Pixel Buds.
4 years, 7 months ago
by
callmeageeth
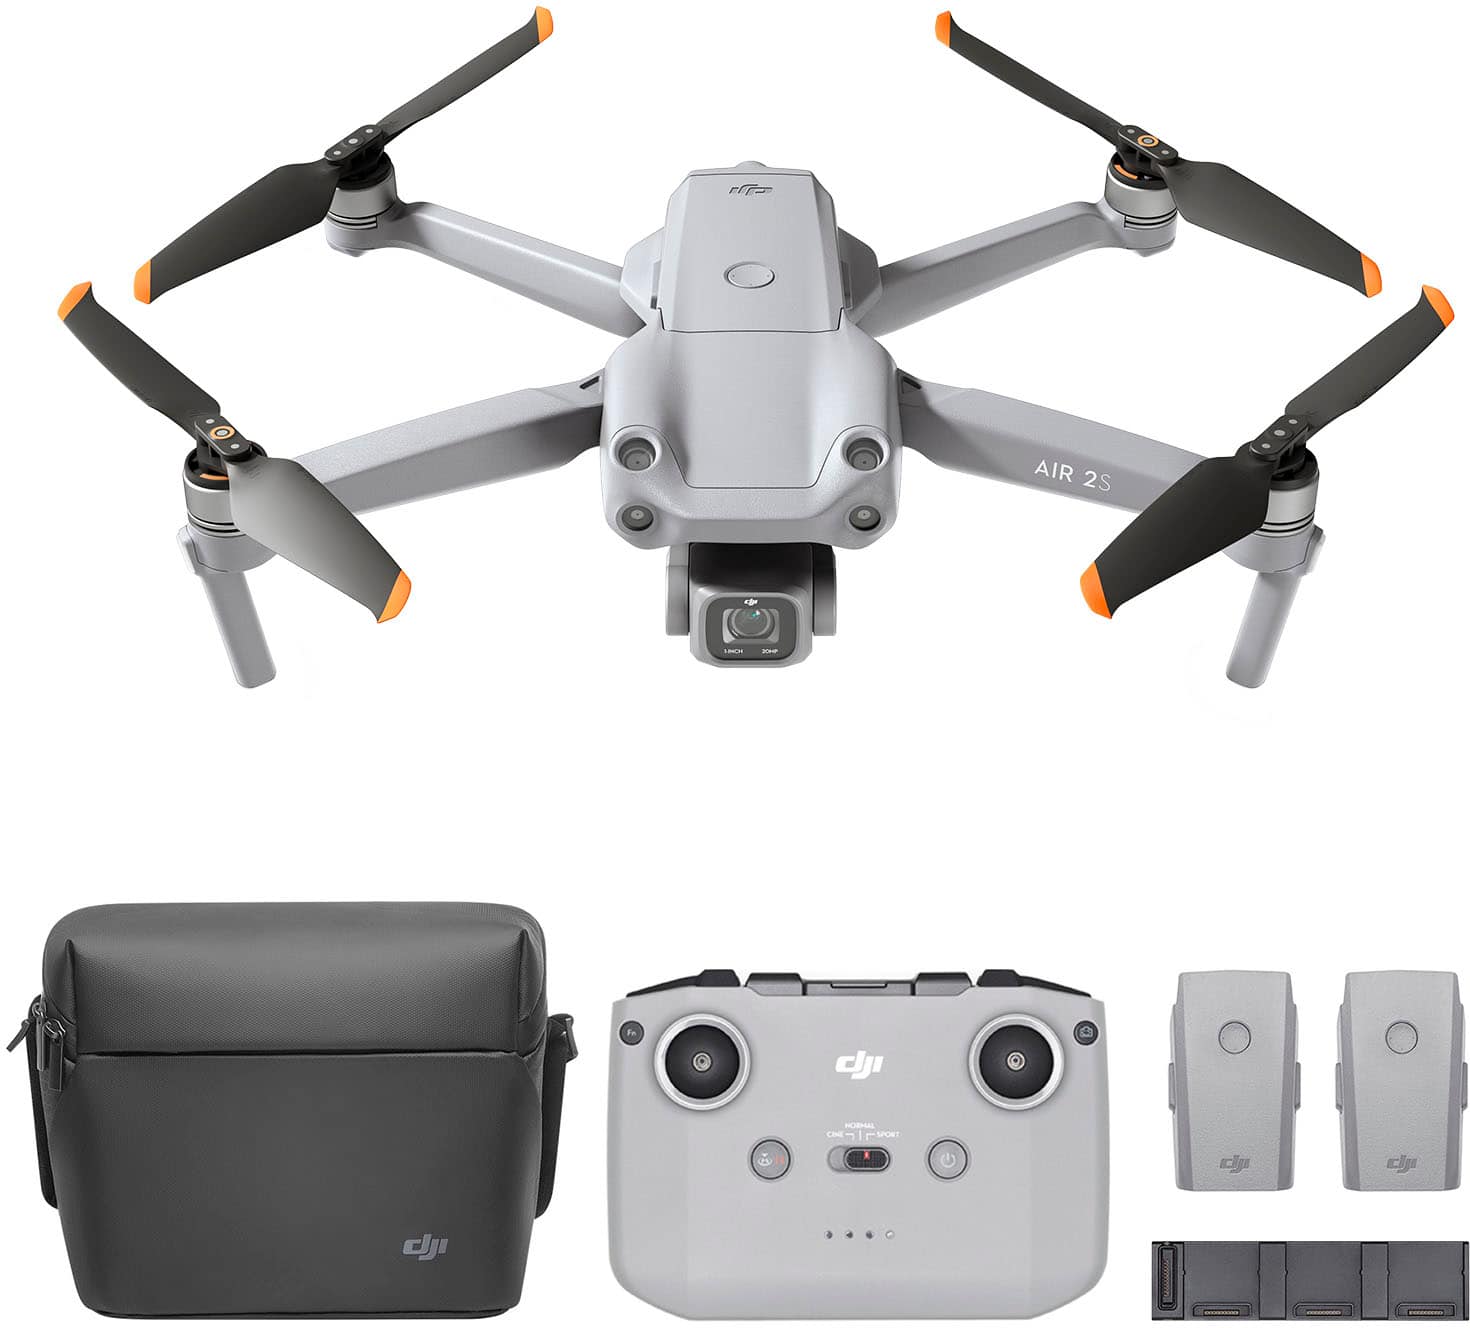
Featuring a 1-inch CMOS sensor, powerful autonomous functions, and a compact body weighing less than 600 g, DJI Air 2S is the ultimate drone for aerial photographers on the move. Take this all-in-one aerial powerhouse along anywhere to experience and record your world in stunning detail.
Can I use my Goggles with the DJI mavic air 2s?
I haven't tested it, because I don't own the goggles, but there's a setting to change the camera to FPV. And according to dronedj.com, it is compatible.
4 years, 8 months ago
by
callmeageeth
Featuring a 1-inch CMOS sensor, powerful autonomous functions, and a compact body weighing less than 600 g, DJI Air 2S is the ultimate drone for aerial photographers on the move. Take this all-in-one aerial powerhouse along anywhere to experience and record your world in stunning detail.
Will Air 2s work with note 20 ultra?
I don't own that phone, but I don't see why not. Biggest concern is size of the phone and whether it fits into the controller. I use a Google Pixel 4 XL and there's still a little more space for the "arms" of the controller to hold the phone. And in terms of the app itself, you'll need to download it straight from the DJI website (which is the same process for all Androids)
4 years, 8 months ago
by
callmeageeth

