callmeageeth's stats
- Review count375
- Helpfulness votes1,298
- First reviewJune 23, 2014
- Last reviewMarch 24, 2026
- Featured reviews0
- Average rating4.4
Reviews comments
- Review comment count0
- Helpfulness votes0
- First review commentNone
- Last review commentNone
- Featured review comments0
Questions
- Question count0
- Helpfulness votes0
- First questionNone
- Last questionNone
- Featured questions0
- Answer count27
- Helpfulness votes50
- First answerOctober 20, 2014
- Last answerDecember 15, 2021
- Featured answers0
- Best answers7
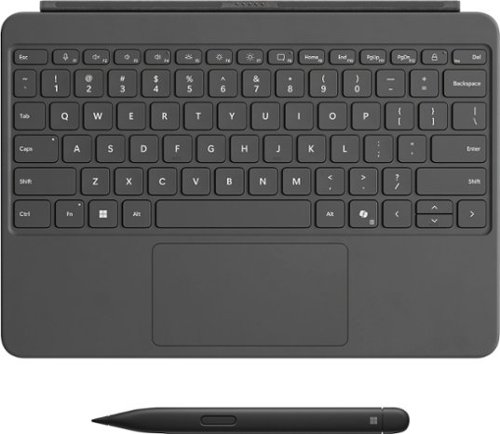
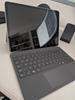
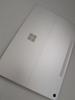
Level up your productivity in a click by easily attaching Surface Pro 12" Keyboard to Surface Pro 12" [1], transforming it into a powerful laptop. Designed by Microsoft, it features a stable and durable design, full size backlit keyboard, a dedicated Copilot key for instant AI access, and dynamic hinge that unlocks new postures. Perfect for your on-the-go lifestyle.
Customer Rating

4
Awesome, but should be included with the Surface
on June 16, 2025
Posted by: callmeageeth
Just getting the obvious out of the way, and that is, this should be included with the Surface (at least the keyboard). But given that will never change, I do appreciate Microsoft bundling the pen and keyboard together.
Pointing out the obvious, but the keyboard attaches to the bottom of your Surface (note, this only works for the new 12 inch model). It’s a strong magnet, you could hold the Surface upside down by the keyboard and it wouldn’t fall. For those who have never used one, it’s plug and play and is that simple to use.
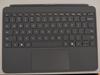
The keyboard is well built and looks sharp. I like the suede back of the keyboard, it feels nice, although I do get concerned about stains and discoloration over time. The top of the keyboard has a rubber feel. It feels nice to the touch. The keyboard is passable, it’s the best 2 in 1 keyboard, but will never (and it doesn’t really try to) replace a mechanical keyboard. The depth is shallow. It has a nice satisfying click to it. I found it very responsive. The biggest drawback for me is the size, I’m just used to a full size keyboard and this feels cramped. Not complaining about it, it’s just something that I have to become accustomed to.
The touchpad’s surface is very responsive to single and multi touch gesture. The clicking of the touchpad feel satisfying as well. I was able to navigate the mousepad with ease using multiple fingers. It’s not something you’ll want to use in your lap, the keyboard is too flimsy IMO. It’s best suited setup flat on a table.
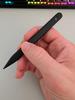
The pen is a nice touch. I’m not creative by trade so I don’t know what I would necessarily use it for, but I like using it for navigating while I’m holding the Surface in my hand. It uses Bluetooth to connect. I’m not sure how long the battery lasts, but it charges in the small charging cradle (more of an indention) on the backside of the Surface. I found a journal app that was seemingly built into Windows to be the most fun option. I found the pen to be highly accurate and responsive.
I find the keyboard to be an absolutely necessary accessory to the Surface. Unlike an iPad, I think the Microsoft and Windows platform demands a keyboard. The keyboard is minimal, looks good and types well given its size and thinness. I like the pen, and it works really well, it just feels gimmicky mostly because I don’t think of a Windows platform to draw and create. Not to mention it has an odd shape and doesn’t carry the heft of an iPad pencil. But kudos for Microsoft for having included it the keyboard. I think the pen can be a fun distraction, there when you need it, and I could see its utility in digitally signing things on the go.
I would recommend this to a friend!


Share this review:
0points
0of 0voted this as helpful.
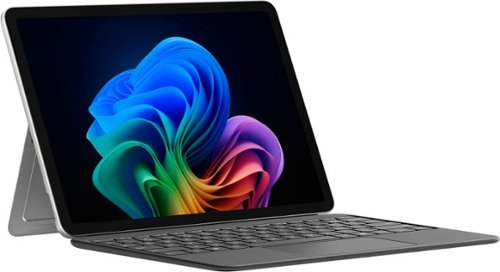
Get the flexibility you want and the performance you need with Surface Pro 12~, a Copilot+ PC and the most versatile Surface~designed for creativity, efficiency, and mobility. Use it as a powerful tablet with an intuitive touchscreen, touch, voice, and Surface Slim Pen [3] to bring ideas to life, or attach the Surface Pro 12~ Keyboard for a full Windows laptop experience [3]. With built~in AI features, seamless integration across the Windows ecosystem, and an ultra~thin, lightweight design, Surface Pro gives you the freedom to work, create, and go beyond what you thought possible.
Customer Rating
4
Beautiful and compact device
on June 16, 2025
Posted by: callmeageeth
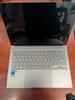
As someone who’s accustomed to Windows, I’ve always been a big fan of the Surface line of devices. They’re sharp looking and functional. Not to mention the size. It’s essentially an iPad but in Windows form. While this is a terrific all around device, it’s still not without its shortcomings, which have plagued the Surface line for a while. If you desire a light and flexible Windows laptop, this should be towards the top of your list.
IN THE BOX
The first drawback, going back to the original Surface, is the fact that the keyboard isn’t included. It’s just a fact. While the Surface line has gotten somewhat “cheaper” over the years, it’s always misleading when you factor in the lack of accessories. Even worse, you no longer get a charger anymore. In the box is simple the Surface and a USB-C cable. Now, granted, the Surface could arguably get a pass given that 27W chargers (which most of us will have with our smart phones) can charge the device, it still stings a little bit when buying an $800 computer to not have a charger.
The first drawback, going back to the original Surface, is the fact that the keyboard isn’t included. It’s just a fact. While the Surface line has gotten somewhat “cheaper” over the years, it’s always misleading when you factor in the lack of accessories. Even worse, you no longer get a charger anymore. In the box is simple the Surface and a USB-C cable. Now, granted, the Surface could arguably get a pass given that 27W chargers (which most of us will have with our smart phones) can charge the device, it still stings a little bit when buying an $800 computer to not have a charger.
SETUP
Setup is similar to any Windows computer and your experience can vary depending on a number of factors. A straight new install (i.e. not backing up from old computers) can be pretty quick, but expect it to take some time. It took me about 2 hours to get up and running after taking into account the large Windows update out of the box.
Setup is similar to any Windows computer and your experience can vary depending on a number of factors. A straight new install (i.e. not backing up from old computers) can be pretty quick, but expect it to take some time. It took me about 2 hours to get up and running after taking into account the large Windows update out of the box.
SPECS
Here, you’re getting a 12” super sharp display, 256 or 512GB of storage, Qualcomm Adreno GPU, and an 8 core Snapdragon X Plus chip. As with most new Windows laptops, has a dedicated neural processing unit which is a specialized chip to accelerate AI tasks, taking them away from the CPU and GPU. This allows it to process AI tasks on the device, rather than relying entirely on cloud processing. For everyday tasks, it’s superlative. The Snapdragon X chip allows the device to run cooler and extend battery life when (generally speaking) compared to Intel chips. But you are sacrificing some features - namely compatibility - but more on that below.
Here, you’re getting a 12” super sharp display, 256 or 512GB of storage, Qualcomm Adreno GPU, and an 8 core Snapdragon X Plus chip. As with most new Windows laptops, has a dedicated neural processing unit which is a specialized chip to accelerate AI tasks, taking them away from the CPU and GPU. This allows it to process AI tasks on the device, rather than relying entirely on cloud processing. For everyday tasks, it’s superlative. The Snapdragon X chip allows the device to run cooler and extend battery life when (generally speaking) compared to Intel chips. But you are sacrificing some features - namely compatibility - but more on that below.
While AI features are getting pushed in all our devices, individual mileage will vary depending on your use of AI features. The most obvious one is the built in Copilot function. The free version allows for conversational AI and image creation. You’ll have to pay a monthly fee to get Copilot integration with 365 apps, as well as the latest AI models for conversations.
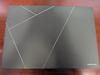
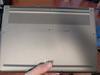
DESIGN
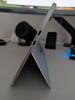
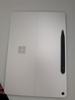
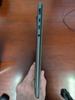
I’ve always been a fan of the Surface line. Like Macs, I think they’re beautiful and elegant products and scream premium. The Surface 12 inch continues that trend and just looks absolutely great. The big design change, if you can call it that, is the recessed pen storage area on the back. I admit I was a little concerned about that because I thought the pen would come off easily, but the magnets are really strong.
I’ve always been a fan of the Surface line. Like Macs, I think they’re beautiful and elegant products and scream premium. The Surface 12 inch continues that trend and just looks absolutely great. The big design change, if you can call it that, is the recessed pen storage area on the back. I admit I was a little concerned about that because I thought the pen would come off easily, but the magnets are really strong.
The hinge is really stiff and the same time, easily movable. It has 160 degree movement on the hinge almost allows it to go from straight up to lying flat. It’s smooth and durable.
FEATURES
As stated earlier, one of the drawbacks of the Surface is the need to purchase what I believe to be, necessary accessories. The drawback is simply the price on the Surface itself isn’t the total that you will be paying. But putting that aside, you really need to invest in the Surface keyboard and slim pen to really get the most out of your Surface. I have both, and will be referencing them because I think that’s the best way to highlight the Surface’s features overall.
As stated earlier, one of the drawbacks of the Surface is the need to purchase what I believe to be, necessary accessories. The drawback is simply the price on the Surface itself isn’t the total that you will be paying. But putting that aside, you really need to invest in the Surface keyboard and slim pen to really get the most out of your Surface. I have both, and will be referencing them because I think that’s the best way to highlight the Surface’s features overall.
The Copilot+ PC is Microsoft’s big push towards everywhere AI and that’s really the star of this Surface (to be clear, it’s not limited to Surface devices). But the Surface has a dedicated neural processing unit that allows the computer to process AI on the device itself, rather than in the cloud. A few things that stick out - again, these are available on any Copilot + PC - is recall, cocreator and copilot. Recall is a somewhat controversial feature whereby your PC takes screenshots of your computer and allows you to conduct a search as to what you might have been doing or what was visible on your screen. This feature is a gamechanger for me, I use it to search through old communications whether it be letters or emails. I use it as a search function across my entire device. Cocreator is hit and miss, but allows you to create images with image prompts. It’s cool, but the novelty wears off quickly. There’s also Windows Studio Effects that allows enhanced video chat quality and filters. But this is all subjective and depends on how often you’re on video calls and whether you have a dedicated setup.
It has two USB-C 3.2 ports (with USB4/Thunderbolt support). Either port can handle charging, data transfer, and display port for connecting up to two 4K monitors. It utilizes Wi-Fi 7 (which I guess is future proofing, I don’t have WI-Fi 7) and Bluetooth 5.4.
The big feature for me is battery life and the touchscreen. The battery life is phenomenal, in no small part because of the Snapdragon chip. I use this much like an iPad, where I just hit the power button to put it to sleep and then wake it up when I need it. It just always seems to hold a charge. The touchscreen is terrific and very responsive. It’s even better with the sold separately slim pen. I very much enjoyed writing and drawing on the screen with the slim pen, even though I’m not a creative type by profession. While the novelty wore off a little bit, I do enjoy writing and drawing with the pen when I’m just sitting on the couch and reading the news, surfing the web. It’s a fun way of input.
DOWNSIDES
The big downside is also the Surface’s biggest strength and that’s the Snapdragon processor. While it brings a lot of positives, including snappy performance and very long battery life, you sacrifice a lot of compatibility. Old drivers (mostly printers at my office) are tricky and won’t work, and some software we use at my office isn’t compatible with the Arm architecture. Luckily, there seems to be a concerted effort to expand the Arm ecosystem so hopefully this becomes an absolute non issue.
The big downside is also the Surface’s biggest strength and that’s the Snapdragon processor. While it brings a lot of positives, including snappy performance and very long battery life, you sacrifice a lot of compatibility. Old drivers (mostly printers at my office) are tricky and won’t work, and some software we use at my office isn’t compatible with the Arm architecture. Luckily, there seems to be a concerted effort to expand the Arm ecosystem so hopefully this becomes an absolute non issue.
As I’ve said earlier, one of the biggest complaints is that the keyboard and pen are sold separately. I’ll also say, the AI features aren’t unique to the Surface, so the only real selling point is the Surface hardware and form factor.
CONCLUSION
The Surface line continues to shine. This is an extremely portable, great looking piece of hardware that will go for several workdays. It’s a capable performer, and will tackle 90% of all tasks the average person might throw at it, with ease. It’s just a shame the keyboard, pen, and a charging brick wasn’t included.
The Surface line continues to shine. This is an extremely portable, great looking piece of hardware that will go for several workdays. It’s a capable performer, and will tackle 90% of all tasks the average person might throw at it, with ease. It’s just a shame the keyboard, pen, and a charging brick wasn’t included.
I would recommend this to a friend!

Share this review:
+2points
2of 2voted this as helpful.
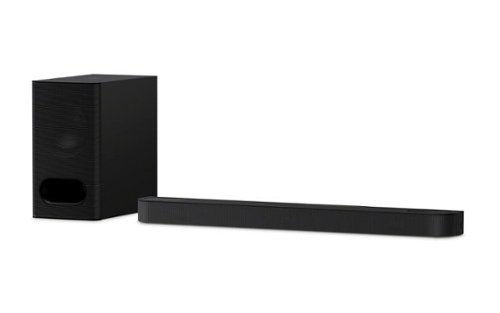
Discover 3.1.2ch spatial sound with the BRAVIA Theater Bar 6. Up-firing speakers, a dedicated center channel speaker, and support for Dolby Atmos and DTS:X will surround you with expansive sound and clear dialogue. The included subwoofer adds deep, powerful bass, letting you feel the rumble in every scene.
Customer Rating

5
Truly exceptional sound quality
on June 15, 2025
Posted by: callmeageeth
I have to admit I’m in love with the Sony Bravia Theater Bar 6. I upgraded from an aging, but still good, Samsung soundbar that was nearing 8 years old. While I was satisfied with the Samsung soundbar, the Sony Bravia Theater 6 quite frankly blew my socks off and made me wonder what I was missing. While it will never - nor will any soundbar - equal a dedicated, multi-speaker setup, this gets pretty darn close. And the ease of installation is just the icing on the cake.
IN THE BOX
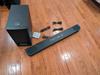
Inside you’ll find the soundbar, the subwoofer, two power cables (one for each, they’re interchangeable), a HDMI cable (thank you Sony for continuing to provide essentials), a remote, and some footers that allows you to put the soundbar on the TV stand (mine’s on the wall, so I didn’t pay much attention to that).
Inside you’ll find the soundbar, the subwoofer, two power cables (one for each, they’re interchangeable), a HDMI cable (thank you Sony for continuing to provide essentials), a remote, and some footers that allows you to put the soundbar on the TV stand (mine’s on the wall, so I didn’t pay much attention to that).
I found the soundbar to be quite compact, light and small. But I’m comparing it to my old Samsung soundbar that a tiny subwoofer built into it (it was as as long as a 65 inch TV and pretty heavy).
SETUP AND INSTALLATION
It’s simple. You plug in the power cord to both the subwoofer, and then for the soundbar, and then you plug the HDMI cable into the soundbar and into the TV. IMPORTANT TO NOTE, you must have a TV with eARC HDMI port. Otherwise, it will not work. Granted, most new TVs have it, so it shouldn’t be a problem, but something to look into before dropping a lot of money on this soundbar and subwoofer.
It’s simple. You plug in the power cord to both the subwoofer, and then for the soundbar, and then you plug the HDMI cable into the soundbar and into the TV. IMPORTANT TO NOTE, you must have a TV with eARC HDMI port. Otherwise, it will not work. Granted, most new TVs have it, so it shouldn’t be a problem, but something to look into before dropping a lot of money on this soundbar and subwoofer.
At that point you’ll want to download the Bravia app (although I’m not 100% certain it’s required, but that was the instructions on the box). When you open the Bravia app, you’ll turn on some permissions and then your phone will find the soundbar and subwoofer and make sure the HDMI is working and the sub is paired. It took just a few moments. Then you’re asked some questions about placement of the subwoofer and soundbar (i.e. when sitting, are you less than 5 feet away or further?). The app allows you to control the volume and the bass level, but little else. It’s where you would change the input to Bluetooth (to stream music from your phone). Which is a little annoying, I would have preferred a button or something like that on the device itself.
But after that was all done, my soundbar was rocking. I use a Google TV plugged into one of the HDMI ports in my TV and I use that Google remote to control my TV’s power and volume. Everything worked flawlessly. I was stoked at how easy it was, and I hope everyone else would have the same experience (candidly, I’ve had issues with other soundbars and eARC inputs on my TV. But I will admit the TV I was plugging this soundbar into is a Sony TV, however, it’s about 10 years old).
SOUND QUALITY
What immediately struck me was the clarity of dialogue in TV shows and movies. I didn’t really have a hard time hearing it with my prior soundbar, but it was just so much more clear. It works especially well in complex sound environments, where the dialogue comes out crystal clear even when there’s a lot of other ambient sounds going on at the same time. I will note that if you have a newer Bravia Sony TV, you can utilize Acoustic Center Sync, whereby the TV’s speakers act as a center channel to enhance dialogue. But my Sony TV was too old to test that out.
What immediately struck me was the clarity of dialogue in TV shows and movies. I didn’t really have a hard time hearing it with my prior soundbar, but it was just so much more clear. It works especially well in complex sound environments, where the dialogue comes out crystal clear even when there’s a lot of other ambient sounds going on at the same time. I will note that if you have a newer Bravia Sony TV, you can utilize Acoustic Center Sync, whereby the TV’s speakers act as a center channel to enhance dialogue. But my Sony TV was too old to test that out.
Obviously the star of the show is Dolby Atmos and the simulated surround. Again, as I said earlier, NO sound bar will replace a dedicated 5.1 or 7.1 setup. But so long as you have minimal obstructions in your room, this soundbar does a great job at firing sounds off walls and ceilings to simulate surround sound. You won’t be spooked into hearing footsteps behind you, but the effects are nonetheless impressive. It’s not pinpoint accurate, but you definitely get the feeling of sound “around you.”
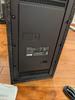
The bass is very robust. I love that the speaker is wireless, and I found it very satisfying in heavy action sequences- especially explosions. The subwoofer combined with the simulated surround really enhances the viewing experience.
Playing music was great, I like playing loud music when my family’s not home and this setup can rock the house. It provides a very balanced profile and nothing I played was distorted in any way. It’s more than adequate.
MISC.
There are some sound modes that you can adjust within the app. But it’s very minimal, such as music, movies, or night voice. The night voice made things a little softer so as not to shake and rattle your whole house while the kids were asleep. But it was too much of a pain to open the app so I prefer to do what us parents always do at night, and that’s simply turn the volume down a little bit at night.
There are some sound modes that you can adjust within the app. But it’s very minimal, such as music, movies, or night voice. The night voice made things a little softer so as not to shake and rattle your whole house while the kids were asleep. But it was too much of a pain to open the app so I prefer to do what us parents always do at night, and that’s simply turn the volume down a little bit at night.
CONCLUSION
This is expensive and may not be worth it if you already have a soundbar, but if you are just listening to your TV speakers, this is a must have upgrade. You can get really good surround sound quality audio with simple setup. While it works best with Sony Bravia TVs, you should still give it a look even if you own a different brand TV. The Atmos technology in soundbars is no joke and will vastly increase your listening and entertainment experience.
This is expensive and may not be worth it if you already have a soundbar, but if you are just listening to your TV speakers, this is a must have upgrade. You can get really good surround sound quality audio with simple setup. While it works best with Sony Bravia TVs, you should still give it a look even if you own a different brand TV. The Atmos technology in soundbars is no joke and will vastly increase your listening and entertainment experience.
I would recommend this to a friend!


Share this review:
+2points
2of 2voted this as helpful.

The new Zenbook S 14 harmoniously blends craftsmanship and performance, featuring an impossibly thin 0.47-inch profile made from Ceraluminum. Immerse your senses in a breathtaking 14-inch 3K OLED Lumina touchscreen and experience multi-dimensional, high-fidelity sound from a four speakers tuned by Harman/Kardon. Optimized for productivity, the S 14 is powered by an all-new, supercharged Intel Core Ultra 7 Series 2 processor with an Intel AI Boost NPU up to 47 TOPS that speeds up local AI processes, while a quick-access Copilot AI Assistant key streamlines your workflow. Powerful yet light, keep it portable with an all-day 72Wh battery.
Customer Rating
5
Great looks and stellar performance
on May 19, 2025
Posted by: callmeageeth
I’ve become a big fan of ASUS over the years, and the 2025 Zenbook continues that trend. The Zenbook S 14 is a beautiful looking laptop that can handle most any task. While it lacks a dedicated laptop GPU for gaming, it more than makes up for it with killer battery life and efficiencies. If you’re looking for a light, powerful, and long-lasting non-Apple laptop this should be at the top of your list.
IN THE BOX AND SETUP
The packaging is de minimis. You only get a 65 W charger and the laptop. If you’ve set up a Windows computer before, the setup is familiar (which can be a little tedious). All in all, I ran into no issues on that front.
The packaging is de minimis. You only get a 65 W charger and the laptop. If you’ve set up a Windows computer before, the setup is familiar (which can be a little tedious). All in all, I ran into no issues on that front.
DESIGN
This laptop is made of ceramic, at least according to the packaging. It’s a striking steel metal gray like color. I much prefer it over a standard black laptop and it skips the colorful lighting that can be found in many gaming laptops. It is very elegant. I’m a big fan. The ceramic coating also prevents smudges and palm prints. Granted, I haven’t had the laptop that long, but I have yet to see any smudges. The top of the laptop lid has metal bars going across that looks futuristic and abstract. Again, I’m a big fan. It’s also extremely thin and light. Now, the rubber feet at the bottom do increase the width at its widest point, but they do a great job of keeping the laptop rooted on your table/desk.
This laptop is made of ceramic, at least according to the packaging. It’s a striking steel metal gray like color. I much prefer it over a standard black laptop and it skips the colorful lighting that can be found in many gaming laptops. It is very elegant. I’m a big fan. The ceramic coating also prevents smudges and palm prints. Granted, I haven’t had the laptop that long, but I have yet to see any smudges. The top of the laptop lid has metal bars going across that looks futuristic and abstract. Again, I’m a big fan. It’s also extremely thin and light. Now, the rubber feet at the bottom do increase the width at its widest point, but they do a great job of keeping the laptop rooted on your table/desk.
There’s not that many ports, just two USB-C, HDMI, headphone jack, and a standard USB-A (the rectangle one we’re all used to). I really appreciate the USB-A port as we all have old thumb drives and accessories that still use it.
The keyboard is satisfying for a laptop. There’s short travel with the keys, but that’s to be expected with such a thin laptop. I had no issues typing and quite enjoyed it. The keyboard is spacious for a 14 inch laptop. No complaints there.
The trackpad is plenty big and it’s very responsive, with a satisfying click. It also has some hidden functionality, you can adjust the volume of the speakers and screen brightness by sliding your finger along the edges. It’s a nice touch.
SPECS
This baby is rocking an Intel Arc GPU. I honestly don’t know a lot about it, but it is more than capable for handling everyday tasks (which in my mind, includes everything but video editing and gaming). You get an Intel Core Ultra 7 CPU, which is wicked fast, especially with 32 GB of RAM. This is a beast that does everything lighting quick. From cold boot up to surfing the web, it takes all of a few seconds. It has Wi-Fi 7 to handle the fastest internet speeds. But the true star of the show, the real reason to consider this laptop over a sea of other (capable) thin ultrabooks is the screen. The 3K OLED screen with refresh rate up to 120 HZ is absolutely stunning. Seriously, OLED screens are just better, and this is no exception. Colors are bright and sharp and the blacks are inky. Watching content is a joy.
This baby is rocking an Intel Arc GPU. I honestly don’t know a lot about it, but it is more than capable for handling everyday tasks (which in my mind, includes everything but video editing and gaming). You get an Intel Core Ultra 7 CPU, which is wicked fast, especially with 32 GB of RAM. This is a beast that does everything lighting quick. From cold boot up to surfing the web, it takes all of a few seconds. It has Wi-Fi 7 to handle the fastest internet speeds. But the true star of the show, the real reason to consider this laptop over a sea of other (capable) thin ultrabooks is the screen. The 3K OLED screen with refresh rate up to 120 HZ is absolutely stunning. Seriously, OLED screens are just better, and this is no exception. Colors are bright and sharp and the blacks are inky. Watching content is a joy.
Finally, I’d be remiss not to mention another high point of this laptop and that’s the battery. I’ve been using an ASUS gaming laptop for my daily driver. I have no complaints but for the battery, Here, this laptop is lasting a full week and more. And I don’t always shut it down. It has fast charging with 65 W charger, so charging is a breeze. Point is, the battery can last longer than you can in one work day, and charging takes no time. Honestly, between the battery life and screen, I can highly recommend this laptop.
It comes with a fancy array of microphones for video conferencing as well as a HD webcam.While I prefer a more professional setup, the equipment built in was more than adequate.
PERFORMANCE AND AI
It’s tough to talk about a laptop’s performance and comparing it to other without mentioning “benchmarks.” To me, what matters is real world performance. As I mentioned earlier, this laptop is appropriately specced to handle any tasks, including AI. Multiple windows, and programs open at the same time don’t seem to slow it down.
It’s tough to talk about a laptop’s performance and comparing it to other without mentioning “benchmarks.” To me, what matters is real world performance. As I mentioned earlier, this laptop is appropriately specced to handle any tasks, including AI. Multiple windows, and programs open at the same time don’t seem to slow it down.
I use AI on occasion, but haven’t really fully incorporated into my workflows, so I might not be the best person to talk about it, but I have been using CoPilot along with the new Microsoft Recall feature, both of which incorporate AI and I have been impressed with the processing speed - or at least the responsiveness. I can’t say for certain how that performance is specifically tied into the laptop, but all that matters is that it works and works well.
Honestly, watching TVs and movies on this screen is a treat. While I use this for work and don’t typically use it after my work day, I can definitely see the appeal of using this for both work and pleasure.
The speakers are good not great. For a 14 inch computer, I’m very pleased. But it’s not something you’re going to fill the room with.
I haven’t installed any games on this computer to test out its gaming chops, primarily because that’s not what it’s intended to handle.
SOFTWARE AND QUIRKS
There is minimal bloatware, and you can still delete what you don’t want. There were a few preinstalled ASUS apps that I quickly deleted. I didn’t find the amount of software offensive. In fact, the MyAsus program is actually a great tool to help refine your computer experience and tweak your settings. For example, I went there to change the keyboard backlight settings, and fan performance.
There is minimal bloatware, and you can still delete what you don’t want. There were a few preinstalled ASUS apps that I quickly deleted. I didn’t find the amount of software offensive. In fact, the MyAsus program is actually a great tool to help refine your computer experience and tweak your settings. For example, I went there to change the keyboard backlight settings, and fan performance.
I will just add as a minor quip, that I had some difficulties getting the settings just right. When using a new laptop, the settings are different than what you’re used to, and I seemed to have a more difficult time finding how to change the settings I wanted to. Some of this is user error (maybe you know how to navigate those settings better than me) while other times it seemed more difficult than it should have been. It’s not necessarily the computer’s fault, it’s more Windows, but at the same time, some of the issues were in the ASUS app. Bottomline is, it took me a little time to get the computer tailored to my needs.
CONCLUSION
If you’re looking for a durable, sharp looking laptop that is lightweight and can handle most any task at lightning speed, look no further than this ASUS Zenbook. I’ve been really impressed with the build quality as well as the performance. Battery life and the screen alone are reasons to get this laptop. I’ve had zero complaints and have been really impressed with it.
If you’re looking for a durable, sharp looking laptop that is lightweight and can handle most any task at lightning speed, look no further than this ASUS Zenbook. I’ve been really impressed with the build quality as well as the performance. Battery life and the screen alone are reasons to get this laptop. I’ve had zero complaints and have been really impressed with it.
I would recommend this to a friend!
Share this review:
+3points
3of 3voted this as helpful.
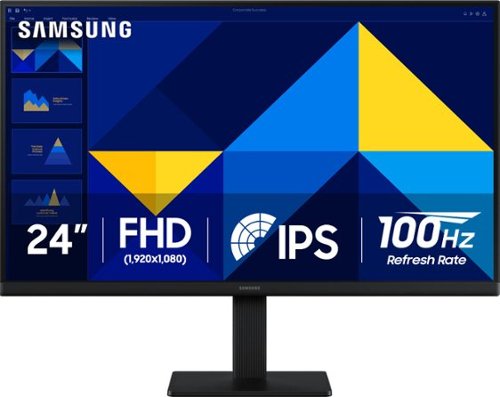
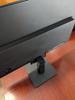
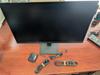
Samsung~s 24" S3 Monitor enables smooth performance, heightened productivity, and greater comfort. The IPS Panel delivers a stunning color experience across the entire display with less color washing, offering clarity from any viewpoint so tones stay consistent and accurate. The 100Hz refresh rate reduces lag and motion blur while playing games, watching videos, or working. Game Picture Mode with optimizable game settings enables instant adjustment of color and image contrast. Eye Saver Mode protects vision, reduces blue light and screen flicker, and extends comfort even during long sessions. The ergonomic super-slim design is a stylish addition to any environment, while ultra-thin border bezels make the most of screen space. Multiple connectivity enables devices to be plugged straight into the monitor for increased flexibility.
Customer Rating
5
Basic, no frills monitor
on April 11, 2025
Posted by: callmeageeth
If you need a quality monitor for basic tasks, or for work, this Samsung S3 model is a great option I’d recommend. While it’s certainly a serviceable gaming monitor, there are better monitors out there to fill your needs.
GETTING STARTED
Like most monitors, you’ll need to install the stand to attach the monitor (or use the screw holes in the back to mount it). There is no mounting hardware. There is no tiny screwdriver either to help you screw the base stand to the monitor. Inside the box is the monitor, two pieces of the stand, a power cord, an HDMI cord, and an instruction manual.
Like most monitors, you’ll need to install the stand to attach the monitor (or use the screw holes in the back to mount it). There is no mounting hardware. There is no tiny screwdriver either to help you screw the base stand to the monitor. Inside the box is the monitor, two pieces of the stand, a power cord, an HDMI cord, and an instruction manual.
The manual clearly lays out how to install the base stand, but honestly, it’s dead simple as there’s really only one way to do it. After that, you simply plug in the power cable and the HDMI cable and you’re off and running.
DESIGN
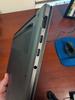
The design is boring, yet at the same time elegant. There are minimal bezels, so the 24 inches of the screen extends all the way to the monitor’s edges. It’s black plastic, which makes it extremely light and thin (other than some metal to weigh the monitor down inside the base stand). It’s distraction free. At its thinnest point, it gets close to OLED thin, which is quite impressive. But I doubt this was designed to “stick out.”
The design is boring, yet at the same time elegant. There are minimal bezels, so the 24 inches of the screen extends all the way to the monitor’s edges. It’s black plastic, which makes it extremely light and thin (other than some metal to weigh the monitor down inside the base stand). It’s distraction free. At its thinnest point, it gets close to OLED thin, which is quite impressive. But I doubt this was designed to “stick out.”
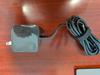
I will add I was very pleased with the small size of the power brick. I very much dislike large power bricks for any device and appreciate Samsung creating such a small one. My guess is the power brick exists to make the monitor smaller/lighter, but this one is small.
SPECS
It’s 1080p LED with 100hz refresh rate. For most tasks and things the average person does on a computer it’s more than adequate. There’s no RGB lights, no syncing with GPUs, and the refresh rate is nothing to write home about. Again, this is your basic working, productivity device.
It’s 1080p LED with 100hz refresh rate. For most tasks and things the average person does on a computer it’s more than adequate. There’s no RGB lights, no syncing with GPUs, and the refresh rate is nothing to write home about. Again, this is your basic working, productivity device.
It only has one HDMI port. I don’t need more than one, but I would have preferred DisplayPort (although I can’t really articulate why, as my GPU has HDMI port in addition to DisplayPort). But it works out well when using my laptop which uses HDMI. It does have a VGA cable, which seems odd to me, but I guess that’s for legacy devices.
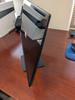
The biggest downside to me is the limited movement adjustments the base allows of you. I had hoped to convert this to portrait landscape as a secondary monitor, but that plan was foiled. It’s landscape only (absent some sort of “arm” to attach to the mounting holes in the back). And it only tilts up and down. It has a surprising amount of range in that regard. And it also, oddly, swivels a hair left and right (as if you could rotate it to portrait mode) but that’s not the case.
PERFORMANCE
The colors are plenty vibrant and accurate, so no worries there, it’s a Samsung display after all.
If you’ve ever had the benefit of using a computer with a high refresh rate, it’s pretty cool. It makes everything look and run smoother. It’s hard going back to 60hz. The 100hz is a happy medium, a little better than “normal” monitors but not quite as nice as some newer laptops for example which pump out really high refresh rates. Watching videos was OK, but not something I’d personally do as my laptop (13 inch) has a higher resolution screen and it’s clearly not as good as my 4K TV. But it’s serviceable. Same goes for gaming. The gaming performance was good. I noticed little to no “tearing” of the visuals, but again, my laptop’s built in screen has a much higher resolution and refresh rate. I prefer the larger screen when I need multiple windows/tabs open to get work done but when I want to play games or watch movies, I much prefer the higher resolution of my smaller screen. But it really all depends on the user and your needs. If I was a dedicated gamer, I wouldn’t recommend this screen, but if you just need a bigger monitor and you will occasionally game, etc., then this will work just fine.
The IPS panel means you have great viewing angles. Granted you're mostly going to be looking at it straight on, it's bright, legible and clear from many different viewing angles
CONCLUSION
I’ve said it several times, but this is a no frills business monitor. Or for someone on a budget. Perfectly acceptable 23 inch monitor for 95% of people out there. Great color, easy to use and setup, little fuss, but don’t expect all the bells and whistles and customization of bigger and more expensive monitors out there.
I’ve said it several times, but this is a no frills business monitor. Or for someone on a budget. Perfectly acceptable 23 inch monitor for 95% of people out there. Great color, easy to use and setup, little fuss, but don’t expect all the bells and whistles and customization of bigger and more expensive monitors out there.
I would recommend this to a friend!

Share this review:
+2points
2of 2voted this as helpful.
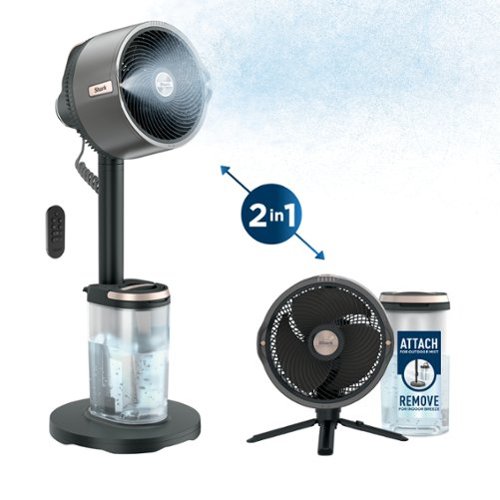
Introducing the Shark FlexBreeze Pro Mist indoor and outdoor fan with portable misting system ~ ultra-powerful, whisper-quiet, and perfect for any space in your home or beyond the backyard. With a 70 ft range and weather-resistant design, use it corded or cordless for ultimate flexibility from floor to tabletop. Enjoy up to 24 hours of cordless runtime at speed 1, six hours at speed 3, and two hours at max speed.
Customer Rating
5
Great way to keep you cool outside
on April 7, 2025
Posted by: callmeageeth
This Shark Misting Fan is a powerhouse designed to keep you cool outside. It has a smart design that's versatile and best yet, it runs off a battery allowing you to take it anywhere. There are a few accessories that Shark sells that I wish it would have included but overall, it's a well thought out and does its job well.
Inside the box you get the fan head, a pedestal pole, a pedestal base, a charging cable, water tank, misting hose, and remote. Setup is relatively straightforward, and shark does a great job of providing contextual stickers on the device itself. For those like me, who tend to glance or discard the instruction manual. Point being it's all smartly designed and easy to put together.
As I said, there are a number of additional accessories that you can purchase from the shark website, some include garden hose adapters to keep the water filled for the misting, a car charger, and fan cover, but the thing that I wish that was included with this package was a carry bag. To me having a carry bag would make this truly portable. Just having something to carry everything in.
But back to setup. You pet the pedestal on the ground and then you put the pedestal pole into the base. There's one allen wrench and one screw that you have to use to attach the pole to the base, it takes little time and effort. The fan itself has a three-legged stand on it. It's kind of like a tripod where when you fold them all down it makes a slender pole that fits inside of the pedestal pole. Or if you want to set it on top of a table or if you don't have the pedestal with you, you can snap out the three legs and set it down. I found it to be very sturdy. Whether you're using the table, top legs or the pedestal itself. The water tank snaps in really easily and the misting hose is easy to set up as the ends of it can only be affixed at specific parts on the fan. In other words, you can't mess up installing the hose because it only goes in one way.
You are supposed to charge the fan fully before you use it, which took a few hours. There's a green light on top of the fan that shows the battery status and the fact that it's charging. Another minor quibble I have is that it uses a proprietary charging cable. I'm not smart enough to know why they could not or did not use a USBC cable, but that would have been preferable as I'm sure many of you have one laying around. Now you have to make sure that you have the specific charging cable whenever you need it.
There's a nice handle on the back of the fan that makes it easy to carry and I love how the plastic guards around the fan are very close together which prevents little ones from injuring their fingers.
The buttons are all easy to use and understand. On top of the fan there is a power button, a fan speed button, and an oscillating button which has four different settings, a tight 45° all the way up until 180°. The buttons all make sense and are easy to navigate. There's also a remote that's very small, but I appreciate that shark designed a magnetic attachment to the back of the fan, so the remote has its own dedicated spot. It allows you to control all functions of the fan remotely, you can even adjust the fans right to left) angle with the remote.
But all of this makes a little difference if the fan doesn't perform well, and I will say that it performs extremely well whether plugged in or on battery power. I could not tell a difference between the output when it was plugged in or running on battery. It's extremely quiet. One of the most quiet fans I've ever used. It sends out quite a bit of cool air at high velocity and will cool you off in no time. The misting portion is quite cool too. All you need do is fill up the water tank with some water. Make sure the hose is connected and hit the misting button and all of a sudden you get a nice water mist with your fan. This is really great for my family as we spend a lot of the summer sitting outside at swim meets at or soccer games. It's a great way to keep us cool and we look forward to using it more.
It's obviously portable, but as I said I'm reluctant to want to take the pedestal and pull and water tank with me when I travel. Not because it's heavy but because I have to carry all of the pieces separately. A travel bag would be a big boon for me. But nonetheless, just taking the top portion of the fan with its nice carry handle. It's easy to move around and place wherever you need it.
This fan is somewhat Overkill, as I'm sure you can get away with something smaller and less pricey, but I'm nonetheless a big fan of it. It. I think shark makes good products, easy to use products, and durable products. The flexibility of having a powerful fan that can run for several hours on battery power. It allows me to use the fan in various situations, not only keeping me cool outside, but also drying off wet shoes and the like.
It is pricey for a fan, but for all the features it has, it feels worth the cost.
I would recommend this to a friend!


Share this review:
+2points
2of 2voted this as helpful.
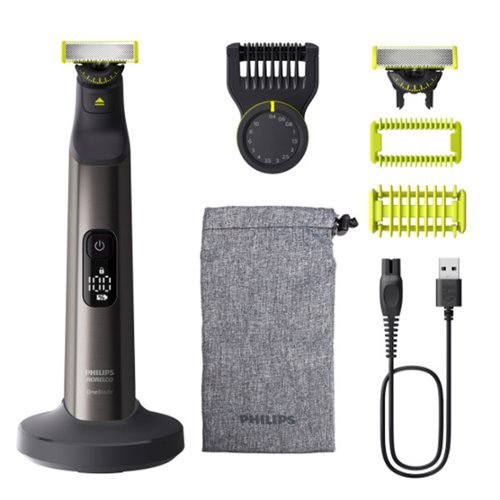
Trim, edge and shave any length of hair. Designed to cut hair, not skin. Philips Norelco OneBlade 360 Pro is a revolutionary hybrid styler that can trim, shave and create clean lines and edges, on any length of hair. Forget about using multiple steps and tools. OneBlade does it all. Philips Norelco OneBlade 360 has a revolutionary technology designed for facial styling and body grooming. It can trim, edge and shave any length of hair. Its dual protection system ~ a glide coating combined with rounded tips ~ makes shaving easier and comfortable. Its shaving technology features a fast-moving cutter (12000x per minute) so it's efficient - even on longer hairs. The innovative 360 Blade can flex in all directions to adjust to the curves of your face. The design enables constant skin contact and control. Easily trim and shave hard~to~reach areas ~ with few strokes and great comfort.* The versatile 20-length precision trimming comb offers length settings from 0.5 to 10 mm, giving you an even trim at exactly the length you want. OneBlade is 100% waterproof, so it is easy to clean, just rinse it under the tap.
Customer Rating
5
The most versatile trimmer I've ever owned
on April 1, 2025
Posted by: callmeageeth
This is the most versatile trimmer I've ever owned. It has a few performance drawbacks compared to more traditional clippers but the versatility more than makes up for it.
In the box you get the trimmer body, 2 one blades, a charging stand and cable, 3 guards (one for face), a protective cover (for travel) and a carrying bag.
It takes just a few minutes of fiddling with it to get going. I was new to the one blade and while that fit on the trimmer without a problem, the guards snapped on after looking at it for a moment.
The benefit of the one blade is shaving close to the skin - really any part of the body - without fear of nicking or scratching. If you don't shave any parts of your body then you might not need it, but I found it to be right on point in terms of closeness of shaving as well as comfort. The one blade is true to its name in so much as you can trim the most sensitive areas of your body without fear of nicks.
I have a beard and using the guard with the one blade to trim my beard worked really well. I got a consistent shave without fear of trimming too much. I used it to trim around my beard and while it does a decent job if getting close to the skin, I still opt for my razer to shave my face around my beard but that isn't a knock on the one blade. I just prefer the closeness of razer on my face. You could certainly use the one blade on your face in a pinch.
In terms of shaving my body, I shave my back, arms and shoulders frequently and I thought the one made did a terrific job. It gets closer than anything I've used (outside of razers). And it's simple and easy. The only knock is that the one blade is small, and for longer hair it takes several passes to shave the hair. So it takes a little longer than my larger trimmer. But the benefit is convenience, closeness and no nicks.
The blades rotate allowing it to conform to your body as you shave. Basically they swivel to the left and right. The blades supposedly last a few months each. I'm not sure how to tell when you need to replace it, I'm assuming when the cutting performance is compromised but a several months use case seems plenty reasonable to me and the replacement blades aren't cost prohibitive.
The battery is rated for 120 minutes. There's a charging percentage on the handle when you turn it on. It lasts plenty long for any job. But the charging bag allows you to take everything with you whenever you travel, so battery should never be an issue.
It's also completely waterproof. Trimming in the shower isn't always the best because the hair sticks to your body, but I like to rinse it under the faucet to clean out the hair which is a big benefit. I love not having to worry about it getting damaged with water.
All in all, this is my favorite trimmer and quickly made it's place into daily care routine.
I would recommend this to a friend!


Share this review:
0points
0of 0voted this as helpful.

The Insignia 6' USB-C to USB-C Braided Charge-and-Sync Cables (2-Pack) will not only quickly charge your smartphone but also let you transfer files and sync your devices. The 6 ft. cable provides enough flexibility for various placement options and the braided jacket keeps the cable protected.
Customer Rating
5
Quality Cables at a Great Price
on February 3, 2025
Posted by: callmeageeth
Cables are a dime a dozen these days, and given how much torture they're put through, it's imperative that I get one that's high quality. I much prefer braded cables with a firm charging port. These Insignia cables do the trick, at a great price. They're 6 feet long, $14 gets you two of them. And these do more than just charge your phone. I've had several occasions where I've tried to use my USB cables to transfer data - not all the time mind you, but when I need to do so, I need to do so - and sometimes I'd discover my cables only allowed me to charge. Here, you get 60 W of Power Delivery (to charge your phone faster, but note you'll need a compatible charging brick) as well as 480Mpbs transfer speeds. So long as you're using a computer with high transfer speeds - anecdotally, most USB-C ports in computers are - and are transferring to a hard drive or the like to support those speeds, you'll see high transfer rates. These cables bend easily and are resistant to tearing due to the braded design. 6 feet is a good length that will accommodate most use cases. I like that it came with 2 so I can keep one in my work bag for emergencies. Bottomline is, that while a simple device - cables are something we all need for our devices and Insignia delivers in the quality and value department.
I would recommend this to a friend!


Share this review:
0points
0of 0voted this as helpful.

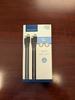
Keep your screen ultra-protected from the hardest falls with the Insignia Anti-Reflective Glass Screen Protector for Apple iPhone 16 Pro and Apple iPhone 17 (3-Pack). Made of thin, .33 mm tempered glass, this screen protector fits most cases and fully protects your screen with edge-to-edge coverage. It has anti-reflective technology that provides extreme clarity in strong outdoor light and eliminates other lighting impacts. Its 9H hardness rating protects your screen from everyday accidental falls and won~t affect the sensitivity of your touchscreen. It also includes everything you need for easy application, ensuring a bubble-free appearance.
Customer Rating
5
Great value, does the job
on January 1, 2025
Posted by: callmeageeth
I'm a big proponent of screen protectors. I always use them on my phones, especially brand new ones. My wife recently got an iPhone 16 Pro, and we got these. I love that they come in a 3 pack, as I know from experience, they're bound to crack or break at some point. So for that, I consider it a great value. The biggest concern about screen protectors, however, is always the installation process and getting rid of dust and bubbles on the inside. Typically, the cheapest screen protectors don't come with any guides or frames to help line it up just right. Here, Insignia includes a plastic bracket that snugly fits around the outside of the phone. This allows you to place the screen perfectly - after preparing the screen of course - and eliminate bubbles. I found the installation process to be pretty east and seamless. And again, not only do you get the frame and three total screen protectors, you get three sets of wipes and dust stickers. The only thing I wish it had was a rubber wedge to help get rid of stubborn bubbles, but if you take your time and do it right, it's not really necessary (plus you could find something in your house like a credit card to do the trick). Once installed, the screen worked perfectly. It's considered anti-reflective but it's glass and will still look "shiny" and mirror when off. But it does a pretty good job of minimizing smudges over time. And we can wipe it with our sleeve to clean it off when necessary. And It affects absolutely nothing regarding the performance of the phone. There's no cut out, so the glass covers the sensors and "island" display at the top, but again, you won't notice it at all. I give it high praise for ease of installation, what's included, and peace of mind that you can minimize the chances of damaging your screen when you inevitably drop your phone.
I would recommend this to a friend!


Share this review:
0points
0of 0voted this as helpful.

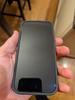
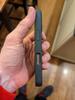
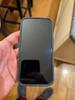
Discover the perfect blend of protection, sustainability, and style with Pela~s compostable phone case for the Apple iPhone 16 Pro. This eco-friendly case not only shields your phone from drops and scratches but also includes a MagSafe module, providing you with peace of mind and effortless connectivity. Crafted from sustainable materials, the Pela case reflects your commitment to the environment, turning everyday use into a statement of eco-consciousness. Its sleek design and enhanced grip ensure it feels just right in your hand, adding a touch of elegance to your daily routine. Choose a case that protects your iPhone while aligning with your values~embrace sustainability without compromising on style. As a bonus, your purchase includes an exclusive voucher for a second case, which you can personalize or select from 500+ designs to match your style.
Customer Rating
5
Quality case, 2 for 1
on January 1, 2025
Posted by: callmeageeth
Pela offers earth friendly cases, cases that are made of recycled materials and/or plants. But to be honest, if it doesn’t protect your phone from drops, then being made of plants and compostables are of little value. While I haven’t dropped my phone to test it, I can confidently say that’s built with durability in mind.
This particular case is a bit thicker, more like an Otterbox, than a slim, minimalist case. It’s cushiony. It’s sturdy but has some flex like it’s made of rubber. But when you put it on the phone, it feels great. Which is great for drop absorption. It has a raised lip, meaning it you place it face down, there’s a gap between the screen and the surface it’s laying on. I found it to be precisely cut, leaving ample gaps for the speakers at the bottom of the iPhone 16 Pro and charging port. And it covers the entire back of the phone except for the camera housing and it fits perfectly. There’s a lip on the camera housing to protect it from drops which I like. But it will not lie perfectly flat on a table - but that’s no big deal. Don’t get me wrong, it will lie down just fine, but it wobbles when pushing down on it.
It’s Magsafe and wireless charging compatible. There’s a Magsafe compatible ring on the inside of the case to help extend the magnetic ability of the phone’s Magsafe. We only use a Magsafe charger and had no issues using it.
I really like the design of this particular case, it’s black with what looks like little specks of gold. Of course, it’s not really gold, but it looks snazzy to me without being too over the top.
Finally, one of the best parts is that you get 2 cases for the price of 1. Whether you want to gift it, or have a second to swap out to change the look of your phone from time to time, there’s a QR code inside the packaging that takes you to a website to purchase a second case. You can even customize the case (the new one) with a photo which is really cool. We don’t have the second case yet, but assuming it’s the same exact size we’ll have no issues or complaints.
While I can recommend this case no matter what it’s made of, I do appreciate that companies are out there making a difference and creating quality products of reusable materials.
I would recommend this to a friend!


Share this review:
0points
0of 0voted this as helpful.
callmeageeth's Review Comments
callmeageeth has not submitted comments on any reviews.
callmeageeth's Questions
callmeageeth has not submitted any questions.
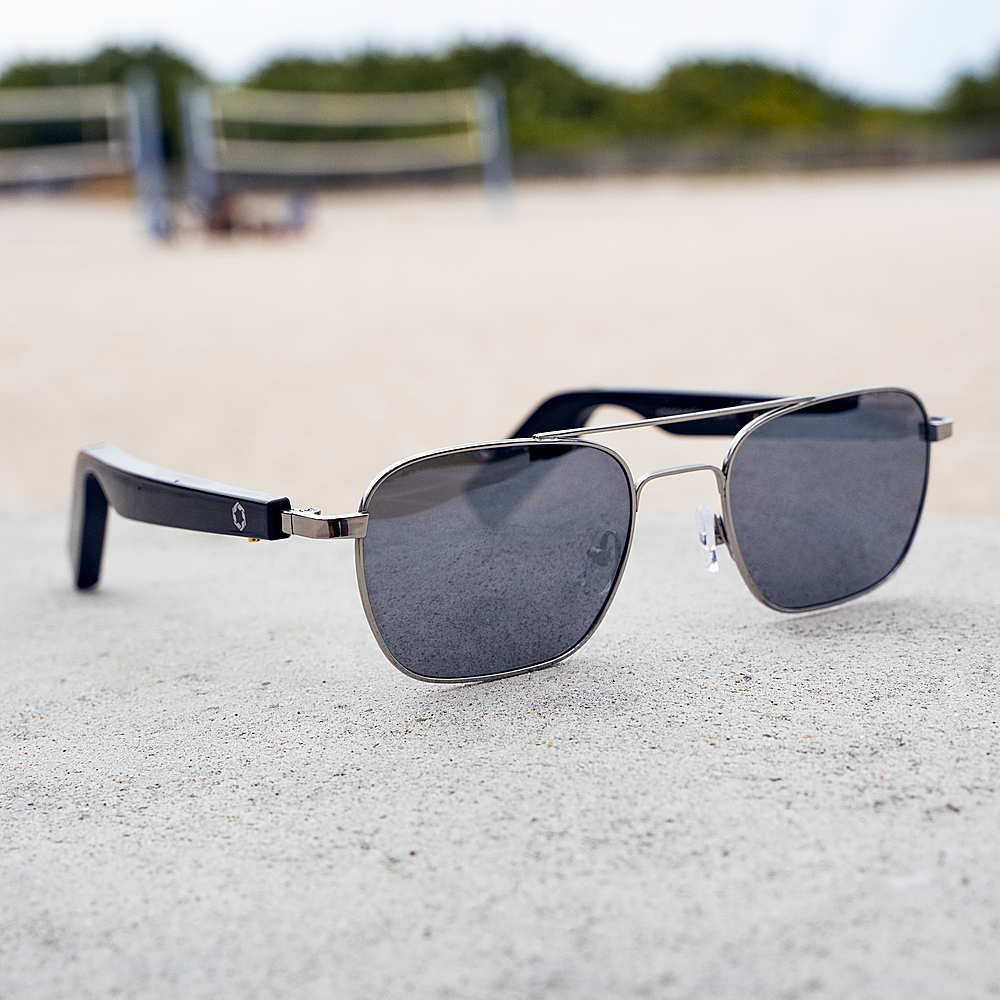
The Lucyd Starman titanium frames weigh just over an ounce, and with their enhanced flexibility will fit most users out of the box. These patent-pending Bluetooth frames offer a unique mix of durable titanium, designer styling, optional vision correction, and smart features. All Lucyd frames include a 7-day moneyback guarantee and 1-year warranty against any defects in frame or lenses.
What are the glasses capable of?
That's a seemingly broad question, but they connect to any Bluetooth source device and can play music through the speakers embedded in the arms of the glasses. The sound is good based on the open speaker design, so the sound will bleed a little bit. But overall, I like them.
4 years, 3 months ago
by
callmeageeth
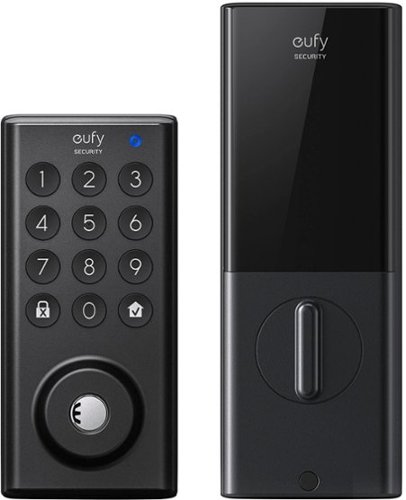
Feel safe and protected with eufySecurity Solo Smart Lock D20. Securely open your front door with built-in Wi-Fi to only let trusted friends and family enter your home when you allow it. And when you are outside your front door, connect with Bluetooth via the eufy Security app, so you don~t need to fumble for your keys. Solo Smart Lock is tough, too, with stainless steel construction that earned it a BMHA certification. Plus, the IPX3 weatherproof rating ensures it can endure wild temperature swings and heavy rain. Give yourself peace of mind with Solo Smart Lock, and you~ll always feel your home is secure.
Does it come with the lever handle? If not, how can one order the handle shown?
No, it does not come with a lever. You're stuck with what you have, or going to a home improvement store to get one.
4 years, 4 months ago
by
callmeageeth
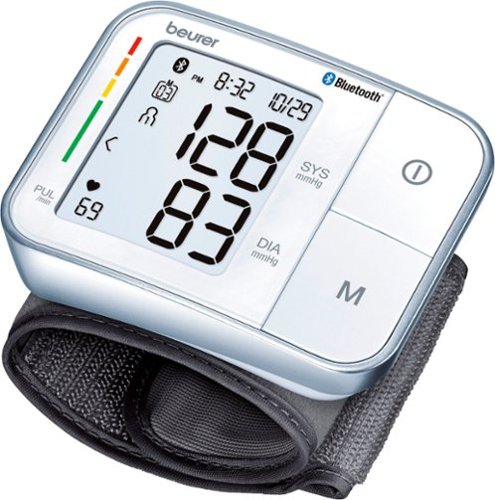
Easily track you and your children~s (pediatric use) well-being with the ability to store up to 60 measurements for up to 2 users. A universal cuff is wearable on any wrist large or small. The Beurer BC57 synchronizes with your smartphone via Bluetooth~ technology so you can see your readings over time and share with your doctor. It also identifies arrythmia and alerts you of any detections.
How do you change the battery?
Underneath the monitor itself, where it attaches to the wristband, there's a cover you can pop open to replace the AAA batteries.
4 years, 6 months ago
by
callmeageeth
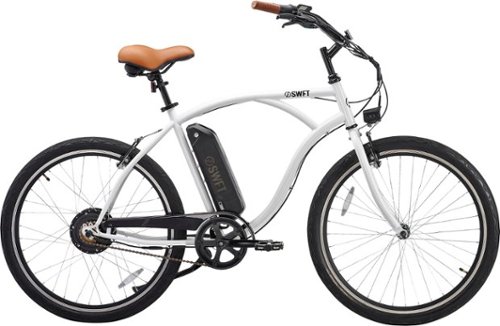
Your SWFT journey starts here. Wherever you~re headed, FLEET will get you there with style, safety, and a fresh design that~ll turn heads as you turn corners. Move ahead of the pack with a SWFT e-bike with a detachable, rechargeable battery. Multiple modes allow you to use pedal-assist or your throttle to propel you forward. With a 19.8 mph max speed, you can travel up to 37.2 miles on a single charge of your battery alone. A built-in monitor display indicates your battery output and speed. Let the journey begin.
Do you have to pedal this bike to make it work?
You have to pedal it to get it going, once you turn the pedal maybe twice, the motor kicks in and it will either assist your pedaling or you can use the throttle
4 years, 6 months ago
by
callmeageeth
Your SWFT journey starts here. Wherever you~re headed, FLEET will get you there with style, safety, and a fresh design that~ll turn heads as you turn corners. Move ahead of the pack with a SWFT e-bike with a detachable, rechargeable battery. Multiple modes allow you to use pedal-assist or your throttle to propel you forward. With a 19.8 mph max speed, you can travel up to 37.2 miles on a single charge of your battery alone. A built-in monitor display indicates your battery output and speed. Let the journey begin.
What if I purchase this bike now and and later is cheaper on Black Friday. Do I get the different?
Depending on your membership status, you can get a refund of the difference so long as you're in the return period.
4 years, 6 months ago
by
callmeageeth
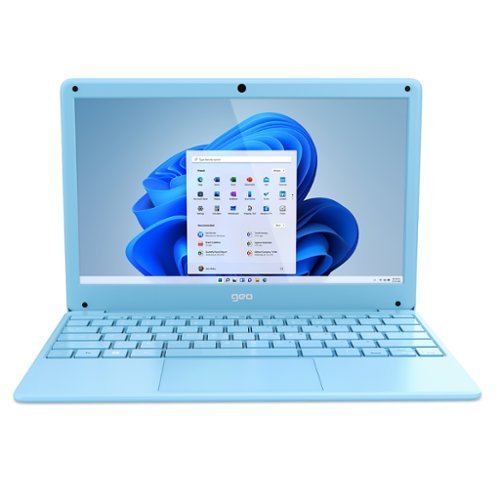
GeoBook 120 is a 12.5-inch Windows 10 laptop complete with a 1-year subscription to Microsoft 365 Personal. Powered by an Intel Celeron Dual Core Processor and 4GB RAM, this lightweight laptop makes easy work of essential tasks, browsing and more. 64GB eMMC storage is built in and can be expanded with the addition of a MicroSD card (up to 64GB). GeoBook 120 also features a 2MP webcam, dual microphones and integrated speakers, plus reliable AC Wi-FI.
Can I play Roblox and Minecraft?
My kid has played both on it, and they run just fine.
4 years, 6 months ago
by
callmeageeth

Pixel Buds A-Series bring you rich, high-quality sound for a lot less than you~d expect. Their beamforming mics help make calls crystal clear.*** The flush-to-ear design is stylish, and the stabilizer arc keeps them in place so you can wear them even during the sweatiest workout.**
Does it have Noise Cancellation feature ?
No they do not have active noise cancelling. One of the drawbacks of the Pixel Buds (IMHO) is that they let in a lot of ambient noise, even with a good seal/fit in your ears.
4 years, 9 months ago
by
callmeageeth
Pixel Buds A-Series bring you rich, high-quality sound for a lot less than you~d expect. Their beamforming mics help make calls crystal clear.*** The flush-to-ear design is stylish, and the stabilizer arc keeps them in place so you can wear them even during the sweatiest workout.**
Does Google pixel buds pair with iPhones?
I haven't specifically tried it, but it's my understanding they do, but I do know you'll lose the ability to use/activate the Google Assistant through the Pixel Buds.
4 years, 9 months ago
by
callmeageeth
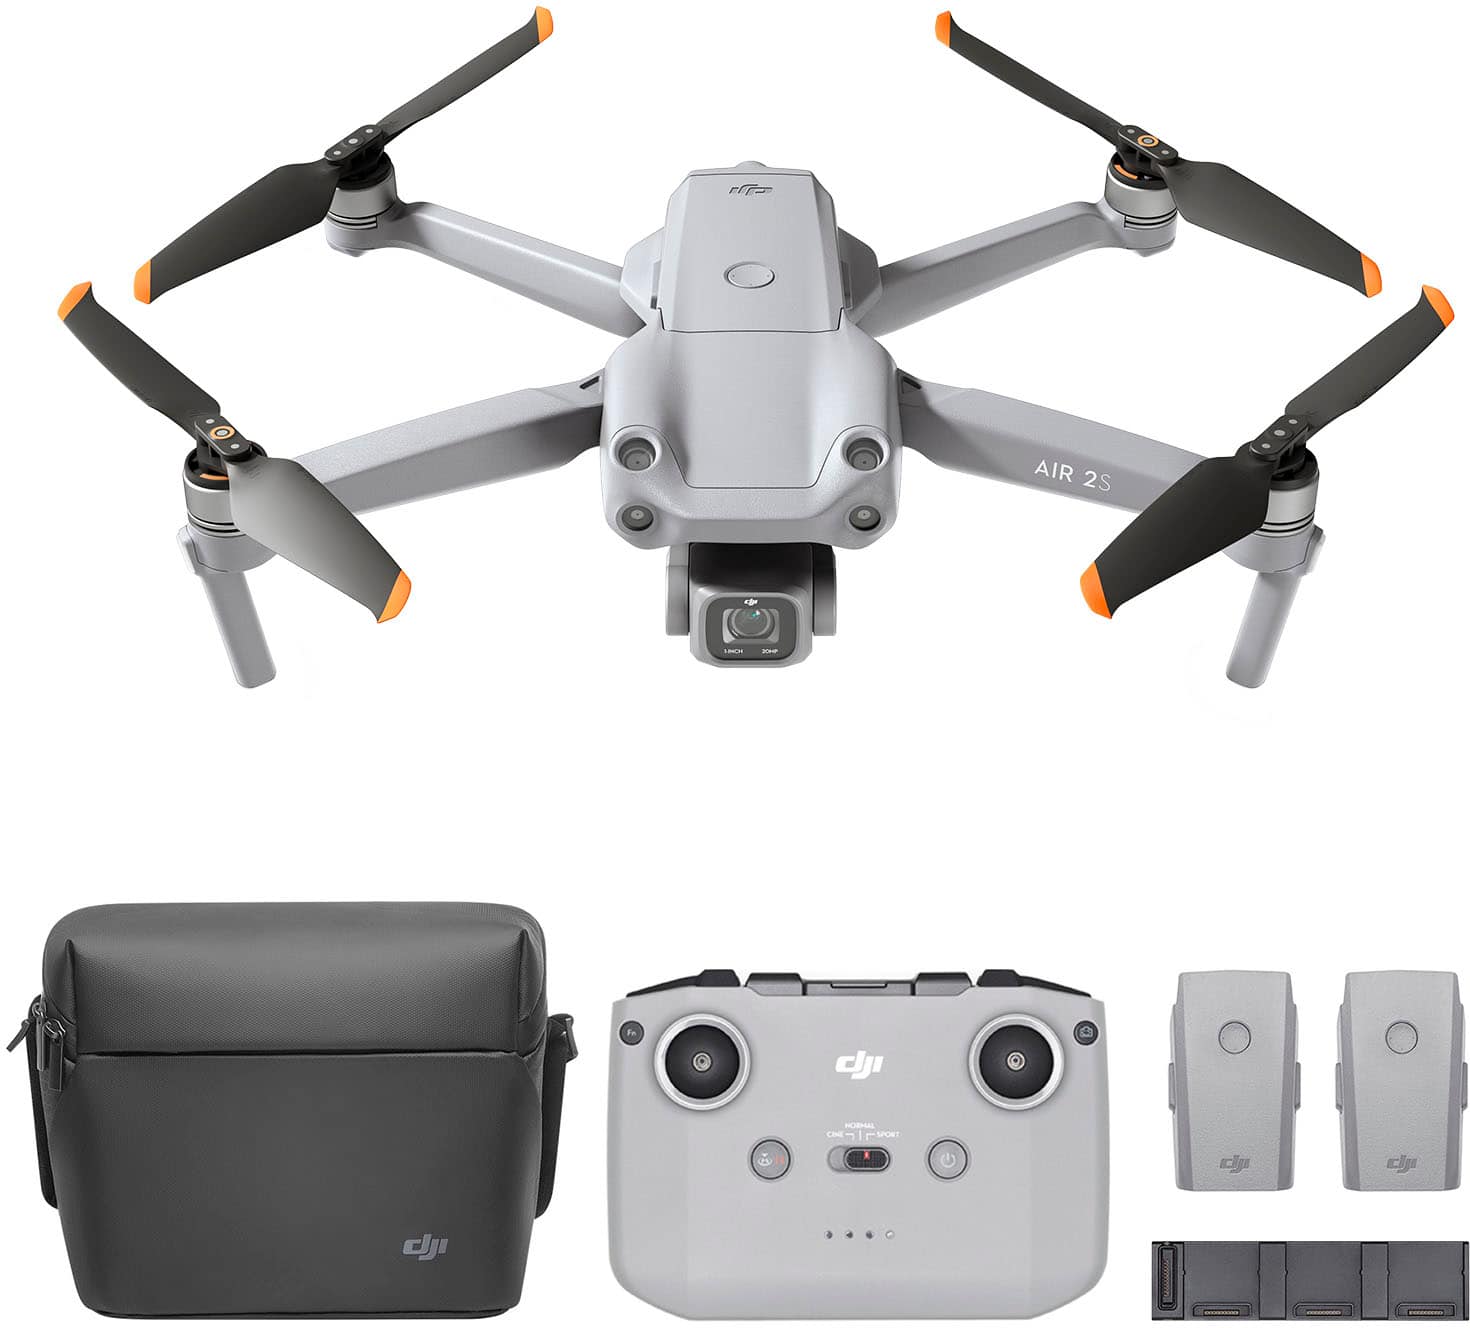
Featuring a 1-inch CMOS sensor, powerful autonomous functions, and a compact body weighing less than 600 g, DJI Air 2S is the ultimate drone for aerial photographers on the move. Take this all-in-one aerial powerhouse along anywhere to experience and record your world in stunning detail.
Can I use my Goggles with the DJI mavic air 2s?
I haven't tested it, because I don't own the goggles, but there's a setting to change the camera to FPV. And according to dronedj.com, it is compatible.
4 years, 10 months ago
by
callmeageeth
Featuring a 1-inch CMOS sensor, powerful autonomous functions, and a compact body weighing less than 600 g, DJI Air 2S is the ultimate drone for aerial photographers on the move. Take this all-in-one aerial powerhouse along anywhere to experience and record your world in stunning detail.
Will Air 2s work with note 20 ultra?
I don't own that phone, but I don't see why not. Biggest concern is size of the phone and whether it fits into the controller. I use a Google Pixel 4 XL and there's still a little more space for the "arms" of the controller to hold the phone. And in terms of the app itself, you'll need to download it straight from the DJI website (which is the same process for all Androids)
4 years, 10 months ago
by
callmeageeth