nickcal's stats
- Review count352
- Helpfulness votes1,336
- First reviewFebruary 22, 2014
- Last reviewMay 25, 2026
- Featured reviews0
- Average rating4.7
Reviews comments
- Review comment count0
- Helpfulness votes0
- First review commentNone
- Last review commentNone
- Featured review comments0
Questions
- Question count0
- Helpfulness votes0
- First questionNone
- Last questionNone
- Featured questions0
- Answer count4
- Helpfulness votes0
- First answerMay 23, 2016
- Last answerSeptember 7, 2020
- Featured answers0
- Best answers0
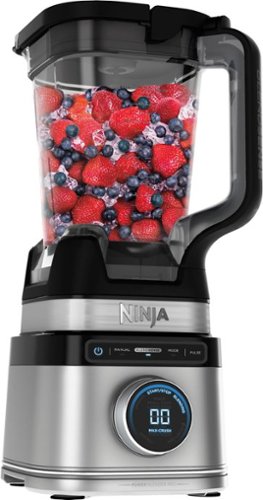
The Ninja Detect Power Blender Pro with BlendSense Technology allows you to toss in any ingredients, press the dial, and watch them transform into a perfectly smooth output. The Ninja Total Crushing & Chopping blades give you perfectly crushed ice for your frozen drinks and will chopped veggies for a chunky salsa . The blender that automatically adjusts speed & time for perfectly smooth results.
Customer Rating

5
Simplicity and power combined in one blender
on October 20, 2023
Posted by: nickcal
One of my first blenders was a simple one that only had levels 1-8 and a pulse option. It had a glass pitcher and was powerful enough to blend up ice. Since then, I’ve used many different types of blenders including Ninja brand blenders. One of the things I like about this model is that it combines Ninja’s power with old-fashioned simplicity thanks to the Blendsense technology.
I’ve used it to make several different types of smoothies including straight up milkshakes and have even made a puree for soup. I found that I had to do very little in terms of determining what speed to use since the blender did that for me. It’s a simple blender for getting things done. Here is a quick synopsis of how the main features worked for me.
Crushing Power
One of my favorite things to do with a blender is make crushed ice. In fact, growing up, this was the only way we got crushed ice at home because our ice maker only provided full sized cubes. The Ninja blender’s 1800 watt motor has no problem with providing this icy treat. I was able to toss in full size ice cubes and watch it make frosty crushed ice that I could use in other drinks or even create slushie-type sodas. This beast of a motor doesn't flinch and in seconds, your concoction is transformed into a silky, frosty delight. I was even able to make an at-home version of snow cones. It wasn’t the shaved ice type, but the ice was crushed up enough to enjoy as a frozen treat.
BlendSense Technology
The main ‘technology’ feature of this blender is the BlendSense innovation that is built into the device. It’s almost like having your own personal smoothie sous-chef. While I still monitor it pretty closely, I have to say that the blender does a great job of figuring out what type of ingredients I’ve put in and how much power it needs to blend it all together. It detects the mix of fresh and frozen ingredients, adjusts the power, and precisely calculates the blending time. My mixtures have come out just right — not too chunky or too runny. In addition to type of ingredients, the blender takes into account the quantity of ingredients you've thrown in – if it's a massive breakfast bowl or just a quick snack. There is a manual control if you want to fine-tune the speed for yourself.
Pitcher Size & Chop in the Pitcher
The pitcher is a 72-ounce beast. It has the capacity to handle any type of blending recipe you throw at it. I’ve always struggled with this because even with simple powder-based smoothie recipes, I always seem to overfill when I add ice. This extra large pitcher has been just what I needed. I love that the blades go up the center of the blender. It really makes blending a breeze. Given its size, it is a little harder to store but that’s a minor issue in my opinion.
Clean-up
Based on how the blender is constructed I thought it might be hard to clean. Fortunately Ninja thought this through and made the blades removeable for easy cleaning. I’m also thrilled that it’s all dishwasher safe. I will usually give everything a good rinse before I put it in the dishwasher, but that’s just to get the excess debris loosened up. I’ve not had any issues with the blender elements getting clean in the dishwasher.
Overall, the Ninja Blender Detect seamlessly combines power and simplicity. With its BlendSense technology, it's a breeze to make a variety of concoctions, from smoothies to milkshakes and soups. The 1800-watt motor effortlessly crushes ice, while the roomy 72-ounce pitcher handles large recipes with ease. Cleanup is a cinch, thanks to removable blades. While it may take up a bit more counter space, it's a testament to how far blender technology has evolved, harmoniously marrying the best of the past and present.
I would recommend this to a friend!


Share this review:
+1point
1of 1voted this as helpful.
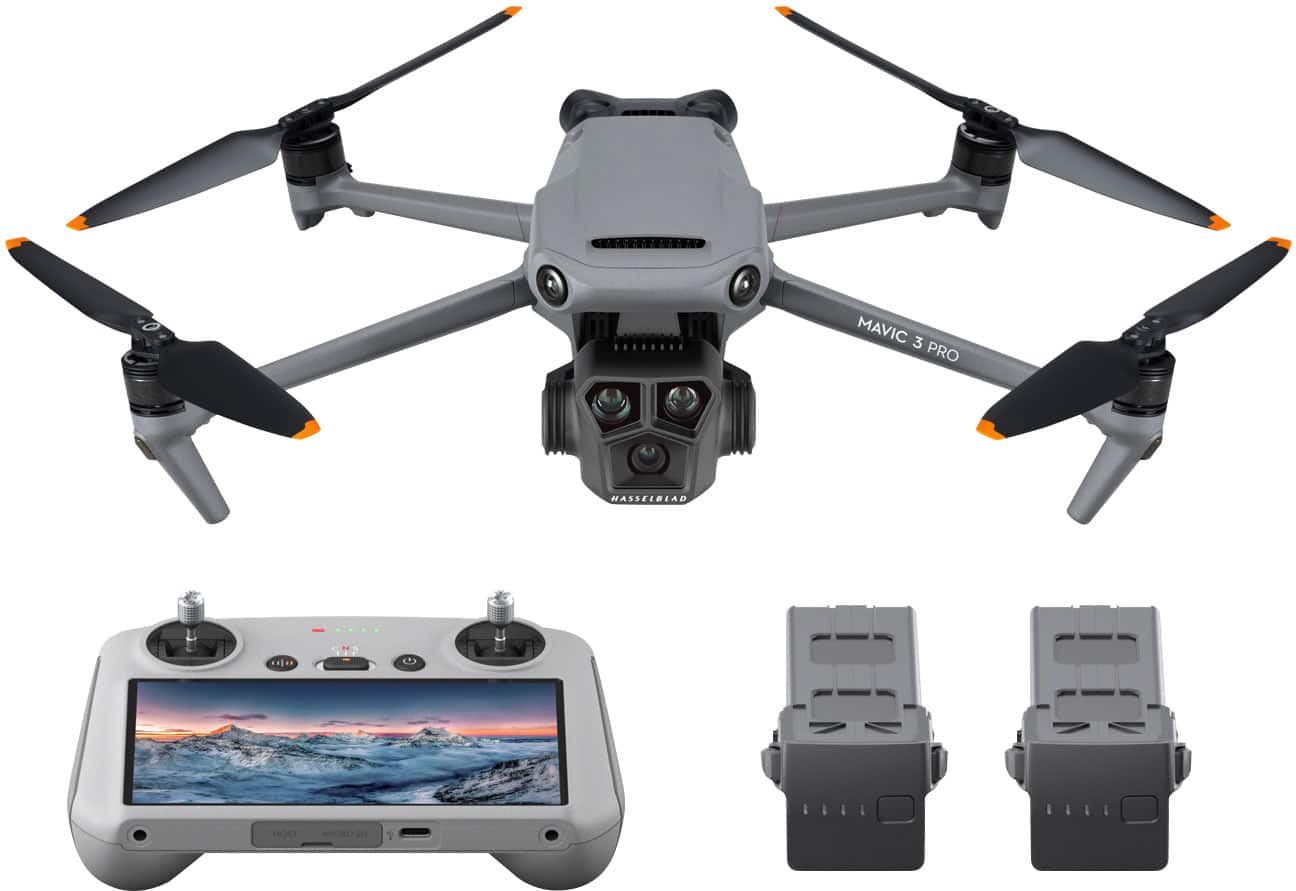
The DJI Mavic 3 Series features next-level imaging performance. Mavic 3 Pro's triple-camera system ushers in a new era of camera drones by housing three sensors and lenses with different focal lengths. Equipped with a Hasselblad camera and dual tele cameras, Mavic 3 Pro is a triple-camera drone that unlocks new shooting perspectives, allowing you to embrace creative freedom further, capture fascinating scenery, explore photographic storytelling, and make cinematic masterpieces.
Customer Rating
5
Exceptional Upgrade to Past Models
on October 17, 2023
Posted by: nickcal
As an avid gamer, I've always thought the option to fly a drone would feel like a real-life video game. When I flew my first pro-level drone (straight into a tree, I might add), I knew it was an activity I would enjoy for a very long time. Since that first flight, I've had the fortunate opportunity to fly several different types of drones from different manufacturers, but DJI has remained my favorite. They build a solid product that works and they keep improving it. The Mavic 3 Pro is an outstanding option for anyone who enjoys drone flight. While it has pro-level features, it isn't too complicated for a beginner to understand or feel intimidated by. Here is a rundown of some of my favorite features of this updated flying machine from DJI.
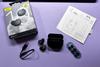
Unboxing
The drone kit comes with a very nice travel bag. All the pieces and parts are shipped inside the bag for added safety for the product. Several power cables are included for international compatibility. The power adapter and cables are packaged in a separate box along with the Mavic 3 Pro ND Filter Set. There are three battery packs for the drone (one is already installed). None of them are charged out of the box. There is quite a bit of unpackaing/unwrapping you have to do to get everything ready to go. Fortunately, though, there is no assembly required. I do recommend charging the batteries and making sure the firmware is up-to-date before taking the drone outside.
Camera - Main & Tele
I've always been impressed with the camera that DJI includes with their drones, but the Hasselblad main and the Medium tele cameras on the Mavic 3 Pro are exceptional. I love that I can capture pristine 4K video footage and pro-quality still images from the main camera. I am a photographer at heart and have spent a lot of time learning how to capture and edit photos so they look the best they possibly can. I don't have any problem with listing the Mavic 3 Pro as one of my pieces of professional video/photo equipment because I know clients will get high-quality images like they would get from my DSLR since the Hasselblad camera supports 12-bit RAW. It's a highly impressive camera system and it's almost too good to be true on a drone like this.
Obstacle Avoidance
This is probably my favorite feature. The drone is equipped with eight vision sensors that are designed to keep the unit safe while in flight. It works like a charm. The only issue you may have is with something like leaves where the sensors can still almost see through the object. This is an obstacle I've had issues with in the past and while the Mavic 3 Pro's omnidirectional obstacle sensors do a great job and are much improved from previous DJI drones, there is always the possibility of failure or mistake.
Flight Time/Battery Life
When a battery pack has a full charge, users can expect approximately 43 minutes of flight time. I was able to achieve pretty close to that. I think the only reason I didn't hit that exact mark is because I didn't have a windless environment. The battery warnings from the controller were spot-on and provided me with enough time to land the drone.
Transmission Distance/Remote
One of the most impressive features on this drone was the transmission distance. DJI claims that DJI O3+ has a transmission distance of up to 15km. That's approximately 9 miles. While I tend to want to keep the drone with in eyesight, I did test this feature out and found the estimate to be fairly accurate. I aimed for a target that I know was at least 8 miles from my takeoff location and was able to still receive high-quality images on the monitor. This makes it very easy to judge obstacles and capture planned video/photo subjects even when you can't see where the drone is.
In my opinion, the DJI Mavic 3 Pro Drone is a game-changer in the world of aerial photography and videography. With its advanced camera capabilities, intelligent flight modes, and impressive range, it offers professional-grade results for both enthusiasts and professionals alike. Whether you are a filmmaker looking to add breathtaking aerial footage to your projects or an adventure-seeker wanting to document your travels from new heights, the DJI Mavic 3 Pro Drone is undoubtedly a top choice. Even if you've had other DJI Mavic models, this is an exceptional upgrade to the past.
I would recommend this to a friend!


Share this review:
0points
0of 0voted this as helpful.
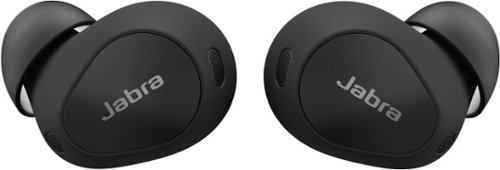
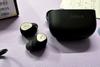
Jabra~s Elite 10 true wireless advanced earbuds for work and life. For the first time, revolutionary Jabra ComfortFit technology has been combined with Spatial Sound and Dolby Head Tracking, for a more immersive Dolby Atmos experience to create the clear-sounding earbuds that you can comfortably wear all day. Complete with 10mm speakers, you can immerse yourself in rich, life-like sound that puts you right inside your favorite tracks. We scanned over 62k ears to create our unique oval EarGels that sculpt to every ear shape, and a semi-open design that relieves any pressure. Unwanted background noise will be blocked by our Active Noise Cancellation even in challenging environments, and you can connect the earbuds to two devices at once for super simple switching between phone and PC. Time to comfortably sink into mind-blowing sound. Don~t get caught without charge again with up to 36 hours (ANC off) of battery life that lasts throughout the day. When your buds run out of juice, simply pop them into the wireless charging case for a fast charge of 1 hour worth of battery in 5 mins. Ready to support Low Energy Audio. Stream pristine audio to multiple pairs of earbuds for easy sharing or tune into public broadcasts.
Customer Rating

4
Fell short of my expectations
on September 28, 2023
Posted by: nickcal
While I wouldn’t really consider myself an ‘audiophile’ I do really enjoy high-quality headphones. In the past few years, technology has advanced so much that some headphones provide a better sound experience than state-of-the-art movie theaters do. I’m an avid user of Apple’s AirPod Pro Gen 2, but I’ve always had a great deal of respect for Jabra products. Jabra’s parent company GN Group also owns ReSound Hearing Aids and Beltone. So, they put a lot of effort into not only developing a great sounding product, but also one that performs perfectly.
When I unboxed the Elite 10 Earbuds, I had a similar expereince to past Jabra unboxings. The product comes in a professionally designed retail-style box. There are plenty of details on the outside (front and back) and when you open the box you will find a quick start/reference card that is very handy. The earbuds are shipped inside their charging case and replacement ear tips and a USB-C charging cable are provided.
Pairing the earbuds to your phone is easy. You remove the earbuds from their case and peel off the protective film from the battery contacts. Then you reseat the earbuds in the case and remove them again for them to enter pairing mode. I was pairing them to an iPhone 14 Pro and when I selected them from my Bluetooth menu, a prompt appeared directing me to download the Jabra app. This app give users the ability to customize their listening experience, but it doesn’t provide a hearing test or optimize for an individual’s hearing level.
Overall, the experience was very good with these earbuds. They are very comfortable to wear — I really like the slanted ear tips as I felt they provided a more solid fit inside the ear — and controls are easy to learn. The sound quality was above average, but not as good as I expected based on their price point and competitors. The spatial audio is good, but not great and voices sounded a little tinny to me — as if they had been recorded inside a tin can.
I thought maybe it was an effect added to the mix to simulate the surroundings of the subject speaking, but when I watched the same video using a different set of headphones, that ‘tinny’ sound was gone. The Jabra Elite 10 earbuds do a great job with subtle sound effects and background noises though.
These earbuds to provide a lot to the user, but I was expecting more from these earbuds. My experience with the Jabra Elite 10 Earbuds was marked by a mix of admiration and some disappointment. While the earbuds excelled in handling subtle sound effects and background noises, the overall listening experience fell short of my expectations. In the end, these earbuds may satisfy casual listeners looking for a solid pair of wireless earbuds, but for those seeking a truly exceptional audio experience, there might be other options in the market worth exploring.
I would recommend this to a friend!

Share this review:
0points
0of 0voted this as helpful.

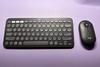
Defy Boring with the Pebble 2 Combo made with recycled plastic. Its minimalist, slim design makes it as iconic as you and super portable. Pair up to 3 wireless devices across OS and switch between devices with a press of a button (Logi Bolt receiver also included). With Logi Options+ app, you can customize your Pebble Mouse 2 M350s~ middle button with shortcuts that shuffle your Spotify playlist, send emojis on WhatsApp, and more. Personalize the 10 keyboard Fn shortcut keys to work how you want and save time.
Customer Rating
4
Compact, Easy to use set
on September 18, 2023
Posted by: nickcal
I have been an avid fan of Logitech products for many years and I’ve always found their keyboards to be well-built and widely compatible across many different devices. This particular set is designed for portability. It’s very compact and because both the mouse and keyboard have power switches, you can easily transport them in a laptop bag.
There are two options for connection to your device - using the Logi Bolt (USB adapter) or using Bluetooth. I used both with my MacBook Air and have mixed feelings about it. I typically prefer to use a USB adapter because the connection is consistent even when I switch between computers. The issue I had this time around was that the mouse and keyboard didn’t want to connect to the Logi Bolt at the same time even though they should have been able to. I’m not sure if this is a macOS issue or a Logitech issue, but I was never able to connect the keyboard to the USB adapter — only through Bluetooth.
The connection was solid for the keyboard and it remained responsive while I was using it. The mouse, however, was a little jittery. I was never able to find a reason for that either. Both devices are powered via battery and they are not rechargeable. This is a big minus in my book. In addition to not being rechargeable, the mouse and keyboard use different sizes of batteries. The keyboard uses 2 AAA batteries and the mouse uses 1 AA battery. This ends up being a little inconvenient because you have to keep both sizes with you.
Aside from the battery issue, I am also not a big fan of the mouse shape. I’ve been using the Logitech MX Anywhere 2S mouse for several years now so the flat nature of the Pebble mouse is very different from what I am used to. If you were using an Apple Magic Mouse, it would feel very similar.
I feel like there is a place for this keyboard but it’s not for my everyday use. It works just fine, but I prefer something a bit larger for work.
I would recommend this to a friend!


Share this review:
0points
0of 0voted this as helpful.
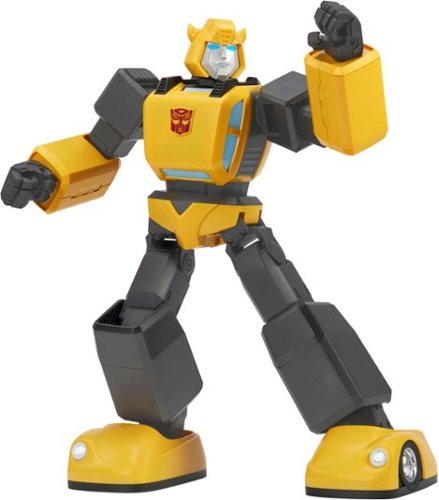
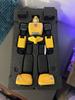
Spring into action with Bumble Bee! Meet the fan favorite - Fast, agile, and fun to be around ~ Bumble Bee, a new Performance Series robot experience by Robosen! With an improved walking algorithm, incredibly fluid actions & sequences ~ Bumble Bee jumps into action with its 17 servo motors and in a perfectly executed original G1 form! Whether interacting with Robosen~s Optimus Prime through the new Mini Theater, or showing off his programming and acrobatic skills ~ you~ll love seeing this Autobot best friend blast away the Decepticons.
Customer Rating
5
Remarkable Interactive Toy
on July 24, 2023
Posted by: nickcal
I grew up watching and loving Transformers so when I saw this was available, I jumped on it. It’s a remarkable ‘toy’ that is highly interactive with its user. It comes preprogrammed with some really fun commands like ‘attack,’ ‘dance,’ and ‘pose.’ Each action includes some fun voice sayings from Bumblebee, too.
Getting started is very easy. There is no assembly required other than unwrapping Bumblebee and his charging cable and power brick. I did have to charge the robot before starting to use him but out of the box, he is ready to interact with even though you can spend time programming your own commands with the app.
I had some trouble getting Bumblebee to turn on the first time, but that was more user-error than a problem with the robot. I found that if I held the button in for 3+ seconds, Bumblebee would come to life. He connected to the app seamlessly and I didn’t have any issue with connection or the app and robot communicating with one another.
I tried several of the commands and was impressed with how fluid the robot moved. He’s very smooth and fluid. He was actually so lifelike that our dog started barking at him. The big complaint I have about this particular robot model is that he doesn’t transform. Some of the other models do. I would also like it if there was an easy tutorial for custom programs. If there is, I didn’t find it easily.
Overall, this is a great device for any Transformer fan to own. I’ve already had tons of fun with it.
Pros:
You can use him with or without the app.
He understands voice commands easily as long as he isn’t in the middle of a response.
His movements are fluid.
Cons:
He understands voice commands easily as long as he isn’t in the middle of a response.
His movements are fluid.
Cons:
He doesn’t transform. Other Robosen Transformers do.
I had trouble getting him to turn on. There is a power button, but there weren’t any directions on how to use it for powering him on.
Custom programming is very time-consuming and there isn’t a walk-through tutorial on a simple command to program.
I had trouble getting him to turn on. There is a power button, but there weren’t any directions on how to use it for powering him on.
Custom programming is very time-consuming and there isn’t a walk-through tutorial on a simple command to program.
I would recommend this to a friend!


Share this review:
0points
0of 0voted this as helpful.

The U6 Series continues Hisense's mission to bring leading-edge technology to everyone. Adding Mini-LED and over 4X the local dimming zones in 2023, along with Quantum Dot Color and Dolby Vision / Dolby Atmos, the U6 series delivers must-have features for uncompromising performance and value. The U6 series incorporates Dolby Vision IQ to its already long list of supported HDR formats. Dolby Vision IQ leverages the full intelligence of your TV to deliver a perfect picture in your room at every moment. It dynamically adjusts to the light in the room and delivers the best experience possible for all content types and HDR formats. Add Game Mode Plus with a variable refresh rate at 60Hz for smoother gaming on next-generation game consoles. And, with Hands-Free Voice Control searching and playing all your favorite content is simple and seamless.
Customer Rating
5
Great TV Upgrade
on July 11, 2023
Posted by: nickcal
The Hisense TV comes in oversized packaging to protect the TV. The package weighs approximately 60 pounds and it’s recommended that you have two people carry it. If you have it shipped, you may have to worry about a scheduled delivery with a third-party service because it is an oversized box for standard delivery vendors. One of the things I do like about this unboxing process is that it’s designed for the TV to be stable in the base while you lift the surrounding box off of it. This makes it much easier and safer to get the TV out of the box in my opinion.
The TV comes with an easy to follow Quick Setup Guide, which contains information for Hisense support. In addition to the TV, the box contains the power cord, remote control, 2 base stand, batteries (for the remote), and a set of screws for the base stand. The TV can be installed on a 400x300 VESA wall mount using M6 screws.
We planned on installing this TV in our bedroom to replace a 55-inch HD television which was already wall mounted. The third-party wall mount was a universal mount for TVs up to 80 inches in size. So, we knew it should work with the Hisense TV. We didn’t have any issues affixing the bracket to the back of the TV and lifting it onto the wall mount. We did have to adjust the tilt mechanism on the mount to compensate for the additional weight/size of the new TV but other than that, it worked without any issues.
Because this is a ‘smart’ TV, you don’t technically need to connect any external devices. We did, however, choose to connect our Apple TV 4K via HDMI because that’s what we use for all our streaming services. If you are primarily a Google user, you can simply log in with your Google account and connect to all the main apps used for streaming. A few of them are pre-installed, but not all of them.
We use the TV in our bedroom for watching videos on YouTube and using streaming services like Netflix and Hulu. We subscribe to Hulu with Live TV for our TV-watching service rather than cable or satellite. We haven’t had any issues with using any services with the Hisense TV since we began using it. We’ve been very impressed with the brightness of the TV, which always seems to be an issue when we are watching content. The Dolby Atmos audio has also been quite impressive. We tested it out using Disney+ and thought that the results were just as good as our external sound bars that we have in other parts of our house. The 4K picture resolution is brilliant and the connectivity between the Apple TV and the Hisense television are flawless. One of the issues we’ve struggled with in the past is getting the Apple TV and television to both work with the Apple TV remote. Right from the first start up, both the Hisense remote and the Apple TV remove worked with both devices. While this might seem like a small issue it has caused us a great deal of frustration in the past.
The Hisense U6 Series Mini-LED Google TV is a great option for someone looking to upgrade their entertainment system. It’s easy to get installed and set-up and its picture quality is outstanding. There are many ports to utilize if you have several external devices to connect, but this is a great unit for someone who wants minimal external connections since it has built-in Google TV.
I would recommend this to a friend!


Share this review:
+3points
3of 3voted this as helpful.
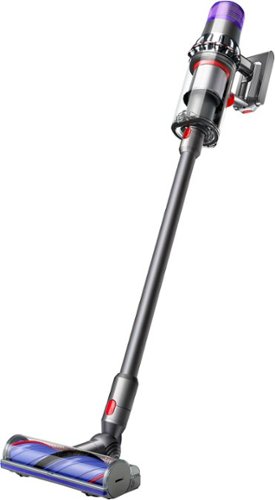
The Dyson V11 Extra cordless vacuum cleaner is engineered with the power, versatility and run time to deep clean homes with pets. Dyson~s de-tangling Motorbar cleaner head deep cleans carpets and hard floors with hair removal vanes that clear long hair and pet hair from the brush bar. The innovative Hair screw tool with a conical brush bar is perfect for cleaning upholstery and pet beds. The Dyson V11 has advanced, whole-machine filtration that expels cleaner air. Its versatile cordless format transforms into a handheld vacuum with one click so you can clean up high, down low and everywhere in-between with 3 cleaning modes for the right power where you need it. LED display shows remaining battery power, power modes and maintenance alerts. Comes with a 2-year warranty and lifetime Dyson support.
Customer Rating
5
Using this vacuum is like magic
on July 11, 2023
Posted by: nickcal
I’ve been using cordless vacuums like this for years as our primary house vacuum. Some of them are not powerful enough to clean the whole house and are only good for spot cleaning. This one from Dyson is ideal for any type of cleaning you can throw at it.
The vacuum comes in a large box that looks like it could be a fancy shipping box. There is a lot of cardboard packaging on the inside that encases all the accessories/attachments — and there are a lot. Included in the box are the main vacuum assembly (motor/dustbin, wand, Motorbar cleaner head, charger), combination tool, crevice tool, hair screw tool, mini soft dusting brush, stubborn dirt brush, mattress tool, up-top tool, extension hose, and wand clip. Not to mention the wall dock, which really comes in handy for charging purposes. The only downside to having so many attachments is keeping them altogether and organized. I did find a stand at one point (sold separately) for a cordless vacuum, which seemed to be the best option available for something like this. It’s unfortunate that a case or bag isn’t included to keep all these pieces together.
Assembly is very easy. In fact, it takes longer to unbox the vacuum then it does to get started vacuuming. The head snaps onto one end of the wand while the motor assembly attaches to the other. One of the things I really like about this device is how incredibly easy it is to connect and disconnect pieces. This is what makes the vacuum so versatile in my opinion. The attachments connect directly to the motor assembly and it doesn’t take any heavy-lifting to get that accomplished. Out of the box, the vacuum did have a minimal charge to it and after only 2-4 minutes, it was dead. So, I recommend charging it before using it.
My primary use of this vacuum is in our house, but I do use it in our cars, too. In our house, we have carpeted, ceramic tile, and linoleum flooring. I have used this vacuum on all those surfaces, as well as furniture upholstery, and small rugs. It works really well — even on the medium level suction, the vacuum picks up a ton of dirt and dust that you otherwise wouldn’t even see. As far as how it does with hair and fur, I’ve not had one issue with the vacuum getting jammed or the rotor getting stuck because of hair. the roller is designed in such a way that those materials just flow through to the dust bin. It’s almost magical.
I’ve used a lot of vacuums in my life, but this one has been the best by far. It has no cord to deal with, a full charge is enough to get through the entire house, and it’s very easy to clean out.
I would recommend this to a friend!


Share this review:
0points
0of 0voted this as helpful.
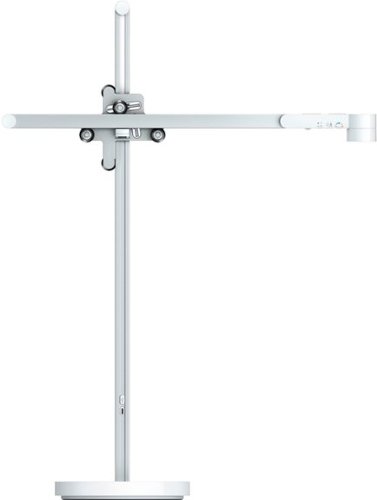
The Dyson Solarcycle Task Light is engineered for versatile illumination - transforming and adjusting light to support the way you live, work, and relax throughout the day. ~ Axis Glide motion puts powerful light precisely where you need it. A gentle touch of the arm precisely positions your light - vertically, horizontally, and through 360~. The Dyson Solarcycle Task Light has intelligently controlled LEDs that adjust brightness and color temperature. Connecting to the myDyson app~, it can adjust with your local daylight providing the right light for the time of day. It also adapts to your task, age, mood, and sleep times. Precisely engineered optics deliver powerful, high-quality light that's calibrated to help reduce eyestrain. And with Heat Pipe technology to cool the LEDs, it maintains its light quality for 60 years.~
Customer Rating
5
Produces bright light for desk areas
on July 11, 2023
Posted by: nickcal
For many years I’ve tried to make sure I have the correct lighting at my desk. It can be a difficult feat to achieve since there are a lot of variables to take into account and a lot of obstacles to overcome (i.e. fighting light from monitors, etc.). This rather impressive lamp from Dyson is a great way to provide lighting for your study/work area.
When I first saw this lamp, I thought it looked like an industrial piece of equipment. But, that was sort of the idea. The lamp is designed with an Axis Glide which allows users to put powerful light precisely where they want it. The lamp generates light through LEDs that are intelligently controlled through sensors or via the Dyson app. This is by far the most personalized lighting experience I’ve ever had.
As is the case with other Dyson products I’ve experienced, there is a lot of packaging to get through. The box is easy to open and all the pieces of the lamp are laid out in an intelligent way inside the box. Unboxing and unwrapping the lamp does take longer than the assembly process though. On the inside of the lid you will find an illustrated guide for assembly. I found this to be an easy way to get started with the lamp.
Some assembly is required of the user — but it’s minimal. There is a weighted base, a center post, and the extension arm with the LED. The LED arm connects to the center post with a magnetic connector and the unit gets power through a power cable that connects to the bottom of the center column through the base. The lamp is fairly heavy, but you want it to be so that it is secure on whatever surface you put it on.
Once the lamp is put together, you can move the LED arm in/out and up/down while the center post pivots on the base. It’s a unique design that makes it possible to position the light wherever you want it. There are touch controls on the lamp along with controls in the connected app.
I’ve been very happy with the light production of the Dyson light because it gives me the very bright light I’ve been wanting for a long time.
I would recommend this to a friend!


Share this review:
0points
0of 0voted this as helpful.
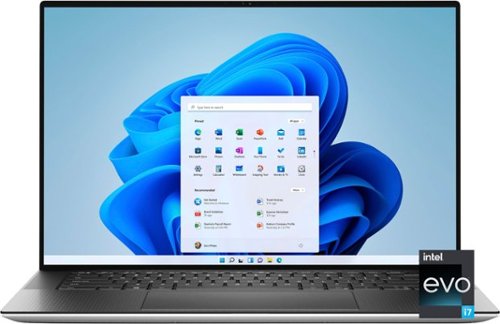
The XPS 15 laptop is the perfect balance of power and portability with an unrivaled immersive visual and sound experience. Whether you are streaming, editing photos or creating your next masterpiece, the XPS 15 has the power to move your ideas into reality.
Customer Rating
5
A high-class laptop for work
on June 22, 2023
Posted by: nickcal
I spend a lot of time on a macOS computer. That said, I do switch back and forth between operating systems — especially for work. So, it’s really advantageous for me to have a solid Windows laptop handy. This Dell laptop was incredibly surprising to me. It was easy to set up and a pleasure to use. It has plenty of power for standard tasks and the only thing that I feel it wouldn’t work well with is heavy photo or video editing.
Set-up
If you have been through one Windows laptop setup, you have been through them all. I got it out, tapped the power button and walked through the setup screens. I had to enter my Windows account information during this process and connect it to my WiFi. Once I got through the initial setup, I visited the Windows Update Center (located in System Settings) and walked through all of the updates that were needed. There were quite a few and it took about an hour to get through them all.
Display
I found the display to be adequate for my needs. It has a clear resolution — even if it’s not 4K. Text was clean and easy to read and videos looked great. Since it’s a 15-inch screen, it’s suitable for any type of productivity task and is even good for entertainment purposes.
Physical Appearance
This is one area where I felt that the Dell really shined. The laptop looks amazing. It’s got a very sleek outer case and when you open it up, there is a carbon fiber covering that really looks classy. There is a nice contrast between the light silver outside and the darked interior. If I were buying a laptop on looks alone, this one would be at the top of the list.
Keyboard
The keyboard feels like a standard laptop keyboard. The keys are easy to press and I really enjoyed typing on the soft rebounding keyboard. The keys are well spaced and I didn’t feel that my typing style was hindered in any way.
Speakers
The speakers are quite loud on the laptop. I tested them out with a number of audio tracks and found that they held their own. Some laptops really need a good external set of speakers, but the built-in ones on this laptop are pretty great.
Speed/Performance
I ran a couple of performance tests on the Dell — Geekbench and Novabench — to see how it would measure up. The overall Novabench score was 3360 which looks to be in line with other computers with a similar processor. The Geekbench score was 2551 Single Core / 12808 Multi-Core. This also seemed to be an average score among machines using the same/similar processor.
I never had any issues with the laptop’s performance. I thought it did a great job with most tasks and aside from the bloatware that was pre-installed on it, the laptop is a great option for most users.
Final Thoughts
While the price tag might spook some potential users away from this laptop, you really get a lot for the value. First of all, the laptop has 2 Thunderbolt 4 ports. Those aren’t cheap. Second, it does come with an external hub for connecting to HDMI or USB-A peripherals/devices. Finally, it has one of the newest processors available and it can tear through a large variety of tasks. It’s a great computer that can provide a lot of value to any type of user.
I would recommend this to a friend!


Share this review:
0points
0of 0voted this as helpful.

Introducing CZ Smart YouQ, the smarter smartwatch. Citizen CZ Smart Casual 41mm smartwatch is designed to help you be the best version of yourself throughout the day, every day. Inspired by the rich design of Citizen~s iconic sport technical timepieces, CZ Smart marries cutting-edge science and technology with the style and quality you expect from Citizen. CZ Smart YouQ leverages AI Models built with IBM Watson Studio and research pioneered by NASA Ames Research Center to power features within the proprietary YouQ application. CZ Smart YouQ helps you anticipate patterns of fatigue and alertness and offers highly personalized insights and suggested actions to help you improve alertness and promote the building of better habits, readying you to meet whatever the day may bring. Compatible with both iPhone and Android, CZ Smart YouQ features Wear OS by Google. The versatile, customizable menu of dials, designed exclusively for CZ Smart, gives you all the information you need at your fingertips. With a range of interchangeable 22mm bands available for all CZ Smart watches in bracelet, mesh, leather, and silicone, you can dress your CZ Smart watch for any occasion and make the most out of every moment. The Smarter Smartwatch: CZ Smart features the new proprietary wellness app YouQ built using research pioneered by NASA~s Ames Research Center and AI Models built with IBM Watson Studio. YouQ helps wearers maximize their daily potential by learning the wearer~s unique Chronotype and rhythms. YouQ computes HR, SP02, fitness activity, sleep data, and alert scores to offer the wearer a personalized 24-hour forecast of alertness. Aggregating data over time will enable CZ Smart YouQ to cater to wearers personally allowing them to understand their body~s natural rhythms. Meet your self-care advisor: CZ Smart YouQ provides the wearer a daily, brief, and gamified Alert Monitor, designed based on NASA~s PVT+ (Psychomotor Vigilance Task Test), a test used by astronauts to measure alertness. Only CZ Smart YouQ uses Alert Monitor scores and sleep data to identify the wearer~s distinct Chronotype (are you a morning go-getter, steady achiever, high-energy hustler?). CZ Smart YouQ helps you stay on track with an Hourly Power Score, an indicator of your cognitive and physical energy at a particular moment and offers Power Fixes to mitigate the effects of fatigue and improve alertness so the user can optimize themselves for what~s ahead. You may have a napuccino or liquid energy in your future. Preloaded and ready-to-go: Citizen Connected works with phones running on the latest version of Android (excluding Go Edition and phones without Google Play Store) or iOS. Applications available via the Play Store include CZ Smart YouQ App, Google Fit, Strava, Spotify, YouTube Music, and Amazon Alexa. CZ Smart features 24+ hour battery life (varies based on usage) and achieves a full charge in just 40-minutes. Connections include Bluetooth (connect your headphones), Wi-Fi, GPS (head out for a run or hike and leave your phone behind), and NFC (make contactless payments). Sensors include Gyroscope, altimeter, barometer, accelerometer, heart rate sensor, SP02, ambient light sensor, so that you can track activity goals, heart rate monitor, cardio fitness tracking, steps, sleep, and more. Personalization, notifications, and more: The uniquely designed CZ Smart dials give hundreds of options to fully customize your watch face and receive the information you find most important. Stay focused all day while getting notifications on your watch for incoming calls, texts, emails and calendar notifications. The built-in speaker enables you to conveniently answer a call from your smartwatch. With Amazon Alexa built-in, CZ Smart makes it easy to tackle your daily tasks and organization. CZ Smart next generation: Citizen Connected works with phones running on the latest version of Android (excluding Go Edition and phones without Google Play Store) or iOS, 24+ hour battery life, Qualcomm 4100+ chipset, offering the user a seamless connection and quick response and screen changes.
Customer Rating

3
Looks great, not quite smart enough
on June 12, 2023
Posted by: nickcal
The watch comes in a nicely branded box with an image of the product on the front and “CZ Smart” printed on the bottom. When you open the box, you find the watch, its charging cable, and the documentation for it directly under a protective piece of foam. The user manual is multilingual and it directs the user to charge the watch before using it and to download the appropriate app for setup. A power adapter is not included with the cable and watch.
This particular watch can be worn by men or women. It’s 41mm in size and looks a little large on smaller wrists, but its fits comfortable. The band is a standard flexible metal band that consumers would find on wrist watches with a similar style. The links can be removed if the band is too loose, but no tool is included with the watch for these adjustments. This was a little bit of a disappointment to me because other bands i’ve gotten like this usually come with a simple adjustment tool. I really do like the look of this watch. It has a classic style and can be worn with casual or formal attire. It’s not super flashy, but definitely makes someone take notice of it.
The setup is fairly straightforward - especially if you have setup a watch before. After you download the app specific to your phone brand (iOS or Google) you follow the on-screen instructions. The user has to scan a QR code that appears on the screen of the watch with your phone. This action pairs the two devices together. Then you will be asked to add a pin number. If it’s required, a software update will occur. I had to restart the watch a couple of times after it was completed before the watch was working smoothly.
In addition to these set up steps, you will also be asked to create a Citizen account, which is free but does ask for some personal information. The app could have a better experience and the on-watch interface is a little confusing to navigate through. There are lots of bugs in the app and one of the pieces of data that I want to track the most - sleep - takes a long time to update.
As far as general functionality goes, I ran into some common issues that others have reports. The watch would freeze and sometimes the settings were saved between the watch and my phone’s app. The battery life is not as good as I was hoping for and there is a lack of customization. I could overlook those two issues, but the connectivity between the watch and the app is really inconsistent. The watch also provides limited data in comparison to other smartwatches and it doesn’t seem to record data accurately. I compared walking and bike riding distances that were recorded by the watch and the phone and they didn’t match.
One other big con I have with this watch is that it is not water resistant. In this day and age, I expect any daily-wear watch to have some water resistance, but this one clearly states that it doesn’t have any within the specs.
Overall, the watch looks great but could function better. In a world where there are some amazing smartwatches that work flawlessly with their respective devices, this one falls a little flat in terms of being ‘smart.’
I would recommend this to a friend!


Share this review:
0points
0of 0voted this as helpful.
nickcal's Review Comments
nickcal has not submitted comments on any reviews.
nickcal's Questions
nickcal has not submitted any questions.
nickcal's Answers
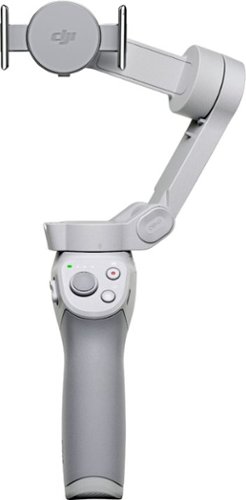
Life~s extraordinary moments deserve to be captured with smooth video. DJI OM 4 is a magnetic gimbal designed to complement your smartphone, allowing you to start recording right away. Ultra-compact, easy to use, and bursting with intelligent features, OM 4 is the ultimate solution for capturing and sharing your world.
Does the magnetic sticker phone attachment interfere with wireless phone charging?
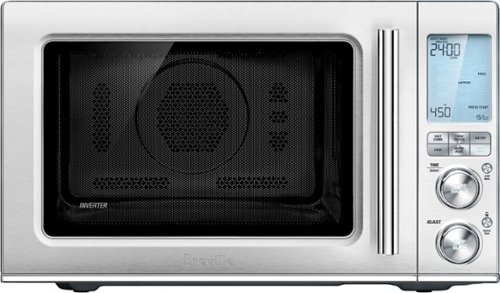
Ensure meals are cooked evenly with this Breville the Combi Wave 3-in-1e microwave. The grill, convection oven and microwave functions provide a variety of cooking options, while the Element IQ technology precisely delivers the right cooking temperature for optimal results. This Breville the Combi Wave 3-in-1 microwave features a Power Smoothing inverter for automatic adjustment of power to enable even heat distribution.
Is this an air fryer, microwave and convection oven
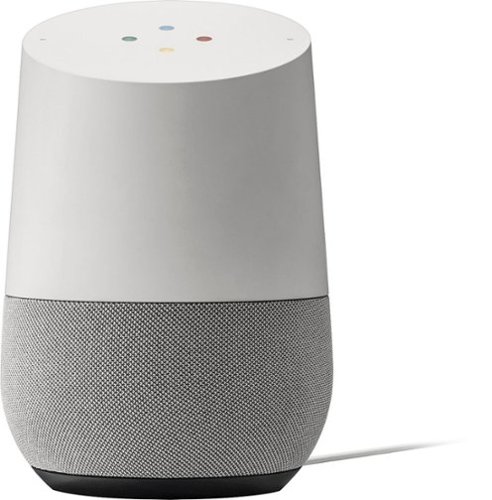
Simplify your everyday life with the Google Home, a voice-activated speaker powered by the Google Assistant. Use voice commands to enjoy music, get answers from Google and manage everyday tasks. Google Home is compatible with Android and iOS operating systems, and can control compatible smart devices such as Chromecast or Nest."
Will Google Home work with ECOBEE Thermostat?
No. Unfortunately, Google has limited functionality to only the Nest thermostat. At this time, I don't see them opening up support for third parties as they are probably trying to push it with their own hardware, but that could always change.
9 years, 7 months ago
by
nickcal
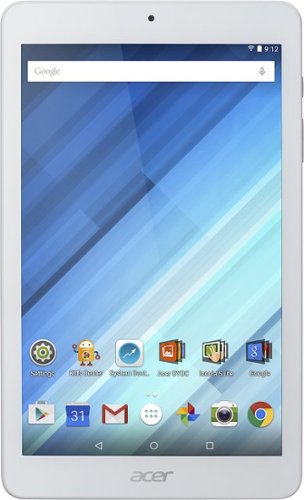
Enjoy a compact tablet that fits neatly in your pocket with this Acer Iconia One 8-inch tablet. It includes a quad-core processor and 1GB of RAM that deliver powerful processing to play all your games and apps, and the 16GB of flash memory ensure this Acer Iconia One 8-inch tablet and store your files.
can i download skype
Depends on the Google Play store. If Microsoft has a version of Skype for Android then yes.
10 years ago
by
nickcal