ReviewedByPhil's stats
- Review count135
- Helpfulness votes1,231
- First reviewJanuary 6, 2016
- Last reviewApril 23, 2024
- Featured reviews0
- Average rating4.6
Reviews comments
- Review comment count0
- Helpfulness votes0
- First review commentNone
- Last review commentNone
- Featured review comments0
Questions
- Question count0
- Helpfulness votes0
- First questionNone
- Last questionNone
- Featured questions0
- Answer count7
- Helpfulness votes7
- First answerJanuary 18, 2017
- Last answerSeptember 1, 2021
- Featured answers0
- Best answers1
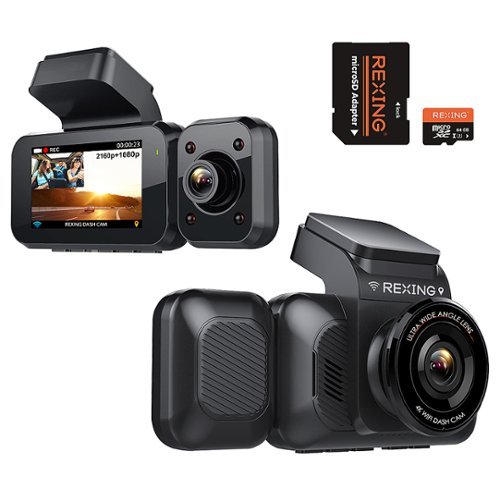
Capture video of the road ahead and your vehicle interior with this Rexing 4K front and cabin dash cam. The ultra-wide-angle lenses capture more of the surroundings and the infrared night vision lets you capture clear footage any time of the day. This Rexing 4K front and cabin dash cam features a parking monitor that automatically begins recording after detecting vibrations.
Customer Rating

4
Nice video & audio quality, simple to use
on October 19, 2022
Posted by: ReviewedByPhil
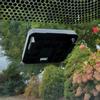
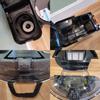
The Rexing V5C Plus is my first dashcam from this brand and also my first experience with an HD interior cabin facing camera in addition to a front-facing 4K road camera. It is a fairly large and chunky dashboard DVR camera with a 5.5” width, 3.5” height, and 2.5” depth due to the permanently attached cabin-facing side camera and integrated GPS antenna on top. The camera attaches to your windshield using a two-piece mount that allows you to snap in or remove the camera easily, while leaving only a small square of plastic adhered to the glass. The unit comes with a spare double-sided 3M sticker and an extra mounting shoe, if you want to switch cars or redo the installation.
On the front of the DVR is a ½-inch 170° ultra-wide angle lens centered within a large bezel on a swiveling ball-joint that allows you to adjust the lens angle to some degree up/down and side to side. The lens cannot rotate, however, so when placing the mount shoe on your windshield, ensure that it is level and parallel to the horizon, or your videos may appear crooked. The interior-facing camera protrudes from the right-hand side of the DVR’s main body, and its 1080p lens is also on an adjustable ball-joint. This camera has an additional input jack for an optional third, rear camera which you can purchase and add on separately.
The dashcam needs to be plugged into a powered accessory port (a USB port may not supply enough power) as the supercapacitor inside doesn’t have sufficient power to keep the camera running for long after the car is shut off; it’s just enough to allow it to save the last video clip before shutting down. If your car’s accessory port only receives power when the car is on, the camera will automatically startup and begin recording when the car is started; it’ll turn off after a brief delay when the car is shut off. If you want the camera to record continuously, you’ll either need to plug the camera into an accessory port that has permanent power even when the car’s engine is off or wire the camera directly into the vehicle’s electrical system with a hardwire kit. Only if permanent power is used can you enable “Parking Mode” which detects and records collision events while parked. A small trim tool is also provided to pry back the edge of your ceiling panel to run the power cable behind it for a cleaner wireless appearance.
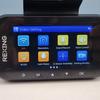
As the dashcam doesn’t have any internal memory, it comes pre-installed with a 64GB microSD card (supports up to 256GB) which can record up to 7.5 hours if using both the front and interior cameras at 4K and 1080p respectively, with clips averaging 80MB and 60MB from each. Clip length is fixed at 1-minute intervals, and the unit has automatic loop recording to overwrite the oldest unprotected clip. Protected files will take up space on the card until they are manually deleted or unprotected. The screen has a large 3” diagonal LCD and displays both the front and interior camera views on the screen simultaneously (picture in picture), however, you can switch to individual views by pressing the ‘down’ button. It also has voice control options with such commands as “take photo” and “lock the video.” I found the voice commands to be fairly responsive, and there’s a chime that plays after each successful command, though sometimes you’ll have to repeat the phrase a couple times before it registers (most often ‘video stop’ and ‘video start’). Note that there is no specific wake word, so it’s possible that camera may respond to similar sounding phrases during normal conversation.
To access ‘Playback’ mode, stop video recording on the device and press and hold the ‘Mode’ key until the file selection screen appears. I did find this mode to be a bit finicky though and the device would often freeze when going into a file’s menu options or attempting to delete one. The dashcam has a mobile app, Rexing Connect, in the Google Play store. While registering for an account is not required, you do need to agree to their collecting data in order to use the app. You only need to login in order to share your videos online, though you can also use social logins with your existing social media accounts.
In the app, you can pair to the DVR’s WiFi network using the password displayed on the screen, then you’ll be able to view and download the videos and photos on the dashcam to your phone, watch the feed of either camera, and take snapshots. It’ll even mark the videos you’ve already downloaded. If you don’t want to use the app, you will be limited to pulling the memory card and using a card reader (an SD card adapter is included) to transfer and save the videos/photos to a computer. The Rexing website has a GPS Player app that you can download to play the video files, but I was a little disappointed to see that the player doesn’t extract any raw GPS data from the video file, as it is unable to display speed, direction of travel, G-sensor data, nor GPS coordinates to generate a travel map, so it just behaves as a standard media player.
There are 5 phyical buttons along the bottom edge of the camera body, since the LCD is not a touchscreen: power, mode, up/down navigation, and OK. The interface is basic and you’ll only be able to navigate the pages of the menu screen serially, meaning if you want to go to a previous menu page, you have to loop through from the beginning.
The image quality of the front camera during the day is clear and detailed, with good color saturation and brightness. Timestamp and GPS information are stamped on the video files marking coordinate location and travel speed. Even at only 25 frames per second the footage is smooth, without capturing a ton of shakes and vibrations; when pausing the video, I’m able to read the license plates of cars within one car length.
At night, the image is clear and colorful but slightly grainier, and there is more glare around light sources, so some license plates will appear washed out to the point that they can’t be read. The cabin footage is decent, though a bit under-saturated. The field of view is wide enough to capture the entire interior of my sedan including both front seats as well as the backseats. In dark conditions, the IR LEDs activate and the interior cabin footage is filmed in black and white but still produces clean and clear images. One thing to be aware of is that if the front passenger puts down the sun visor, this can block the interior camera from capturing any useful footage. Despite the wide-angle of both lens, there is very little fish-eye distortion and minimal appearance of curvature in the corners of the footage. The built-in microphone captures audio inside the cabin, and it is fairly loud, clear, and intelligible. The same audio is used in the both front and rear video files in the same time interval.
You can create a ‘protected’ emergency video file at any time during recording by pressing the ‘Up’ key and this will create a new video file using the previous 10 seconds and the following 10 seconds for a total of 20 seconds. Interestingly, the original unprotected footage is also retained on the card so if you need more than 20 seconds, you can quickly locate the additional footage by the protected file’s timestamps, provided those haven’t yet been overwritten. Note though, that emergency recording can only be activated if the unit is already recording and cannot be initiated from standby mode when no footage is currently being captured. Protected files can also be created automatically with the G-sensor enabled (with low, middle, and high, sensitivity settings). You can take snapshots with the camera by pressing and holding the ‘Down’ button at any time. If you don’t want the live view on all the time, toggle LCD power save mode to switch off the display after 1 or 3 minutes.
Overall, the V5C Plus is a pretty standard and basic dashboard camera. The video footage and audio captured are clear, smooth, and detailed. Both the interior and front cameras have a generously wide field of view without distortion and have decent color, saturation, and brightness. Nighttime footage can be more difficult to make out and glare is an issue, so when paired with the low frame rate makes capturing details like license plates less likely in the dark. GPS and date/time information are stamped in the video footage. The voice commands are a neat addition but somewhat superfluous, and they don’t always trigger on the first try. The app conveniently lets you download and view the videos to a phone via WiFi.
I would recommend this to a friend!


Share this review:
+9points
9of 9voted this as helpful.
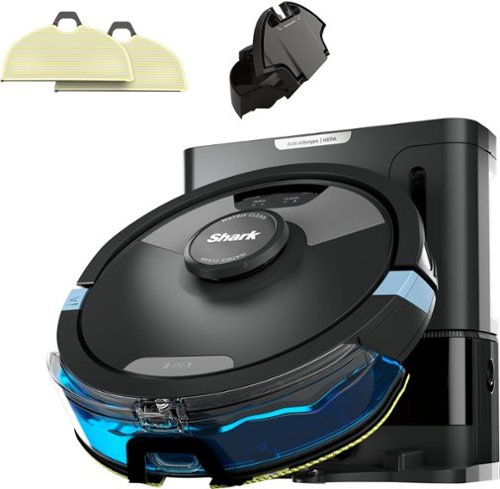
The Shark Matrix Plus 2-in-1 Robot combines an ultra-powerful vacuum with Sonic Mopping for a complete clean from start to finish. First, it’s an ultra-powerful whole home vacuum on carpets and floors that empties its own dustbin. Second, it’s an ultra-powerful vacuum that sonic mops hard floors at the same time. It features Matrix Clean, which allows your robot to clean from multiple angles using a precision grid ensuring no spots are missed on all your floor types. No cleaning detail is unmet with this robot’s corner and edge cleaning, self-cleaning brushroll for pet hair, and HEPA filtration trapping 99.97% of dust and allergens into the bagless base. With Precision Home Mapping, the robot uses its 360 LIDAR vision to scan your home and build a detailed map, enabling fully autonomous movement. This also allows your robotic vacuum to detect and avoid objects in its path day or night. It creates a precise home map in the SharkClean app so you can select specific areas to clean on-demand, initiate Matrix Clean, and set cleaning schedules from anywhere. Utilize the app to set custom carpet and no-go zones for complete control of where the robot cleans and doesn’t clean. This robot masterfully integrates Matrix Clean with vacuuming, mopping, CleanEdge, and self-emptying to give you the ultimate floor cleaning machine.
Customer Rating
4
Cleans floors quickly, large self-empty bin
on September 22, 2022
Posted by: ReviewedByPhil
The Shark AI Ultra is my second 2-in-1 robot mop/vacuum from this brand, though it is my first experience with a bagless self-emptying docking station. It has the typical robot vac disc shape, front bumper, cliff sensors, side brush, and central roller brush. This unit is not the largest robot I’ve used with its 13” diameter but is one of the tallest at 4-1/4” (including the LIDAR module centered on top). The height of the unit’s main body is 3-1/2” which just clears the bottom of the cabinets and appliances in my kitchen without getting stuck.
There are two physical buttons on the machine: dock/power and start/spot clean. To access the different functions, simply short press or long press the buttons accordingly. The LCD screen on the robot has three indicator icons for error, charging, and WiFi as well as red, white, blue and green status lights. Setting up the charging station is pretty quick and straightforward. After assembling the two piece landing mat (it clips together), you sit the charging station on top and plug it in, ensuring that there’s 3 feet of clearance to the left and right of the station and 5 ft of clearance in front. The station has built-in cord storage/guide slots on the back, so you can keep your wires neat and tidy and set it right up against a wall without cord interference. Its placement should be fairly permanent, as moving the station around may cause the robot to have trouble finding it.
When charging, the robot sits facing away from the base if using the self-emptying dust bin. This is because the exhaust port is located at the rear, so it needs to back in to the station in order for it to suction out the debris. If using the combo mop/dust bin, the unit charges facing toward the station, but you will need to empty out the dust bin manually as it is not compatible with the self-empty feature. This is to ensure that you remove the mop bin and clean/dry the mop pad and water tank after each use, as otherwise it could develop mold and mildew from being constantly wet.
The robot takes about 3-4 hours to fully charge. The battery LED flashes when charging and disappears when fully charged. In order to utilize the “smart” features, download and install the Shark Clean app to a mobile device and create an account. This lets you use features like floor plan mapping, schedule automatic cleaning, and change settings on the robot like suction power and water flow amount when vacuuming and mopping respectively. Note that your mobile device needs to have an internet connection in order to use the app. You can also connect the app to Alexa using the Shark skill and start and stop vacuuming using voice commands, which worked well.
After adding the robot to the app, it “explores” your home and creates a map of all the areas that the vacuum can reach. The robot uses LIDAR to scan the room for its size and shape as it traverses your floors. I have an open floor plan with no carpet or rugs and the vacuum was able to go everywhere but the laundry room, since there is a step down. The robot crossed all thresholds between rooms with no trouble and avoided the step with the cliff sensors.
The map generated in the app is very accurate, and the robot did not need to bump something in order to detect obstacles like large furniture and walls, preventing dents and marks. It would go right up to things and turn without touching it using its CleanEdge sensor and the sweeper brush collected any debris along the wall. The exception was furniture with narrow legs, as it would tap them gently before changing direction. The robot could not, however, gather dust from the very corners of a room, due to its shape and limited reach of the brush. I did see the robot push some objects around though, if they were lightweight, for example, it knocked over my studio light on an aluminum tripod and moved a couple of empty boxes as these didn’t have enough weight to activate the front bumper.
You can edit the map in the app to label rooms, define “no-go” and “carpet” zones so the robot will avoid them during vacuuming or mopping, and set “high traffic” areas to be cleaned more thoroughly. The only odd thing is that these rooms/zones have a minimum size of 5.3 square feet, which is pretty substantial. So instead of marking off a small area for the fireplace, I had to block a fairly large space to not be cleaned. The other thing is that rooms and zones can only be defined as parallel/perpendicular rectangles and can’t be rotated (though the entire map can be rotated 90 degrees); so if you have areas that at not square or rooms that exit off at odd angles, it will be difficult to define them properly in the app. I found this model from Shark also does not respond to magnetic barrier strips that I have placed around the house for previous models to not cross, as this feature has been replaced by the no-go zones.
You can only save 1 map at a time, so if you move the base station or make any layout changes, the map will need to be deleted and re-drawn by running the “explore” process again. Just be warned, deleting a saved map takes a pretty long time to complete in the app. The app also does not show you live tracking of the robot as it cleans, so you won’t see its location marked on the map as it moves around the house. However, if you need to track it down, you can use the “find robot” feature which makes the vacuum play a short audible tune. Despite the app telling you that the audio will “persist for about 30 seconds” it only plays the 3 second tune once, so you’d have to trigger it again if you need another auditory clue.
When vacuuming hard floors, the robot picked up plenty of dust, hair, and debris. However, on carpeted flooring its maneuverability and cleaning ability was not comparable. While the wheels were able to travel in fits and starts on medium-pile carpeting, it had trouble moving if the carpet was wavy or wrinkled. It also didn’t penetrate deeply into the carpet fiber to remove hair and debris; even on max suction it left behind bits of fuzz and tangled hair in its wake, so I don’t recommend it for carpet.
After cleaning, the self-emptying station pulls nearly all of the debris out of the robot’s bin, though there is usually some left clinging to the filter screen. The removable HEPA filters in the robot and in the charging station are all washable and should be cleaned regularly or when clogged. The station’s bin holds up to 60 days worth of debris and is easy to eject for emptying; hold it over a garbage can/bag and press a button to release the lower lid and drop its contents into the trash.
When using the mop tank, which also has a dry vacuum chamber, it adequately vacuumed and mopped simultaneously. The water tank is fitted with a mop pad secured via micro-Velcro and a spare is included in the box. Shark recommends using plain water or half and half water with the supplied cleaning solution. After mopping our ~400 sq ft space, there was about half a tank leftover on max flow level. The mopping function was decent, picking up more dirt and debris than vacuuming alone, though it couldn’t remove really stuck-on, dried, sticky bits in the kitchen; those spots required a little more scrubbing and detergent than the robot could deliver. The only part of the mopping process that I found troublesome was emptying leftover water in the tank, as the drain plug’s location doesn’t allow all it to drain out completely without tons of shaking. The mop pad was easy enough to hand wash and hang dry with a bit of laundry detergent.
In the ‘History’ section of the app, you can view a summary of all the cleaning sessions for a particular day, areas cleaned, and total run time. If your home is large and the robot needs to cover more than 900 square feet of space, you can set it to recharge and resume if it doesn’t finish the entire area in one go. You can also set it to return to the station and empty its dust bin after 30 minutes of cleaning before resuming where it left off, for homes with pets or lots of debris that could clog the bin.
For automatic daily cleaning (whole map only), pick a time and the days of the week for the schedule to run. You can only choose one time which will apply to all selected days of the week. The robot can also remember the previously used suction power/flow levels to apply them to future cleaning runs. When cleaning a single room selected on the map, you’ll have the option to use “Ultraclean” mode which always uses max suction power, regardless of your saved cleaning preference.
Overall, despite a couple of shortcomings in the app, the actual vacuuming and mopping performance of the robot is pretty good, though it can be loud when running at max power and self-emptying. For our small home, there is enough battery life to cover all areas without needing to recharge during its run and mops the floors with water to spare. It performs well on hard flooring but not carpet. With daily scheduled cleaning overnight, we’re able to keep a baseline level of cleanliness to our floors and only have to empty the station’s dust bin every other month or less frequently. Mopping can’t really be automated since we’d have to fill the water tank and empty/clean it out afterward, it’s nice to have this option for when we need it.
I would recommend this to a friend!

Share this review:
+7points
7of 7voted this as helpful.
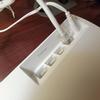
Don’t let the battery of your device die as you work throughout the day. The Insignia NS-PW365C2W22 100W Dual Port USB-C Compact Wall Charger for Business USB-C Laptops & One Device has a high, 100-watt output to quickly charge your business laptop, smartphone, tablet, and more. It has two USB-C ports so you can connect your cable (not included) and charge two devices simultaneously. Its compact and durable body with a foldable plug easily fits into a purse or pocket, ready for when you need it. A simple white design pairs well with your other accessories. Keep your laptop and phone both working as hard as you do with this dual port, easy-to-carry charger.
Customer Rating

5
Fast-charge multiple devices simultaneously
on September 16, 2022
Posted by: ReviewedByPhil
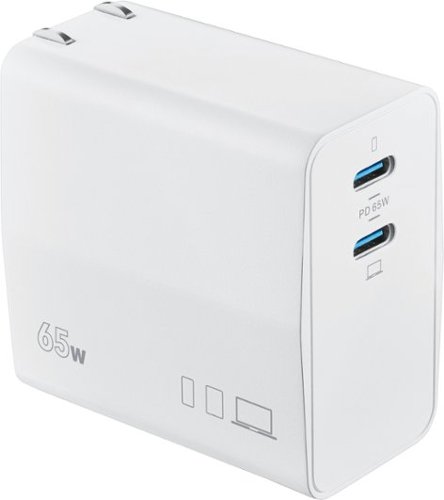
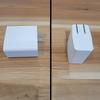
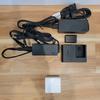
The Insignia dual USB-C compact wall charger is a portable power adapter measuring 2 inches square by about 1-1/4 inch wide. While small in size, it’s actually quite dense and heavy, weighing about 5 oz. A USB-C cable is not included, so you’ll need to provide your own for charging your devices.
The brick has a clean, matte, white design with slightly gabled sides creating a line of texture on either side that’s easy to grab when removing it from the outlet. Its 2-prong plug folds away when not in use and is non-polarized so can be plugged-in in either direction. It is compatible with both 120V and 240V outlets too, so you don’t have to worry about it blowing a fuse when you travel overseas.
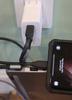
On the front are two USB-C ports with each port able to output 65W (max) to a single device (20V and 3.25 Amps) when one device is plugged into the adapter. If using both USB-C ports, the top one outputs 20W and the lower 45W, for 65W total output. This makes this wall adapter powerful enough to power and charge most business laptops that accept USB-C charging (Power Delivery aka PD), Chromebooks, and the smaller size Macbook Pro, as well as tablets, smart phones, and digital cameras.
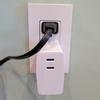
In many cases, you’ll be able to charge both a laptop and a smaller device with the notable exceptions of larger business laptops and Macbooks since these requires the full 65 Watts on their own. There are no LED lights to indicate power or status, but that also means it won’t output any light pollution when used in a bedroom at night. The adapter does get quite hot to the touch when it is operating, so you may need to let it cool down a bit before unplugging it from the wall.
What I like about this charger is that it’s a lot smaller than my Lenovo laptop’s and Chromebook’s power bricks (65W and 45W respectively); it uses USB-C to USB-C cables which are inexpensive and of which I have plenty. The fold-away plug also means that it packs up nicely into my bag, and there’s little chance of it receiving or causing any damage.
The best part is that with a single, compact adapter I can power/charge multiple devices, like my Chromebook and smartphone, or camera and tablet, without taking up an additional outlet, as there’s still plenty of room to plug something else in above this adapter. It also saves me from having to carry multiple power bricks and chargers when I travel. My devices charge quickly, simultaneously, and reliably on this adapter, and it adjusts the amount of power it outputs to whichever power level my devices require.
I would recommend this to a friend!


Share this review:
0points
0of 0voted this as helpful.
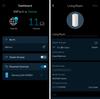
Linksys Atlas 6 with Intelligent Mesh delivers the true power of WiFi 6. From next-level gaming to streaming your favorite content, get the faster connection, wider coverage, for more devices for everyone on your network at an affordable price.
Customer Rating
5
Simple setup, fast/reliable speeds everywhere
on September 8, 2022
Posted by: ReviewedByPhil
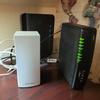
The Linksys Atlas 6 is our third mesh WiFi 6 system from as many brands. As an entry-level mesh system, its network speed is AX3000 running on a 1GHz dual-core processor which supports ~600Mbps and ~2400Mbps on the 2.4GHz and 5GHz bands respectively and has access to 160MHz channel widths. The 3-pack covers up to 6000 sq ft and up to 75 devices, though the system is expandable and can support up to 50 nodes.
This kit includes 3 identical routers with power adapters, and you can use any of the units as the primary node with the other two as client nodes. In our 3-story home, we placed one node on each floor for full wireless coverage of the house. Since the modem and primary router are located on the top floor, we usually experience significant signal strength and speed drops on the first floor, but this was not the case with the Atlas 6 mesh system.
The data transfer speeds our first floor are much improved with average download and upload speeds around ~500Mbps and ~25Mbps respectively, whereas with our previous mesh system it was about half of that. The node on the first floor uses the node on the second floor as an intermediate hop, rather than trying to jump two floors to wirelessly backhaul directly to the main router. All of our IoT/smart home gadgets, switches, and mobile devices stay reliably connected to our network, and we haven’t noticed any dips in internet speeds even when multiple devices are streaming at the same time. You can also enable the higher DFS frequency channels for the 5GHz band to avoid interference, but your client devices would have to be compatible, and this option may cause intermittent connectivity issues if you live near an airport since this range overlaps with radar systems.
To setup and administer the network, I downloaded and installed the free Linksys app to my smartphone. The app connects to the routers via Bluetooth, and you have to set up/add each node one at a time. It took me about 15 minutes to complete setup for the entire system. Folks who don’t have access to a mobile device can still setup and use this mesh system by manually connecting a WiFi device to the setup network printed on the bottom of each router. There, you’ll also find a reset button, WPS button, and on/off switch. The routers have only one small LED indicator on top that uses color and flashing patterns to show its current status; while the light cannot be dimmed or disabled, we didn’t find it to be a huge source of light pollution in the bedroom at night.
Since we have two WiFi networks, one for our data hungry devices like computers, video streamers, and mobile phones, and a sub-network for less demanding devices, the Atlas 6 is replacing our primary network. I like that all the routers have four Gigabit Ethernet ports (1 WAN and 3 LAN) as this enables us to connect multiple wired devices at each node, so for example, our sub-network’s parent node on the second floor can be hardwired, as well as the control unit for our smart water timer on the first floor, without having long runs of Ethernet cables through walls and between floors. However, if you prefer to or already have the wiring in place, you have the option for wired backhaul to the parent node.
The Linksys app is user-friendly and straightforward to navigate and use to modify the handful of available settings like enabling and password-protecting an optional guest network, changing the network name and password, and activating WPS for new devices. You can also prioritize up to 3 devices for limited connections (under 200 Mbps) so that your work computer, media streamer, and/or gaming console, will always have the best connection for more stability where you need it. There are some more advanced setup options too, like MAC address filtering, port forwarding, and DNS settings.
Security-wise, the router employs an SPI firewall and WPA2/WPA3 encryption, though this can be changed in the settings if you experience connection problems with older devices. A couple parental controls help you protect your kids if you need to block specific websites or URLs (you must enter them manually), and you can also pause internet access on-the-fly or on a recurring schedule. These settings must be entered separately for each device connected to the network, as there isn’t a way to create a single block list and apply it to multiple devices.
Overall, the Atlas 6 is an improvement over the mesh network we were using previously, providing stronger, more consistent, and reliably fast signal throughout our home. While there aren’t a lot of advanced configuration options, it should still meet most users’ needs. Setup was very easy and quick, and the network is expandable for larger homes and spaces.
I would recommend this to a friend!

Share this review:
+5points
5of 5voted this as helpful.

JBL 104-BT compact reference monitors with Bluetooth draws from seven decades of JBL Professional engineering to deliver the true sound. They’re perfect for recording musicians, producers, PC gamers, podcasters and vloggers, as well as professional audio engineers seeking an accurate portable reference with Bluetooth streaming. The black 104-BT version is a sleek, elegant design with compact form factors, making stunning statements in any studio while conserving valuable work space. Creative professionals, music lovers and anyone who wants the flexibility to stream both wired and wireless sound into high-quality studio monitors can count on JBL 104-BT to provide an accurate, reliable sonic reference and a truly enjoyable listening experience.
Customer Rating
4
Clean/clear audio, decent for podcasts/voiceover
on September 2, 2022
Posted by: ReviewedByPhil
As a video content creator, I spend a lot of time with headphones on my head, but that can get tedious and tiring pretty quickly, so it’s always nice to use reference monitor speakers to help me work more efficiently and give my head and ears a break.
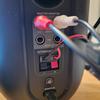
These JBL 104-BT Desktop reference monitors are compact, versatile, and have four input options: Bluetooth, RCA, stereo ¼-inch balanced TRS, and Aux. You’ll receive a pair of flat-bottomed capsule speakers, a master monitor (default right channel) and extension (default left channel). Thick rubber pads on the bases of the speakers keep them from sliding around and isolate them from your work surface.
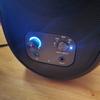
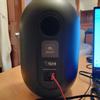
You’ll connect the master monitor to the extension using the included 6 foot black and red speaker wires, which can be cut to length. Volume and input controls are located on the front of the master monitor as well as 3.5mm headphone output jack and Aux-in port, while the power switch is on its back. Note that the speakers are automatically muted when headphones are plugged in. Select an input by pressing the toggle button to switch to an individual source or choose “all” which allows you to monitor all inputs simultaneously for mix monitoring.
The master houses a 60-Watt amplifier that delivers 30 Watts to each speaker, allowing you to get a lot of volume out of these relatively small speakers. The sound is very clean with crisp detail and a buttery, full midrange. While the balance is neutral and flat, I found that there was excess sibilance in the upper registers, resulting in sizzly cymbals and shushy, lisp-y sounding S’s in both spoken and sung voices. There was also a general lack of punch in the bass despite having a low-frequency port on the back, 4.5-inch main driver and ¾-inch high-frequency tweeter. Bass reproduction was a bit more pronounced at higher volumes, but in general, listening to these at super loud volumes isn’t all that helpful for content creation, so if you’re mixing content where bass reproduction is critical, I highly recommend adding a subwoofer to your setup to round it out.
Just be aware that if you use the supplied RCA to 3.5mm cable that this is an unbalanced cable and some interference or white noise will likely be present; I found that when using the RCA to Aux cable, at all volume levels there was audible white noise through the speakers, especially when absent a playback signal, though at lower volumes it was less perceptible. Using the TRS connections with balanced cables and an audio interface that supports balanced output may help eliminate the noise, barring any ground loop issues.
Since these are designed to be desktop monitors, placement relative to the listener does have an impact on how they will ultimately sound. The ideal position is at arm’s length angled inward so the speakers are both pointed toward the listener’s ears. This will be the sweet spot where you’ll find the clearest audio and most accurate soundstage for depth and sound placement. This also means that the best sound will usually only be perceived by one person at a time.
The Bluetooth 5.0 input option is an interesting feature that’s useful for reviewing your mixes post-production to hear how it’ll sound with BT compression applied. Be aware that this input option isn’t great for watching movies or video since there is a noticeable lag between audio and video streams using Bluetooth, though it’s fine for listening to music. Due to the relatively flat and neutral balance of these speakers, for media and entertainment, they won’t sparkle out-of-the-box; that can be easily remedied on a computer or audio receiver with a few quick EQ adjustments but may be a bit more challenging if you plan to use them with other consumer electronics like a gaming console or movie projector.
The speakers enter a low-power standby/sleep mode after a 20-minute period of inactivity, but initiating playback or pressing the toggle button will wake it back up. This feature can also be disabled manually. As for portability, each speaker weighs around 4 lbs, so while they’re not “toss in your backpack” portable, you could still tuck them into a suitcase or pack them in the trunk on a road trip, which is what I did on a recent weeklong vacation to the shore.
Overall, I found the sound from these speakers quite suitable for monitoring my recorded creative content, which consists mainly of spoken word narration and voiceover work. If working with musical content, adding a subwoofer will likely be necessary, and for casual consumptive use, they’re fine, but not fully immersive. They’re nicely designed and somewhat portable, though probably are just unnecessary travel weight if you have a decent pair of reference headphones.
I would recommend this to a friend!


Share this review:
+6points
7of 8voted this as helpful.
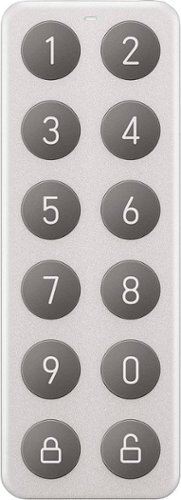
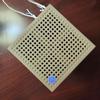
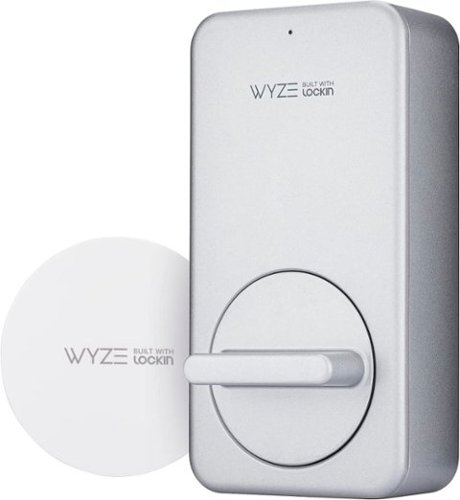
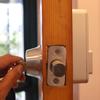
Wyze Lock Keypad makes Wyze Lock even better. Get Wyze Lock Keypad to unlock your door with a code. Wyze Lock Keypad allows you to share time-based codes with guests that only work on specific days and over specific times. It works great in the dark with a crisp LED and locks your Wyze Lock at a single touch of a button.
Customer Rating
4
Backlit keys, 4 access levels, works well
on June 23, 2022
Posted by: ReviewedByPhil
This keypad add-on expands the functionality of our Wyze lock by allowing us to create and share temporary access codes with friends, family, or service people when needed. Without the keypad, the only option to share access for the Wyze lock with others is at the account level through the Wyze app which gives the recipient unrestricted lock and unlock access via a Bluetooth device or remotely over the internet. That’s fine for household members, and while you can revoke access at any time, for others you may want predefined limitations. Another benefit to using this keypad is that the user doesn’t need to have a mobile device, the Wyze app or account, nor an internet connection to unlock the door.
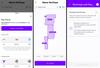
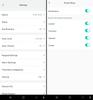
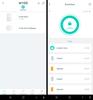
Adding the keypad to the lock allows you to share access codes for guests with varying levels of restrictions: always, recurring, temporary, or one-time. Always means that there are no limitations on its use, and the user can unlock the door anytime with their code until the code is deleted.
For recurring, you can choose one or more days of the week and a time window that will apply to all days, for example, Monday to Friday from 1-2PM for your dog walker. However, you can’t choose different time intervals on separate days, for example, 1-2PM on Mon/Wed but 2-3PM on Fridays. You’ll need to set up a different “guest” for each time window, and unfortunately you can’t duplicate existing PIN codes so each guest needs to have a unique PIN.
For recurring, you can choose one or more days of the week and a time window that will apply to all days, for example, Monday to Friday from 1-2PM for your dog walker. However, you can’t choose different time intervals on separate days, for example, 1-2PM on Mon/Wed but 2-3PM on Fridays. You’ll need to set up a different “guest” for each time window, and unfortunately you can’t duplicate existing PIN codes so each guest needs to have a unique PIN.
For a temporary code, you can choose a start date/time and end date/time for when the code can be used, but again, you can only set up one access window at a time, and it must be continuous. If your guest needs access over multiple intervals, you’ll need to revise the dates and times in their settings after each period expires.
The last type of access is one-time and these codes will expire after a single use and cannot be used again to unlock the door. This works well for things like indoor delivery services, however, you cannot combine this with a time restriction, for example, if you want the code to be valid only after but no later than a specific date and time. The only way would be to manually control that by only creating this type of code when it is needed and remembering to delete the code if it goes unused.
One thing to note is that once a code is created, it will only be displayed once in the confirmation message and won’t be visible in the Wyze app thereafter. So if you or the guest forgets it, it will need to be reset. One bug currently in the Android app is that after creating a guest code, when you press the ‘Done’ button, it goes back to the access type selection screen, and you’ll need to back out manually, otherwise going through the steps again will result in an error.
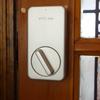
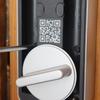
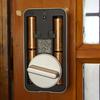
The housing of the keypad is durable, heavy-duty aluminum that matches the Wyze lock's housing. The keys on the keypad are backlit when pressed and are white when entering a code, red if an invalid code is entered, and green when a valid code is entered. There are also audible beeps that confirm valid or invalid entries. The other interesting thing is that you can “mask” your code by entering random digits before and/or after your actual code, up to 20 digits total, and the door will still unlock. This may help prevent folks who are watching you enter the code from discerning your real PIN. There’s a one-touch lock key on the keypad too so you can lock the door from the outside.
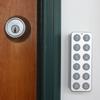
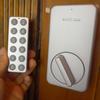
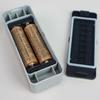
The unit is weatherproof and has a rubber gasket on the battery bay door on the back to keep water, dust, and bugs out and it mounts firmly to the included metal wall mounting plate, though it does not feature any anti-theft deterrent like a security screw. Depending on the amount of usage and ambient temperature, the 2 AA batteries can last weeks or months before needing to be replaced.
Overall, this keypad was quick and simple to install and pair and setup with my Wyze lock. It gives us more options and control when sharing access to the door for our guests, service people, and deliveries. An improvement would be the ability to define multiple time windows for guests upfront and time restrictions on one-time use codes, but as long as you’re aware of these limitations you can work around them.
I would recommend this to a friend!


Share this review:
0points
0of 0voted this as helpful.
Wyze Lock is a staple in our smart home wizardry. This is a smart lock that that does what you expect, and really all that you need from a smart lock. Wyze Lock is Wi-Fi capable, so you can control it remotely from your phone to let the dog walker in, or make sure it gets locked after you left on your vacation in such a rush. That’s not all this bad boy can do. Wyze Lock comes equipped with App and knows when you arrive home and automatically unlocks as you approach the door. Once inside, Wyze Lock’s built-in gyroscope detects when the door is closed and automatically locks behind you. It’s got all that and more. Like we said, all the tech you need, now at a price you can afford.
Customer Rating
5
Easy to use, quick install, convenient
on June 22, 2022
Posted by: ReviewedByPhil
The Wyze smart lock is our first product from this brand, though it is not our first WiFi lock as we already have one from another brand installed at our back door. We decided to go with Wyze for our front door for several reasons. We already have a deadbolt installed, and we don’t often use the front door to come and go from the house, so we wanted to make sure that we could still use a key to get in and out if the batteries in the smart lock ever ran out. We appreciate that this lock has a long lasting battery life of up to 6 months, but also know from experience that it’s easy to get locked out when a smart lock’s battery dies while you’re away and you don’t have a backup entry method when you get home!
We liked that with this lock, you don’t have to replace the whole deadbolt. You just swap out the inside thumb latch with the Wyze lock, which contains the motor, WiFi receiver, and batteries. This allows you to use the physical keys you already have as backup and makes its installation quick and easy; we were able to complete it in under 20 minutes including app setup. Everything you need to install the Wyze lock comes in the box, including two sizes of mounting screws, four AA batteries, a wireless gateway module, and a universal retrofit kit (mounting bracket). I recommend downloading the Wyze app first as it has guided installation instructions with photos and links to video clips to help you at each step.
The mounting bracket has adjustable sliders for the screws' positions, so you can find the right spacing for most existing deadbolts. There are also 4 color-coded adapters to fit different deadbolt tailpipe shapes. The Wyze lock mounts to the retrofit kit with two screws in the battery bay, and the batteries are held in place with small latches that must be engaged in order to replace the magnetic cover properly. After the unit is powered on, you can add it and the accompanying wireless gateway in the app (account registration required).
The gateway is a plug-in module which bridges a connection between the lock and your WiFi router. This is what allows the unit to utilize low power consumption while still being able to be accessed remotely from the internet, but also means that you’ll lose remote access if the power or WiFi in your home goes out. However, since the lock also has Bluetooth, you’ll always be able to control the lock from the Wyze app while you’re in Bluetooth range (~30 ft). Connecting the lock to WiFi also allows the unit to install firmware updates from the internet.
After adding to the app, calibrate the lock to detect the door's position using its internal gyroscope. Then you can open and close it manually using the thumb latch, via the app, or with your existing deadbolt key. We also got the optional numeric keypad (sold separately) that you mount on the outside of the door that lets you to enter a custom 4 to 8 digit PIN code to unlock the door. You can also link Wyze to an Amazon account with Alexa to enable AI voice commands to lock and unlock the door and control it in routines. These features worked as expected, but note that for voice unlocking, you have to choose a 4-digit pin that you say out loud after issuing the unlock command.
The other feature I think is useful is the auto-unlock that utilizes your GPS location. When you’ve returned home after being away for some time, it’ll automatically unlock the door once you’re within Bluetooth range, and you don’t have to pull out your phone or punch in any code. If the door isn’t opened within 10 minutes, it will automatically relock itself.
The main thing to remember about having a smart deadbolt lock is that you still need to carry a key for the door’s knob unless you leave it unlocked or use a knob without a lock; we went with the latter as there’s less chance of getting locked out by accident. The other thing we really like being able to do is remotely set up virtual keys for other people. The first way to do this is to share the lock with another Wyze account, and this grants the recipient lock/unlock privileges just like a primary user which is great for household members. However, if you have the keypad add-on, you also have the option to issue temporary keys (4-8 digit PINs) that work only within specified time windows, are recurring, or expire after a single use. Either way, you’ll be able to see in the app a history of how the keys are used and the door's position.
The only feature that the app seems to be missing is auto-lock via geolocation, which our other smart lock does support. It’s basically the reverse of the “auto-unlock when you arrive home” feature, where instead it would automatically lock whenever we leave our home. The Wyze lock doesn’t have this option built-in since the auto-lock feature is limited to a timer setting only, and it requires that door position sensing be enabled so the unit knows when the door is closed. Fortunately, Wyze supports IFTTT integration, so it’s easy enough to set up a geofence applet that will fill in this gap.
There’s also a “Trash mode” for taking out the trash sans phone or other such short trips, so you don’t get mistakenly locked out when you close the door behind you. To engage it, you slowly unlock, lock, and unlock the door and when you go out and close the door behind you, auto-lock will be temporarily disabled until you re-enter (open and close the door again); then auto-lock will automatically re-engage. Of course, the caveat is that if someone else opens and closes the door before you return, you could still get locked out.
While the embedded gyroscope for sensing the door position is mostly accurate, there were a few times that the door wasn’t shut all the way, and the auto-lock kicked in and subsequently jammed against the jamb. This might happen more often for folks with tight fitting doors or doors that stick and don’t easily close all the way. The other thing we noticed is that if we manually turn the thumb latch too slowly, the deadbolt doesn’t retract into the lock all the way, preventing us from opening the door (as it remains partially latched). This could just be due to our particular deadbolt, and we didn’t notice this same behavior if unlocking slowly from the outside with the key; we just have to remember to turn the latch quickly when unlocking from the inside. Oddly, a couple times the thumb latch free-spinning range appeared to shift so when we manually turned the latch, we had to turn through the motor resistance to both lock and unlock the door. To correct this we simply had to recalibrate the lock, though we’re not sure what triggered this behavior.
Overall, this Wyze smart lock fit the bill for what we need it for. We can share access or temporary keys when needed using the keypad add-on, access and control the door remotely, and have the door automatically lock and unlock in certain situations. It integrates nicely into our existing smart home environment and was quick and easy to install. It’s has a few quirks we can live with though we’re eager to see how long a set of batteries ends up lasting as we don’t use this door often. Best of all, we were able to keep our existing deadbolt and keys to use as backup.
I would recommend this to a friend!
Share this review:
+2points
2of 2voted this as helpful.
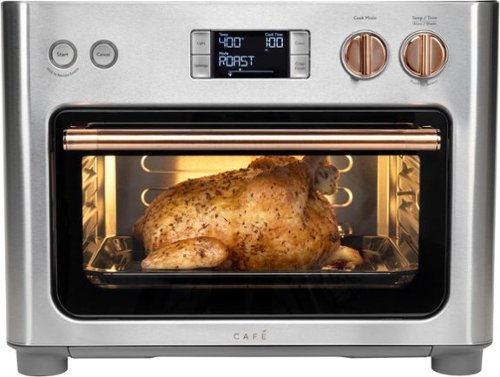
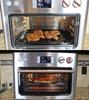
Nothing about your personal style is standard. So why should your appliances be? Created for those who want to reflect their true style in every room of their home, Café is distinct by design. Backed by showstopping features, every Café appliance gives you the form and the function you've been craving. Now that exceptional style is coming to your countertops thanks to elegant and efficient toaster ovens with air fry which feature the signature Café copper accents that truly elevate your experience. Embrace a toaster oven that you can be proud to present on your counters that also boasts 14 essential cooking modes that allow you to flawlessly prepare any recipe, from kids snacks to dinner party hors d'oeuvres. The innovative CrispFinish setting melts, caramelizes, browns or crisps, and puts the perfect finishing touch on any of your signature dishes. Delight in simpler, smarter cooking by using your voice to control your countertop oven through Echo or Google Home devices. Plus, use the SmartHQ app to start and program recipes remotely and even download updates and new features.
Customer Rating
5
Heats quickly, cooks evenly, multi-function
on June 22, 2022
Posted by: ReviewedByPhil
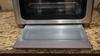
The Couture Oven is my second smart countertop kitchen appliance from Café, and I really like it a lot. It has an upscale brushed stainless-steel finish with modern copper accented dials and door handle, and a large, bright LCD. The chunky feet in each corner elevate it off the counter about ½” with enough room underneath to store the included pizza pan. They also allow the handle of the door to float just above your countertop when the door is opened, rather than smacking into it. Inside, there are three rack levels where you can utilize the included baking tray, wire rack, or 1” deep air fry basket.
The Couture takes up a decent amount of counter space at 14” tall, 17” deep and 18.5” wide. It also requires 4” of clearance at the back, sides, and top for ventilation, as these surfaces can get very hot, so you’ll need to budget for that when calculating space requirements. The trade-off is that you do get plenty of interior space, approximately 13” W, 5”H, and 12.5” D. That’s large enough to a fit a whole 12” pizza, quarter baking sheet, or 12” dual-handle cast iron pan.
The unit has four top and two bottom quartz heating elements that are loosely guarded by wire cages, though these will not prevent drips and spatters of food or liquid from landing on the elements. For this reason, I prefer to keep the baking tray in the lowest position as a drip tray, when possible, so long as it doesn’t impede the distribution of heat for my intended cooking activity. I also like that the wire rack has built-in feet on the bottom, so you can remove it from the oven to use as a cooling rack for your food as well. The included recipe book has a handful of delicious sounding recipes you can try, accompanied by appetizing photos.
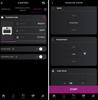
The oven has 14 customizable modes: Air Fry, Bake, Broil, Roast, Reheat, Warm, Slow Cook, Dehydrate, Proof, Cookies, Pizza, Bagel, Toast, and Crisp Finish. Each mode has a range of times and temperatures to choose from, appropriate for that cooking method, for example, Air Fry lets you select from 200°F to 450°F and 1 minute up to an hour, while proof narrows the selection to 90°F to 200°F but you can run it for up to 24 hours. Select modes allow you to toggle convection on/off including Bake, Roast, Reheat, and Pizza, while other modes will always use convection, e.g. Air Fry, Slow Cook, and Bagel, or disable convection when it is not needed like for Warm, Proof, and Toast.
Adjusting the time and temp require turning the right-most dial, and the values do not loop if you try to turn past the min or max settings. To switch between time and temp you simply press the dial in, and to begin cooking, you’ll need to press the separate ‘Start’ button. Most modes will preheat first which takes about 10 minutes. Once preheated, the oven will beep to prompt you to place the food inside. If you don’t hear the beep, just check the progress bar, which will be full when it’s ready. You’ll need to press ‘Start’ again within 10 minutes of preheating in order to begin the timer countdown. If you miss this window, the oven will automatically shut off. You can disable preheating in the settings menu or simply press ‘Start’ again at any time during preheating to skip it and start the timer immediately.
The one function that this oven doesn’t have, that I use every so often, is rotisserie for cooking a whole chicken. However, I found I can achieve similar results using the Air Fry or Roast modes (with convection), as long as I turn the bird over halfway through cooking and once more at the end before using Crisp Finish. The Crisp Finish function is a one-touch button that you press next to the LCD, rather than using the mode dial, though you can adjust the time and temperature just like with any other mode.
Many of the modes are interchangeable and overlap in functionality, so for example, you can use the Bake mode in lieu of Cookies to make cookies, as long as you are able to select the same settings. The nice thing about having the separate modes though is that the machine will remember the time and temp selections that you used most recently for each mode. If you always want to reheat your food at 250°F for 5 minutes, then you just turn the dial to Reheat, and those settings will already be selected. This gives you potentially 14 different pre-sets you can have ready-to-go for your favorite foods.
During cooking, you can change the selected time and temp on-the-fly by simply turning the time/temp dial and selecting new values. You will not have to start/stop cooking to add or reduce time or temperature. Also, when you open the oven door during cooking, this will pause the timer until you close the door again (within 10 minutes), allowing you to check its doneness, add ingredients, or stir your food without losing any time. When the cook time runs out, the oven will automatically shut off the heating elements and go into standby after a brief 2 minute cool down.
The first thing I made in this oven was pumpkin muffins, as I wanted to make a half-dozen batch without needing to turn on my big oven. I choose to bake without convection following the recipe’s directions, then toggled on convection at the last few minutes to achieve evenly browned, lightly toasted tops. The nice part was that I didn’t need to turn/rotate the tray during baking, and there were no hot zones that caused any of the muffins to cook or brown more quickly than the others. It also performed well in a variety of cooking applications from roasting vegetables, melting cheese, and broiling salmon, to gently reheating leftovers without drying them out.
This unit is ideal for crisping up frozen fried foods too such as French fries, onion rings, and tater tots in the mesh air fryer basket. The results were delightfully crispy exteriors with hot, tender interiors, and I liked that you don’t need to stir or shake the contents of the basket, if you cook everything in 1 even layer (don’t stack!). The dedicated pizza mode also worked great for frozen pizza, however, I haven’t yet tried to make one from scratch in this mode.
The thing that makes this oven “smart” is the ability to connect it to your WiFi network and monitor and control cooking using the GE Smart HQ app. Setup takes only a few minutes, and the password for the appliance’s WiFi network is printed on a sticker on the back of the unit. For safety reasons, the oven can only be started remotely after pressing and holding the ‘Start’ button on the front of the machine for 3 seconds. You’ll have 10 minutes to choose the settings and start the machine from you mobile device before this ability expires. That makes sense since you don’t want to start the oven if you don’t know whether or not it’s safe to do so, however, this limits the situations in which this might actually be useful.
However, regardless of whether you started the oven remotely or manually, you can change the time and temp or cancel cooking using the app at any time. Changing the setting at the machine automatically updates in the app after a few seconds as well. Note though that if you try to change the cooking mode remotely, cooking will be cancelled, and you’ll need to start the machine again manually.
The only other feature I think would have been nice would have been an automatic keep warm option following cooking. You can, of course, simply use the ‘Warm’ mode after cooking, but it needs to be manually started. I like that the crumb tray at the bottom under the glass door is easily removed from the outside of the machine for cleaning and hand washing. All other removable accessories are dishwasher safe.
Overall, the Couture Oven does a very nice job cooking a variety of foods with fast preheating, accurate temperature control, and consistent evenness. I can accomplish many tasks with just one appliance like dehydrating fruits and vegetables, proofing dough, and toasting bread/bagels and use less energy for cooking in small batches when I don’t need to turn on my full-size oven. While the smart remote control feature is nice to have, its practicality is somewhat limited.
I would recommend this to a friend!


Share this review:
+7points
7of 7voted this as helpful.
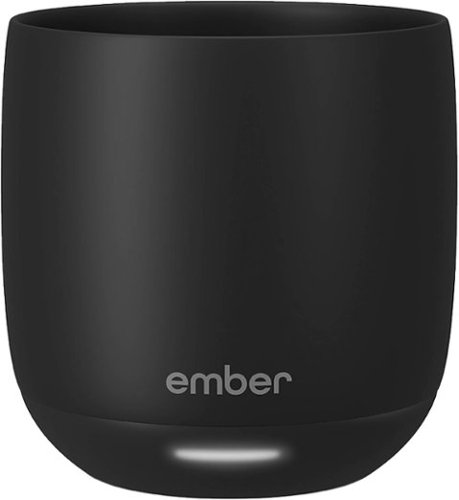
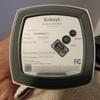
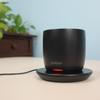
Ideal for espresso-based drinks such as cappuccinos, cortados, and flat whites, the new Ember Cup, 6 oz, offers a premium coffee experience that does more than keep your coffee hot. Our smart mug allows you to set your preferred drinking temperature, so you can enjoy your expertly crafted hot drink —just the way you like it— from the first sip to the last drop. Ember Cup’s built-in battery maintains your precise drinking temperature for up to 1.5 hours or all day with the included charging coaster.
Customer Rating
5
Keeps hot beverages... hot
on June 16, 2022
Posted by: ReviewedByPhil
The Ember Smart mugs aim to solve a small inconvenience that many coffee and tea drinkers often encounter -- that the drinks just don’t stay hot enough from the first sip to the last. This latest model, dubbed the Ember Cup, has the smallest capacity in their lineup at 6 oz, but if you’re not a “big mug” coffee or tea drinker, it just might be the perfect size for your needs.
The cup itself has a minimalist design: a smooth, matte finish, no handle, and inconspicuous branding with a single status LED at the bottom. The cup sits 3.25” tall with a 3” diameter, and 2” interior depth. The reason why the cup is so much shallower than the overall height is due to the electronics and re-chargeable Li-ion battery packed into the base. So while the cup may look larger from the exterior, it still only holds 6 oz. On the bottom of the cup is a single power button in the center, and around it are two gold metal ring charging contacts.
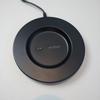
When placed on the accompanying charging saucer/base, two small pins will touch the rings no matter how the cup is oriented, so precise placement is not needed. Since charging is not accomplished through induction, you won’t be able to charge the mug with other wireless charging pads like a Qi charger, however, additional charging bases can be purchased separately and are compatible with all Ember mug models if you want to have multiple places where you can set your mug down to charge. The coaster bases use a standard barrel-style plug with wall adapter and need to be plugged into an outlet. A full charge takes about 2 - 3 hours.
The way the device functions is pretty straightforward; power it on, fill it with your hot beverage of choice, and a heating element in the base keeps it at a temperature of your choosing between 120°F to 145°F (or 50°C - 62.5°C). If the drink is hotter than the set temperature, the cup simply allows the drink to cool until it reaches the target temp. When it falls below that temperature, the heating element kicks in, and the LED will pulse white and remains a solid white while holding at the target temperature. It can keep your drink hot for up to 90 minutes on battery power, perfect if you want to take it when you roam, but be cautious of spills as it has no lid/cover.
If you set the cup on its charging base, the temperature can be held constant indefinitely, though there is a 2-hour inactivity auto-shutoff feature that can be reset by simply picking up the mug. Note that the battery won’t increase in charge if the mug is actively maintaining temperature on the charging coaster. It’ll only charge when the cup is empty or is powered off by pressing and holding the power button for 3 seconds.
Out-of-the-box the default holding temperature is 135°F, which I found to be a pleasantly hot and drinkable temperature for café au lait and cappuccino. The reasoning for not allowing higher temperatures is that this can degrade the flavor of a beverage over time, curdle drinks containing milk, and is a potential scald risk as well. To change the temperature setting, you’ll need to pair the mug to a mobile device via Bluetooth and install the Ember app, which requires you to register for an account. To enter pairing mode, simply press and hold the power button for 5 seconds.
In the app you can also customize whether or not to receive push notifications when your beverage has reached the set temperature, change the temperature units to Celsius, and choose a custom color for the status LED. Your LED color will illuminate upon powering on/off and each time you pick up the mug, as it has a built-in accelerometer to detect motion and help multi-mug households identify individual mugs quickly and easily. When the cup is empty, it’ll automatically enter sleep mode and will not actively heat, though it will remain paired with a mobile device.
Keep in mind this cup is not designed to “heat up” cold drinks quickly, as the heating element delivers only gentle warming and increases the beverage’s temperature about 1 degree every 10 seconds. In fact, if the temperature of its contents is under 100°F, the heating element will remain off, unless you manually change the holding temperature; changing this value will engage the heating element even if your drink is cold, but not if the mug is empty. Pouring in any drink that is at least luke warm, above 100°F, will automatically start the heating element if the cup is on and below the target temperature.
One quirk I found is that if the cup is placed onto the charging base within about 15 seconds of powering it off, it will automatically power on again and connect to the most recently paired mobile device, if it’s in range. While it should still power off after 2 hours of inactivity, I nonetheless found this behavior a bit strange. The mug is neither microwave nor dishwasher safe, so hand washing with a soft sponge is the recommended cleaning method. You should also completely dry the mug before placing it on the charging base as the gold contacts and rings may be corroded by liquid, which can in turn cause charging issues. It seems a bit unexpected that the coaster base would not be waterproof though, since they're usually meant to catch spills and drips. You also won’t want to use metal utensils in the Ember, as this can damage the finish, so you can pre-mix your drinks before pouring into the Ember or use wooden or plastic spoons instead.
Overall, the Ember Cup does the job it’s intended to and keeps a small amount of my hot beverages precisely at my desired drinking temperature, whether that’s tea, coffee, espresso, mulled wine, a hot toddy, etc. The battery life is decently long, and the charging base can extend that to last the whole day if need be. Its care requires a little extra mindfulness to keep it pristine, but I suppose that’s the trade-off for a relatively niche, "nice-to-have," luxury gadget.
I would recommend this to a friend!


Share this review:
0points
0of 0voted this as helpful.

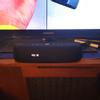
Polk's MagniFi Mini AX 3.1 Ch soundbar delivers powerful, room-filling sound from an Ultra-Compact design that is only 15" wide. Magnifi Mini AX brings certified Dolby Atmos and DTS:X cinematic surround sound to your living room and delivers great bass from a wireless subwoofer. Plus, Polk’s patented fourth generation SDA technology provides an even wider soundstage, and 3D Audio Mode adds a virtual height dimension, immersifying any standard soundtrack or music you listen to. Tired of riding the volume control? Polk’s patented VoiceAdjust speech-clarifying technology works synergistically with MagniFi’s integrated center channel speaker to bring up the level of voices without affecting the rest of the soundtrack. Stream your favorite songs via Apple AirPlay 2, Chromecast, Spotify, Bluetooth for a complete, compact solution.
Customer Rating
5
Compact w/loud, crystal clear, full sound
on June 2, 2022
Posted by: ReviewedByPhil
The Polk MagniFi Mini AX is a 3.1 channel ultra-compact soundbar system that, despite its diminutive size, packs a punch with full-sounding, clear audio and a wide and deep soundstage. Its design is simple with soft, curved edges and clean aesthetic. The soundbar’s dense and weighty plastic housing is wrapped front and back in dark gray mesh fabric. The control buttons on top are integrated into a soft-touch rubber pad and allow you to change inputs, enter WiFi and Bluetooth pairing, mute, and adjust volume level from 0-100. Fair warning though, this tiny soundbar has 3 drivers in it and puts out a lot of sound. In my 250 sq ft living room a volume level of 50 is plenty loud for listening to music and watching movies and volumes above 70 shake the walls and floor enough to bleed through to other floors. We tend to keep it set between 30 - 40 for regular use.
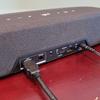
There are three wired input options on the back: HDMI eARC/ARC, optical, and AUX-in. You can also connect wirelessly via Bluetooth 5.0 and WiFi for wireless audio streaming using AirPlay or Chromecast, so you won’t have to download a Polk specific app. Adjacent to the rear inputs, you’ll also find a ‘connect’ button for pairing the subwoofer and/or optional surround sound speakers, a WiFi status LED, and USB input for MP3 playback. The unit will start playing MP3 files loaded to a thumb drive (in alphabetical order) as soon as you plug it into the USB port, however, there are no playback controls like play/pause or track skipping, and it’ll loop continuously until the USB drive is removed. When changing settings a small LED display behind the mesh on the left-front face of the soundbar illuminates with text/numbers for a few seconds.
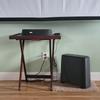
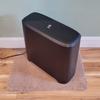
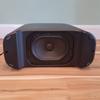
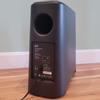
The included wireless subwoofer in this system pairs to the soundbar quickly and easily by pressing the ‘connect’ buttons on both the soundbar and subwoofer for 3 seconds. Since it’s wireless, you can place it anywhere you have an available outlet to plug it into, though the recommendation is to place it along the same wall and close to the TV screen, if possible. The 7” driver for this down-firing subwoofer is located at the bottom, so the sides and front of it are smooth and minimalist; a 3” passive radiator is located in the back. The bass delivered from this sub is deep and satisfying with low rumbles that add weight and gravity to low registers in music, sound effects, and baritone voices. However, if you want to prevent the subwoofer's vibrations from transmitting through your floors and muddying the sound, I highly recommend placing the sub on an isolation pad or a carpet remnant square over bare hard floors.
You’ll get the best performance out of the soundbar if you use an HDMI cable hooked up to an ARC or eARC output, as this is the only connection-type compatible with certain features like audio delay adjustment, Roku TV Ready, Dolby Atmos and DTS:X. However, that doesn’t mean the sound over an optical or AUX connection is bad; on the contrary, it’s still excellent, but without the spatial awareness and immersive-ness of the enhanced formats. The audio produced is crisp with lots of detail and clarity, and at the highest volume level there was very little distortion. As for audio placement, even without the additional satellite speakers, you’ll get a sense of depth and sound moving from one side of the room to the other with a decent amount of left and right separation. However, if you want the full 5.1 channel surround sound experience, you can purchase the wireless SR2 speakers separately to add to this system.
Connecting the soundbar to your WiFi network is simple and straightforward and also enables it to download firmware updates from the internet automatically, which it did immediately after I set it up in Google Home. Streaming music and other audio-only content like podcasts or audiobooks over WiFi works great, however, if you want to stream audio while watching a video on the source device, note that there may be a significant amount of lag and delay between the image and the audio output.
With Bluetooth wireless streaming, the lag is much shorter and barely unnoticeable though the sound and image will still be slightly out-of-sync, even if your source device supports Bluetooth 5.0 with aptX, since the soundbar does not have aptX. Still, I find using it with my projector over Bluetooth an acceptable viewing experience while allowing me to place the soundbar below the screen in front of us for accurate sound placement and without requiring us to run any cables across the room.
In addition to the on-board controls, the remote control can adjust other sound settings like bass, voice, mode, delay, and left/right balance (when paired with surround sound). Bass and voice enhancement can be adjusted from -4 to +4 and work well. The different modes are Music, Movie, 3D and Night and each sculpts the EQ settings accordingly to focus on musical content, dialogue and sound effects, enhance spatial and depth perception, or minimize volume and bass, respectively. For most TV and movie viewing, we leave the speaker in movie or music mode. If you prefer using your TV’s remote, there’s a 'remote learning' mode that you can enable by pressing the source button for 3 seconds which allows you to teach the soundbar to respond to your TV’s remote.
Overall, this soundbar and subwoofer combo deliver an amazing audio experience that is full, rich, and immersive with a number of different input options and enhanced audio capabilities and is definitely a worthwhile upgrade over the sound quality of our TV’s built-in speakers. The soundbar takes up a remarkably small amount of space, and while the subwoofer is somewhat tall and deep, it’s wireless and has a narrow footprint, so it’s easy to move around to find the perfect spot for it.
I would recommend this to a friend!
Share this review:
+2points
2of 2voted this as helpful.
ReviewedByPhil's Review Comments
ReviewedByPhil has not submitted comments on any reviews.
ReviewedByPhil's Questions
ReviewedByPhil has not submitted any questions.
ReviewedByPhil's Answers

The Nest Doorbell is the battery-powered video doorbell that works with any home. See what’s happening at your door from anywhere and get intelligent alerts about important activity, like when there’s a person, package, animal, or vehicle.* And because there are no wires, you can install it yourself. Nest Doorbell requires the Google Home app and a Google Account – it’s not compatible with the Nest app or the home.nest.com site.
My existing doorbell chime (electric) says "must install diode" on the back, and there is a 1N4001 diode installed in my existing doorbell button. Do I need to use the diode in my installation of the Nest Doorbell if I'm hard wiring it to my chime?


The compatibility checker said my electronic chime and transformer are compatible, but the video instructions for a wired installation of the Nest Doorbell (battery) doesn't make mention of installing a diode (or not), if one comes with the chime. At any rate, I performed the installation without it and adjusted the "length of ring" setting to 6 seconds, which is nearly long enough to play through the melody, though it loses power and cuts off at the end. Any longer setting results in the chime beginning to repeat before it gets cut off which I find less desirable.
2 years, 8 months ago
by
ReviewedByPhil
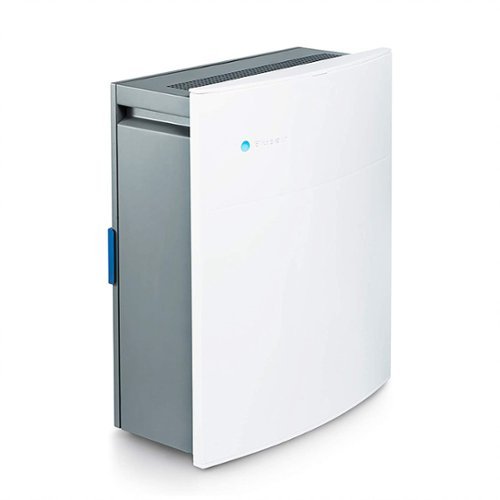
The Blueair Classic 280i air purifier brings clean, energizing air to spacious bedrooms, living rooms, or any rooms up to 279 sq. ft. A built-in air quality sensor makes it easy to confirm your air is virtually free of asthma and allergy triggers and indoor air pollutants such as mold, dust, pet dander, and pollen by scanning the air quality in real-time and adjusting fan speed to your current air quality. The Classic 280i delivers unmatched performance thanks to HEPASilent technology, which combines electrostatic and mechanical filtration technologies. This combination, pioneered by Blueair, delivers a high Clean Air Delivery Rate (CADR) with whisper-quiet operation (32- 56 dB), using 20-80 W of energy.
HOW MANY FET DOES TRHIS BLUEAIR COVER

Play to your full potential with this 23.8-inch ASUS TUF gaming monitor. The 1ms response time prevents blurring and lagging for quality visuals, while the FreeSync technology eliminates stuttering and tearing for seamless gameplay. This ASUS TUF gaming monitor has an anti-glare display that reduces reflections, and it features flicker-free technology that reduces eye strain for comfortable viewing.
Will this monitor support 144mhz for Xbox 1x over HDMI, is the HDMI ports 2.1?
The HDMI port on the monitor is HDMI v1.4, so on the Xbox One X it'll only allow you to output at 1080p @ 60fps and only goes to 75Hz.
4 years, 2 months ago
by
ReviewedByPhil
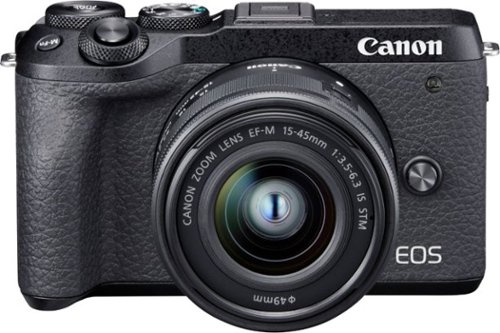
Record 4K UHD videos and capture high-quality stills with this Canon EOS M6 Mark II camera. The 32.5MP APS-C image sensor lets you take detailed, true-to-life photos, while the electronic shutter capable of speeds up to 1/16000 is ideal for taking professional-caliber action shots. This Canon EOS M6 Mark II camera comes equipped with an 15-45mm f/3.5-6.3 interchangeable zoom lens for wide-angle and short telephoto shots..
Does it have a self timer/self-timer delay or remote compatibility?
Yes, the self-timer can be set to 10 seconds, 2 seconds, or continuous, which takes 2 to 10 photos consecutively after a 10 second timer expires. You can use your smartphone as a Bluetooth remote control as a shutter trigger, or connect the phone via WiFi to the camera for remote monitoring (see what the camera sees on your smartphone screen) and control all the settings on the camera through the app.
4 years, 4 months ago
by
ReviewedByPhil
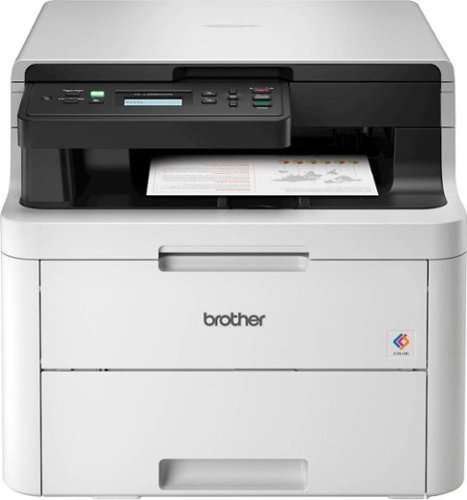
The reliable, robust Brother HL-L3290CDW compact digital color printer with copying and scanning capabilities is a great choice for the busy home or small office. The flatbed scan glass provides convenient copying and scanning. Quick print speeds of up to 25 pages per minute¹ plus manual feed slot accommodates varied printing needs and can handle a variety of paper types and sizes including card stock, envelopes and more. Connect with versatile options including built-in wireless or USB interfaces and print wirelessly from mobile devices. The 250-sheet capacity adjustable paper tray helps improve efficiency with fewer refills and handles letter or legal sized paper. Automatic two-sided printing helps save on paper costs. Brother Genuine high-yield toner replacement cartridges help lower printing costs. Comes with a 1-year limited warranty and free online, call or live chat support for the life of your product.Prints and copies up to 25 ppm in black and up to 25 ppm in color
What language does this printer support? Does it support Chinese mandarin?
No, Chinese is not supported on the LCD for the printer settings. It looks like the LCD can only display Latin and Slavic based characters e.g. English, French, Russian, Polish etc..
4 years, 7 months ago
by
ReviewedByPhil
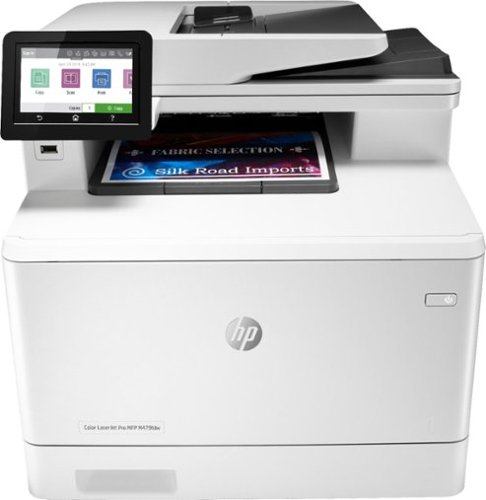
Winning in business means working smarter. This HP Color LaserJet Pro M479fdw printer is designed to let you focus your time where it's most effective - growing your business and staying ahead of the competition.Prints up to 27 ISO ppm*, up to 27 ISO ppm* in color
If this printer is connected via USB to a computer, can other computers print wirelessly to it? I need to have it connected by USB to my work computer but also want to be able to use it for wireless personal printing from two other household laptops.
Yes, you can connect to the printer wirelessly using a direct WiFi connection (local network between the printer and computer) without connecting the printer to your router/home network. You can also connect wirelessly via Bluetooth. You'll get the most out of wireless printing features by connecting the printer to the internet by providing it your home WiFi network SSID and password. Once connected to the internet you can turn on Web Services and print from any device with e-mail capability by simply sending the file to be printed to a uniquely assigned e-mail address for the printer. This will also enable other computers and devices on the network to find and send print jobs to the printer.
4 years, 9 months ago
by
ReviewedByPhil
What does it mean for a webcam to be portable?
Simply that it is small and is versatile in terms of mounting options, for example, if it can be clipped to a laptop monitor as well as a LCD panel or set on a desktop or used with a tripod. They usually still need to be plugged in via USB and require software/drivers to run. Not many are compatible with mobile devices.
7 years, 3 months ago
by
ReviewedByPhil