ReviewedByPhil's stats
- Review count135
- Helpfulness votes1,232
- First reviewJanuary 6, 2016
- Last reviewApril 23, 2024
- Featured reviews0
- Average rating4.6
Reviews comments
- Review comment count0
- Helpfulness votes0
- First review commentNone
- Last review commentNone
- Featured review comments0
Questions
- Question count0
- Helpfulness votes0
- First questionNone
- Last questionNone
- Featured questions0
- Answer count7
- Helpfulness votes7
- First answerJanuary 18, 2017
- Last answerSeptember 1, 2021
- Featured answers0
- Best answers1
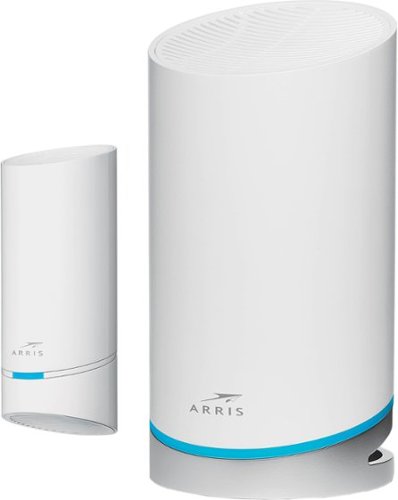
Overhaul your home's Wi-Fi with this ARRIS SURFboard mAX mesh Wi-Fi 6 system. The router supports download speeds of up to 6.6 Gbps for seamless movie streaming, while the compatible mobile app enables easy management. This ARRIS SURFboard mAX mesh Wi-Fi 6 system covers up to 5500 sq. ft., creating an ideal choice for large homes, and two integrated Ethernet ports connect additional wired devices.
Customer Rating

5
Quick setup, fast speeds, good range
on November 10, 2021
Posted by: ReviewedByPhil
from Easton, PA
The Arris SURFboard max is not our first mesh wireless system, but it is our first system that utilizes a tri-band system with dedicated wireless backhaul channel. It is replacing our current WiFi 6 mesh system that has 1 router and 2 access points and no dedicated backhaul channel. I was a little bit skeptical that we would get full WiFi coverage in our home since the Arris system only comes with 1 additional satellite, and we live in a three-story home that typically needs a node on each floor in order to get full speed and complete coverage. We decided to place the router on the third floor, where the cable modem is located, and the satellite on the first floor, but in a new outlet near the ceiling to reduce its distance to the main router.
In order to set the Arris AX6600 router up, you’ll need to download and install the SURFboard Central mobile app on an Android or iOS mobile device and create an account with an e-mail address, if you don’t already have one. Unfortunately, there’s no web interface for app-free setup. The app’s a bit strange too since you don’t need a password to “log in” though they do send you an e-mail with a verification code. In the app, you can follow the onscreen prompts to setup the router.
While mostly straightforward, I did run into an issue where the app was unable to connect to the AX6600’s “Onboarding” WiFi network, so after several tries, I ended up manually connecting to the router’s network through my phone setting’s WiFi menu and was able to continue setup after that. The satellite needs to be set up separately, but the process is similar, and I had to use the manual workaround for connecting to its network as well. Be sure to use the included flat Ethernet cable to connect the router to your modem, as it has a shorter connector than a typical CAT5/6 cable in order to fit in the tight space underneath the router where the WAN and LAN ports are located.
The Arris system allows you to link up to 3 devices together in its mesh network, including other AX6600 routers so you could add a second satellite or use three routers if you wanted to. The advantage to using another AX6600 router as an access point is that it gives you access to two LAN ports, whereas the satellite has none, however, it occupies less space than the router and doesn’t need a flat surface to sit on; both offer the same amount of WiFi coverage.
In a side-by-side comparison of WiFi speed, I was surprised to find that the download speed of the Arris, compared to the mesh network it had just replaced, was consistently almost 50% faster, while upload speeds were the same on both systems. While we don’t get gig speed service from our ISP, the Arris system was able to deliver speeds close to the max bandwidth level that we subscribe to in almost all areas of the home. With this 2-node system, the AX6600 offered similar coverage of our three-story home (~700 sq ft per floor) to our previous 3-node system did, and in most cases, faster download speeds from the same locations in the house. Both the router and satellite broadcast 2.4GHz and 5 GHz signal that your devices can connect to depending on their capabilities and signal strength.
One notable exception was a speed reduction in our second floor bathroom where our prior system had a 3rd node with a direct line of sight, whereas the Arris system had no node on the second floor and therefore more obstructions between the signal and two access points. We also experienced slower speeds on our front porch, due to the orientation and height of placement we chose for the satellite on the first floor. However, WiFi reach did extend outside of the home to our side and back patios where we had dead zones previously. Unfortunately, since our property is not flat and the house itself sits at the top of a hill while the rest of our yard is 15-20 feet lower in elevation, we still did not have WiFi signal in the backyard.
A minor complaint that I had about this system is the bright blue LED ring at the base of both the router and the satellite. While the brightness can be dimmed in the control app for both, it cannot be turned off completely (only reduced to 10%); this is not ideal as we have the router setup in the bedroom and the light can be a nuisance at night, even at the lowest setting. It also would have been great is the satellite had LAN ports, but I suppose if you want that you could just get the router 2-pack.
The app interface is clean and simple, and also offers more advanced setup features like UPnP, port forwarding, DNS configuration, and IP reservation. You can also test/check your download and upload speeds, setup a guest WiFi network, and enable parental controls to block access from certain devices on a schedule or at the touch of a button. You can even enable Amazon features like Frustration-Free Setup, which saves your WiFi network information to the cloud, attached to your Amazon account, for faster setup of new devices, and link the system up with an Alexa account to utilize voice commands. As of this writing, the Alexa voice commands are limited to enabling/disabling the guest WiFi (provided you set one up in advance) and checking the status of the internet connection.
Overall, I’m pretty happy with the quick setup and fast performance of this mesh system. I may add a third node to this system to ensure a strong and reliable connection on our second floor so that the satellite has a closer node to communicate with, but even without it, the system works well for our home.
Mobile Submission: False
I would recommend this to a friend!


Share this review:
0points
0of 0voted this as helpful.
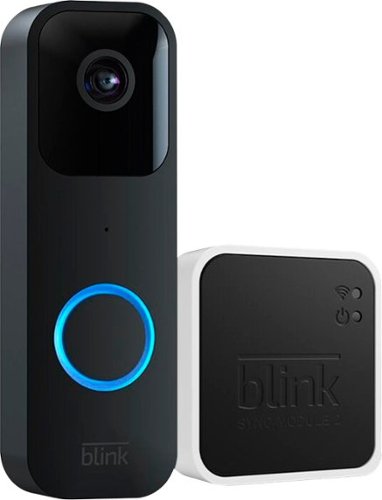
Smart security that is designed for every home. Set up in minutes, and receive notifications from the app whenever a visitor presses your Video Doorbell or motion is detected. You can also choose to wire it to sound your existing home chime. Blink Video Doorbell lets you answer your door no matter where you are. Receive customizable alerts right from the Blink Home Monitor app, and experience helpful features like HD day and night video and two-way audio. Best part – Blink’s long-battery life technology provides peace of mind for up to two years.
Customer Rating
5
Clear video/audio, wired or wireless
on October 27, 2021
Posted by: ReviewedByPhil
from Easton, PA
The Blink video doorbell is my second camera enabled smart doorbell, but my first from this brand. Since we already use mostly Amazon devices, integrating the Blink video doorbell into our smart home ecosphere was easy and straightforward. The Blink app needs to be downloaded and installed to a mobile device in order to set up both the doorbell and the included Sync module 2. In the app, instructions for physical installation are simple to follow with animated graphics and clear instructions. The doorbell comes with an angled wedge plate if you need to change the direction the camera faces, and you can customize the experience to your exact setup via the prompts that appear. For example, we wanted to use this doorbell with our existing doorbell chime and wiring, which we were able to do by first confirming compatibility of our doorbell transformer, then removing our manual doorbell button and connecting the Blink’s mounting plate to the wires.
Once we attached the Blink doorbell to the mounting plate, it had permanent power, as well as the two AA 1.5V Lithium batteries (included) in the housing as backup power. Note that it doesn’t have an internal rechargeable battery, and Blink recommends against using any type of rechargeable battery or even Alkaline batteries with the device. However, when used with a Sync module, the batteries are supposed to last up to 2 years (w/avg use 70 seconds per day), even without being permanently wired. When the batteries need changing, the release tool makes it easy to separate the camera from the mounting plate to do so.
The only part of the setup that didn’t work perfectly for me was setting up the “length of ring” for our electronic chime, which plays a number of different melodies that we select on the chime box. Although we were able to set the length of the chime in 0.5 second intervals, we still got a weird clipped beep after the conclusion of the chime melody every time, no matter what length was set. This likely has to do with the fact that our chime box says that a “diode” is required for installation, which we had installed on the manual doorbell button and is usually what allows the chime to play through exactly once, but installing the diode with the Blink video doorbell is not possible, and the app setting is the equivalent but imperfect workaround.
In the Blink app, you can access the live view of the camera, change its settings, and review past recordings. I like that you can adjust the camera’s motion sensitivity, define activity/privacy zones, and customize which notifications the app sends you, to reduce nuisance pop-ups. One thing about the motion detection feature is that it is very basic and doesn’t distinguish between a person, package, animal, or car. Also, motion detection recording and announcements are only active if the device is in the “armed” state, but doorbell presses are always recorded regardless if it is armed or not. You can also set the camera to automatically save the footage any time you access ‘Live’ view. With photo capture enabled, the camera takes one photo every hour and saves it as a collection of photos in the Clip Roll.
Linking the Blink app to Alexa lets you use voice commands to display the camera feed to and play announcements through your Echo devices. However, since you cannot view the Blink camera’s video feed in the Alexa smartphone or PC app, you must have an Echo show or use the Blink app for remote monitoring. Once we had our Blink and Amazon accounts linked, we were able to enable voice announcements and select a chime sound to play through all the Echo speakers in our home when the doorbell button is pressed, in addition to our wired chime and notifications from the Blink app. It also plays a chime through the doorbell's built-in speaker for the person who pressed it, to let them know that it actually did something.
We signed up for the Blink monthly subscription Plus plan (free for the first 30 days), which gives us unlimited live view recording and photo capture and cloud storage/access to recorded footage from the doorbell camera within the previous 60 days. If you don’t want to have a monthly cloud subscription, the Sync 2 module allows you to store video and photos locally to a USB thumb drive plugged directly into the Sync 2 module (from 1 GB up to 256 GB) and can connect to up to 10 different Blink cameras. Just note that the recordings do not automatically loop and write over the oldest footage, and you must disconnect and download or delete the files when the drive is full. With a monthly subscription, the module backs up the footage from the cloud once per day rather than immediately saving them to the thumb drive.
The video footage from the camera is 1080p HD (1920x1080) when set to “best quality” and very crisp and clear but somewhat distorted with a fisheye effect, due to the 135° horizontal, 80° vertical, wide-angle field of view. When a person is standing at your door (~6 ft tall), you should be able to see them from the waist up when they are standing about 2 feet away from the camera. At night, the night vision infrared footage is ok for illuminating people in front of the doorbell, but if you have a light source in the background, the IR will wash out that area even when set to low IR Intensity; for example, we have LED string lights in a tree on our patio about 8 feet from the camera that aren’t even that bright but in the nighttime video they look like a floodlight. The sound quality from the doorbell is fine, and I didn’t have any trouble hearing or understanding conversation via the app to the doorbell and vice versa, though the audio picked up in the video recording from the doorbell’s mic tends to have a lot of digital compression noise. The speaker volume on the doorbell is loud and clear and is adjustable as well.
Overall, I think the video and audio quality of the Blink doorbell camera is decent, and the doorbell integrates easily with other Amazon Alexa smart devices. We get notifications on our phones, smart speakers, and can still use our existing door chime, albeit with a slight quirk. The setup and installation was quick and simple, and it can be used both wired with permanent power or wirelessly with long lasting battery life. The ability to store video files locally with the Sync module 2 is great if you don’t want a monthly subscription or just want to have automatic backups.
Mobile Submission: False
I would recommend this to a friend!


Share this review:
+4points
5of 6voted this as helpful.
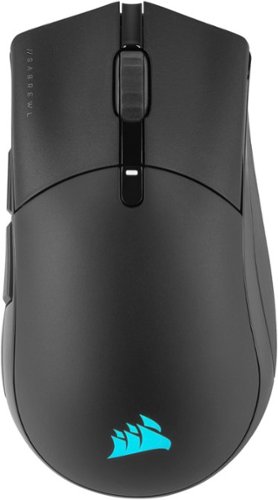
The CORSAIR SABRE RGB PRO WIRELESS Gaming Mouse is designed for and tested by esports pros, weighing an ultra-light 79g and equipped with SLIPSTREAM WIRELESS technology to achieve lightning-fast response times and 2,000Hz hyper-polling. CORSAIR QUICKSTRIKE buttons provide zero gap for fast and responsive clicks, The SABRE RGB PRO WIRELESS boasts a 26,000 DPI MARKSMAN optical sensor customizable in 1 DPI steps, with a dedicated button to cycle through five DPI presets on-the-fly. Finished with high-quality materials such as 50 million click-rated OMRON switches and 100% PTFE glide pads, the SABRE RGB PRO WIRELESS cuts through the competition.
Customer Rating
5
Light, responsive, accurate
on October 26, 2021
Posted by: ReviewedByPhil
from Easton, PA
The Corsair Sabre RGB Pro Wireless Champion Series mouse is feather light, responsive, and easy to customize. It comes with a wireless Slipstream 2.4GHz USB dongle and 6 foot USB-C charging cable. While I was surprised to see that the USB cable was rubber sheathed and not braided fabric, since the mouse is meant to be used wirelessly, the extra drag factor and stiffness of the cable won’t normally be an issue. The mouse can be connected to your computer 3 ways: with the USB charging cable, over WiFi using the Slipstream USB dongle, or via Bluetooth. There’s even a compartment on the bottom of the mouse to store the dongle when you’re on the go, though I wish the door wasn’t fully detachable as it seems easy to lose.
The mouse has a simple ergonomic contoured design with 6 buttons: left and right mouse click, clickable scroll wheel, thumb forward and back buttons, and DPI toggle. On the bottom of the mouse are 4 PTFE glide pads which are replaceable and enable the mouse to slide smoothly and effortlessly over a flat surface. The left and right primary mouse buttons use Corsair’s Quickstrike spring mechanism to deliver gapless actuation of the Omron switches beneath, resulting in fast and responsive clicks, especially when executing a series of clicks in quick succession; using them is quite satisfying in terms of feel and responsiveness. The switches are also rated to last 50 million clicks so it should be durable enough to last many years before wearing out. The scroll wheel has a medium incremental feel when rotating that is not too stiff nor too loose, and clicking the wheel enables hyper-fast scrolling with the cursor, but it doesn’t have infinite scrolling on the wheel nor tilt clicking.
This mouse has an adjustable polling rate of 125 Hz – 2000 Hz across 5 levels. In practical terms, a higher polling rate means lower latency and better accuracy of mouse movements – perfect for aiming and pinpoint cursor placement when gaming. This may even help creatives with editing, 3D modeling, and art work. Just note that setting the polling rate higher will consume more CPU resources. In order to change the mouse settings and customize the RGB lighting, which appears under the translucent Corsair logo on the palm of the mouse, you’ll need to download and install the iCue software from Corsair’s website.
Upon plugging the Wireless USB Slipstream dongle into my computer, the Sabre paired to it immediately without requiring any additional setup. In iCue you can update the firmware, reassign the mouse keys to different actions or complex macros, change the lighting effects, set DPI levels etc. Your settings can be saved directly to the mouse (hardware) or in the iCue software, which would only use those settings while the software is running. You can also create multiple ‘profiles’ and save them both in the iCue software or directly to the mouse (up to 5 hardware profiles). To cycle through the different hardware profiles, just press the profile switch button on the bottom of the mouse, and the status LED will help you determine which profile you currently have selected.
The DPI toggle gives you access to 5 stages of DPI from 100 to 26,000 (adjustable in increments or 1) and each of these are indicated by the LED color on the DPI key, also customizable; although you can set a ‘sniper’ DPI as a sixth setting in iCue, the mouse can’t activate that setting unless you remap one of the keys. Also note that some features in iCue are only available to modify when the mouse is connected to your computer via the USB cable, for example, surface calibration, saving hardware profiles, and changing the polling rate. Since I also have Corsair’s K57 wireless keyboard which is Slipstream compatible, I was able to take advantage of the multipoint access feature, so both the Sabre and the K57 were paired to a single WiFi USB dongle; however, you do need enough USB ports on your computer to connect the dongle and all of your peripherals via USB simultaneously in order to set that up in iCue.
Overall, my experience using this mouse has been great, whether it’s gaming, creative work, or just browsing the web. The mouse is fast, responsive, and accurate all while being lightweight and wireless. You can even adjust DPI incrementally on-the-fly in increments of 50 for fine tuning, by pressing and holding the DPI toggle and adjusting up or down with the forward or back buttons, and the mouse will automatically save the new DPI level in the current stage. The battery life without RGB enabled is super long, and I’ve gone all week with daily use without needing to plug it in to charge. If you’re really worried about the battery running out when you need it most, you can customize the sleep mode timeout down to 1 minute, toggle it off when not in use, display the Sabre’s battery life in your system tray, and the status light on top will blink red when it needs charging, so you’ll never be caught unawares.
Mobile Submission: False
I would recommend this to a friend!


Share this review:
0points
2of 4voted this as helpful.
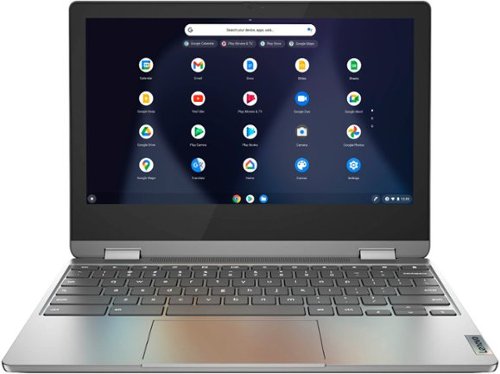
Versatile and portable, the IdeaPad™ Flex 3 Chromebook measures just 19.6 mm thick and weighs 1.2 kg with a full keyboard and spacious trackpad, and can be viewed in tent, tablet, laptop or stand modes. Watch crisp visuals in high definition with its 10-point touchscreen on the 11.6" IPS display while being more productive with help from Google. Just say “Hey Google*,” to manage tasks, enjoy your entertainment, get answers, or control smart home devices.
Customer Rating

4
Hybrid laptop/tablet for mixed use
on October 25, 2021
Posted by: ReviewedByPhil
from Easton, PA
The Lenovo IdeaPad Flex 3 Chromebook is my first laptop/tablet hybrid computing device and it offers a compact and versatile user experience for a variety of tasks and activities. While it may look like a small laptop, the device feels more like a tablet with a keyboard attached from a use standpoint and was surprisingly hefty at just over 2.5 lbs. The outer housing has a matte finish with a texture grip on one side of the top cover and two rubber feet that span the length of the bottom cover. When open, you can use the non-backlit keyboard and trackpad mouse for input just like a laptop, but the IPS screen is also a touch display with 10-point multi-touch support enabling you to interact with it with taps and swipes on the screen like a tablet as well. Since the hinge on the device rotates 360 degrees, you can use it in multiple form-factors, for example, opening the screen past horizontal disables the keyboard and trackpad but allows you to place the device in tent orientation so that it stands up on its own, or fold the screen completely flat for use as a tablet, viewable in both portrait and landscape orientation, though it felt a little weird to place the keyboard facedown on surfaces when folded flat.
Spec-wise this model has a 64-bit 8-core processor (4x ARM Cortex A73 and A53 @ 2.0 GHz), 4 GB of RAM and 32 GB of eMMC internal storage (though about 12 GB is used by the OS and pre-installed apps). Since the eMMC is soldered to the motherboard, the internal storage space is not upgradeable, however, you can add additional storage space by popping a microSD card in the slot adjacent to the headphone/mic combo jack. As for connectivity, this device supports WiFi 5 802.11AC (2 x 2) and Bluetooth 4.2; not the latest and greatest for either standard but still decent in terms of speed and device compatibility. There is one full-sized USB 2.0 port that, along with the USB-C power port, can be used for connecting a USB hub or other peripherals and storage devices. The power and volume control keys are found on the right-hand edge of the keyboard along with a Kensington lock slot. The unit runs Chrome OS, an Android based system, but the UI is a little different than your typical smartphone or tablet, as app shortcuts don’t appear on the main desktop but rather on a recent/running apps “shelf” along the bottom of the screen and app drawer that you have to swipe up to view.
The 11.6” diagonal glossy display is nice and bright but doesn’t “wow” with only a 1366 x 768 (HD) resolution at 160dpi and its large ½ inch bezels; it looks decent when viewed straight on but dims quickly at off viewing angles. Color reproduction and saturation are on the low side (45% NTSC color gamut), so if you need pinpoint color accuracy for creative work like professional photography this may not be a great fit. When used for watching streaming video content like Netflix and YouTube, since the highest resolution it can display is 720p, choosing higher video quality settings can detriment playback performance by introducing buffering and skipping without actually improving visual detail.
The device natively supports the entire Google suite of apps, and it’s easy to integrate your Google account settings, email, cloud photos, etc. by logging into a Google account and syncing your settings. If you don’t want to log-in or have a guest user, you can skip signing-in and 'Browse as a Guest,' though you will be limited in terms of the apps and features you can use in this mode. Many of Google’s services can be launched within the Chrome web-browser itself versus using a standalone app, for example Gmail, YouTube, and Drive. You can opt to download the apps from the Play Store if you prefer, however, this will use up internal storage space which is in short supply.
I did find the “everything button” on the keyboard in place of the Caps lock key an interesting feature, as it is basically a one-touch button to bring up a universal search bar that searches for results both on the device itself for files and apps and online for other queries. Chromebook also supports Google’s virtual assistant which you can talk to by using the wake phrase “Hey Google” allowing you to control smart home devices, ask questions, or issue voice commands. You can set this feature to be ‘always on’ or only when it is plugged in and charging, to prolong battery life. The stereo microphones are situated adjacent to the 720p front facing camera above the top of the screen, and the while image/video quality from this camera isn’t amazing at 1 megapixel, it’s suitable for video chat and virtual meetings. Note that there is no rear facing camera on the device.
The Chromebook can be used for casual gaming and basic creative work like image editing and digital art via lightweight cloud based apps like Lightroom mobile, but won’t be able to handle resource heavy desktop-based applications like Photoshop or Premiere. However, I was able to run and play mobile games like PUBG on it without any issues. The battery life is decent at up to 10 hours on a full charge, depending on your usage and settings like screen brightness and WiFi. I did have one instance where I couldn’t get the screen to power up despite the LED on the power button being on and having the unit plugged in with a full charge, however, I was able to perform a hard reset by pressing and holding the power button for 6 seconds and then booting it up again and that resolved it.
Overall, the Flex 3 is a nice lightweight alternative to a traditional laptop. Its small form factor and range of features make it versatile for a variety of applications from work and play to entertainment. It has built-in anti-virus protection and performs OS updates automatically, to keep the device up-to-date and secure. While it doesn’t sport the best looking screen or most powerful processor, it starts up nearly instantly and can perform daily productivity tasks and handle internet browsing with ease.
Mobile Submission: False
I would recommend this to a friend!


Share this review:
+26points
31of 36voted this as helpful.

Nothing about your personal style is standard. So why should your appliances be? CAFÉ redefines the kitchen space with trend forward appliances that reflect your personality. Get the look you crave with CAFÉ’s distinct finish offerings that blend sophistication and performance for a kitchen this is unique as you.
Customer Rating
5
Delicious drinks from an all-in-one machine
on October 21, 2021
Posted by: ReviewedByPhil
from Easton, PA
The Café Bellissimo is my first espresso machine with a built-in bean grinder, so it takes up a fair amount of space on my countertop but serves the purpose of two appliances – three if you count the integrated milk steamer/frother. The unit comes with a few other accessories like a solid stainless-steel tamper, stainless-steel milk pitcher, de-scaling tablets, a water hardness test strip, and a cleaning kit.
The machine’s build quality seems very good and although the body of the machine is plastic this does allow it to be relatively lightweight for its size, and it has a nice, matte metallic dark-gray (not quite black) finish that complements the copper accents on the unit. The top surface of the machine doubles as a warming station for your cups and has a round depression on which to store the tamper. The water tank for the unit is tall and narrow. It has a hinged lid that flips open for filling, but if the machine is stored under your cabinets, you may need to pull it out from beneath them or lift the tank out of the machine to fill it with water. The minimum fill for the water tank is about 20 oz (2.5 cups) and the max fill is about 100 oz (12.5 cups).
The bean grinder in this machine uses conical burr style blades for producing an even and consistent grind size, and the hopper has a capacity of about 3 cups of whole roasted beans. The size of the grounds can be adjusted by simply rotating the bean hopper and set to fineness levels from 0 - very fine to 15 - coarse. This wide range in grind size allows you to use the resulting grounds for more than just espresso, whose optimal size is 7-9, so larger grounds could be used in a French press or drip coffee machine and very fine grounds for Turkish brew or dusting cakes. For me, the optimal grind size for my beans to make espresso was 8; I experimented with using different sizes but found that finer grounds clogged the machine during brewing and larger ones didn’t compress enough with tamping so the portafilter would not fully lock. My only small complaint is that the grinder can be a bit messy, as stray grounds tend to end up everywhere. I did like that when grinding, an LED under the grind head illuminates so you can watch the grounds fill the basket, and the portafilter can be seated in the grinder cradle for hands-free operation. The portafilter also has a rubber foot pad just under the front lip of the basket for stabilizing it against the edge of a countertop, as this made tamping the grounds level with firm, even pressure really easy.
Connecting the machine to my home WiFi using the Smart HQ app was simple and straightforward, and it even downloaded a firmware update for the machine right away. I appreciate that the app has a de-scale countdown reminder (in liters) but there aren’t a lot of functions for the machine – pretty much just setting the grind time and water volume for single and double shots as well as the default hot water dispensing volume. The manual also indicates hot water temperature and water hardness levels can be set, though I couldn’t find those settings in the current app (neither Android nor iOS versions). Alternatively, you can set the water volume for espresso shots by pressing and holding their brew buttons respectively and releasing when the desired volume has been dispensed, or adjust the grind time for a single shot by pressing and holding the ‘Grind’ button, however, the grind time for a double shot can only be changed in the Smart HQ app. If you do sync the machine with the app, it can also send you push notifications when the water tank is empty and when the bean hopper has been removed. Since the machine is only semi-automatic, and there are a lot of manual time-sensitive steps a person has to perform at the machine, I understand why the app doesn’t have more “smart” functionality like voice controls or auto-brew timers.
Using the milk steamer is also pretty simple, though if you adjust its position you do need to be careful to only handle the wand by the rubber grip as the metal gets hot enough to cause burns and only hold the milk pitcher by its handle as the cup itself will get very hot during steaming. I like that the milk pitcher has marked volume levels on the interior for measuring. Achieving the perfect “silky milk” texture for creating latte foam art is certainly a skill in and of itself, but I’m content just having some hot milk and foam to add to my espresso for a cappuccino or latte. Just make sure you clean the wand after using it to steam milk and flush it with a bit more steam immediately, so you don’t end up with cheesy spoiled milk bits clogging the nozzle. As a side bonus, the steam wand also dispenses on-demand hot water at a piping hot 180°F (82°C) which is super convenient whether you are adding it to your shot for an Americano or just making tea.
Cleaning and maintenance is a breeze as the drip tray that catches most of the stray grounds from the grinder and drips from the brew head and steam wand, as well as collects water released during depressurization after each use, has a red float indicator to let you know when it is full and slides out easily for emptying. Stored behind this tray is a smaller accessory dish in which you can store 1 additional filter basket, cleaning brush, and cleaning pin for clearing debris from the steam wand and pressurized baskets. Depending on your usage, you’ll need to run the “clean” mode to de-scale the unit of mineral deposits every 3-6 months.
Once you get the process down and have set the amounts you want for grounds and water volume, pulling consistent, great tasting espresso shots is relatively easy after that. The double-walled pressurized portafilter baskets are useful for those that don’t want to fuss with achieving perfect tamping technique or for use with pre-ground espresso powder, while the single-wall baskets require a bit more skill and effort but allow for greater control and adjustments. The portafilter has a dual spout dispenser on the bottom, so while it can’t sit flat on your counter, you can get two separate single shots when brewing a double shot by placing a shot glass under each spout.
Mobile Submission: False
I would recommend this to a friend!


Share this review:
+4points
4of 4voted this as helpful.
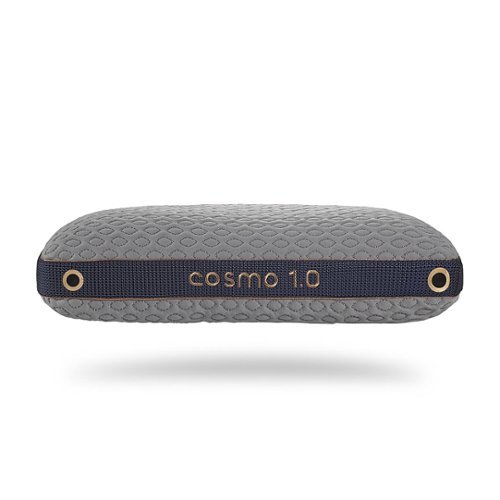
High-Low Performance Pillows. Available in 2 PillowID sizes for a personal fit and affordable comfort
Customer Rating
5
Soft, cool, comfy, and supportive
on October 6, 2021
Posted by: ReviewedByPhil
from Easton, PA
Up until a few years ago, my favorite pillow had been a down feather-filled one, but after many years of great sleep I had to stop using it when I developed an allergy to down feathers. Since then I’ve been on the hunt for another pillow that provided the same comfort and support with a different fill material and it seems that search might be over.
I used to be a really good back sleeper and for a long time I’d sleep like a stone: out like a light when my head hit the pillow, and I’d wake feeling rested in pretty much the same position as I fell asleep. But these days I find myself turning a lot in my sleep, especially onto my sides and occasionally my stomach, and no matter how long I slept would feel tired in the mornings. I needed a pillow that would comfortably accommodate a number of sleep positions and allow me to get a good night's sleep. Each style pillow from Bedgear comes in a range of sizes from 0.0 - 3.0, and according to the Pillow ID chart printed on the back of the box, as a small t-shirt sized back sleeper, my size should be 1.0 which is suitable for both back and multi-position sleepers. You can also use Bedgear’s website’s “Find Your Fit” tool, which also uses your mattress’s firmness and nighttime body temperature to determine the recommended pillow type and size, and that’s precisely how I selected the Cosmo Performance Pillow 1.0. The thickness of this pillow, uncompressed, is about 6 inches and it feels neither over nor under stuffed.
The Cosmo is a dual-chamber style pillow with separated sections on top and bottom containing distinct fill materials giving each side of the pillow a different feel. With the pillow name facing up and readable, the firmer side is on top, and you simply flip the pillow over to use the softer side. The fill insert for the firm side is a solid, domed block of foam with the soft springiness of a marshmallow that has a similar density to a feather pillow when compressed. It does not have the extended shape-retention characteristics of memory foam and tends to spring back pretty quickly after weight is removed from it. The soft side fill insert is marked “Active Core” and feels like shredded tufts of silky poly fiber. It is not a solid mass and therefore rearranges easily and feels a bit mushier. This allows the fill to compress easily and mold around your head and neck while providing medium-soft density support. Personally, I think the firmness differential between the two sides is marginal and I’m often not quite certain which side I’m using, but either way the sleep experience has been very good.
Aesthetically, the pillow has a flashy, space-age design and color scheme with its blue/gray tones and rose-gold metallic stitching and accents. I tend to get warm when I sleep, so the Cosmo works well for me because it employs a number of different cooling technologies to keep me from overheating and help regulate my body temperature; for example, the Ver-tex instant cooling fabric cover disperses heat across the fabric on the pillow’s surface rather than absorbing it so that it remains cool to the touch. This, combined with the side air vents and Air-X breathable mesh on all four sides of the pillow, keeps air flowing within and around the pillow, rather than trapping heat inside it. Since your skin should come in direct contact with the Ver-tex material, you don’t need to use an additional pillow case over it as this could actually reduce its cooling benefits. If you do want to use another pillowcase, Bedgear recommends its Performance pillow protectors that employ the same technologies as the pillow. The two zipper pulls along the front side of the cover allow you to remove the fill material from each section individually, so the cover can be washed. Note that the inner fill material inserts are spot clean only.
I’ve been sleeping on this pillow for a little over a week and from the first night to last night, I’ve had a really great sleep experience with it. Not only do I feel I have the head and neck support I need, regardless of my sleep position, I’m also enjoying the cool-to-the-touch smooth feel of the Ver-tex cover. The pillow doesn’t get hot at night, and I feel I’ve been rolling over less throughout the night while using it and waking up less sore and more refreshed.
Mobile Submission: False
I would recommend this to a friend!


Share this review:
0points
0of 0voted this as helpful.
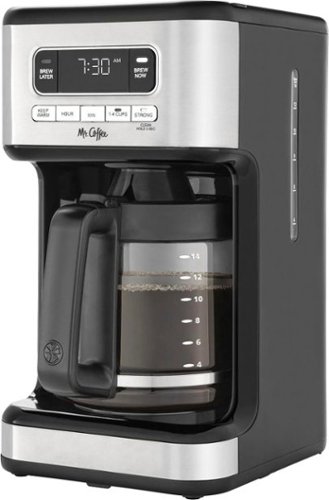
Do you drink coffee all day every day? Love to brew for a crowd? The Mr. Coffee 14-Cup Programmable Coffee Maker is perfect for you. This extra-large-capacity coffee maker brews up to 14 cups of hot coffee, so you get more coffee with every brew. Plus, its advanced showerhead evenly saturates grounds for more flavor extraction. This coffee machine also features a Small Batch setting for brewing 1-4 cups, a Strong Brew Selector for making bolder coffee, and a Brew Later function so that you can wake up to fresh-brewed coffee. With its adjustable Keep Warm setting, the coffee maker keeps your coffee at the perfect temperature for 1 to 4 hours. After 4 hours, the machine shuts off automatically for peace of mind. A clean machine means better tasting coffee. This coffee maker features an Automatic Cleaning Cycle, and also includes a reusable coffee filter that is dishwasher-safe. For capacity you can count on, the 14-Cup Programmable Coffee Maker is perfect for coffee fans and coffee fams.
Customer Rating
5
Easy to use features, great coffee
on September 28, 2021
Posted by: ReviewedByPhil
from Easton, PA
This Mr. Coffee 14-cup coffee maker is our first new automatic drip coffee maker in a very long time. It’s a huge step up from our simple on/off-only coffee maker and has a variety of features that make it easy-to-use and convenient for brewing a great tasting cup of Joe. I love the stainless steel and black finish as it goes with the rest of my kitchen appliances, though the steel portions tend to pickup fingerprints easily. On the right-hand side of the machine is a water-level monitor window into the reservoir marking 4 to 14 cups (max) in 2 cup increments. Note that there isn’t an indicator float, so you’ll just have to look for the water line where the color changes from translucent white to a clear-black. The carafe is also marked with the same volume indicators on either side of the handle.
The coffee maker is a bit larger than my last one and my only “issue” with the size is that I have to pull it out from under my kitchen cabinets in order to open the cover to the reservoir, as when fully open the height is 22 inches and my cabinets are only 18 inches above the countertop. This is probably not a bad thing though as it allows the steam from the machine to not get trapped under my cabinets and cause water damage to the woodwork.
After plugging it in, the only setup involved is setting the current time on the clock using the hour and minute buttons. You have the option to ‘Brew Now’ for coffee on demand or ‘Brew Later’ by selecting a time to turn on, for example, the next morning the machine can start brewing before you even get out of bed. Just remember that choosing ‘Brew Later’ will only run the coffee machine once, and you have to press the button again each time you want to use that feature. However, it will remember the time you chose for that setting until you change it or the machine is unplugged. I did like that there is a safety feature that if you open the reservoir lid while it is actively brewing, the hot water will pump back into the reservoir at the lid hinge, rather than shoot out of the drip head. The top of the machine does get warm/hot during brewing as well and you can set your coffee mugs on top to warm up, but I found that the lid is not completely flat (it is very slightly dome-shaped) so you do have to be careful the mugs won’t topple off.
In either mode, after brewing, the hotplate under the carafe automatically stays heated in ‘Keep Warm’ mode, and you can choose the amount of time it remains on in 1 hour increments up to 4 hours. However, there’s no option to skip the keep warm mode all together, and it doesn’t shut off automatically when the carafe is empty nor when it is removed for extended periods of time, so make sure you remember to press the same brew button you used to start the cycle in order to turn off ‘keep warm’ when necessary. It’s easy to remember though because there is a white indicator light on each setting’s button when it is active.
This coffee maker can make use of an optional ‘Advanced Water Filtration’ cartridge which is basically a small filter capsule of activated carbon that removes impurities, minerals, and trace chemicals from your water prior to brewing. Since I always make my coffee with filtered water anyway, this extra filtration step didn’t produce a noticeable difference in the taste of our coffee, but you may notice an improvement in your coffee’s taste if you are brewing with unfiltered tap or well water. A sample filter cartridge is included and you place it into a long-handled basket which sits at the bottom of the reservoir where the water is drawn into the coffee machine. There’s a handy replacement reminder dial at the top of filter’s basket handle that lets you display the month that you last replaced the cartridge. These cartridges should be replaced after 30 days (or 30 uses, whichever is earlier) and can be purchase by the dozen for a 1-year supply.
There are several other features on this machine which I think are pretty neat. The first is a ‘1-4 Cups’ brewing option which, if selected, slows down the brewing process so that the lesser amount of grounds needed to make that amount of coffee stays in contact with the hot water for longer, helping to draw out more flavor. Note though that enabling this setting, doesn’t allow the machine to measure the amount of water used. It will still empty the entire contents of the reservoir into the carafe, so only add as much water to the machine as needed for the amount of grounds used for the desired volume of coffee. The ‘Strong’ button does a similar process in order to brew a bolder, more concentrated coffee, which is great for making iced coffee (since the ice will water down your drink) or for use in recipes like tiramisu. You can have both ‘Strong’ and ‘1-4 Cups’ modes enabled simultaneously, and it will remember these settings until you toggle them off (LEDs in the button will be lit).
This machine comes with a reusable nylon coffee filter which eschews the need for paper filters. Not only can this save you the expense, but it is also more environmentally friendly. Just note that the nylon mesh will stain and turn brown through use, and while lifting the filter out of the machine using the handle is convenient, emptying it of grounds is a little messier than removing a paper liner. You can, of course, still use disposable filters, if you prefer, with or without the reusable filter installed. The brew basket, reusable coffee filter, and carafe are all top rack dishwasher safe. There is also a decalcifying ‘Clean’ mode you can activate by pressing and holding the ‘Strong’ button for 3 seconds, if your machine’s performance isn’t brewing optimally, and it’s recommended to complete this cycle once every 1-3 months depending on your water hardness.
Overall, I’m pretty happy with this coffee maker. Its 14-cup capacity allows me to brew a large pot for friends and family, and the 1-4 cup brewing mode is perfect for small batches for one or two people. The settings are easy to use, and I love that I can wake up to freshly brewed coffee in the mornings without waiting, if we plan ahead and prep the machine up the night before.
Mobile Submission: False
I would recommend this to a friend!


Share this review:
+5points
7of 9voted this as helpful.

Enjoy stunning panoramic views during gameplay with this Dell 32-inch curved gaming monitor. A vibrant 2560 x 1440 resolution coupled with a contrast ratio of 3000:1 delivers precise colors for an immersive gaming experience. This Dell 32-inch curved gaming monitor has AMD FreeSync 2 to reduce screen tearing and splitting, and a 165Hz refresh rate keeps the action smooth.
Customer Rating
5
Vibrant and bright w/smooth, blur-free motion
on September 16, 2021
Posted by: ReviewedByPhil
from Easton, PA
The Dell S3222DGM 32” gaming monitor is my first curved screen monitor, and it’s pretty cool. I’d previously been using a flat IPS display for gaming, and since this is a VA display, the experience was quite different. After a very brief acclimation period of getting used to a curved screen versus a flat one, I found that despite the significant increase in screen real estate, I could still see pretty much the whole screen all at once, plus there was little distortion at the peripheral of my vision. That’s thanks to the screen being at a roughly equal distance to your eye even at the sides of the screen, and it really does feel like a more immersive experience when gaming.
Make sure you measure your desk space though because the monitor has a quite a large footprint at 28 inches wide, 18 inch minimum height, and a depth of 9 inches. The screen height is adjustable on the included stand about 4 inches increasing the maximum height to 22 inches. You can also tilt the screen around 30 degrees to pitch up or slightly down, however, there is no side-to-side swivel or portrait rotation. I like that attaching the included stand and base is a tool-less process, though the stand can be easily removed, and underneath are four removable screws to make this monitor compatible with VESA 100mm x 100mm mounting systems.
Since this monitor is an upgrade for me from 250 nits to 350 nits, the increase in brightness was instantly noticeable, especially in a brightly lit room with window glare. At full brightness, I feel it’s a tad intense, so I like to set the color mode to ComfortView which is Dell’s “Low Blue Light” setting. This mode also has the benefit of reducing eye strain and fatigue, though it will throw off color accuracy, so you’ll want to use the standard of custom color calibrated profile for creative work where accuracy is important. Speaking of which, the colors on the screen are in general, vibrant and well-saturated with a full 8-bit color depth that covers 99% sRGB color gamut.
The contrast of this monitor is good at 3000:1, displaying dark blacks and bright whites, and the visual performance is pretty uniform across the screen – provided you’re sitting centered in front of it. Because this is a VA panel, there is a slight color shift at off angles, so while the visuals are great for a single viewer, this monitor may not provide the same experience when there are multiple viewers seated in different positions around the screen. At full 2560x1440 resolution (1440p), text is crisp, clear, and easy to read. While the monitor’s fastest refresh rate is 165 Hz, note that this can only be achieved over a DisplayPort connection and if connecting via HDMI, the max refresh rate you’ll get is 144 Hz, which is still plenty fast.
The monitor does support Adaptive Sync for AMD FreeSync Premium, but if you’re using a contemporary NVIDIA GPU, you may still be able to enable G-SYNC for the display, but again, only when connected via DisplayPort and performance/compatibility is not guaranteed. Adaptive Sync over HDMI is available with AMD GPUs. For me, G-Sync appeared to be working just fine with my GTX 1070 and gaming in large, fast-paced arenas like Fortnite and CS:GO was a super smooth with tear-free motion. The monitor’s OSD is accessible by pressing any of the 4 buttons on the back or clicking the 4-way joystick. You can custom set the functions for the OSD buttons and change the various settings like adaptive sync, frame rate display, and response time in the full menu. Interestingly there’s a soft blue downlight in the center of the screen that you can toggle by simply tapping just under the logo, but you can also turn it off altogether in the menu as well as disable the light in the power button.
The bezels around the screen are razor thin, though keep in mind there’s about a ¼ inch border from the viewable screen to the bezel as well, so there will be a gap in multi-monitor setups, albeit a pretty small one. One thing to note is that this monitor does not have built-in speakers, so you won’t be able to hear audio out of the monitor itself. However, it can pass through audio via DP/HDMI to the AUX output port adjacent to the video inputs, to which you can attach a set of headphones or external speakers. This model also does not have a USB hub, so you won’t be able to connect or power USB devices off of it.
Overall, I’ve been pretty happy with the performance of this screen for gaming. It’s fast, smooth, bright and immersive. It’s even pretty good for watching movies on. For productivity applications and creative work, I’m a bit more ambivalent because you can tell that the screen is curved when you track your eyes along the bottom and at the sides and your eyes have to move over a greater distance, which can be distracting depending on what you’re working on; so when I don’t need all that screen real estate, I just work in a smaller window centered on the screen instead.
Mobile Submission: False
I would recommend this to a friend!


Share this review:
+7points
7of 7voted this as helpful.

Your SWFT journey starts here. Wherever you’re headed, VOLT will get you there with style, safety, and a fresh design that’ll turn heads as you turn corners. Move ahead of the pack with a SWFT e-bike with a built-in rechargeable battery. Multiple modes allow you to use pedal-assist or your throttle to propel you forward. With a 19.8 mph max speed, you can travel up to 32 miles on a single charge of your battery alone. A built-in monitor display indicates your battery output and speed. Let the journey begin.
Customer Rating
4
Fun, fast, built for tall riders
on September 8, 2021
Posted by: ReviewedByPhil
from Easton, PA
The SWFT Volt e-bike is my first electric bicycle and my first new bike in a long while. A couple things to know upfront is that this bike is designed for riders who are around 5’10” (178cm) or taller and that there is a bit of assembly required, since it comes flat packed in a shipping box. The bike comes with the tools you’ll need to put the bike together (three Allen wrenches and a multi-wrench) and generic assembly instructions. While a QR code in the manual appears in the “Assembly Tips and Videos” section, as of this review’s writing, the page it points to doesn’t yet exist. Thankfully the written assembly instructions in the manual are pretty easy to follow, consisting of installing the saddle (seat), attaching the handle bars to the stem, attaching the front wheel to the fork, and installing the two pedals to the crank. Assembly took me about 20 minutes total by myself and charging the bike up for the first time took about 5 hours.
The bike itself weighs a little over 40 lbs and is rated to carry a rider/load weighing up to 220 lbs. The frame of the bike has a sturdy construction, and the battery for the 350 Watt motor is housed inside the down tube, which is wider than a regular bike’s but low-profile enough that it looks and feels very much like a manual bike. The kickstand is also wide and chunky and easily supports the bike when freestanding. The bike is single-gear, and the 700c x 28mm road tires are suitable for use on smooth, paved surfaces, but not designed for off-road terrain like nature trails or grass. The bike comes with four safety reflectors: one on each tire, a red one on the back, and white one on the handlebars. The LCD for the electronic controls sits on the left-hand side of the handle bars and shows you the remaining battery life, current travel speed, distance traveled (trip/total), travel time, and certain types of error icons. It can be set to display English or metric units. There’s also a powered headlight that runs off the motor’s battery that you can activate by pressing and holding the “up” button on the display. Note that if you turn the display off, the headlight will power off as well.
Since I’m a bit shorter than the recommended rider height, adjusting the seat height to the lowest setting still didn’t allow my feet to fully touch the ground when stationary. Although, once I’m on the bike and moving, it was less of an issue. The electric motor is turned on by pressing and holding the power button on the control display. When riding without the motor on, it just feels like a normal bike. Activating pedal-assist even at the lowest of the three settings, makes pedaling significantly easier, since it feels like there is less resistance, akin to switching to a lower gear on a multi-speed bike. Increasing the pedal-assist level gives you more motor power and greater assistance.
One thing to keep in mind is that pedal-assist doesn’t propel the bike forward on its own; you will still need to pedal to keep it engaged, and it tops out at 19.8 mph, providing no assistance at higher speeds. You can also twist the half grip throttle on the right-hand side towards you to engage fully automated propulsion, without the need to pedal. The thrust from the throttle is instantaneous and can be a little disconcerting at first as you get a jolt of power and speed. However, it’s really nice to be able to take a break from pedaling and just cruise by enabling cruise control (press and hold the “down” key while travelling above 5 mph), or use the throttle as needed for short bursts of speed, for example to help you climb steep hills with minimal effort. The power-assist can also be used when walking your bike at under 2 mph. The brakes for the bike operate smoothly and were easy to adjust and calibrate, but note that using the brakes frequently with power-assist will deplete the battery faster.
Overall, I found the riding experience on the Volt to be super fun and exciting. The bike is easy to assemble and ride, and the motor lets me go faster and farther than I typically would on a manual bike. The battery life on a single charge is great, providing up to 32 miles of travel on a single charge, so I can worry less about getting stranded due to exhaustion when riding for longer distances. You do have to maintain the battery though, by charging it at least once a month, and the operating efficiency of the battery may be impacted by environmental factors like ambient temperature. While the bike is water-resistant, to prevent water from damaging the electronic components you have to be mindful that the charging port is always covered by the silicone port plug, which in my opinion doesn't really ever feel like it seats fully/securely. If you live in an urban or suburban environment with lots of paved roads and lanes for biking, this e-bike would be awesome for getting around, commuting, and leisure rides. I wish that the bike was proportioned a bit smaller to be accessible to shorter riders, like myself, but taller riders should have an easier time with handling, control, and comfort with this e-bike model.
Mobile Submission: False
I would recommend this to a friend!


Share this review:
+96points
104of 112voted this as helpful.

The Nest Doorbell is the battery-powered video doorbell that works with any home. See what’s happening at your door from anywhere and get intelligent alerts about important activity, like when there’s a person, package, animal, or vehicle.* And because there are no wires, you can install it yourself. Nest Doorbell requires the Google Home app and a Google Account – it’s not compatible with the Nest app or the home.nest.com site.
Customer Rating
4
Good video/audio but no 24/7 recording
on September 1, 2021
Posted by: ReviewedByPhil
from Easton, PA
The Nest Doorbell (battery) is our first smart video doorbell, but not our only product from Nest, as we also have their Learning Thermostat. Since we already have multi-room smart speakers throughout the house and security system hubs with screens, we were hoping to have the doorbell play a chime through them or display its video feed on our existing screens, when the doorbell button was pressed, however, the Nest Doorbell is only able to do this with Google branded speakers, hubs, or screens. Since we don't own other products in the Google IOT ecosphere, we can only get push notifications from the doorbell and view its video on our mobile devices through the Google Home app. Thankfully, a hard-wire kit is included with the doorbell, so we could at least use our wired electric doorbell chime for an audible notification throughout the house, and it would be permanently powered as an added bonus.
The doorbell camera itself is quite large as it contains a fairly sizeable battery. The battery is rated to last 1.5 to 6 months depending on the frequency of usage eg. average number of daily events it records and other battery saver settings like video/audio quality and minimum event recording length. When the battery power is low, it will enter into a "low power" mode to conserve more battery until you charge the unit; to charge it, you'll need to take down the unit and plug it in via the included USB-C cable for about 5 hours. The other option is to direct-wire it to a compatible doorbell transformer. As for installation instructions, a link to a video demonstrating the battery operated installation is included in the box, but no written instructions. If you want to perform a wired installation, you'll have to search for those directions on your own, but it's easy to find the video for that process as well. However, one thing that was unclear during my installation was whether or not I needed to install the diode that came with my chime on the wire contacts of the Nest Doorbell; while my chime appeared to be compatible, since I wasn't able to find any information from Google/Nest specifically mentioning installing a diode one way or the other, I did not install it. Other than that, the installation process was pretty straightforward and took about 15 minutes. There’s also an angled wedge included if you need to change the direction the camera faces by 20°.
For the most part, the doorbell works pretty much as advertised. When I ring the bell, a notification pops up on my phone through the Google Home app, and I can view the doorbell's live video and audio feed and use the mic to communicate with someone in front of it. The external chime that I wired to the doorbell also starts ringing right away and kind of works, but my problem is that the “length of ring” setting in the app for electronic chimes can only be set in whole second increments, which either cuts off the chime before the melody is done playing (6 secs) or allows the chime to start repeating before getting cut off (7 secs). With my normal mechanical doorbell, I never had a problem with the chime playing the melody all the way through exactly once.
The app experience is just okay. During setup, I was a bit disappointed to find that the Nest Doorbell (battery) could not be added to the existing Nest app that is used to control the Nest Learning Thermostat and can only be added to the Google Home app. Doing this took me a few tries too because the Home app wanted to use my existing Nest product to "assist" the setup by passing along my WiFi network name and password, but it kept failing. I ended up needing to remove the Nest thermostat from my account first, enter my WiFi network info manually, and then re-add the thermostat through the Nest app which was then pulled into the Google Home app. After setup, navigating the app is somewhat clunky and it took me a while to figure out how to download a saved event video clip (you have to go into the "event details"). Changing and customizing the settings for the doorbell was pretty easy though.
I was also surprised to find that the free 3-hour event recording history is not a cumulative measure of time. Instead, it is a 3-hour lookback period, which means you can view any events that happened in the past 3 hours, but no earlier, even if the amount of recorded footage during this period amounts to only a few minutes. So if I viewed something in the event history yesterday that I wanted to re-watch today, I wouldn’t be able to do so, unless I downloaded the clip during the 3-hour period when it was available to view or had a Nest Aware subscription. The monthly Nest Aware subscription adds benefits like a longer event history period, familiar faces recognition, allowing the unit to announce your frequent visitors' names, sound detection like glass breaking or smoke alarms, and emergency calling to 911. Note that there is no way to enable 24/7 recording (to capture non-event footage), even if you choose to hardwire the unit and get a Nest Aware subscription. The camera itself has local onboard storage for 1 hour's worth of footage, which is helpful if it gets disconnected from the internet and can’t upload it to the cloud right away.
I will say that the video footage is clear and crisp with plenty of detail at 960x1280p, and the viewing angle is wide at 160° field of view (FOV) in a 4:3 ratio. The audio picked up from the doorbell is also quite good with decent volume. However, when speaking through the mic in the app, the speaker on the doorbell itself isn't very loud, so sometimes it's hard for your visitor/guest to hear you. You can opt, instead, to respond to doorbell rings with a pre-scripted message that is recited in Google's text-to-speech voice. I also liked that you can select intelligent motion detection options for specific types of events like people, vehicles, animals, or packages versus all motion, and you can also define multiple detection zones within the view for specific event activity and customize the alert settings for each one separately.
Overall, I do like having the features of the doorbell, from the high quality video and audio capture, to the intelligent event recording and notifications, which was fairly accurate, though we did find that door-less mail and delivery vehicles often came up as “person” events because the camera picked up the driver inside. You have the flexibility for a wired or battery operation installation, and if you’re already using Google speakers and screens, this doorbell would work seamlessly with them. If you’re like me, and don’t though, you may still be able to hook it up to your existing doorbell chime as a low-tech workaround. The biggest drawbacks for me are the lack of 24/7 and non-event recording, the fact that my wired chime doesn't play through exactly once, and the relatively short "free" event history review period without a monthly subscription.
Mobile Submission: False
I would recommend this to a friend!


Share this review:
+9points
10of 11voted this as helpful.
ReviewedByPhil's Review Comments
ReviewedByPhil has not submitted comments on any reviews.
ReviewedByPhil's Questions
ReviewedByPhil has not submitted any questions.
ReviewedByPhil's Answers
The Nest Doorbell is the battery-powered video doorbell that works with any home. See what’s happening at your door from anywhere and get intelligent alerts about important activity, like when there’s a person, package, animal, or vehicle.* And because there are no wires, you can install it yourself. Nest Doorbell requires the Google Home app and a Google Account – it’s not compatible with the Nest app or the home.nest.com site.
My existing doorbell chime (electric) says "must install diode" on the back, and there is a 1N4001 diode installed in my existing doorbell button. Do I need to use the diode in my installation of the Nest Doorbell if I'm hard wiring it to my chime?


The compatibility checker said my electronic chime and transformer are compatible, but the video instructions for a wired installation of the Nest Doorbell (battery) doesn't make mention of installing a diode (or not), if one comes with the chime. At any rate, I performed the installation without it and adjusted the "length of ring" setting to 6 seconds, which is nearly long enough to play through the melody, though it loses power and cuts off at the end. Any longer setting results in the chime beginning to repeat before it gets cut off which I find less desirable.
2 years, 9 months ago
by
ReviewedByPhil
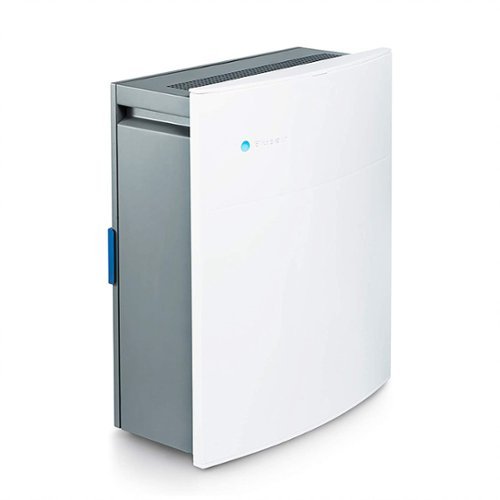
The Blueair Classic 280i air purifier brings clean, energizing air to spacious bedrooms, living rooms, or any rooms up to 279 sq. ft. A built-in air quality sensor makes it easy to confirm your air is virtually free of asthma and allergy triggers and indoor air pollutants such as mold, dust, pet dander, and pollen by scanning the air quality in real-time and adjusting fan speed to your current air quality. The Classic 280i delivers unmatched performance thanks to HEPASilent technology, which combines electrostatic and mechanical filtration technologies. This combination, pioneered by Blueair, delivers a high Clean Air Delivery Rate (CADR) with whisper-quiet operation (32- 56 dB), using 20-80 W of energy.
HOW MANY FET DOES TRHIS BLUEAIR COVER

Play to your full potential with this 23.8-inch ASUS TUF gaming monitor. The 1ms response time prevents blurring and lagging for quality visuals, while the FreeSync technology eliminates stuttering and tearing for seamless gameplay. This ASUS TUF gaming monitor has an anti-glare display that reduces reflections, and it features flicker-free technology that reduces eye strain for comfortable viewing.
Will this monitor support 144mhz for Xbox 1x over HDMI, is the HDMI ports 2.1?
The HDMI port on the monitor is HDMI v1.4, so on the Xbox One X it'll only allow you to output at 1080p @ 60fps and only goes to 75Hz.
4 years, 2 months ago
by
ReviewedByPhil
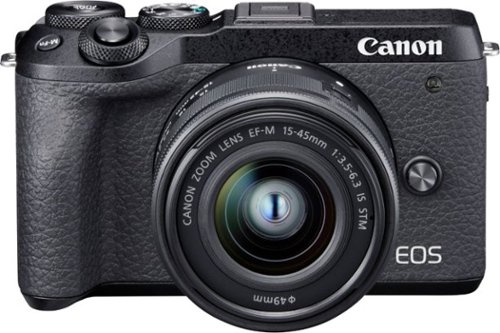
Record 4K UHD videos and capture high-quality stills with this Canon EOS M6 Mark II camera. The 32.5MP APS-C image sensor lets you take detailed, true-to-life photos, while the electronic shutter capable of speeds up to 1/16000 is ideal for taking professional-caliber action shots. This Canon EOS M6 Mark II camera comes equipped with an 15-45mm f/3.5-6.3 interchangeable zoom lens for wide-angle and short telephoto shots..
Does it have a self timer/self-timer delay or remote compatibility?
Yes, the self-timer can be set to 10 seconds, 2 seconds, or continuous, which takes 2 to 10 photos consecutively after a 10 second timer expires. You can use your smartphone as a Bluetooth remote control as a shutter trigger, or connect the phone via WiFi to the camera for remote monitoring (see what the camera sees on your smartphone screen) and control all the settings on the camera through the app.
4 years, 5 months ago
by
ReviewedByPhil
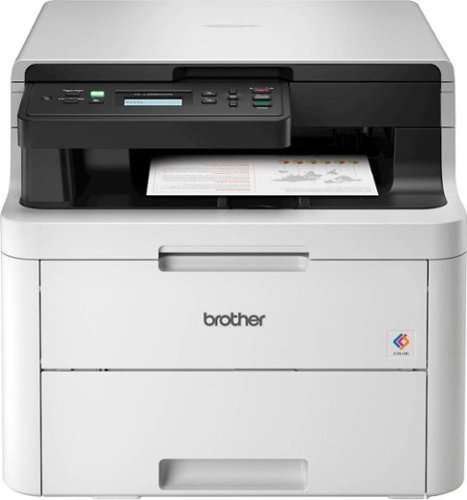
The reliable, robust Brother HL-L3290CDW compact digital color printer with copying and scanning capabilities is a great choice for the busy home or small office. The flatbed scan glass provides convenient copying and scanning. Quick print speeds of up to 25 pages per minute¹ plus manual feed slot accommodates varied printing needs and can handle a variety of paper types and sizes including card stock, envelopes and more. Connect with versatile options including built-in wireless or USB interfaces and print wirelessly from mobile devices. The 250-sheet capacity adjustable paper tray helps improve efficiency with fewer refills and handles letter or legal sized paper. Automatic two-sided printing helps save on paper costs. Brother Genuine high-yield toner replacement cartridges help lower printing costs. Comes with a 1-year limited warranty and free online, call or live chat support for the life of your product.Prints and copies up to 25 ppm in black and up to 25 ppm in color
What language does this printer support? Does it support Chinese mandarin?
No, Chinese is not supported on the LCD for the printer settings. It looks like the LCD can only display Latin and Slavic based characters e.g. English, French, Russian, Polish etc..
4 years, 7 months ago
by
ReviewedByPhil
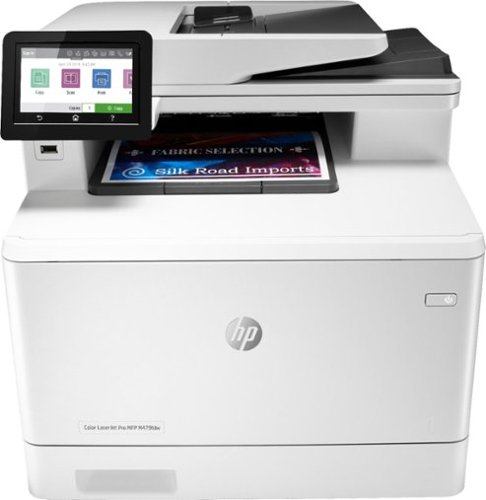
Winning in business means working smarter. This HP Color LaserJet Pro M479fdw printer is designed to let you focus your time where it's most effective - growing your business and staying ahead of the competition.Prints up to 27 ISO ppm*, up to 27 ISO ppm* in color
If this printer is connected via USB to a computer, can other computers print wirelessly to it? I need to have it connected by USB to my work computer but also want to be able to use it for wireless personal printing from two other household laptops.
Yes, you can connect to the printer wirelessly using a direct WiFi connection (local network between the printer and computer) without connecting the printer to your router/home network. You can also connect wirelessly via Bluetooth. You'll get the most out of wireless printing features by connecting the printer to the internet by providing it your home WiFi network SSID and password. Once connected to the internet you can turn on Web Services and print from any device with e-mail capability by simply sending the file to be printed to a uniquely assigned e-mail address for the printer. This will also enable other computers and devices on the network to find and send print jobs to the printer.
4 years, 9 months ago
by
ReviewedByPhil
What does it mean for a webcam to be portable?
Simply that it is small and is versatile in terms of mounting options, for example, if it can be clipped to a laptop monitor as well as a LCD panel or set on a desktop or used with a tripod. They usually still need to be plugged in via USB and require software/drivers to run. Not many are compatible with mobile devices.
7 years, 4 months ago
by
ReviewedByPhil