ReviewedByPhil's stats
- Review count135
- Helpfulness votes1,231
- First reviewJanuary 6, 2016
- Last reviewApril 23, 2024
- Featured reviews0
- Average rating4.6
Reviews comments
- Review comment count0
- Helpfulness votes0
- First review commentNone
- Last review commentNone
- Featured review comments0
Questions
- Question count0
- Helpfulness votes0
- First questionNone
- Last questionNone
- Featured questions0
- Answer count7
- Helpfulness votes7
- First answerJanuary 18, 2017
- Last answerSeptember 1, 2021
- Featured answers0
- Best answers1
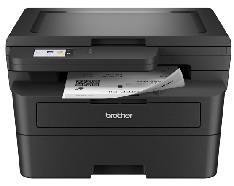
Best for small offices and work from home, the Brother HL-L2480DW Wireless Compact Black & White (Monochrome)
Multi-Function Laser Printer is the affordable 3-in-1 option for exceptionally efficient printing, copying, and scanning.
This compact, multi-function wireless printer is an effective, time-saving addition to any home or small workspace. As
quick as it is efficient, the HL-L2480DW consistently produces crisp, easy-to-read black & white prints at speeds up to 36
ISO pages per minute (1) (ppm). Automatic duplex printing saves time and reduces paper waste, while the 250-sheet
capacity paper tray (2) decreases paper refill frequency. With an integrated 2.7” touchscreen, navigation is simple and
straightforward, and the touchscreen allows you to print-from and scan-to popular cloud-based apps. (3) Flexible
connection options include dual-band wireless, Ethernet, and USB 2.0 interfaces. Plus, advanced security features help
protect your information and maintain secure connections while you're printing
Customer Rating

5
Fast prints & copies, best for sharp/crisp text
on January 7, 2024
Posted by: ReviewedByPhil
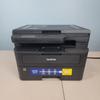
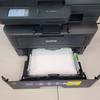
I’ve used several Brother printers in the past and this is my third monochrome, or black and white only, printer from this brand. The HL-L2480DW is an all-in-one printer that can copy, scan, and print on a variety of media including envelopes, labels, letter and legal sized paper. It cannot, however, print in color nor send or receive faxes. It takes up a decent amount of desk space, and you’ll need to leave some clearance in front, behind, and above it to open the paper tray, rear panels, and scanner lid. That said, I found it surprisingly light at just over 22 lbs.
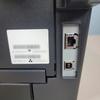
The machine is pretty simple to setup. After plugging it in and turning it on, I connected it to my home’s WiFi network from the touch display control panel, though you can also use an Ethernet cable for a wired connection or connect directly to your computer using a USB-B cable, if you prefer keeping the machine offline (cables not included). Using the color LCD’s menus is intuitive and user-friendly, however, I found the screen’s keyboard for entering my WiFi password very tiny and difficult to tap the right keys. If you don’t want to share the printer on your LAN, you can use a direct WiFi connection to another device that supports it.
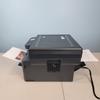
Drivers and software for the printer can be downloaded from Brother’s website, and installation takes about 5 minutes. I was able to get started printing within about 10 minutes from unboxing. The paper tray on the bottom can be fully removed and holds up to 250 sheets of paper from A6 to A4 sizes. The back of the tray can even be extended to accommodate legal size paper (11x14 inches), though note that it will stick out of the back of the machine several inches when closed. Envelopes, labels, and other custom media can be fed into the manual feed tray that folds out from the front of the machine and is ejected from the rear return tray.
Sending print jobs to the printer wirelessly was fast, and printing started within a few seconds of hitting print. In terms of print quality, I found that text-only documents came out quite nicely. Lettering is crisp and clear, and print/copy speed was fast at 36 pages per minutes (ppm). The printer can handle 2-sided duplex printing sequentially and retracts sheets to print on the reverse side. The paper return tray can hold up to 100 sheets and has a flip out support flap for high volume printing.
Large graphics and photos, however, printed with less than “photo” quality. I found that across large images, there were very noticeable horizontal bands (light and dark) across the page. These persisted after multiple attempts at cleaning the toner cartridge, rollers, corona wire, and drum. Images also appeared much darker on paper (with default settings) than on screen, losing contrast, textures, and fine details in the print. I did not see a huge difference in print quality when setting the output DPI to 1200 versus the default 600, though contrast improved marginally. Fortunately, the banding isn’t apparent at all with text-only printing.
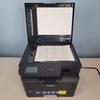
For scanning, you’ll choose upfront where to save the file from the menu, for example, to your computer, in an email, or to your linked cloud storage (e.g. Google Drive, Dropbox, SharePoint). Scanning a page of text produced clear, legible copies in about 10 seconds at the default 200 DPI; scanned text was easily recognized by the OCR software and the file contents could be copied and edited in word processing applications. There was little, if any, bleed-through when scanning a page with text on both sides. However, this machine cannot scan both sides of a page simultaneously or automatically, and you must manually flip the sheet in order to scan the other side. After each scan, the control panel will ask you if there are more pages so you can save them as a single PDF file.
Scanning photographs at 200 DPI, on the other hand, produced results that were a little lighter than their physical originals, with a warmer tint and softer focus. When zooming in on a 200 DPI image scan, there was a bit of a grid effect due to data compression/loss, though the scans managed to capture most of a photo’s details with accuracy and good color and saturation. When scanning at the max resolution of 600 DPI, each scan took longer, about 30 seconds, and individual pixels were less noticeable with smoother edges and little noticeable grid effect. However, there was a slight rainbowing of grayscale colors. With photocopies, it was much the same results as with scanning, and I noticed text in photocopies appeared slightly darker and thicker, so regular font appeared slightly “bold” faced.
You can print from a mobile device using the Brother Mobile Connect smartphone app. This app requires you to login or create an account to link your printer. Once linked, “Scan to Mobile App” will also appear in the Scan options on the printer’s control panel. Just make sure your phone and printer are connected to the same network. In the app you can print documents and photos or initiate a scan that saves directly to your phone. You can also manage or sign up for Brother’s Refresh EZ Print Subscription, an automatic toner refill program; a 4-month free trial is included with this printer.
A feature that may be useful for folks using the printer in a shared office environment is the ability to send a secure print job to this printer’s queue; this will require a user to enter a password/PIN entered on the machine’s LCD in order to complete the print. Toner cartridges for this machine are the Brother TN830; a standard version yields up to 1200 pages while the high-yield XL prints up to 3000 pages for a lower cost per print. The starter cartridge included with the printer, however, will only last about 700 pages.
I like that you can add shortcuts for functions that you use often to the control panel’s menu, like Scan to Google Drive or Mobile App. One thing to consider though is that there is no automatic document feeder tray for scanning and copying a lot of pages. As these functions are single-sided, you’d have to do one sheet at a time, one side at a time.
Overall, the printer is great if you don’t need color printing and mostly print text, as it prints quickly both single-sided and duplex. Graphics will print fine but larger images won’t be “photo” quality. It also functions well as a scanner and copier with decent reproduction quality, though isn’t as fast or convenient with a large number of pages or at its highest resolution. The printer is easy to setup and share on a network with multiple ways to connect, and has a number of useful Internet capabilities like linking to cloud storage, scan to email, and secure remote printing.
I would recommend this to a friend!

Share this review:
+2points
2of 2voted this as helpful.
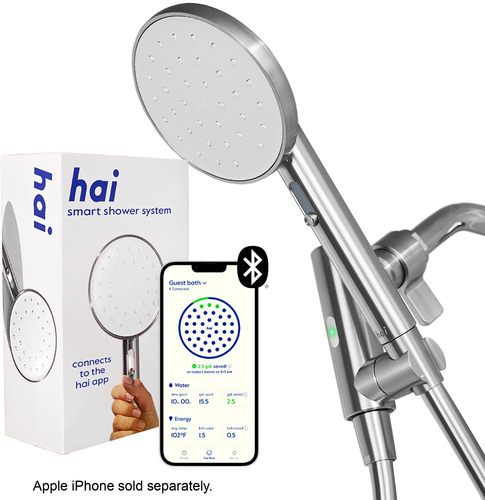
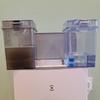
Say hai to a smart sustainable showerhead. Water-powered Bluetooth technology connects to the hai app, helping you track your water usage - no batteries required. Save water with customizable LED alerts, indicating when the water's reached your perfect temperature and when you're at your set water use target. A specially designed patented spray slider makes it easy to adjust between a high-pressure stream to a steamy fine mist. hai features more coverage than the average showerhead and is perfect for low-flow environments. Constructed with durable, high-quality, stainless-steel materials and a smooth bacterial-resistance hose, hai can be mounted on the wall or used as a handled shower device. A 2-year warranty lets you buy with confidence.
Customer Rating
5
Quick Install, Good Spray, Easy Alerts
on January 4, 2024
Posted by: ReviewedByPhil
The hai smart shower was a very simple DIY installation that required no tools and only a few minutes of my time. I chose to use plumber’s Teflon tape (not included) at the inlet connection to ensure a watertight connection but everything else was simply hand-tightened, and there were no leaks or drips anywhere.
After installation, you need to download and install the hai app to a mobile device and create or log in to an account. A unique activation QR code is included on a card inside the package that you’ll use to add the device to your account and activate its two-year warranty.
The showerhead and shower arm are both made of heavy-duty metal with a brushed stainless steel exterior. The 5ft hose is a silvery metallic color but made of rubber, and is just long enough that if I drop the showerhead, it doesn't hit the floor of my tub. Since the showerhead comes in several colors, the back and front faces of the wand are plastic in your chosen color, and I got the light blue called "Surf."
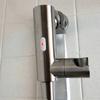
The unit comes in two versions to accommodate different flow rates: standard at 2.5 gpm or eco at 1.8 gpm, and I have the former. The flow rate is printed at the base on the back of the wand. The holster that holds the wand is adjustable, so you can point the wand straight out or angle it downward when not using handheld. I didn’t like, however, that it is a metal-on-metal connection because the finish of the collar that slips into the holster does get scratched, and if you go past horizontal the wand can fall out.
The sprayer has 35 rubber nozzles for the jets and a slider on the handle to gradually change from high-pressure streams to a softer aerated mist-like spray. The high-pressure setting provides decently firm but not sharp or painful jets of water while the mist is gentler and more soothing, but don’t expect a very fine mist, like a steam bath. I like the slide mechanism because you can choose spray patterns in between the two for your desired water pressure.
To pair the showerhead with the app, you’ll need to run the shower, as the electronics embedded in the arm are water-powered and do not require batteries or wiring. It’ll connect to your phone via Bluetooth and the app should automatically detect the unit during pairing. Once added to your account, it may require a software update that could take a few minutes, during which you’ll need to leave the water running. After setup is complete, you can shut the water off before adjusting the settings in the app. You can add multiple hai showerheads in the app if you install them in more than one bathroom in your home.
The two smart features included are the ability to choose a preferred water temperature from 33° to 120° F and a water usage alert from 2 gallons onward, which does not appear to have a maximum. For either of these, you can set a color (9 choices) for the LED on the shower arm to display to alert you that the set temperature or usage has been reached. You can also receive a push notification to your phone regarding water temperature, if it takes a while for your water lines to warm up. However, neither of these settings are limiters; that is, the water temperature can continue to rise above your desired temp, and you can continue to use water past your usage alert setting.
When you’re done using the shower, if your phone is nearby, it will sync information to the app regarding your usage including a timestamp, time spent in the shower, gallons used, average water temperature, and kwh of energy used (to heat the water). You’ll also see efficiency metrics like water and energy saved when compared to the national averages. Just remember that only water usage through the showerhead itself gets tracked, and any water usage through a separate tub spout would be left out of these metrics.
These numbers are averaged and recorded on daily, weekly, monthly, and annual charts in the app, so you can track your usage over time and spot trends. You can also review your recent shower sessions, though you’ll only see duration and gallons used in this history log. There is one final section of the app called 'rituals' that contains articles promoting wellness and well-being, like recommendations for better sleep, stretching, meditation, and tips for maintaining your showerhead.
Overall, the hai smart showerhead provides a really nice shower experience with on-the-fly adjustable water pressure from firm to soft while providing you convenient notifications regarding water temperature and consumption. It unlocks the power of your usage data, so you can make decisions and take action regarding your household's habits in the shower, which not only helps you to save water and energy but also reduces costs and promotes conservation for a more sustainable lifestyle.
I would recommend this to a friend!


Share this review:
0points
0of 0voted this as helpful.
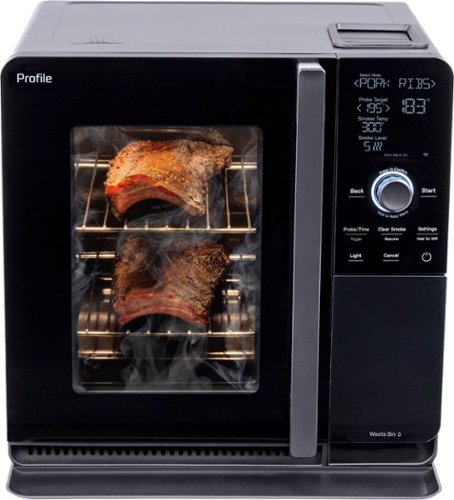
GE Profile provides modern design and the latest features in home appliances. Designed for today’s smart home, GE Profile provides features that allow you to do more, through remote monitoring, voice activation and technology that takes the guess work out of cooking and cleaning. Now the advanced engineering you've come to expect from Profile is available in an indoor smoker that delivers modern styling and exceptional performance. This innovative smoker offers the convenience of indoor smoking, while still delivering delicious, wood smoke flavor. Active Smoke Filtration turns real-wood smoke into warm air so you can prepare smoked brisket, pork butt and more at any time from the comfort of your kitchen. The Flavorful Smoke Generation system precisely controls pellet temperature to release the best aromatic compounds possible. Includes six pre-set food settings and an auto warm option that make it easy to prepare real wood smoked foods whenever you want. Includes a built-in temperature probe for precise food preparation and has a pellet capture system for easy disposal and clean-up. Plus, GE Profile Connect+ lets you set your favorite smoke mode and monitor cooking process from anywhere via the SmartHQ app. With the GE Profile Smart Indoor Smoker anyone can create amazing results from the comfort of their kitchen.
Customer Rating
5
Great smoky flavor, easy cleanup
on December 27, 2023
Posted by: ReviewedByPhil
The GE Profile Smart Indoor Smoker isn’t my first foray into smoking foods indoors, as I do have a stovetop smoking kettle. However, what I like about this unit is that it contains and eliminates the smoke after it’s been exposed to your food, so your house doesn’t fill up with harmful particles and carbon monoxide.
The machine is about the size of a large microwave or toaster oven at 16” tall/wide and 17” deep. It has a sleek, glossy, modern look with a tempered glass door that takes a bit of force to open and close, due to the hermetic seal. The unit comes with 3 adjustable position racks, a drip tray, counter guard, 1lb of wood pellets, metal bristle cleaning brush, and removable food thermometer probe on a magnetic holder. A color booklet with a handful of recipes is also included along with the manual.
The unit is heavy, around 50 lbs, and it takes up a bunch of counter space, but don’t let that deter you if you’re interested in smoking food indoors because I would gladly reserve space on my countertop for this machine based on its results. The max capacity for each rack is 15 lbs, though a more useful guide for capacity is approximately 0.5 cu ft. Its temperature range is 170-300° F and you can smoke for as little as 15 minutes up to 24 hours.
The only setup required is to load food-grade wood pellets in the hopper (about 2 cups), prime the auger, and optionally connect it to your WiFi network for remote control via the GE SmartHQ app. Its operation is simple and intuitive using the touch keys and rotary selection dial below the LCD panel or change settings via the app, though you'll need to log into or create an account. To smoke food, set the oven temperature, smoke level (1-5), and cook time or alternatively choose a target temperature, if using the thermometer probe. I find using the probe easier because it takes the guesswork out of knowing how much time to smoke for, though either way you can set the machine to shut off or go into ‘keep warm’ mode after your food reaches the target temp or the cook timer expires. You can even cook without smoke though keep in mind that the unit only goes up to 300°F for slow roasting.
There are a handful of pre-set modes like Brisket, Pork Ribs, Chicken, and Salmon, or you can define your own custom program to suit your tastes. In the app, you can save and name your custom pre-sets and send them to the machine over WiFi, but the machine itself won’t store any custom programs in its onboard menu. The display is nice and bright and easy to read and a color-coded LED around the dial lets you know the progress and status of different modes like pre-heating, keep warm, and smoke removal.
The unit takes about 15 minutes to pre-heat, and if using the probe, you should install it first before starting the cook cycle. Once the unit is up to temperature, you can place your food inside and insert the probe into it, but don’t forget to use heatproof mitts as all surfaces inside the chamber will be hot, including the probe!
So far I’ve smoked salmon and chicken in it with delicious results using the recipes included with the machine. While the taste isn't exactly the same as an overnight smoke in an offset smoker, both meats came out cooked thoroughly, juicy, and with a strong but not bitter or overpowering smoky flavor. I can’t wait to try making ribs, brisket, and turkey in it. I’ve even ordered other flavor pellets like fruit woods, so I can experiment with the different aroma and taste profiles.
While smoking, you can see the smoke being generated and pumped into the smoking chamber when you turn on the interior light. I did not notice any visible smoke escaping the machine although excess heat is exhausted out of a vent just below the door and some smoke smell is perceptible but not heavy. The scent dissipates pretty quickly in a well-ventilated space and doesn’t seem to linger long, especially if you have air purifiers in your home. You can also pause and clear the chamber of smoke at any time during the cooking process, though this process takes a few minutes to complete, say if you need to open the door of the unit to add or remove food.
The machine uses about ¼ cup of pellets for every hour of smoking at the highest smoke level (5). After the pellets are burned, they’ll drop into a water collection bin to be extinguished, though you’ll notice at the end of any smoking session that some un-ignited pellets will also end up in the bin. Unfortunately, once they pellets get wet, they’re unsuitable for use and must be discarded, however, this is part of its normal operation and reportedly still more efficient in terms of pellet use than a traditional smoking coil. If you decide you want a different flavor smoke profile, you can empty any remaining pellets in the auger into the bin without using water and collect them for before loading the hopper and priming the auger again with different pellets.
Cleaning the unit after use isn’t too bad but is about as much work as cleaning a roasting pan. The interior of the machine is coated like an oven or microwave as is the drip tray that goes under the food while smoking. The racks and side supports are stainless steel; both are easily removed for cleaning. I found that wiping down the interior with a wet cloth after it’s cooled a bit but is still warm to the touch to be the best time to clean. Be wary of using any harsh chemical cleansers as this could damage the heating coil or the non-stick coating. I discovered even vinegar is a bit too harsh, as it ended up discoloring and etching the drip pan during a brief soak to remove burnt on particles.
Overall, I found this indoor smoker to be a game-changer for my kitchen. It has opened up new possibilities for meals I can make year-round; I can add smoke flavors to foods quickly, indoors without filling my house with dangerous VOCs and don't need to babysit an outdoor smoker for hours. It's a large countertop machine, but the capacity is decent, and while you won’t be able to smoke a ton of food at once, you can still do a whole chicken/roast, a couple racks of ribs, or just smoke in small batches for one or two people.
I would recommend this to a friend!


Share this review:
+1point
2of 3voted this as helpful.
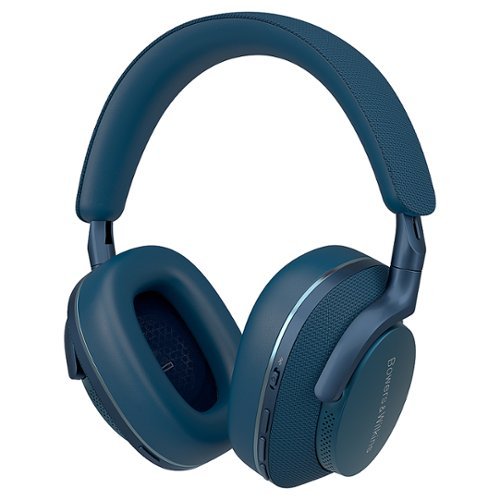
Elevate your auditory journey with the Bowers & Wilkins Px7 S2E Over-Ear Headphones that seamlessly merge 24-bit processing high-res DSP, custom 40mm drive units, and feature Qualcomm aptX Adaptive, creating an immersive sound production for your movies, music, and shows. Advanced features including active noise cancellation resulting in crystal-clear calls, promise a technologically sophisticated experience. Step into a realm of luxurious comfort and sophisticated design with these over-ear headphones. Its premium architecture showcases plush foam earpads and an elegant finish, providing an unobtrusive yet snug fit even during extended listening sessions. This seamless fusion of comfort and aesthetics creates a haven for your senses, amplifying your listening experience. Take full command of your sonic environment with the Bowers & Wilkins Px7 S2E Headphones. The Bowers & Wilkins Music app allows seamless direct streaming, efficient voice assistant support, and customizable noise cancellation adjustments. The substantial 30-hour battery life, quick-charge support, and other essential features cater to your audio needs throughout the day, making the Px7 S2E an ideal companion for your day-to-day adventures. These headphones not only feature technological prowess but also an aesthetic feel, ensuring that every note, beat, and whisper sounds exactly how the artist intended.
Customer Rating
5
Elegant style, amazing sound, wired and wireless
on November 22, 2023
Posted by: ReviewedByPhil
This is my first pair of Bower + Wilkins headphones though not my first foray into the world of luxury premium audio products. That said, it probably comes as no surprise that the latest iteration of their entry-level wireless Bluetooth headphone, the Px7 S2e (‘E’ for evolved), delivers a deliciously satisfying listening experience.
These headphones are designed with style and beauty in mind second only to its exceptional sound quality. The headphones come with a velvet-lined, zippered protective case that cleverly stows the USB-C to USB-C charging cable and USB-C to 3.5mm wired cable in a magnetic compartment in the middle. The minimalist monotone color palette used throughout complements soft curves and clean lines in its handsome yet durable construction. Adjusting the flexible headband feels smooth and seamless and is free of any creaks or clicks, and they fold flat for storage.
These cans are weighty at around 11 oz but don’t feel heavy because of how well-balanced they are. The leatherette-lined headband offsets and distributes the weight, and the clamping force is firm but not uncomfortably tight. I like that oval ear cups are tall and wide with angled interiors, giving your ears more room inside the cup without adding bulk, and the soft leather pads create a good seal around the ear for isolation. This design also helps contain and direct the sound from the 40mm drivers into your ear canals.
Upon powering on the headphones for the first time, my smartphone detected it immediately and even prompted me to download the accompanying B&W Music app. After creating an account or logging in, you’ll add the headphones to the app by pairing over Bluetooth 5.2, so you can change its settings. By default, noise cancelling is enabled, and it works well thanks to its use of 6 microphones to detect and eliminate background noise. The mics are also used when making hands-free calls for clear noise-free pickup of your voice. Alternatively, you can use the USB-C for a wired connection (up to 24-bit/48kHz), if your Bluetooth codec doesn’t support aptX Adaptive or HD for hi-res audio transmission.
Pressing the quick action key on the left earpiece switches to pass-through mode which lets the mics pickup audio so that you can listen to your surroundings without taking the headphones off. Pressing once more toggles ANC off, but just note that without pass-through audio, the passive isolation of the ear cups is still quite good and sounds around you will be dampened. You can also change the function of this key to activate a voice assistant instead, so you can ask your AI questions, make calls, send texts, and control your IoT devices. The position of the key is convenient and places it just under your thumb when cupping the earpiece with your left-hand.
The power switch and playback controls are similarly placed on the right ear cup. Since there are three physical keys to press, the middle multi-function button (MFB) is textured so you can differentiate and identify it, which also gives you a reference point to locate the volume buttons above and below it easily. For track skipping forward or back, you’ll double and triple press the MFB.
In the app you can view the headphone’s battery life, which can last up to 30 hours on a full charge which takes only 2 hours. If you need a quick top up, just 15 minutes of charging can deliver 7 hours of runtime. There’s also an automatic standby feature that will put the device in low power after 15 minutes of inactivity and an adjustable wear sensor that automatically pauses what you’re listening to if you take the headphones off (or lift an ear cup off your ear) and resumes when you replace them. Both of these features can be toggled off in the app as well.
The only EQ adjustments you can make in the app are to boost or reduce the treble or bass by up to +/- 6dB. There is no advanced control that will allow you to adjust the mid-ranges or get more granular. Ostensibly, this is because the sound engineers at B&W have already tuned the drivers to give you the most accurate listening experience, as recorded, though some music streaming apps may allow you to apply additional EQ adjustments.
Speaking of, the sound that the Px7 S2e delivers natively is truly enjoyable. A bit bass heavy perhaps, but in a good way. Even so, the sound overall was full and detailed with bright trebles and rich, clean textures. The headspace and sound stage both felt adequately spacious though not large, per se, which is typical of closed back headphones. However, I found the stereo separation and imaging to be clean and precise.
Overall, the listening experience with the Px7 S2e is satisfying, immersive, and comfortable even over longer listening sessions. You can pair them with up to two Bluetooth source devices simultaneously, and the battery lasts all day on a single charge. I also like the option of using them wired, though I found the volume levels are somewhat reduced when doing so.
I would recommend this to a friend!


Share this review:
0points
0of 0voted this as helpful.
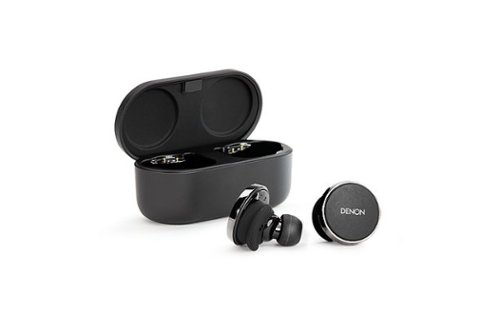
Denon Perl Pro True Wireless Earbuds let you create a personalized sound profile via Masimo AAT for audio that is perfectly tuned to you. Add in CD-quality sound from Qualcomm aptX lossless technology and spatial audio from Dirac Virtuo for an unrivaled wireless audio experience. Confidently take calls with best-in-class voice audio. Use the Denon Perl Pro app to create your profile and fully customize your listening experience. And with eight hours of earbud battery life-plus 32 additional hours from the case and wireless case charging-you can keep the music going all day.
Customer Rating
5
Personalized, spectacular audio from TWS buds
on November 21, 2023
Posted by: ReviewedByPhil
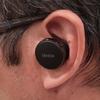
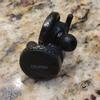
This is my first pair of wireless earbuds from Denon, though it’s a brand I’m familiar with as I have one of their soundbars for my TV. The earbuds come in a pocket-size battery case that charges via USB-C or Qi wireless charging. An 8” USB-A to USB-C cable is included as well as 4 sets of silicone ear tips, large, medium (pre-installed), small, and x-small, a set of medium-size memory foam ear tips, and two pairs of ear wing stabilizers, medium and large. Don’t be afraid to mix and match the wings and tips, as not everyone’s ears will be symmetrical; this helps ensure that you’ll find a good fit for your ears and create a good seal while still being comfortable to wear for extended periods of time. I personally don’t love having things in my ear canals, but found that the unique oblong shape of the ear tips on these sat more comfortably in my ears over longer listening sessions than the typical round shape.
While I’ve owned dozens of Bluetooth earbuds over the years, none of them have delivered a customized listening experience like the Denon PerL Pro (a mashup of Personalized Listening). The PerL Pro uses Masimo Adaptive Acoustic Technology, formerly Nura, to tailor a unique sound profile mapped to your ears based on how they perceive sound. In order to take advantage of this technology, you’ll need to download and install the Denon Headphones smart phone app and complete a short calibration in which you’ll hear a series of tones; you won’t need to submit any responses like an audiologist’s hearing test, and it takes just a couple minutes.
Once completed, you’ll get a visualized “map” of your ears’ sensitivity and deficit towards different frequencies. You can save up to 3 profiles if you have multiple users, though you can only swap between them using the app. If you want further EQ customization (with or without personalization), use the app’s ProEQ to adjust 5 bands of frequencies.
The difference between the unmodified and personalized profile is quite noticeable. For me, music sounded less flat with a wider and deeper sound stage. My profile indicates that I’m extra sensitive to higher frequencies, so my profile reduces the levels in these ranges which took the harsh edge off sibilance in voices and sizzles in cymbals and hi-hats. It also boosted the bass as there’s where I showed the most deficit, making it sound fuller and better supported in the lower registers. The best way to describe it is like hearing the difference between watching a concert on TV and being there in person.
These earphones use Bluetooth 5.3 with multipoint connection, so you can pair them with up to two source devices simultaneously and quickly switch between the two by initiating playback. I also found these perfectly suitable for watching videos and movies as there was no perceivable audio lag or delay.
One of the main features that Denon advertises is the “uncompressed” CD-quality sound delivered by Qualcomm’s aptX Lossless codec, but in order to benefit from it, you’ll need a compatible transmitting device; a difficult feat considering there just aren’t that many devices that currently support it (my flagship Android phone does not, nor do iPhones). It’s much more likely that you’ll be utilizing one of the other supported lossy codecs: aptX Adaptive, aptX Classic, AAC, or SBC. If you can’t experience the full impact of lossless audio at a 1,200kbps bit rate yet, with an aptX Adaptive capable device you’ll still be able to playback audio with up to 24-bit depth, 48Hz sample rate, and 420kbps bit rate, and it’s always nice to have a bit of future-proofing too.
The earbuds have adaptive noise-cancellation that do a decent job at silencing the outside world with its eight microphones, enveloping you in a veritable sound bubble. Though its parameters are not adjustable or customizable, ANC can be toggled off. The mics also do double duty for capturing clear super-wideband (32kHz) voice calls. On the other hand, if you would like pass-through audio so you can hear people around you talking, enable “social mode,” and you’ll be able to listen to your environment along with your music without taking your earbuds out.
Immersion mode is basically a shortcut to increase/decrease bass EQ in the low and low-mid frequencies by up to 3 levels that can be toggled on and off. Virtualized spatial audio from Dirac Virtuo, when enabled, creates a more three-dimensional sounding environment via stereo upmixing, however, depending on what you’re listening to, you may not perceive a huge change other than sounding slightly more resonant.
All of the modes and playback controls, including play/pause and volume, can be programmed to touch actions, 4 on each earpiece with single, double, and triple taps as well as tap and hold. I like that the large profile of the earpiece makes executing these easier, but I did find that double and triple taps have to be quite quick, otherwise they will register as a series of single taps. The earbuds are also lightly weather and sweat resistant but only to IPX4 which means they can get wet but not be submerged.
The PerL Pros have 8 hours of battery life on a full charge and dropping them in the case can top them up with an hour’s worth of runtime in just 5 minutes, up to 24 hours of additional use. The case fully charges in 1 hour and can simply be placed on a wireless charging pad to charge. On the front, there are 3 embedded color-coded LEDs (red, yellow, green) that turn on for several seconds when the earbuds are removed or replaced. The middle one represents the battery life of the case, and the left and right LEDs of their ear pieces respectively.
Overall, the PerL Pros provide an immensely satisfying personalized listening experience, even when using lossy codecs. The audio produced by the 10mm dynamic drivers output more than enough sound for safe listening with low-distortion, sparkling trebles, fully rounded out bass, and balanced midranges. While not as immersive or directional as a true surround sound system, spatial audio places you at the center of a natural and realistic sounding 3D sound stage with depth, accuracy, and precision.
I would recommend this to a friend!


Share this review:
0points
0of 0voted this as helpful.
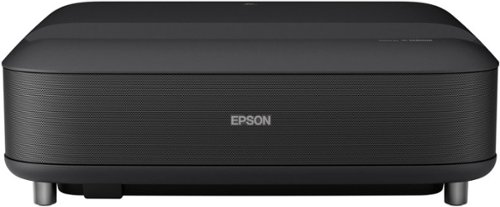
Make everyday entertainment epic with the Epson EpiqVision Ultra LS650 Smart Streaming Laser Projector. Whether watching movies and TV shows or gaming with the whole family, the Epson EpiqVision Ultra LS650 delivers an immersive experience for everyone with amazing 4K PRO-UHD (1) picture quality. The larger-than-life display size up to 120" provides a front-row seat to all the action and the convenient ultra short throw design allows the projector to be placed close to the wall for easy viewing. Perfect for your living room, the Epson EpiqVision Ultra LS650 features advanced 3-chip 3LCD technology to produce crisp, clear and colorful images—even in brightly lit environments. And, with the Epson Setting Assistant app (2), projector setup is faster and easier than ever.
Customer Rating
5
Theater Quality Viewing at Home
on November 15, 2023
Posted by: ReviewedByPhil
The EpiqVision LS650 is my first short-throw laser projector from Epson, though I’ve had one of their 1080p LED Home Cinema projectors for a while now. The LS650 projector has a fairly large footprint in comparison at 18.5”W x 16”L x 5.5”H but was lighter than expected at only 16.5 lbs. It needs to be placed 1-16 inches away from your screen in order to project image diagonals of 60-120 inches which will appear 4-12 inches above the top of the projector accordingly. With a short-throw projector you won’t have to install a ceiling mount, and its proximity to your screen means folks getting up to walk around won’t cast shadows on it. However, you also don’t have the option to place the projector at the back of the room, and you’ll need to make sure your entertainment console is wide enough or moved away from the wall to accommodate it (26-32 inch total depth).
This projector outputs 4K PRO-UHD by using three 1080p LCD chips with pixel shifting, and while the machine is capable of receiving and processing a 4K signal, it only delivers half the resolution of true 4K to your screen (~4 million pixels vs. 8 million); however, the difference between these resolutions to the eye at typical viewing distances is hardly noticeable. It is a noticeable improvement over the 1080p resolution we were used to, and the images produced were bright and clear with barely visible pixels at 120”.
The laser light source has a rated lifespan of 20,000 hours at full power and can achieve a max brightness of 3600 ISO lumens, bright enough to view with some ambient light, but somewhat washed out in full sun or with ceiling lights on. You’ll get better daytime viewing if projecting onto an ambient light rejecting screen. Just note that above about 75% brightness the cooling fan can be quite loud, emitting a high-pitched whir. The fan noise is much quieter and is easily drowned out at 50% brightness which is still plenty bright at night. There is a replaceable air filter that ejects on the right-hand-side for easy maintenance.
Setting up the projector is simple. After placing the projector below the center of your screen, plug it in and turn it on using the remote. If the surface the projector sits on it not level, you can correct the image tilt by adjusting the height of the two front feet. A manual focus lever is hidden behind a removable cover on the right-hand side and sliding it up or down will bring the image into focus; no electronic or automatic focus is available. We project without a screen right onto the wall which is painted a flat green, however, the colors still look very natural. There are four customizable preset picture modes for different content and viewing conditions: Vivid, Cinema, Dynamic, and Natural.
The first time you turn it on, you’ll need to pair the projector and remote control. If the image is skewed, its shape can be squared using the remote to adjust the corner positions. Warping due to waves or curves in your wall or screen can be corrected manually or with the Epson Setting Assistant mobile app. Simply take a photo of a calibration image with your phone’s camera and the app will automatically straighten out and flatten the image, which worked perfectly for me. Note that these adjustments can produce “over splash” where you have a skewed light border around your projected image.
The LS650 has built-in Android TV OS which starts up by default. To use integrated streaming services and apps, connect it to your WiFi (2.4 or 5 GHz) and log into a Google account. I was able to add most of the streaming services from the Google Play Store including live TV apps right on the projector, like Disney+ and Hulu, but with the notable exception of Netflix. Unfortunately, that means I have to use a separate streaming device for that app plugged into one of the HDMI inputs, and it’s an extra step for me to switch inputs.
I was able to cast my screen from various devices connected to the same WiFi network like my phone, tablet, and laptop, thanks to built-in Chromecast. Google’s voice assistant is available too, though you’ll have to manually trigger the AI with the remote’s mic button since the projector doesn’t respond to a wake word. You can link other Google Home devices to the projector to control it via voice as well.
The projector has integrated Yamaha 2.1 channel front-facing speakers (two 5W drivers and 10W subwoofer) that can fill a medium-sized room easily. They have decent sound quality with balanced and well-rounded bass response. You can also output sound to an external speaker or sound system using the Optical output, Bluetooth, or eARC/ARC device plugged into HDMI 2. I connected my soundbar via HDMI for CEC, Dolby Atmos, and DTS surround sound support, and was able to control its volume using the projector’s included remote. When powered off both devices shutdown simultaneously. I like that the projector can pair with wireless Bluetooth headphones for private listening, or conversely, enable "Bluetooth speaker mode" and used as a wireless speaker or receiver. If you experience audio lag, you can compensate the output latency up to 200 ms in 10ms increments.
Other I/O located at the rear are 2 USB-A inputs, 1 USB-A 2Amp output for power/charging, and a mini-USB service port. This projector doesn’t have an Ethernet port so can’t be wired to your network but does have a Kensington lock slot on the left-hand side.
One cool safety feature of the projector is that is has a motion detector located to the right of the lens that senses movement in front of the laser and will dim, then shutdown, the light beams to prevent accidental shining in your eyes. This happens nearly instantly, though can be triggered accidentally if you wander too close to the sides of the screen. Just note that your media will continue to play while the lasers are off; when the sensor no longer detects movement, it will turn them back on automatically.
While the image produced looked sharp and smooth across the entire screen, occasionally I noticed compression artifacts like blocks or fuzzy halos around fast-moving objects, especially when watching 4K native content. This effect can be mitigated somewhat by adjusting picture settings like frame interpolation, noise reduction, and super-resolution or improving your wireless connection speed and strength. Other than that, the image quality was very good with a high contrast ratio of 2.5 million to 1 and 10-bit color depth for realistic and vivid colors, which I found especially satisfying when watching nature documentaries.
For gaming, the projector is pretty good with an input lag of only 20ms making it fairly responsive to controller movements, but note that the screen refresh rate is capped at 60Hz. One thing I would have liked would be a backlit or glow-in-the-dark keys on the remote, as pressing the correct buttons in the dark was tricky. The Android TV interface sometimes gets bogged down and feels a bit sluggish, however, is easy to navigate. There 13 GB of internal storage space for you to install apps and games, and you can add additional storage using USB storage.
Overall, the EpiqVision LS650 projector delivers a very satisfying and enjoyable cinematic viewing experience complete with respectable audio performance as a standalone unit. When paired with a surround sound system, you can achieve an immersive movie theater-like experience at home whether you’re watching films, streaming live TV, or playing video games.
I would recommend this to a friend!


Share this review:
0points
0of 0voted this as helpful.

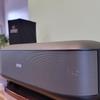
Sennheiser AMBEO Soundbar Mini – the immersive sound from just one compact device for movie and music lovers. AMBEO Soundbar Mini delivers a cinema-grade sound experience from one sleek unit, with no more cables and speakers cluttering your precious space. Developed with the German research organization Fraunhofer IIS Institute, the AMBEO virtualization technology creates a virtual speaker setup that delivers the maximum possible 3D immersion a single compact device can offer. Designed with Sennheiser’s audiophile expertise, AMBEO Soundbar Mini brings music to life and automatically adjusts the sound to the type of content. AMBEO can even upmix stereo and 5.1 content to make you feel like you are in a concert hall. Enjoy the best of Dolby Atmos, DTS:X, 360 Reality Audio, and MPEG-H audio. Set up is easy. The self-calibration feature adapts to your room’s acoustics, positioning virtual speakers around the room. The intuitive app provides easy control for audio settings, equalizer, voice comprehension, and more. AMBEO Soundbar Mini’s modern design, elegantly crafted to fit any room, hides a feature-loaded digital soul. AMBEO|OS supports all major audio streaming services, WiFi and Bluetooth connectivity, granting access to powerful features. Upgrade your audio experience with Sennheiser’s AMBEO Soundbar Mini.
Customer Rating
5
Small size, crystal clear theater sound
on November 3, 2023
Posted by: ReviewedByPhil
I’ve always thought of Sennheiser as a purveyor of professional audio equipment, notably in DJing, theater, studio, and broadcast, so this is my first experience with one of their consumer level home theater products.
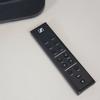
In the AMBEO Soundbar product line, the Mini is its most compact offering and has much of the same features as its larger brethren, albeit in a smaller package. The soundbar is wrapped front to back in black mesh fabric and has a minimalist matte black profile with white touch controls on top. The soundbar comes with an IR remote control, power cable, and HDMI cable. It has one HDMI input compatible with (e)ARC TVs and home theater equipment, so there aren’t multiple input options. If your TV doesn’t support HDMI ARC/eARC, then you’ll need an adapter, splitter, or converter to make it work. The 5V 1A USB-A port can only be used for powering/charging devices and manual firmware updates.
Because the two woofers are facing up and project the sound out of the top of the soundbar, you’ll need to leave at least 10 cm of space above the speaker between it and your TV. You’ll also have to ensure that nothing is placed on top of the soundbar and that it isn’t enclosed, for example on a middle shelf of a console, as this will block its sound projection. Two primary drivers are facing forward while another two are angled off to the sides allowing the speaker to project sound in multiple direction with precision. There are two rubber feet on the bottom of the soundbar for stabilization on a flat surface, though there are also two threaded M4x16 mounting points for Sennheiser’s custom wall mount bracket (sold separately).
Setup is basically plug-and-play, though you can also download and install the Sennheiser Smart Control app and control it from your phone as well. From the app, you can add the speaker to your WiFi network (2.4 or 5 GHz), update its firmware, initiate calibration, and adjust the modes, volume, and input source. All these functions are also available on the remote control and touch keys on top of the soundbar. Room calibration takes only a few minutes and the speaker will play a series of tones and a sample track to detect how the sound reflects around your room with its built-in microphones in order to place “phantom speakers” for virtualized 3D surround sound.
When AMBEO virtualization is active, the LED logo at the front right corner of the speaker will illuminate, and I was really impressed with the fullness and richness of the sound across content and genres. The soundbar is compatible with a number of surround sound formats including Dolby Atmos, dtsX, MPEG-H Audio, and Sony’s 360 Reality Audio. AMBEO's virtualization will also upscale 5.1 audio content to a 7.1.4 mix, though it can be toggled off. However, I think you’ll find the sound placement with it turned on surprisingly accurate with an immersive sense of depth, height, and movement.
The sound produced by this soundbar is well-balanced and powerful for a single speaker with a relatively small footprint. Voices are clear, details crisp, and there is virtually no distortion, even at higher volumes. The bass response is also really good with satisfyingly deep, low rumbles without excess boominess. A few enhancement options are available to suit your needs and preferences like voice enhancement, night mode (bass dampening), and modes specific to music, movies, news, and sports. I really liked the voice mode for documentaries and shows where dialogue can be hard to pick out as it did a great job at boosting only voices.
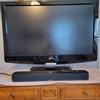
I have the speaker connected to my TV and with CEC control I can change the volume of the soundbar using both the TV's and Sennheiser's remote. If you find that there is a timing mismatch between the audio on the soundbar and the picture on your TV screen, there is a Lip Sync offset setting in the app that you can adjust from 0 to 100ms (HDMI ARC/eARC only).
In order to get the soundbar to pair properly over Bluetooth 5.2, I did have to use the control app, as I was unable to simply pair to the speaker by selecting it in my phone’s Bluetooth menu. However, once paired I was able to stream lag-free audio to the soundbar from both music and video app. You’ll use the multi-function button for playback control like track skipping and play/pause (with Alexa disabled).
The speaker has Alexa built-in, but it’s not enabled by default. You’ll have to activate it in the app’s settings under the “services” menu. Once linked to your Amazon account, you can use Alexa voice commands and add it to your multi-room speaker setup. The multi-function button operation will also be slightly different, with only the ability to start/stop playback with long presses and Alexa waking with short presses. Google Chromecast for audio streaming is also built-in and enabled by default, and it was easy to cast audio to the soundbar from my phone while on the same WiFi network without any additional setup. If you need to disable/mute the microphones for privacy, you can tap the microphone icon on top of the soundbar. There are several other supported streaming services available as well like Apple AirPlay 2, Spotify Connect, Tidal Connect, and uPnP.
The speaker is also compatible with Sennheiser's optional wireless subwoofer (but not wired) sold separately. If you want to make EQ adjustments, you can edit the “pre-sets” in the app and adjust 4 different frequency ranges: foundation (bass), low-mid, clarity (high mid), and brilliance (treble).
Overall, the Sennheiser AMBEOS Mini is an impressive soundbar that delivers a satisfying 3D listening experience, whether you’re listening to music, podcasts, watching movies or live TV. It adapts to your room and listening environment with a brief calibration process, and the virtualized surround sound is full, well-rounded, and cinematic, though limited by a single input option.
I would recommend this to a friend!


Share this review:
+1point
1of 1voted this as helpful.

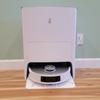
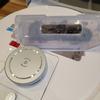
ECOVACS DEEBOT T20 OMNI not only cleans floors, it cleans itself too – leaving you to more important things. The OZMO™ Turbo mopping system with dual spinning mops now features automatic mop lifting for seamless cleaning of every type of floor surface. The all-in-one OMNI station automatically empties the dustbin, washes the mops with hot water, and dries them with hot air – and is ready to clean again.
Customer Rating
5
Vac, Mop, and Dry all-in-one
on November 1, 2023
Posted by: ReviewedByPhil
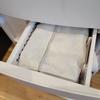
Of the half dozen or more robot floor cleaners I’ve owned over the past few years, the Deebot T20 Omni is by far the easiest to use and most fully featured unit I’ve used thus far. This is my first experience with this brand, and it did not disappoint. The unit comes with a sizable docking station weighing 32.5 lbs and standing 22.5” tall, measuring 17.5” wide and 16” from front to back. There are two color-coded 4L water tanks inside (blue for clean and gray for dirty water), a 75-day capacity dustbin, and a hot air blow dryer built-in.
The robot itself has a typical circular shape with 13.5” diameter plastic exterior, LIDAR guidance system, TrueDetect Laser and IR sensors, two rubber drive wheels, 360 front roller wheel, removable soft roller brush, dual side sweeping brushes, and dual removable washable mopping pads. The silver cover on top is held on with magnets and lifts completely off the unit to give you access to the power switch, dust bin, and Wi-Fi setup button.
The height of the robot including the LIDAR puck on top is 4-1/8” which is low enough to go under most of my furniture and cabinet/appliance toe kicks. There is a capacitive touch button towards the front of the robot that lets you start and stop cleaning with a short press or send the robot back to the docking station to charge with a long press.
Setting up the base station is quick and simple. When selecting a location, I liked that it does not need a ton of clearance at the sides, only a couple inches, and just 2.5 feet of clear space in front of the unit. The cord on the back is 6 ft long and can be stored on the cord cleat at the back. The battery takes about 6 hours to fully charge, and you’ll need the Ecovacs Home mobile app to complete the setup including adding the device to your home WiFi network for remote control, automatic firmware updates, and receiving notifications from the machine. You can also start a cleaning run by simply pressing the button on top of the base.
The first thing you’ll need to do is create a map of the areas that the cleaner has access to. This process took about 5 minutes and worked pretty well for my open floor plan first story. The robot was able to travel to each room, crossing thresholds with ease, and accessed everywhere except the laundry room, which has a step down. However, the app had trouble automatically dividing rooms accurately that didn’t have clear entryways or contained multiple open walls. Even through map editing, I was not able to parse such rooms as I could only “split” an existing room with a straight line where I needed to draw at least 2 to create distinctly separate rooms from the mapped space. However, I did appreciate that I could save up to 3 maps for use in other parts of the house, as I was also able to map our second floor. I was then able to take the robot upstairs, select the associated map, and use it there. The only downside is that the robot isn’t able to empty its bin or rinse the mop heads in these secondary areas, as the base station isn’t present.
After mapping, you can set virtual boundaries (straight line or rectangle) where the robot won’t enter or cross, for example a fireplace, and these can be set to exclude mop-only or both vacuum and mop. The maps generated are pretty accurate; the robot detects furniture and obstacles in real-time and maneuvers around them. It had a little more trouble with avoiding long and skinny chair and table legs though and tended to tap them lightly. The AI TrueDetect is supposed to help it avoid things like toys, socks, power cords and cables, however, I found that it doesn’t always work as a couple time it got stuck on cords. It will attempt to dislodge itself if it gets tangled but isn’t always successful.
For cleaning there are several modes. Housekeeper mode uses AI to determine which cleaning strategies to use for different areas of the home for a particular map and adjusts its settings automatically. You can also select specific rooms or define a custom rectangular area to clean and choose standard, deep, or fast with one or two passes; suction can be set to quiet, standard, strong, or max, depending on the level of soil. With the mop pads installed, you can set the machine to vacuum and mop simultaneously, mop after vacuuming, or just perform one or the other. I recommend “mop after vacuum” mode, as when vacuuming and mopping at the same time, the side brushes get wet and dust in them tends to ball up into a paste which can stick to the wet floors instead of being picked up.
The vacuum picks up a lot of hair, dust, and debris and the side brushes do a great job getting close to walls, into corners, and going around furniture without bumping into things often. At max mode the unit can be pretty noisy, but is not as loud as a traditional vacuum. The small dustbin was completely packed after vacuuming our carpeted second floor for an hour, though you can set the emptying behavior to “smart” which empties at the station every 6, 10, or 15 minutes. The base station completely clears the robot’s bin each time and captures the dust in the pre-installed 3L vacuum bag. The bin inside the robot and its filter are removable and can be washed and dried as needed.
For mopping, you can set defaults for the pad wetness, the pad rinsing interval, and the length of hot air drying time from 2 to 4 hours. The base station heats the rinse water to 131°F to better remove dirt and oils from the pads and seems really effective; the rinse water is always dark and gray, and my floors do look brighter afterwards. The water tanks hold just over 1 gallon of water and to mop my entire first floor (600 sq ft.) consumes about 2/3 of the tank. The auto-lift feature of the mop pads raises them when not in use, so that when the unit is not mopping, for example when going over rug and carpet, the wet pads are not being dragged along the floor.
On a full charge, I got about 1 hour and 40 minutes of continuous use: an hour of that time was using mop and vacuum in housekeeper mode and the rest running vacuum only at max suction (6000 Pa) on carpet. At its lowest settings (quiet mode, vacuum only) you can get over 4 hours of runtime on a single charge. The hot air drying for the mop pads takes a while as it’s quite gentle, so I recommend letting it run for the max duration or simply removing the pads to hang dry to avoid the buildup of mold, mildew, and bacteria. If you won’t be mopping daily, I’d also suggest taking the tanks out of the machine to dry completely between uses.
The app will track and record the robot’s travel path right on the map, so you can see its coverage during and after a cleaning session. It also shows you the robot’s location in real-time, though if you can’t find it for any reason, you can tap the ‘Find My DEEBOT’ button and it will announce “I’m here” each time. With ‘continuous cleaning’ enabled, if the robot runs low on power before finishing, it will return to the station to charge and resume from where it left off once it has enough power to finish the cycle.
The robot has a built-in voice assistant named “Yiko” and you can issue verbal commands using the wake phrase “Ok Yiko” followed by a command; it works well for starting and stopping cleaning programs, targeting specific defined areas and asking for status updates, as well as sending the robot back to the dock. This feature can also be disabled and enabling ‘Do Not Disturb’ will turn off the mic, lights, announcements, and scheduled cleanings.
I found it most convenient to set a daily cleaning schedule for the robot. Multiple schedules can be set up with separate settings for different areas at different time. If ‘edge deep cleaning’ is enabled, once a week, the unit mops right up to the edges of your walls for better cleaning coverage. This helps us maintain our floor’s cleanliness on a regular basis and saves us a bunch of time and effort.
For hard flooring this robot cleaner picks up a ton of dust, dirt, and hair, and even some larger bits like leaves. On rugs and carpets, it’s more of a surface clean, as it doesn’t have stiff brushes to dig deep into the pile to remove trapped dirt and dust. With daily maintenance runs, I expect to change the vacuum bag only every couple of months, which will be an ongoing consumable expense. As for other maintenance, the mop “sink” where the pads are rinsed need to be manually cleaned once in a while, as the self-clean cycle can only do so much. A telescoping bristle brush is included for this purpose and can be stored inside the base between the water tanks along with a bottle of cleaning solution.
Overall, this robot floor cleaner makes vacuuming and mopping my floors on a regular basis simple and convenient. With the automated hot water rinsing and drying of the mop pads, there’s little manual intervention outside of filling and emptying the water tanks. The robot empties its dustbin after each run, and will prompt you when it’s time for maintenance steps like replacing the vacuum bag, brushes, and pads, so you don’t have to keep track of it. The unit has ample battery life, and the maps and avoidance systems are quite good; the robot rarely bumps or rubs against furniture or other obstacles. This will go a long way to ensuring the sensor windows stay clear and scratch-free as this is an issue with other robots that I’ve owned. I can clean multiple mapped areas of my home, even without the base station present, and the unit is easy to control via the app, voice commands, or simply set on a schedule to run on its own.
I would recommend this to a friend!


Share this review:
0points
0of 0voted this as helpful.
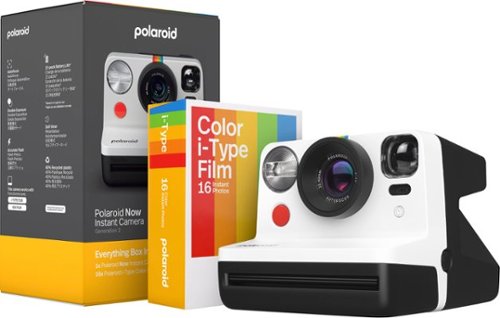
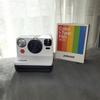
Welcome to the beautifully imperfect world of Polaroid photography with the Polaroid Now Generation 2 camera. The classic, iconic analog instant camera comes with autofocus, a self-timer, and double exposure. All in a classic design, and now made with 40% recycled materials. Includes a Polaroid Color i-Type Film Double Pack for 16 color instant photographs with white frames. Compatible with Polaroid i-Type & 600 film in the original Polaroid instant film format.
Customer Rating

4
Vintage Vibes, Classic Feels
on November 1, 2023
Posted by: ReviewedByPhil
If you’ve ever owned a Polaroid camera, using the Now Gen 2 Instant Camera may feel like a familiar and nostalgic experience. The body is made of plastic though feels rather hefty and durable. The unit comes with an adjustable wrist strap and has two mounting loops at the back corners for left or right-handed users or optionally attaching a neck strap (not included).
From the camera’s unique shape to its basic functionality, not a lot has changed from the original vintage design, though contemporary models have been updated with a couple modern day conveniences and softer rounded edges. For one, this analog camera has a built-in rechargeable battery that charges via an included USB-C to USB-C cable, but it doesn’t come with an AC power adapter so you'll need to provide your own. The battery should be charged for 1-2 hours prior to use and on a full charge has an estimated runtime of 15 film packs (8 prints per pack). When the battery is low, the charging port's LED will flash red (green is full and orange is medium). Secondly, you can quickly activate double-exposure mode by double pressing the self-timer button at the front.
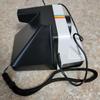
This camera works with both Polaroid i-Type film and 600 Film and the Everything Box includes 16 sheets of the former (2 cartridges of 8). The main difference between the two is that i-Type film doesn’t have a battery inside the cartridge and won’t be compatible with vintage Polaroid cameras, while 600 film is usable in all Polaroid cameras, but comes at a slight premium.
Film packs are loaded into the camera after it’s been turned on by pressing and holding the orange power button for 1 second. Just press the eject button and the film door will pop open; then remove the film cartridge from the foil with the darkslide facing up and the tab facing you. Once the door is closed, the darkslide protecting the film sheets will automatically eject. I wish the door had a lock on it though, to prevent accidental opening of the compartment which can expose the top sheet of your film, rendering it useless.
To take a photo, half-press the red shutter button at the front and the camera will auto-focus (chooses between portrait and standard lens). While holding the button in that position, you can then reposition and compose your shot if desired, pressing the shutter button fully to take the photo only when you’re ready. When taking photos, the flash will fire by default unless turned off by pressing the flash button. The flash's LED will be on when active, off when disabled, and flashing when charging up. Note that after taking a photo without flash it will be re-enabled for the next shot. However, you can disable the flash until you power off the camera by double pressing the flash button.
A small LED just below the power button shows you the number of remaining film sheets, counting down from 8. If using the self-timer, press it once and the LED will illuminate orange. After you press the shutter button, the front LED will blink, and you have 9 seconds to set the scene before the photo is taken. Note that there is no thread mount on the camera to attach to a tripod, so it’s recommended to place the camera on a flat level surface when not handheld.
When using double-exposure mode, a ‘1’ flashes on the display for the first exposure and changes to a flashing ‘2’ for the second exposure. If you’re not ready to take the second exposure right away, you can turn the camera off and it will continue where you left off when you turn it on again. You may also use the self-timer and/or flash with one or both exposures by activating them prior to each shot. The general rule of thumb is the first shot should be darker, so flash is not recommended for that one. This mode lets you be more creative by combining different subjects, backgrounds, and patterns for interesting and unique outcomes, for example, for Halloween we used the double exposure to make some of our costumed subjects appear as “ghosts” in the final image.
The built-in flash is super bright but still requires the photographer to be relatively close to the subject in order to be effective. The minimum focal distance for the lens is at least 1.8 ft and anything closer than that will likely appear out of focus. There is a slight difference in how the frame is aligned when looking through the camera’s viewfinder and what is captured on the film, called parallax. To properly line up your shot, aim the camera slightly up and to the left of the image you want to capture.
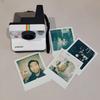
While the camera is advertised as a point-and-shoot instant camera, there is a bit of a learning curve, and I found that it takes a little bit of practice and trial and error to produce good prints. However, the cost per print of the film can make this an expensive lesson. You also need to wait at least 10-15 minutes after taking the photo and keep it facedown or in a dark place as it develops. The photo dimensions are 3.1 x 3.1 inches (7.9 x 7.9 cm) and including the frame/border is 4.2 x 3.5 inches (10.8 x 8.8 cm), though special cartridges can have different colored frames or shapes as well.
The image quality of the photos has a distinctive antique look that is somewhat undersaturated, almost faded. Images often have a softer focus though may sharpen over the course of several days. I found that outdoors in bright lighting produces the photos with the best contrast, though can still look a little washed out. In medium to low lighting the photos tend to appear dark if your flash isn’t close enough to your subject. Most of the ones that I’ve taken with the first film pack have a slightly green cast to them and occasionally have chemical bleed crackles or dark grayish streaks appear along the edges of the photo frame. If you’re looking for consistent crisp, sharp, digital precision, this is not the camera for you. The vintage look and feel of these photos will definitely be the selling point for creators, artists, and enthusiasts.
Overall, taking photos with the Polaroid Now Gen 2 is an enjoyable and unique photography experience in today’s digital, instant gratification age. Waiting for the film to develop adds to the fun and anticipation to see how the photo turned out!
I would recommend this to a friend!


Share this review:
0points
0of 0voted this as helpful.
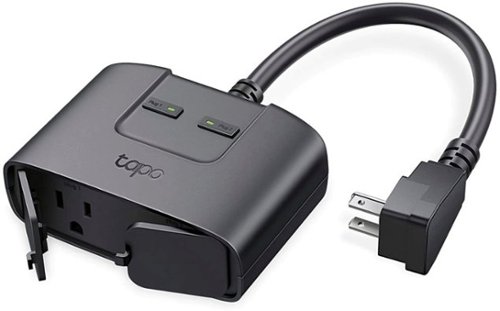
Take control of your outdoor lighting or devices with the Tapo Smart Wi-Fi Outdor Plug. The independent outlets allow you to individually control up to 2 devices through your smartphoone via the Tapo app or with you voice through compatiable voice assistants; Amazon Alexa, Google Assistant, and Samsung SmartThings. Utilize the Scheduling or Away Mode features to automatically turn lights or device on/off.
Customer Rating
4
Easy app/timers setup, Matter disappointed
on October 23, 2023
Posted by: ReviewedByPhil
This is my first smart home product from TP-Link, though I’ve owned many from other brands over the years. I like that the Tapo TP25 Smart WiFi Outdoor Plug has two individually controlled outlets whose power can be turned on and off using either the physical buttons or remotely via a smartphone app, when connected to your home WiFi network. The device is compact, has a 10-inch durable power cord, and comes with a mounting clip to ensure that the outlets are installed facing down to prevent water ingress. There are also two rubber doors to cover the outlets for additional protection against the elements, though I found that they aren’t super secure and dislodge easily.
The plug is rated to handle a total of 1800 Watts and outputs up to 15 Amps. It is IP65 waterproof so long as the covers are in place or a plug is installed in the outlets. It connects wirelessly using Bluetooth 4.2 and WiFi 802.11 b/g/n but is only compatible with 2.4 GHz networks. The WiFi range of the unit isn't great though, and I had to move one of my mesh nodes to the opposite side of the wall where the TP25 is plugged in on the outside of the home in order for it to establish a good WiFi connection.
The plug advertises its compatibility with Matter, a universal IoT standard that allows it to connect to various smarthome assistants like Alexa, Apple Home, Google Home, and SmartThings. However, I found its implementation to be somewhat disappointing. Apps like SmartThings and Google Home indicated that I needed to have a separate Matter hub in order to set up the plug; when adding to Alexa as a Matter device, I was only able to get one of the two outlets to appear. Even then, Alexa lacked control functionality beyond on and off, and I was unable to natively set up timers or schedules for the plug, though I was able to execute voice commands and create routines for the one outlet that was added.
I had a better experience using TP-Link’s Tapo app, although I had to reset the device first by pressing and holding one of the buttons for 10 seconds in order to setup it up from scratch. In the Tapo app, you’ll need to register for an account and/or sign in, but adding the device was quick and straightforward. Once setup, I could toggle each outlet on and off from my phone and create timers or repeating schedules including automatic sunrise and sunset triggers with or without an offset. The app also shows you daily, weekly, and monthly accumulated runtime for the past 30 days (though not power consumption) and lets you to share the device with other TP-Link users. I was able to link Alexa to my TP-Link account using the Tapo skill in order to enable voice commands that worked for both outlets.
Overall, the outdoor plug is able to perform as a smart wireless timer for my outdoor lights with a number of different trigger options. It has physical on/off buttons for each outlet and can be controlled remotely via the Tapo (or Kasa) app and integrates with Alexa fine if using the skill to link your accounts in order to utilize voice commands. I didn’t have much luck getting it the device setup with Matter, however, so if that’s important to you, it’s something to consider.
I would recommend this to a friend!


Share this review:
0points
0of 0voted this as helpful.
ReviewedByPhil's Review Comments
ReviewedByPhil has not submitted comments on any reviews.
ReviewedByPhil's Questions
ReviewedByPhil has not submitted any questions.
ReviewedByPhil's Answers

The Nest Doorbell is the battery-powered video doorbell that works with any home. See what’s happening at your door from anywhere and get intelligent alerts about important activity, like when there’s a person, package, animal, or vehicle.* And because there are no wires, you can install it yourself. Nest Doorbell requires the Google Home app and a Google Account – it’s not compatible with the Nest app or the home.nest.com site.
My existing doorbell chime (electric) says "must install diode" on the back, and there is a 1N4001 diode installed in my existing doorbell button. Do I need to use the diode in my installation of the Nest Doorbell if I'm hard wiring it to my chime?


The compatibility checker said my electronic chime and transformer are compatible, but the video instructions for a wired installation of the Nest Doorbell (battery) doesn't make mention of installing a diode (or not), if one comes with the chime. At any rate, I performed the installation without it and adjusted the "length of ring" setting to 6 seconds, which is nearly long enough to play through the melody, though it loses power and cuts off at the end. Any longer setting results in the chime beginning to repeat before it gets cut off which I find less desirable.
2 years, 8 months ago
by
ReviewedByPhil
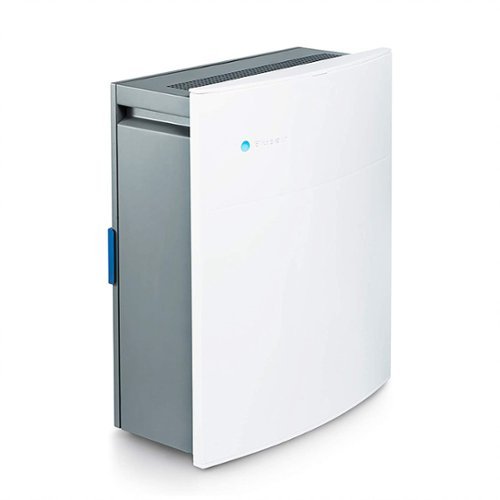
The Blueair Classic 280i air purifier brings clean, energizing air to spacious bedrooms, living rooms, or any rooms up to 279 sq. ft. A built-in air quality sensor makes it easy to confirm your air is virtually free of asthma and allergy triggers and indoor air pollutants such as mold, dust, pet dander, and pollen by scanning the air quality in real-time and adjusting fan speed to your current air quality. The Classic 280i delivers unmatched performance thanks to HEPASilent technology, which combines electrostatic and mechanical filtration technologies. This combination, pioneered by Blueair, delivers a high Clean Air Delivery Rate (CADR) with whisper-quiet operation (32- 56 dB), using 20-80 W of energy.
HOW MANY FET DOES TRHIS BLUEAIR COVER

Play to your full potential with this 23.8-inch ASUS TUF gaming monitor. The 1ms response time prevents blurring and lagging for quality visuals, while the FreeSync technology eliminates stuttering and tearing for seamless gameplay. This ASUS TUF gaming monitor has an anti-glare display that reduces reflections, and it features flicker-free technology that reduces eye strain for comfortable viewing.
Will this monitor support 144mhz for Xbox 1x over HDMI, is the HDMI ports 2.1?
The HDMI port on the monitor is HDMI v1.4, so on the Xbox One X it'll only allow you to output at 1080p @ 60fps and only goes to 75Hz.
4 years, 1 month ago
by
ReviewedByPhil
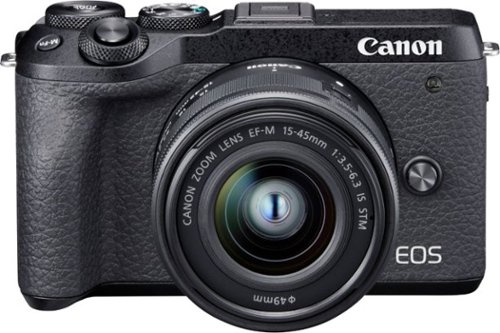
Record 4K UHD videos and capture high-quality stills with this Canon EOS M6 Mark II camera. The 32.5MP APS-C image sensor lets you take detailed, true-to-life photos, while the electronic shutter capable of speeds up to 1/16000 is ideal for taking professional-caliber action shots. This Canon EOS M6 Mark II camera comes equipped with an 15-45mm f/3.5-6.3 interchangeable zoom lens for wide-angle and short telephoto shots..
Does it have a self timer/self-timer delay or remote compatibility?
Yes, the self-timer can be set to 10 seconds, 2 seconds, or continuous, which takes 2 to 10 photos consecutively after a 10 second timer expires. You can use your smartphone as a Bluetooth remote control as a shutter trigger, or connect the phone via WiFi to the camera for remote monitoring (see what the camera sees on your smartphone screen) and control all the settings on the camera through the app.
4 years, 4 months ago
by
ReviewedByPhil
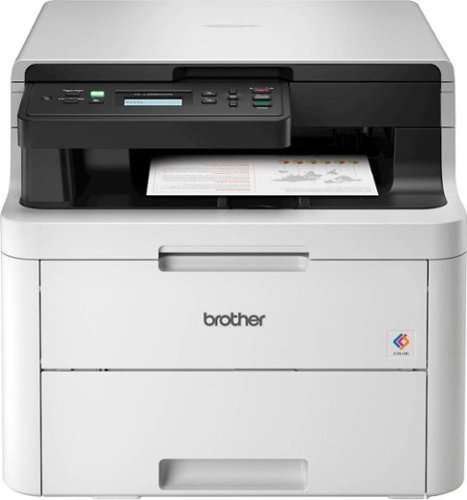
The reliable, robust Brother HL-L3290CDW compact digital color printer with copying and scanning capabilities is a great choice for the busy home or small office. The flatbed scan glass provides convenient copying and scanning. Quick print speeds of up to 25 pages per minute¹ plus manual feed slot accommodates varied printing needs and can handle a variety of paper types and sizes including card stock, envelopes and more. Connect with versatile options including built-in wireless or USB interfaces and print wirelessly from mobile devices. The 250-sheet capacity adjustable paper tray helps improve efficiency with fewer refills and handles letter or legal sized paper. Automatic two-sided printing helps save on paper costs. Brother Genuine high-yield toner replacement cartridges help lower printing costs. Comes with a 1-year limited warranty and free online, call or live chat support for the life of your product.Prints and copies up to 25 ppm in black and up to 25 ppm in color
What language does this printer support? Does it support Chinese mandarin?
No, Chinese is not supported on the LCD for the printer settings. It looks like the LCD can only display Latin and Slavic based characters e.g. English, French, Russian, Polish etc..
4 years, 6 months ago
by
ReviewedByPhil
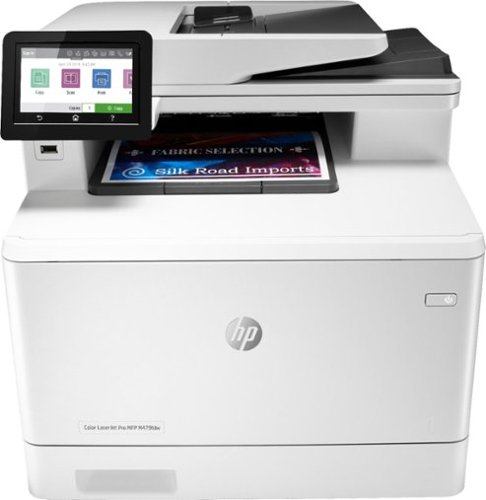
Winning in business means working smarter. This HP Color LaserJet Pro M479fdw printer is designed to let you focus your time where it's most effective - growing your business and staying ahead of the competition.Prints up to 27 ISO ppm*, up to 27 ISO ppm* in color
If this printer is connected via USB to a computer, can other computers print wirelessly to it? I need to have it connected by USB to my work computer but also want to be able to use it for wireless personal printing from two other household laptops.
Yes, you can connect to the printer wirelessly using a direct WiFi connection (local network between the printer and computer) without connecting the printer to your router/home network. You can also connect wirelessly via Bluetooth. You'll get the most out of wireless printing features by connecting the printer to the internet by providing it your home WiFi network SSID and password. Once connected to the internet you can turn on Web Services and print from any device with e-mail capability by simply sending the file to be printed to a uniquely assigned e-mail address for the printer. This will also enable other computers and devices on the network to find and send print jobs to the printer.
4 years, 9 months ago
by
ReviewedByPhil
What does it mean for a webcam to be portable?
Simply that it is small and is versatile in terms of mounting options, for example, if it can be clipped to a laptop monitor as well as a LCD panel or set on a desktop or used with a tripod. They usually still need to be plugged in via USB and require software/drivers to run. Not many are compatible with mobile devices.
7 years, 3 months ago
by
ReviewedByPhil