ReviewedByPhil's stats
- Review count135
- Helpfulness votes1,231
- First reviewJanuary 6, 2016
- Last reviewApril 23, 2024
- Featured reviews0
- Average rating4.6
Reviews comments
- Review comment count0
- Helpfulness votes0
- First review commentNone
- Last review commentNone
- Featured review comments0
Questions
- Question count0
- Helpfulness votes0
- First questionNone
- Last questionNone
- Featured questions0
- Answer count7
- Helpfulness votes7
- First answerJanuary 18, 2017
- Last answerSeptember 1, 2021
- Featured answers0
- Best answers1
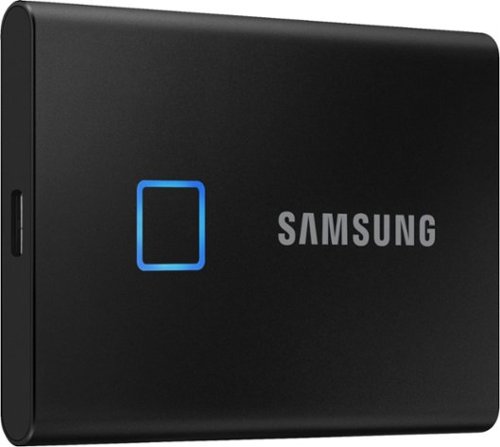
Add this black 1TB Samsung T7 portable SSD to your mobile office setup and enjoy high-speed transfers. AES 256-bit hardware encryption helps you secure confidential documents through a password or fingerprint, while the 1TB capacity offers ample file storage space. This Samsung T7 portable SSD has write speeds of up to 1000MB/sec. for moving large files swiftly, and the metal body protects sensitive parts against daily drops and knocks. Transfer in a flash, secure with a touch whether you're storing critical business documents, games, or movies, the Portable SSD T7 Touch gives you speed and security in a palm-sized package.
Customer Rating

5
Easy setup, fast transfers, quick unlock
on April 8, 2020
Posted by: ReviewedByPhil
from Easton, PA
I think it’s pretty cool how small external storage media has become. The T7 Touch is the size of a short stack of credit cards and weighs just 2 oz, so fits in my pocket easily and doesn’t take up a ton of space in my laptop bag. I appreciate that it came with both a USB-C to USB-C cable and USB-A to USB-C cable. I have both ports on my laptop, but didn’t find there to be a significant difference in transfer speeds when moving files to and from the drive (both ports are USB gen 3.1 with ~425 MB/s for sequential read/writes and ~115MB/s 512K random read/writes). Copying a 1GB file to and from the drive takes only a few seconds.
The outer case of the drive feels durable and is made of a lightweight aluminum with a matte brushed metal finish. The only markings on the case are the ‘Samsung’ brand on the front next to the ½” square fingerprint sensor and small print on the back with the drive’s model name. There’s a blue status LED embedded around the fingerprint reader that illuminates when the drive is being used.
The drive is basically plug-and-play and you can start using it, without security features, right away after plugging it into your computer or mobile device. To setup password and fingerprint security for this drive, I had to install the Samsung Portable SSD software on my computer; it’s pre-loaded to the root directory on the drive and takes only a minute to install.
You can secure the data on the drive with a password only or both a password and fingerprints. However, be warned, if you forget the password without a fingerprint unlock, there’s no way other to access or recover the data on the drive. When saving your fingerprint data, you’ll have to scan the same finger about a dozen times, in different positions so it can get a full scan of all parts of your fingerprint. You can save up to 4 fingerprints, either multiple of your own, or add fingerprints of other users.
Each time you plug the drive into a computer or mobile device, you’ll have to scan your fingerprint to unlock the contents of the drive (or enter the password). If you don’t unlock the drive, you’ll only be able to see the software installation files and a text document named, “This is a read only partition.” You won’t be able to copy any files to the drive or see any other files while it is locked. However, you can turn the security off at any time; just note that this action will delete the password and all fingerprint data, so next time you turn security on, you’ll have to choose a new password and re-scan you fingerprints. If you just want to rename or remove an individual fingerprint, you can edit them in the software’s settings.
I can also use this drive with my mobile phone by plugging this SSD into it's USB-C charging port (Samsung Galaxy Note 9) and I had to install the Samsung Portable SSD app from the Google Play store. However, there is a bug in the software where it doesn’t recognize the drive is plugged into my phone, despite the LED turning on and allowing me to unlock the drive with my fingerprint. Once unlocked, I am able to access the files on it, even though the app continues to say "DISCONNECTED - No Samsung Portable SSD is connected." However, this means I am not able to use the password to unlock the drive since the app couldn’t “see” the drive. However, it appears the fingerprint unlock works fine on mobile.
Other than that, the drive works great. It’s small and compact, transfers files quickly, and lets me protect my data, whether that’s sensitive work stuff or personal files. It’s also nice having 1 TB of storage space that can fit in my pocket and plug directly into my phone when I need to move files off it, so I can free up space for taking more photos and video on my phone.
Mobile Submission: False
I would recommend this to a friend!


Share this review:
+1point
2of 3voted this as helpful.
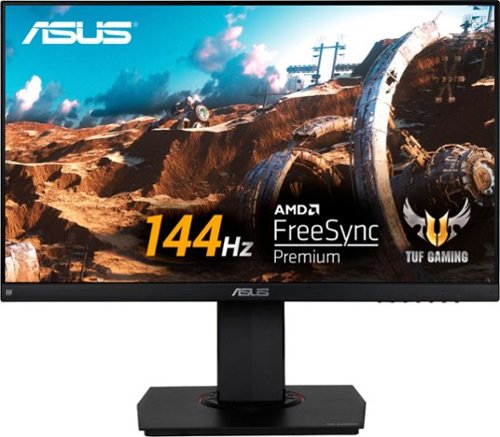
Play to your full potential with this 23.8-inch ASUS TUF gaming monitor. The 1ms response time prevents blurring and lagging for quality visuals, while the FreeSync technology eliminates stuttering and tearing for seamless gameplay. This ASUS TUF gaming monitor has an anti-glare display that reduces reflections, and it features flicker-free technology that reduces eye strain for comfortable viewing.
Customer Rating
5
Beautiful display, smooth visuals, accurate color
on March 17, 2020
Posted by: ReviewedByPhil
from Easton, PA
I upgraded from my LED Backlit LCD Monitor to this ASUS IPS monitor and the difference is night and day. The color, brightness, and saturation all outperform my old monitor, delivering better color depth, true to color reproduction, and clearer, crisper visuals. Since the monitor came with a DisplayPort cable, I finally was able to take full advantage of the capabilities my NVIDIA GTX 1070 G1 video card. The DisplayPort on the monitor is also required to be used in order to enable G-SYNC with NVIDIA graphics cards (or FreeSync with AMD cards). Note that currently, the NVIDIA control panel will give you a “non-validated” compatibility warning when you go to enable G-SYNC with this monitor.
The wide 178° viewing angle enables the screen to look sharp with accurate colors from about every angle and position and when paired with the super thin bezels at the top and sides makes this monitor a good candidate for having multiple displays. You can toggle built-in alignment screens, accessible from the menus, to help you level and line up several monitors to make a nearly seamless large display. The monitor can tilt, swivel, and rotate 90° from horizontal in either direction on its included stand or you can remove the stand and attach it to a VESA mount, giving you a wide range of positioning and arrangement options. I particularly like portrait orientation when working on large spreadsheets or editing portrait framed photos.
There are seven pre-set color profiles you can choose from, my favorite ones are ‘Scenery’ and ‘RTS/RPG mode,’ or you can tweak individual parameters to suit your preference. The change in visuals compared to my 60Hz LCD is stark. I guess I had kind of gotten used to the graphics on my system during gaming being choppy at times and stuttering every so often. I also didn’t realize how blurry most fast motion looked, especially with fast-paced action games like FPS and racing titles, until I could see the difference the higher refresh rate made with the low motion blur (ELMB) enabled; just note that you can’t have both Adaptive-sync and ELMB enabled at the same time. In general, I thought having ELMB set to “standard” was sufficient since the improvement to “turbo” wasn’t as noticeable and tended to darken the screen too much. In general, I didn’t have any issues with tearing or ghosting.
The clearest difference I saw was in the color depth as this Asus monitor display has 8-bit color support via 6-bit + frame rate control to achieve near the full range of color in the sRGB color space for more vivid colors with clearer contrast and deeper saturation. For me, this also makes this monitor great for creative work especially when color correcting photos and editing video.
I wasn’t in love with the 6 menu control buttons adjacent to the power button though, because they’re unmarked and change functions depending on where in menu tree you are; so navigating through the options was a bit clunky, and it took me a few tries to get the hang of it. Unfortunately, this is the only way to adjust the max volume for the monitor which is buried several layers deep within the menus. Not that the built-in stereo speakers are that great, but I don’t have other external speakers for my gaming PC, so I’d previously only been using headphones for audio. This monitor gives me the option to output audio through its 2 Watt speakers and since the DisplayPort cable carries the audio signal, I didn’t even have to hook up an extra AUX cable (HDMI also transmits both audio and video). It’s nice too that there’s a VGA port for folks with older systems, but you really don’t get to take full advantage of all the monitor has to offer using VGA input, so there’s no point in spending the money for this monitor if you’re going to use VGA, in my opinion.
I also appreciated the ability to turn off the power LED, even though it’s quite small to begin with. One neat feature is the blue light filter, though it takes a little getting used to. There are 4 levels of blue light removal to help protect your eyes from its potentially harmful effects. While it will change the color representation on the screen, giving everything a yellowish tinge, your eyes eventually adjust and the color offset is less noticeable. At the highest filter (level 4), though, I did feel that the brightness dropped off too much to be usable for gaming, though it did significantly reduce IPS glow in pitch black conditions. There are a couple interesting gaming specific features like being able to add a static crosshair to the center of the screen, live FPS counter, a countdown timer to help you track your gameplay time, and shadowboost.
Overall, I think that this is a fantastic entry-level gaming IPS monitor that will be game changing for anyone who hasn’t experienced refresh rates over 100Hz. It also performs well as a general use monitor for creatives that work with visual media and is suitable for watching Full HD movies (though not 4K) for a good all-around value.
Mobile Submission: False
I would recommend this to a friend!


Share this review:
+2points
20of 38voted this as helpful.

This H&R Block Premium & Business Tax software offers everything small business owners need to easily complete their personal and business federal and state taxes. It includes a free online chat with a tax professional, step-by-step guidance on hundreds of credits and deductions, and in-person representation in the unlikely event of an audit. The H&R Block Premium & Business Tax software provides assistance to small business owners, including creating payroll and employer (W-2 and 1099) forms and more.
Customer Rating

4
Easy to use, clear explanations for most tax prep
on February 19, 2020
Posted by: ReviewedByPhil
from Easton, PA
I got H&R Block Premium and Business 2019 to help me prepare my taxes because I am a freelancer with my own business as my primary source of income. In previous years I’ve filed on my own using other tax software, but this is my first experience with H&R Block software.
The software download and installation was quick and straightforward. This software package actually comes with two different programs, H&R Block Business and H&R Block Premium. Each time you launch the software it will ask to check for updates, which is typical of tax prep software as new laws and rules can change calculations even during tax filing season and patches are issued to correct any errors or omissions. I wasn’t surprised that despite downloading the latest installation file from H&R Block, within a week the software found updates to install on subsequent launches of the program. Some of the forms directly from IRS.gov haven't even been updated for 2019 as of this writing, and the software tells you upfront if you should wait to file due to pending changes in the law that may affect your tax situation.
I started with the H&R Block Business software and when it came time to choose my business type (partnership, S Corp, etc.). I went through the ‘help me decide’ wizard. The questionnaire determined that, as a single member LLC, I would be reporting all my business income on my individual tax return, and I would actually only need to utilize the Premium program that came with the software package. The rest of this review will focus on my experience with that piece of the software as I didn’t require any of the forms included with the Business portion of the software for my tax situation.
The first thing I did was import my federal tax return from last year; I was happy to see that even though I created the file in different software (TurboTax) I was able to do this, which helped me save some time by pre-populating fields like address, filing status, and expected forms based on what I entered last year. Of course, you’re able to change or delete whatever items it pulled in that are no longer relevant. Note that if you want to import previous tax data using the Business portion of the software, it only is able to import files created specifically by H&R Block Business 2018. When importing individual return tax data, you can also import financial data from Quicken, Microsoft Money, etc. if the information is saved in Tax Exchange Format (.TXF file).
What I like about this software, and most tax prep software in general, is that the questions they ask are in plain English and relatively easy to understand. This makes filling out the fields and selecting answers more straightforward. Where there might be some confusion or clarification needed, there are links to popup more information and explanations to help you better understand what the question is asking and for what situations a response may be required or applicable. If you need live help, there’s a chat feature that allows you to speak with a tax professional, though this service costs extra to activate.
I like that prior to each section there’s a little summary of what’s coming up so that you can collect and prepare your documents and information before you get started and at the end of each section is a summary of all the information you entered. There’s also a running tabulation of your refund (or owed taxes) with the latest change history so you can see live when you’re inputting new values how your tax liability changes with each entry.
At the top of the screen is a menu bar that lets you choose or search for specific forms. Or if you want to go into the underlying IRS form for the section you’re currently filling out, you can click the ‘show form’ button at the bottom of the window and manually check and adjust the fields. This is also useful if you need to look at a specific line or entry on a particular form, as it’s not otherwise clear when you fill out the fields in the software where those values end up on the forms.
I was a little disappointed that some forms weren’t included/automated in the software, for example Publication 535 for taking a self-employed health insurance deduction, the program directed me to download the paper worksheet to fill out by hand and then manually input the calculated result back into the software. When you’re finished inputting data there’s a check for errors and validation. Errors need to be fixed, though validations don’t always need clearing in order for you to move on. Just be careful if you go back to a specific form and change a value as it can impact other values "downstream" which might not recalculate immediately unless you go back through to those entries as well to double-check them.
One state return is also included with the software package which is a separate download but added on to the existing software. If you need to file in more than one state you have to purchase additional states to download. The experience for the state return forms was about the same as for federal forms: this piece of the software pulled in some information from the federal return. There were also some worksheets not in the software that I had to fill in by hand (Worksheet L) and then input the resulting calculations. Because of this, I almost missed an exemption that wasn’t highlighted in the software, but rather I had to go looking for it on my own to figure it out. However, the state return was a lot easier to fill in with fewer prompts, questions, and fields.
Error checking is performed at the end of filling out the forms as well as an overall audit risk check for both state and federal. There’s even a max refund guarantee that H&R Block will refund you the software fee if you find another tax software that results in a bigger refund using the same data and free audit support when you file using the software (print or e-file). Five federal e-files are included with the software; e-filing state returns cost extra, though you can print and file by mail any number of returns for free. If you owe money, you can send a check, authorize a bank transfer (ACH) for a specific date when you file, or pay using a credit/debit card through a separate secure website. If you’re getting a refund you can choose to receive a check, direct deposit, or have the amount loaded to an Emerald Prepaid Mastercard which works like a re-loadable debit card.
Overall, I found the H&R Block software about as easy to use as other tax prep software I’ve used. Afterwards, I felt confident that the values and calculations were correct and that my taxes were prepared correctly using it. The interface of the software is easy to navigate and sections and fields are explained well, however, a few supporting forms were not included in the software that I needed for my tax situation, and I spent a little extra time researching on my own how to fill these out correctly.
Mobile Submission: False
I would recommend this to a friend!


Share this review:
0points
0of 0voted this as helpful.
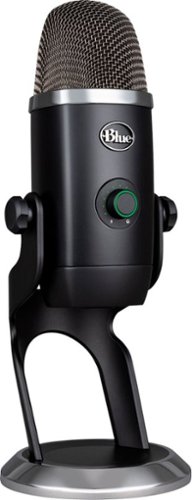
The Blue Yeti X is a state-of-the-art flagship USB microphone for professional-level gaming, streaming, podcasting, YouTube videos and more. With enhanced Blue VO!CE software, Yeti X delivers legendary Blue broadcast sound with greaterclarity than ever—in four versatile pickup patterns.
Customer Rating
5
Clear/crisp audio w/custom live processing
on December 24, 2019
Posted by: ReviewedByPhil
from Easton, PA
I got the Yeti X as an upgrade to the mic I currently record with, the original Blue Yeti. I mostly record video voice-overs and narrations using the cardioid pickup pattern and rarely, if ever, use any of the other three polar patterns for my needs. However, it’s nice that they’re there and they do work well when I use them. The sound quality from the Yeti X is crisp, clean, and warm sounding. Arguably, so is the original Yeti’s, however, you can hear a difference between the two: there’s a bit less harshness and smoother edges from recorded voices from the Yeti X versus the Yeti. This is unsurprising given that the Yeti X sports four condenser mic capsules over its predecessor’s three. I also thought it did a better job at controlling and evening out levels when your position relative to the mic changes.
Like the original Yeti, you can plug a set of monitor headphones into the bottom of the Yeti X, so you can listen to your mic input overlaid with your computer’s audio. You can change the volume and balance of the monitor headphones relative to computer audio using the dial on the front or in the G Hub software. The Yeti X made the dial on the front clickable to activate the mic mute and change modes, which is a bit cleaner than having separate buttons and dials, although making adjustments with the physical controls during a recording will inevitably introduce some noise in your recording. The microUSB cable is positioned in a way that makes pulling it out by accident a concern, but that it is removable allows you to customize its length and replace it if that component fails. I also found the placement of the pattern selector button on the back a bit inconvenient as sometimes when moving the mic, I would accidentally press it and have to cycle back through the settings. This was not a problem on the old mic which used a physical analog dial that had to be twisted.
With the gain set to zero, I thought the pickup wasn’t very strong. I found myself needing to set the gain to at least 3 LEDs (gain level 24 in G Hub software) to match the volume that I get from the original Yeti without gain from the same distance. When you turn up the gain, you can set the mic farther away from the sound source, but it will also pickup more ambient noise. That said, the mic sounds best when your mouth is practically right up against it, so you’ll want to make sure you get a pop filter if you’ll be speaking or singing into the mic to soften plosives e.g. ‘p,’ ‘t,’ and ‘k’ sounds. However, this wouldn’t be the best option for folks who want to record themselves in video and also keep their face visible.
One advantage that the Yeti X has is its compatibility with Blue Voice filters which let you adjust and apply live processing to your voice on-the-fly in G Hub. This gives you fine tune control over how your voice sounds from EQ adjustments, to noise reduction, and compression settings. If you’re not sure where to start you can always choose a voice profile pre-set and customize them from there. Once you’ve found settings you like you can save it as a custom profile. The only thing is that you won’t be able to hear your filtered voice through the monitor headphones in real-time. You’ll still just hear your own unfiltered voice, so the only way to hear the output of the Blue Voice filter would be to record a sample and play it back, which thankfully there’s a ‘mic test’ feature in the Blue Voice settings of G Hub that does just that.
In G Hub you can also customize the colors of the LEDs on the front of the unit for the various mode adjustments: mute, gain, live level monitoring, headphone volume, and headphone balance. The only feature that I found slightly unnecessary was the live level monitoring because when using the mic, your mouth is generally right up against it, which means that you’re never actually looking at the mic when you’re recording, so practically speaking, the levels indicator isn’t very useful.
If you already own the original Blue Yeti, you know it already sounds pretty good, so it’s a judgment call whether or not you’ll want to invest in the more expensive Yeti X, given its marginal improvement in audio quality -- especially if you don’t think you’ll be using the live filters. But if you’re just starting out or are looking to upgrade a basic setup as a podcaster, livestream gamer, or for doing voice-over work, you’d be getting a beautifully designed and professional sounding mic with plenty of customizable features at an affordable price.
Mobile Submission: False
I would recommend this to a friend!


Share this review:
+3points
3of 3voted this as helpful.
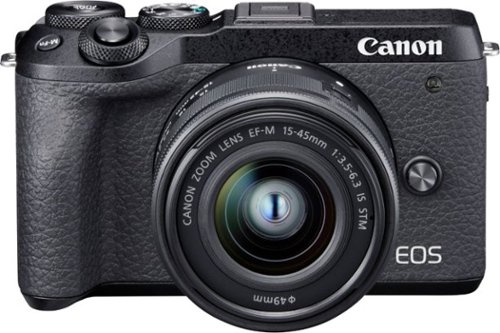
Record 4K UHD videos and capture high-quality stills with this Canon EOS M6 Mark II camera. The 32.5MP APS-C image sensor lets you take detailed, true-to-life photos, while the electronic shutter capable of speeds up to 1/16000 is ideal for taking professional-caliber action shots. This Canon EOS M6 Mark II camera comes equipped with an 15-45mm f/3.5-6.3 interchangeable zoom lens for wide-angle and short telephoto shots..
Customer Rating
5
Fast focus, hi-res, ok 4K video, solid overall
on December 20, 2019
Posted by: ReviewedByPhil
from Easton, PA
There’s a lot to like about the Canon EOS M6 Mark II from its ultra high-resolution 32.5MP sensor and zippy dual pixel autofocus to its large tiltable touchscreen and wireless connectivity options, but a few lacking features and design choices may affect its competitiveness against similar mirrorless cameras in its class.
One of the first things you’ll notice with this camera is that there isn’t a built-in viewfinder on the back; instead you have a generously sized 3” touch LCD which articulates and pitches up or down for low and high angle shooting, and flips up 180° for front-view monitoring and taking selfies. The LCD does not, however, swivel left and right nor flip out to the side. Even though you can use an add-on external EVF via the hot shoe, which is included with this kit, you’re then left having to choose between using the viewfinder or a flash or mounted microphone. You’ll also have to remove the EVF anytime you want to flip the LCD up to view the monitor from in front of the camera, otherwise it will block the screen, which could prove cumbersome for vloggers and selfie-takers who also frequently use the EVF.
As for the image quality, the camera delivers faithfully sharp photos and accurate colors that feel natural and lifelike. It performs equally well in bright, daylit conditions as well as at night with respectable low-light performance that has little graininess even at higher ISO settings. The one limitation to all of this hi-res goodness is the current lack of premium lenses that are able to take advantage of all the camera has to offer. The included 15-45mm kit lens is just 1 of 8 available EF-M mount Canon lenses, of which 3 are prime lenses. Separate adapters are required to open the camera up for use with EF or EF-S lenses.
What the camera excels at is its fast and generally very accurate autofocus performance both for video and still photos. With the ability to set autofocus priority to face and eye detection, this makes tracking moving people effortless, even during fast-paced movement and action. You can even easily switch subjects by tapping them on the LCD screen making performing a rack focus dead simple.
The fast AF pairs nicely with its 30 frames per second e-shutter raw burst capability, but you’ll need a sufficiently fast memory card to capture the maximum number of frames per CR3 RAW file. Using a 2000x 300 MB/s write speed UHS-II card, I was able to capture about 45 frames on average in a single RAW file before the buffer ran out, but this will vary depending on the camera’s settings. Be prepared for the multi-frame files to be quite large, often 500-900 MB each. Speaking of the new CR3 format, in order to extract individual frames from a multi-frame CR3 file, you’ll need to use Canon’s proprietary Digital Photo Professional software on a PC, Mac, or mobile device (it’s free) or extract frames directly on the camera, as most third-party software isn’t yet able to process these files. The DPP app isn’t terrible, but its interface feels a little dated and the tools and menus aren’t the most intuitive.
I did enjoy the one-tap focus and shutter trigger on the LCD. This made handing off the M6 to others not familiar with handheld cameras easier. I found the creative assist for applying in-camera filters and editing photos interesting. There's a lot you can do to tweak the photos on-the-fly, though ultimately, I prefer to do my post-processing on a computer where I can see more detail on a bigger screen.
The one feature that I was pretty excited about was the addition of 4K video to this line of cameras. However, compared to the 4K video I’ve taken with other ASP-C sensor cameras, I found the M6’s quality to be just a touch softer, so edges aren’t as crisp, and you lose a bit of refinement in the details. The M6 also doesn’t currently support shooting at 24fps in either 1080p or 4K modes, so that might give pause to filmmakers who shoot in this format until the announced firmware update adds this functionality (sometime in 2020). You can, however, shoot at 60 fps in 1080p for super smooth footage or 120 fps at 1080p for a cool slow-motion effect.
The battery life for this camera is so-so lasting in the range of 250 to 300 shots on a full charge depending on whether or not you’re using the flash and EVF (which consume MORE battery). One small complaint I had was the size of the battery door; since it’s so wide, I have to take off my tripod’s quick release plate to get it open and take the battery out for charging. Charging via the USB-C port is only possible using the dedicated (and pricey) Canon charger and you cannot just use a regular USB-C cable. My other pet peeve was how easily the lens cap pops off the kit lens as several times I found it laying at the bottom of my camera bag instead of dutifully protecting the glass. I put a UV filter on the lens as an extra precaution. USB-C data transfer speeds were pretty good when uploading photos to my computer and the wireless connectivity to copy photos directly to a mobile device worked fine, albeit slowly. I did like being able to use my smartphone as a remote monitor and control for the camera via the Canon mobile app.
While this latest addition to Canon’s EOS-M lineup has the highest resolution of any ASP-C sized sensor digital camera made to date and is certainly geared towards enthusiast photographers replete with plenty of manual controls, the lack of an electronic viewfinder and lackluster 4K video performance may be a deal breaker for some photographers or filmmakers. However, for users who might not place so much importance on those features, it’s a solidly performing mirrorless camera with fast and accurate autofocus that takes sharp detailed images, even with the basic kit lens, and has the capability to meet a wide range of needs.
Mobile Submission: False
I would recommend this to a friend!


Share this review:
+1point
1of 1voted this as helpful.
Improve your confidence with the Upright GO posture trainer. The personalized program trains your body to notice when you're slouched, while the small, lightweight design makes it unnoticeable. This Upright GO posture trainer features an app on iOS and Android for real-time progress tracking and provides instant feedback once placed on your back.
Customer Rating
4
Good reminder to sit/stand up straight
on December 2, 2019
Posted by: ReviewedByPhil
from Easton, PA
For work I sit in front of a computer a lot, and my posture isn’t perfect all the time, so I decided to give the Upright Go a try to see if it could help train me to have better posture over time. For the record, my posture actually wasn’t as bad as I initially thought, but I still think the device helped “train” me to be more aware of when and how often I was slouching.
The device itself is small and lightweight, about the size of an adult thumb, and it adheres to your back with re-usable (up to a few days) but ultimately disposable gel sticky pads, like the ones used in TENS machines. The device works by sending you small vibrations via haptic feedback, like the vibrate feature on your phone when it detects that you’re slouching. If you don’t like the idea of have to buy stickers that you need to replace, there’s a necklace accessory sold separately that you can use with it instead.
This upright “metric” in and of itself is dependent on how you setup the device and calibrate it. Each time you put on the device you need to calibrate it to “perfect posture.” That is, after you’ve put on the device, with your back in an upright and straight position you’ll have to double-click the button on the unit or tap ‘set posture’ to calibrate in the smartphone app which pairs with the device over Bluetooth. My phone paired with the Go quickly and setup took only a few minutes. The app lets you customize the device's features, upgrade its firmware, check its battery level, and tracks your posture in real time as well as captures historic data over time displayed in daily graphs.
There are two primary modes with this device: training and tracking. In training mode, the device sets up a training program and schedule for you to practice you posture with the device during 5 to 10 minutes sessions over the course of several weeks. Each day, you wear the device for at least the allotted amount of time to train (you can skip days, it just picks up where you left off). In training mode the device will vibrate if you slouch. You can customize how the vibration feels using the app: Short, Medium, Long, Knock Knock or Ramp-Up.
When not training, you can set the device to tracking mode which will record data on your posture (how much time you spend upright or slouching and when) to be uploaded to your app for you to view the data later. This allows you to monitor your posture throughout the day without having to deal with the vibrations if you happen to slouch for a moment, but you also don’t get the benefit of correcting your posture on the spot. The second mode is useful for tracking your progress over time to see if your habits have changed and that your posture remains improved when not receiving reminders from the device.
You can also set the sensitivity (amount/angle of the slouch) and a timeout period of up to 30 seconds before you start getting the vibration feedback. When I first started using the Upright Go, I felt it was buzzing way too often for even the slightest movements. I wanted to have good posture but also feel comfortable sitting at my desk, so I relaxed the sensitivity a bit and gave myself a longer lead time before it started buzzing. The various “modes” like stationary, standard, and active let you customize three presets for different activity styles so you can switch between them easily.
Most of the time the device is pretty accurate; when I bent or leaned forward for longer than a few seconds, it would buzz until I straightened up. However some activities would throw it off like going up a flight of stairs, sitting in lounge chair, and driving. This also made training mode pretty annoying for common tasks like washing the dishes or doing laundry, but you can switch between training/tracking modes by double-clicking the button on the unit while wearing it to switch on/off the vibrations. For me, usually I got about 12-14 hours of use from the device on a single charge. It’s pretty comfortable and after a while you don’t even notice it’s there (unless you have it in training mode and it buzzes you!). It’s fairly discreet too and can be worn under most clothes unnoticed.
For me, I think the device worked fine and did what I expected it to. The recorded data suggests that I really wasn’t slouching as much as I thought I was, but during those times that I did, I liked that the device gave me a little reminder to sit/stand up straight which, over time, I just started doing out of habit. I didn’t really have any back or neck pain to begin with, so I can’t really say whether or not this device helps with that. I did find it strange that the USB cable doesn't actually fit in the case with the device, so that was a bit disappointing. Also, you can reset the calibration of the device as often as you like, if it’s giving you false readings (thinks you’re slouching when you are not) but remember the effectiveness of this device is largely dependent on whether or not you’ve calibrated it correctly, so your mileage may vary.
Mobile Submission: False
I would recommend this to a friend!


Share this review:
+7points
12of 17voted this as helpful.
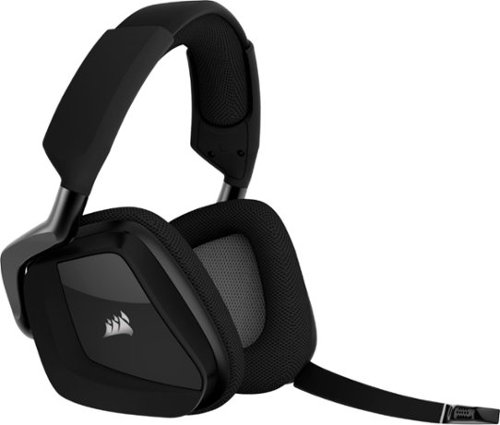
Enjoy an immersive audio experience while gaming with this carbon CORSAIR VOID RGB ELITE wireless headset. The custom-tuned 50mm high-density neodymium drivers offer crisp, powerful sound, while the breathable microfiber mesh and soft memory foam earpads add comfort to all-day gaming. This CORSAIR VOID RGB ELITE wireless headset has an omnidirectional microphone for clear communication, and the on-ear controls help you adjust sound settings easily.
Customer Rating
4
Very comfortable, good sound, ok mic
on November 20, 2019
Posted by: ReviewedByPhil
from Easton, PA
This is the first headset that I’ve tried from Corsair, and so far I’ve been pretty impressed with its comfort, performance, and features. The headset uses a lot of lightweight plastic in its construction but that seems to be intentional to offset the weight of the headphones which are actually quite heavy in the hand. The only parts that appear to be metal are the hinges and sliders in the internal headband. Still, the headphones feel pretty durable and can handle some twisting and flex with zero creaking. The expansion capability of this headset is very broad with 9 levels for adjustment on each side, so it’s fairly unlikely that anyone will find these to be too tight. The contoured shape of the headband and thick cushioning on the earpads and bottom of the headband provide enough comfort that 1, it doesn’t put a lot of pressure on the sides of your head and 2, the weight is distributed and doesn’t actually feel that heavy once you’re wearing it.
The microfiber mesh on the earpads is also breathable and when combined with the plush low-density memory foam and large contoured ear cavities makes wearing these for hours on end a pleasant experience with little fatigue. I will say, though, that I’m not a fan of the glossy plastic on the exterior of the earcups because it tends to attract dust and fingerprints easily. Also, it can pick up micro-scratches and won’t look as nice once that happens. That said, I do like that the earcups swivel 90 degrees and can fold flat, which makes them a bit easier to wear around your neck when not in use.
All the controls exist on the left earpiece which include the power button, mic mute button, volume control, and USB charging port. I thought it was clever that a short press of the mute button would switch off the mic while a long press could toggle on/off sidetone input (listening to your mic input through the headset). You also have the option of muting the mic by simply swiveling the microphone to the up/vertical position. Just note that if you manually muted the mic, folding it back down to the horizontal position automatically switches it back on. The mic boom arm itself is flexible and holds the position that you put it in without permanently deforming, so you can repeatedly position it as close to or as far away from your mouth as needed.
I was a bit surprised at how large the wireless USB receiver dongle was though, thankfully, the width of it gives you just enough clearance to still be able to use an adjacent USB port. The low latency 2.4 GHz wireless performance of the receiver was excellent and I noticed no lag, stutters, or delay from the audio when gaming, nor when using the headphones to watch movies and video on my computer. The headset is also compatible with the PS4, but stereo only sans 7.1 surround. The internal battery reliably lasts all day and can run about 16 hours on a full charge depending on listening volume level and whether or not you have the RGB lights active. You can view the exact charge level percentage of the headset in the iCue app by checking the device’s settings. However, if you want to use the headphones while plugged in and charging, you still need to have the wireless USB dongle plugged in, potentially taking up two USB ports on your computer. There’s also no Bluetooth connectivity nor 3.5mm input cable option, so you won’t have compatibility with other consoles and devices that use AUX output either.
Short pressing the volume jog key cycles through five EQ presets, and you can create your own custom profiles, though you’ll have to select your top five and remember the "number" of the setting as that is what is announced as you cycle through them. Surround sound can be turned on in the iCue software or toggled by pressing and holding the volume jogger. In general, I found that in surround sound mode the volume was a bit boosted and sounds were more immersive allowing me to reliably determine directionality, whether a sound was coming from in front, behind, or to the sides. There was also fairly good depth perception to hint at how far away sounds were from the listener giving the sense of a 3D environment.
As for sound quality I found the listening experience to be really pleasant with present mid-ranges and adequate bass, though the upper ranges tended to sound a little thin without EQ adjustments. Even though these are closed back headphones because the ear cushions are mesh, you don’t get a lot of isolation and external sounds and noise bleed can be a minor issue. The audio from the microphone is ok, but not amazing. While there isn’t a lot of distortion, your voice will sound somewhat compressed, like speaking through a small box and artifacts are occasionally present, especially if you bump up the gain. Since it’s an omnidirectional mic, I did notice a little bit of background noise and hiss in the feed too, but this can be somewhat mitigated by using the included foam wind screen. The mic is fine for gaming and Discord, but I wouldn’t necessarily use it for video voiceovers because the levels are quite low, so it can sound soft.
Overall, I think the Corsair Void Elite is a solid headphone in the gamer space that offers good audio quality, does so wirelessly, has a comfortable fit for me and decent battery life. Mic audio could be a bit better but is usable, and the RGB options are cool, but you don’t really see them when you’re wearing the headphones anyway.
Mobile Submission: False
I would recommend this to a friend!


Share this review:
+17points
22of 27voted this as helpful.
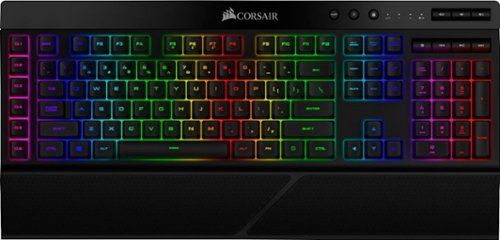
Up your game with this Corsair RGB wireless gaming keyboard. Six programmable macro keys let you easily rebind important functions or create powerful hotkeys to help you win in the heat of battle. SLIPSTREAM WIRELESS, Bluetooth or wired USB connectivity let you choose how to reduce lag and overcome your opponents with this Corsair RGB wireless gaming keyboard.
Customer Rating
4
Responsive/versatile, inconsistent features
on November 18, 2019
Posted by: ReviewedByPhil
from Easton, PA
The K57 is a decent gaming keyboard that offers versatile connection options, nearly unlimited customized RGB lighting and animation effects (when wired), built-in dedicated macro and recording keys, and responsive, reliable keystrokes. However, some features are inconsistent depending on your connection type and the keyboard’s size and weight aren’t exactly travel friendly.
First off, users should note that this is a membrane keyboard, not a mechanical one. This means you’ll get a bit less auditory feedback (e.g. “clickiness”) and a different physical feel from key strokes, which for me translates to slightly more effort to press the keys hard and far enough to actuate them. Personally, I’m not a huge fan of the mushiness of the key-feel, though it is admittedly more tactile than most membrane keyboards, but occasionally, when typing fast, a key won’t register because I didn’t press hard enough (not due to rollover); I found you have to be pretty deliberate in your keystrokes which can lead to typing fatigue and reduced typing speed.
I do like that this keyboard has a number of different ways to connect with your computer: wired, wireless (USB dongle), and Bluetooth pairing (up to 2 devices). On my laptop I have a limited number of USB ports, so it’s convenient to connect via Bluetooth rather than take up a USB port. When charging the battery via the USB cable, you can use the keyboard as a wired keyboard. This method also gives you nearly unlimited customization options for the RGB lighting with the iCue software. In the software, you can adjust the color and animation of individual keys or groups of keys and set multiple animations to loop continuously or be triggered by events like keystrokes or holding down specific keys. However, note that when connected via WiFi or Bluetooth you only have 10 lighting profiles to choose from (“Off” is one of them).
This is the first gaming keyboard that I’ve used that features a set of dedicated custom macro keys. Since it’s also a full-sized keyboard that includes a number pad and dedicated multimedia keys, this means it takes up a bit more real estate space on my desk at 18.75” wide. The macro keys work great for gaming and productivity, as it allows you to record a series of keystrokes, and even mouse movements/clicks when recorded in the iCue software, to perform repetitive actions and key combinations at the press of a button. However, there seems to be a bug where if you’re using the keyboard wired or with the WiFi dongle, the macro status LED doesn’t light up (e.g. won’t blink when recording is started nor illuminate when you enter “special macro mode”). The macro status LED only works as described in the user guide when the keyboard is paired via Bluetooth. Conversely, when connected via Bluetooth, you won’t have access to the keyboard in the iCue software for customizations (e.g. Lighting, assigning macros, polling rate).
Despite its size, the keyboard is “portable” in the sense that it IS wireless, with a built-in 3200 mAh Li-ion battery that can last up to 35 hours when using the LED backlight (but only 8 hours at max brightness) or 175 hours with the LEDs off. What I liked about this keyboard is that the lettering on the keycaps is completely legible with the backlight off, which is not always that case with RGB keyboards. I also appreciated the detachable wrist rest which is nice to use if you have the space to spare.
The K57 keyboard is one of the first models from Corsair to feature their latest “SlipStream” technology, a type of wireless connection that has better reliability, less power consumption, and conflicts less with other wireless devices you may be using at the same time. Your keystrokes are even protected by 128-bit AES encryption to ensure no one can skim your data as it's being transmitted wirelessly. I found the latency to be nearly non-existent and keystroke response to be swift and lag-free when using the wireless USB dongle. This allows you to maneuver the battlefield and switch weapons quickly during gameplay as well as execute key combinations that are precisely timed.
Overall, as a wireless gaming keyboard, I think the K57 has its merits which include the faster, lag-free, and low interference SlipStream technology, the custom built-in macro recording and macro buttons, ample battery life, and cool backlight effects. However, be aware it has inconsistent availability of some features (e.g. light profiles, macro status LED) depending on the connection type you’re using, a somewhat mushy key-feel, and is on the bulky/heavy side for travel.
Mobile Submission: False
I would recommend this to a friend!


Share this review:
+8points
8of 8voted this as helpful.
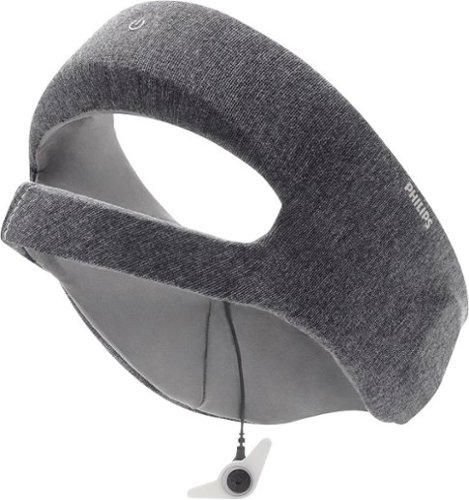
Improve your sleep quality with this Philips SmartSleep Deep Sleep headband. This wearable system increases energy, helping you reduce daytime sleepiness and boost alertness. Dual sensors accurately track your sleep conditions, and this Philips SmartSleep Deep Sleep headband has a SleepMapper mobile app that shows your sleep patterns and measures key metrics.
Customer Rating

2
Better sleep quality but uncomfortable
on November 4, 2019
Posted by: ReviewedByPhil
from Easton, PA
I’d like to start off by saying that I feel the Philips SmartSleep Deep Sleep headband actually did make a difference in my alertness and ability to function normally on days following nights where I slept less than 7 hours. The product is specifically for people who usually get less than 6 hours of sleep or regularly sleep only 5 to 7 hours due to choice or lifestyle. That’s a really important point because if you have a sleep disorder or condition like insomnia or sleep apnea this product isn’t designed to help you. There are a lot of conditions you have to meet in order to use the device as well, for example: be under the age of 50, be able to hear 80 dB, and be able to fall asleep quickly without any aid.
Since I met all of the requirements I thought that product might be a good fit for me. As a reference point, I normally need between 8 and 9 hours of sleep to function optimally the next day and feel refreshed. I know from experience that when I sleep less than that, I wake up feeling tired, am exhausted throughout the day, and sometimes get headaches or even migraines when I’m sleep deprived over consecutive days. So in order to faithfully test out this product, I restricted my sleep to 5 to 7 hours per night for two weeks straight to align my habits with the target consumers and determine if the product could actually help me sleep less and feel optimal, or at least normal, the following day.
What I found was that, yes, on nights where I slept fewer than 7 or even 6 hours, even though I felt terrible shortly after wakening, that feeling did not persist throughout the day, and after about an hour I actually felt alert enough to get through work, concentrate on tasks, and power through pretty late into the night without needing to take a nap or generally feel too exhausted. Even while following this routine for multiple days back-to-back I never got to the point where I had bad migraines or decided I couldn’t handle the restricted amount of sleep.
From a functionality standpoint, the sensors on the headband always picked up their signals immediately, after placing a drop of water on my forehead under the contact point. Syncing the data with the app the next day was simple too. The app logged the data that the headband tracked during the night and gave me an insightful breakdown of my sleep pattern and progress over time. My first night with the device I slept 5 hrs and had a sleep score of 51 with a Sleep Boost measurement of 14. After several more nights, some where I got 6 hours of sleep or more, I regularly received Sleep Boost scores in the mid to high 20s; as a result my total sleep scores were in the 90s, and sometimes hit 100. That said, if you get more than 7 hours of sleep the app will always give you high sleep scores, so it’s unclear how much the device is helping you, if you get adequate sleep. In general, the higher the sleep score form the night before, the better I felt and functioned the next day. Only once during the two-weeks did the headband shift and disconnect in the middle of the night, because I rolled over and the headband slipped off my forehead, resulting in only a partial data set for that night. I generally do not move a lot in my sleep.
The headband itself has a pretty nice construction. It’s made from a soft, stretchy, slippery fabric like performance athletic clothing and is lightweight overall. The headband’s design is not unlike a regular sports sweatband but with some electronics embedded inside: earpieces on each side for delivering sound into your ear and a secondary forehead band for one of the sensors. The forehead sensor strip is removable for cleaning, though none of the rest of the headband has removable parts. Since you can’t submerge the headband in water due to the electronics inside, washing it in the washing machine is out of the question and you’re limited to wiping it down with a damp cloth. I would have preferred the parts of it that come in direct contact with your skin and hair to be removable for washing. The second sensor consists of a disposable gel pad that you stick behind your right ear and snap onto a wire just under the right earpiece. I did find that upon removal, this sticky sensor left a tacky residue behind my ear that was difficult to clean off, even with soap, warm water, and scrubbing with a terry cloth.
The headband comes in two sizes: medium and large; I got the medium size as this supposedly fits most users. However, for me, it was not a comfortable product to wear nightly. I thought perhaps it was due to the size because I had the band expanded to the max and it was snug, though according to the manual this is appropriate as long as it is not overly tight, which I didn’t think it was. The headband also loosened up over time and by the end of the first week didn’t feel as tight, and I even needed to use the adjusters to make it smaller.
Since the headband goes over your ears, your ears are pressed flat against your head for the duration of the night. This actually bothered me a lot because I would wake up with pain and soreness at the back of my ears, akin to the feeling of wearing on-ear headphones or earmuffs for too long. The earpieces also prevented me from side-sleeping because the components inside the earflaps are somewhat hard, and I could feel them quite clearly when I slept against them. However, my discomfort was mainly due to the fact that the headband adjusts via two flat metal brackets (not removable) at the back of the headband.
I had the headband at the max circumference and the brackets sat right in the center at the back of my head. I get that they’re thin and lightweight and very durable, but so is Velcro, or silicone, or a whole host of other materials other than solid metal. Since I’m a back sleeper, this resulted in the brackets digging into the back of my head as soon as I put my head down. This was somewhat mitigated by changing from a feather pillow to a memory foam one, though it was still very palpable. I’m not normally aware of waking up at all during the night, and if I do I usually fall back asleep pretty quickly, but I noticed (and the sensors noticed) that I was waking up during the night more often when wearing the headband. This was particularly annoying because when I would wake, I was aware of how uncomfortable the headband felt and this kept me up, making it difficult for me to fall asleep again.
In the mornings I would wake up with a sore spot at the back of my head just under the where the brackets sat, due to the friction, pressure and abrasion they applied to my skin. That, coupled with the ear pain made this, albeit effective sleep booster, a poor user experience as a whole. I just didn’t want to use the product despite what it could do for me. I wore the headband nightly over the course of 14 days to see whether or not my opinion on this point would evolve over time, but it did not. I really wanted to like this smart sleep headband, and I felt like it really did improve the quality of sleep I got, when it was limited. But the experience of using it was, on a whole, not pleasant. I think the technology is great, and a few design changes could make this an amazing product as it would potentially put a few hours back into my day when I could really use it.
Mobile Submission: False
No, I would not recommend this to a friend.


Share this review:
+11points
13of 15voted this as helpful.
Built for pros from the bottom up. A compact tenkeyless design frees up table space for low-sens mousing. Pro-grade Clicky switches give you an audible feedback bump. Programmable LIGHTSYNC RGB and onboard memory lets you customize and store a lighting pattern for tournaments. A detachable cable makes for easy transportation. Play to Win.
Customer Rating
5
Responsive, colorful, and awesomely loud
on October 21, 2019
Posted by: ReviewedByPhil
from Easton, PA
One of the main complaints I have with my gaming laptop is that the keyboard feels cramped, and there’s very little in the way of tactile feedback. Enter the Logitech G Pro keyboard. Although this keyboard has roughly the same footprint as my 15.6" laptop's keyboard and exactly the same width, its tenkeyless (TKL) design means there’s no number pad on the right-hand side, so each key gets a little more room to breathe without taking up extra real estate space on my desk, leaving me more room for my mouse and trackpad. The GX Blue Clicky switches also provide that satisfying clicky-clack of ye’ old keyboards and typewriters of yesteryear. If you’re not a fan of loud key clicks, this keyboard is not for you.
Why do I love the GX Blue Clicky switches? For me the physical and auditory feedback of the keys actually helps me not only type better, but game better. With tactile and silent keyboards it can be hard to know if you’ve actually actuated the keys, and during fast-paced gaming, accurate complex key combinations and effective button mashing can often be the difference between a loss and victory.
The keyboard itself measures about 14 inches wide, 6 inches across and about 1.5 inch tall when the feet are not engaged. There are even two separate elevation angles available to choose from by propping up either pair of the nested kickstands. While most of the keyboard is made of plastic, it is reinforced with a steel backplate for durability which accounts for some of its heft, weighing in at just over 2 lbs. The fabric braided USB cable with stabilizing prongs is secure but detachable, which is great for travel, and it measures about 6 feet long. Don’t be misled though, this is not a wireless keyboard, and it does not have an internal battery nor way to communicate with your computer wirelessly.
A bit of the technical details for those of you that are interested, the actuation point of the keys sits at 2.0mm with a travel distance of 3.7mm, and actuation force required is 50g with a 1ms report rate. It’s got twelve programmable ‘F’ keys along the top which allow you to assign custom macros using the Logitech G Hub software. I tried the macro creator for a number of work and gaming related automated sequences, and it works really great, though depending on the responsiveness of your system, you may have to play with the keystroke delays a bit (default is 50ms). You can also set the ‘F’ keys to perform specific actions in integrated applications like Discord, OBS, and Overwolf.
For gaming, I found that this keyboard works great with e-sports and MMO titles like Fortnite and Overwatch. In Counter-Strike: Global Offensive, for example, I had no trouble navigating with the WASD keys, switching weapons, or using any of the comms shortcuts for communicating with my team. The keyboard was equally zippy and responsive in PUBG and Minecraft. The ‘F’ keys can be useful for executing repetitive long-chain combos that help you clear tough areas of games that would otherwise make them laborious and frustrating, though you should to be aware that some online multi-player games specifically disallow macros that give players an unfair advantage and you may risk getting banned from the game if you use them during competitive gameplay.
Now onto the lighting profiles. I find this feature to be good and bad. The keycaps that you get with the keyboard have transparent sections for the characters near the top of the switch, so while you get bright and vibrantly lit primary characters, the secondary characters are not illuminated at all. There is a dedicated button at the top right-hand corner of the keyboard to toggle the lights on or off, but it doesn’t allow you to change the brightness of the lights. Just a quick note too, with the lights off, the characters on the keyboard are really difficult to read, so if you need to read the labels on the keys, you’ll have to keep them on, which uses more battery in a laptop setup. The G Hub software does let you set custom animations and colors and you can even choose a different color for each key individually if you want. It still won’t let you adjust the brightness of the lights though and only certain settings can be 'saved' to the default profile stored in the keyboard. There’s also a ‘game mode’ toggle button on the keyboard that disables specific keys on the keyboard that you don’t use while gaming. You can choose the default, which is just the Windows, function, and menu keys, or set a custom set of disabled keys depending on your needs.
Overall, I really like the Logitech G Pro keyboard for its understated but attractive design, customizable backlighting, amazing key feel and responsiveness, and generously loud clicky keys.
Mobile Submission: False
I would recommend this to a friend!


Share this review:
+20points
20of 20voted this as helpful.
ReviewedByPhil's Review Comments
ReviewedByPhil has not submitted comments on any reviews.
ReviewedByPhil's Questions
ReviewedByPhil has not submitted any questions.
ReviewedByPhil's Answers

The Nest Doorbell is the battery-powered video doorbell that works with any home. See what’s happening at your door from anywhere and get intelligent alerts about important activity, like when there’s a person, package, animal, or vehicle.* And because there are no wires, you can install it yourself. Nest Doorbell requires the Google Home app and a Google Account – it’s not compatible with the Nest app or the home.nest.com site.
My existing doorbell chime (electric) says "must install diode" on the back, and there is a 1N4001 diode installed in my existing doorbell button. Do I need to use the diode in my installation of the Nest Doorbell if I'm hard wiring it to my chime?


The compatibility checker said my electronic chime and transformer are compatible, but the video instructions for a wired installation of the Nest Doorbell (battery) doesn't make mention of installing a diode (or not), if one comes with the chime. At any rate, I performed the installation without it and adjusted the "length of ring" setting to 6 seconds, which is nearly long enough to play through the melody, though it loses power and cuts off at the end. Any longer setting results in the chime beginning to repeat before it gets cut off which I find less desirable.
2 years, 8 months ago
by
ReviewedByPhil
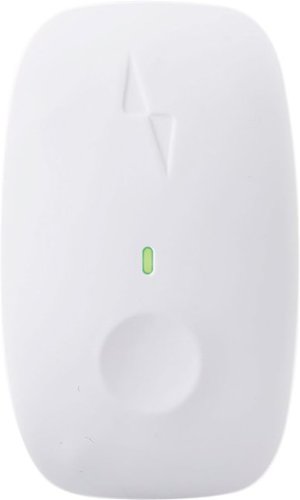
The Blueair Classic 280i air purifier brings clean, energizing air to spacious bedrooms, living rooms, or any rooms up to 279 sq. ft. A built-in air quality sensor makes it easy to confirm your air is virtually free of asthma and allergy triggers and indoor air pollutants such as mold, dust, pet dander, and pollen by scanning the air quality in real-time and adjusting fan speed to your current air quality. The Classic 280i delivers unmatched performance thanks to HEPASilent technology, which combines electrostatic and mechanical filtration technologies. This combination, pioneered by Blueair, delivers a high Clean Air Delivery Rate (CADR) with whisper-quiet operation (32- 56 dB), using 20-80 W of energy.
HOW MANY FET DOES TRHIS BLUEAIR COVER
Play to your full potential with this 23.8-inch ASUS TUF gaming monitor. The 1ms response time prevents blurring and lagging for quality visuals, while the FreeSync technology eliminates stuttering and tearing for seamless gameplay. This ASUS TUF gaming monitor has an anti-glare display that reduces reflections, and it features flicker-free technology that reduces eye strain for comfortable viewing.
Will this monitor support 144mhz for Xbox 1x over HDMI, is the HDMI ports 2.1?
The HDMI port on the monitor is HDMI v1.4, so on the Xbox One X it'll only allow you to output at 1080p @ 60fps and only goes to 75Hz.
4 years, 2 months ago
by
ReviewedByPhil
Record 4K UHD videos and capture high-quality stills with this Canon EOS M6 Mark II camera. The 32.5MP APS-C image sensor lets you take detailed, true-to-life photos, while the electronic shutter capable of speeds up to 1/16000 is ideal for taking professional-caliber action shots. This Canon EOS M6 Mark II camera comes equipped with an 15-45mm f/3.5-6.3 interchangeable zoom lens for wide-angle and short telephoto shots..
Does it have a self timer/self-timer delay or remote compatibility?
Yes, the self-timer can be set to 10 seconds, 2 seconds, or continuous, which takes 2 to 10 photos consecutively after a 10 second timer expires. You can use your smartphone as a Bluetooth remote control as a shutter trigger, or connect the phone via WiFi to the camera for remote monitoring (see what the camera sees on your smartphone screen) and control all the settings on the camera through the app.
4 years, 4 months ago
by
ReviewedByPhil
The reliable, robust Brother HL-L3290CDW compact digital color printer with copying and scanning capabilities is a great choice for the busy home or small office. The flatbed scan glass provides convenient copying and scanning. Quick print speeds of up to 25 pages per minute¹ plus manual feed slot accommodates varied printing needs and can handle a variety of paper types and sizes including card stock, envelopes and more. Connect with versatile options including built-in wireless or USB interfaces and print wirelessly from mobile devices. The 250-sheet capacity adjustable paper tray helps improve efficiency with fewer refills and handles letter or legal sized paper. Automatic two-sided printing helps save on paper costs. Brother Genuine high-yield toner replacement cartridges help lower printing costs. Comes with a 1-year limited warranty and free online, call or live chat support for the life of your product.Prints and copies up to 25 ppm in black and up to 25 ppm in color
What language does this printer support? Does it support Chinese mandarin?
No, Chinese is not supported on the LCD for the printer settings. It looks like the LCD can only display Latin and Slavic based characters e.g. English, French, Russian, Polish etc..
4 years, 7 months ago
by
ReviewedByPhil
Winning in business means working smarter. This HP Color LaserJet Pro M479fdw printer is designed to let you focus your time where it's most effective - growing your business and staying ahead of the competition.Prints up to 27 ISO ppm*, up to 27 ISO ppm* in color
If this printer is connected via USB to a computer, can other computers print wirelessly to it? I need to have it connected by USB to my work computer but also want to be able to use it for wireless personal printing from two other household laptops.
Yes, you can connect to the printer wirelessly using a direct WiFi connection (local network between the printer and computer) without connecting the printer to your router/home network. You can also connect wirelessly via Bluetooth. You'll get the most out of wireless printing features by connecting the printer to the internet by providing it your home WiFi network SSID and password. Once connected to the internet you can turn on Web Services and print from any device with e-mail capability by simply sending the file to be printed to a uniquely assigned e-mail address for the printer. This will also enable other computers and devices on the network to find and send print jobs to the printer.
4 years, 9 months ago
by
ReviewedByPhil
What does it mean for a webcam to be portable?
Simply that it is small and is versatile in terms of mounting options, for example, if it can be clipped to a laptop monitor as well as a LCD panel or set on a desktop or used with a tripod. They usually still need to be plugged in via USB and require software/drivers to run. Not many are compatible with mobile devices.
7 years, 3 months ago
by
ReviewedByPhil