Dragonhunter281's stats
- Review count57
- Helpfulness votes1,648
- First reviewApril 19, 2014
- Last reviewMarch 13, 2024
- Featured reviews0
- Average rating4.6
- Review comment count1
- Helpfulness votes4
- First review commentOctober 31, 2016
- Last review commentOctober 31, 2016
- Featured review comments0
Questions
- Question count0
- Helpfulness votes0
- First questionNone
- Last questionNone
- Featured questions0
- Answer count3
- Helpfulness votes6
- First answerSeptember 20, 2016
- Last answerAugust 24, 2017
- Featured answers0
- Best answers1
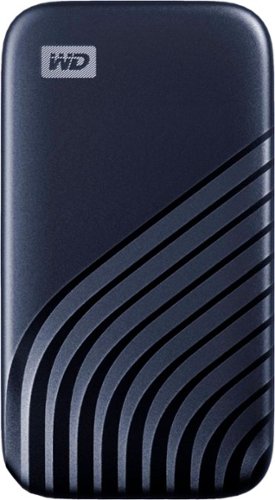
Secure and store important files safely in this Western Digital My Passport SSD. The fast data transfer rates of up to 1,050MB/s lets you move large amounts of content swiftly, while the 256-bit AES hardware encryption offers secure password protection. This Western Digital My Passport SSD features a maximum capacity of 1TB to store pictures, videos and documents, and the drop-resistant construction absorbs a maximum of 6.5-foot drops for durability.
Customer Rating

5
Affordable SSD Storage!
on December 9, 2020
Posted by: Dragonhunter281
As a computer enthusiast, you can never have enough storage, especially when you need to backup your most sensitive data. Typically faster storage usually coincides with higher price, however, we are at a point now to where external SSDs are quite affordable even for those who do not necessarily care about the speed of the transfer. As such, I was happy to be given the opportunity to review WD's latest passport offering. Packing 1 TB of space in a sleek and lightweight enclosure, the new passport attempts to offer the sweet spot for price and capacity. Additionally, I wanted to test several different types of transfers to give you a clearer picture on what to expect with this latest offering.
As one would expect, the newest My Passport SSD features NVMe technology, offering read speeds up to 1050 MB/s and 1000 MB/s write over USB 3.2 Generation 2. As soon as you open the box, you will be quite excited with the sheer size (or lack thereof) of the new drive. It is extremely compact and has a nice aluminum iodized feel. On the front of the drive, you will note the wavy etched pattern that gives the new drive a premium design. As expected, the drive includes a small USB Type-C cable, along with an adapter that will allow you to plug the drive into existing Type A ports. Overall, setup should be straight forward. Lastly, the new SSD Passport ships already formatted in exFAT.
For my tests, I wanted to focus the new Passport with a comparable drive of similar specifications. I decided I would compare the newly released SanDisk Extreme V2 1TB drive (Model: SDSSDE61-1T00). Additionally, for data transfers, I wanted to keep my tests relatively simple to focus on an out of box experience. As with anything computer related, data and benchmarks can quickly become complicated, especially when you factor in the different ways USB is implemented across a wide range of chipsets. With this in mind, I wanted to give you an idea on what to expect with this drive given two drastically different computer environments. I ran both drives over USB 3.0 using the included Type-A adapter on my Asus Maximus V Extreme Z77 motherboard running Windows 7 Ultimate. My second test was to then use my HP Laptop Envy X360 (2017), this time over USB Type-C using Windows 10. Additionally, the laptop's USB Type-C port is limited to Generation 1. Lastly, to compliment my Crystalmark tests, I manually copied two sets of data. My first data test is one large 37.3 GB bluray image. The second transfer is one large 28.9 GB music folder, but features 5,002 files and 1,152 folders to test the random 4K performance.
Here is the data for both drives on my desktop. UASP was disabled on my board due to not being supported in Windows 7. To shorten the data, I will only list the Sequential values and Random 4K at a queue depth/ thread of 1 (full results in the pictures).
Passport: Sequential Read: 257.97 / Sequential Write: 264.06
Passport: 4K Read (Q1T1): 37.26 / Random 4K Write (Q1T1): 72.99
SanDisk: Sequential Read: 258.18 / Sequential Write: 263.23
SanDisk 4K Read (Q1T1): 37.26 / Random 4K Write (Q1T1): 72.73
As you can see both practically equivalent, which probably suggests that both of these drives could, in fact, house the same M.2 drive inside, though I cannot 100% confirm that is the case. Coinciding these results, here are the results from my laptop.
Passport: Sequential Read: 430.72 / Sequential Write: 368.50
Passport: 4K Read (Q1T1): 22.74 / Random 4K Write (Q1T1): 30.96
SanDisk: Sequential Read: 430.68 / Sequential Write: 367.83
SanDisk 4K Read (Q1T1): 28.22 / Random 4K Write (Q1T1): 37.81
Once again, the results are almost identical as I noted on the desktop between the two drives. The noticeable increase on sequential is almost certainly due to having UASP native support on Windows 10. Next, I ran both of my manual transfers on both computers.
As for my manual transfers, the WD 1 TB and the SanDisk Extreme V2 performed just as my data would suggest. On the desktop and laptop, my Bluray image would sustain a write speed on both drives around 215-230 MB/s, which was exciting to see. The nearly 40 GB image transferred in roughly two minutes. Next my 28.9 GB folder of music proved to be a more difficult task, albeit still extremely fast. I noted that the drives would both sustain around 140-160 MB/s. Occasionally, you will see some dips but nothing too drastic. I will note, however, that on my laptop, the music folder transfer was drastically different. The manual transfer dipped anywhere from 75 MB/s all the way up to bursts of 180 MB/s. Not sure of the reasoning of the drastic dips, especially given that my laptop uses a Crucial P1 1TB M2 as its boot drive. However, it is certainly obvious that this transfer is certainly a worst case scenario and yet it was still able to complete the task in roughly 3-4 minutes. Safe to say, the WD My Passport SSD is absolutely stunning in performance.
In conclusion, the WD Passport 1 TB SSD performs exactly as expected. It is both sleek and compact, and certainly breezes through any transfer you can throw at it. In addition, the price is certainly affordable and with 1 TB of space it could prove quite useful for anyone looking for storage. Unfortunately, I wasn't able to fully unlock the drives full potential due to not having an available device that is equipped with a USB 3.2 Generation 2 port. However, it would not surprise me if those results are exponentially faster than the ones I have presented here. Regardless of whichever device you use this with, most should be extremely satisfied with the results. With that said, the WD My Passport SSD comes highly recommended.
Mobile Submission: False
I would recommend this to a friend!


Share this review:
+12points
14of 16voted this as helpful.
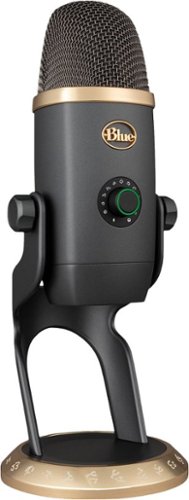
Crafted together with Blizzard Entertainment, Blue’s Yeti X World of Warcraft Edition professional USB mic can change the sound of your voice for a fully immersive streaming experience. Stun your audience by summoning the sound of your favorite World of Warcraft denizens using advanced voice modulation with Warcraft presets. Celebrate victories and entertain your stream audience using hundreds of HD audio samples from Shadowlands and the World of Warcraft universe. With Yeti X World of Warcraft Edition, you can create a unique audio broadcast that elevates your stream to new levels.
Customer Rating

4
Solid Microphone Experience
on November 1, 2020
Posted by: Dragonhunter281
The Blue Yeti X Warcraft Edition USB Microphone is the latest entry to the Yeti family based on the previously released Yeti X. Crafted especially for those who are fans of World of Warcraft, the Yeti X features an exclusive gray and gold and top level craftsmanship to commemorate the game. In addition, it features exclusive runes from the Warcraft universe etched along the base and around the multi-function knob on the front. In addition, it also features exclusive sound samples and voice effects that every fan should know. Since this was my first hands on experience with the Yeti X, I was excited to setup and test the latest offering!
Upon opening the box, the new Yeti X microphone includes a quick start guide and a micro USB cable. The packaging was put together quite well. Inspecting the microphone, I was immediately impressed with the color as it is quite slick in appearance. The gold accents around the microphone and base accompany the runes that are etched at the bottom. Even those who are not a fan of the game would be pleasantly surprised at how well this looks in person. On the front, you will notice the multifunction knob and on the back you will notice the pattern selection button that will set your microphone to one of the four modes microphone patterns. Default mode will be the cardioid mode which operates with the microphone straight up. As for the multi-function knob, you will have 3 modes that you can choose from by holding the button for one second: microphone gain, headphone volume, and blend mode where the feedback is adjusted accordingly with the output volume (provided of course that your headset is connected into the 3.5mm at the bottom). Additionally, the colors that you see can all be customized to your liking. Lastly, by pressing the button in the middle of the knob, you will mute the microphone. Overall, setup is fairly straight forward. I do wish that there was more documentation included with the Yeti. There is a ten paged manual on the Blue website that I suggest you download.
The G-Hub software is where the true potential of the Yeti X is realized. Upon downloading and installing the software, the microphone should be detected immediately. For simplifying this review, I am going to discuss what I observed with my Astro A40 headset plugged into the Yeti as opposed to my Creative Soundblaster ZxR sound card (as a side note, I was able to have my headset plugged into my soundcard, but also use the Yeti as my microphone). Additionally, you will need to make sure that your Yeti is the default communications device in your operating system along with the Yeti as your playback device. Once that is done, you will need to verify that each program has the proper microphone and output device selected.
As for the G-Hub software, there is a learning curve that you will need to be aware of as it does take some time to get used to. Once you select the Yeti, on the left side of the page, you will have three options: Microphone, Sampler, Lighting, and 3.5mm. The sampler and lighting pages should be fairly straight forward. As for the microphone page, the advanced sound options are not available until you enable the Blue Voice option. You will then be able to record yourself then listen to the recording while you adjust your options accordingly. You may also select each pre-defined preset to hear how each of them will sound. During my communication sessions, I was able to fix my echoing by clicking on the effects tab and then click on FX OFF. Additionally, you will see several settings under the Equalizer and signal cleanup tabs. There are several settings such as compressor, limiter, and noise reduction just to name a few. There a total of 9 settings across both tabs. While the interface may not bother some, I initially felt that it took some time to get use to. I was disappointed that you cannot select the format your microphone records in, nor do you have access to the samples that you dynamically record while you are setting up your microphone (they are deleted, to my knowledge, when you record over it, or exit the program). In addition, there are some instances where the software is redundant. For example, on the 3.5mm tab, you will note a setting called Direct Monitoring. This is the exact same setting as blend mode that you can access by cycling through the different functions on the front knob. Another example I noticed was that you can select the same microphone modes within the software as you do with the pattern button. Overall, it does get the job done and for most I think it will more than suffice. However, more advanced users might dislike some instances I laid out here.
In conclusion, the Yeti X Wow Edition Microphone checks all the necessary boxes that users will demand for their communication needs . As a fan the game, I am more than pleased with the look of the Yeti X. The overall craftsmanship is excellent and I am extremely pleased that they still retained a professional look to the microphone. The color scheme is subtle, yet very effective to the point that even those who are not necessarily a fan of the game would definitely consider this edition. Connectively, the runes on the base are exceptionally well done. With some minor gripes on the software, the Yeti X executes flawlessly on the hardware side of things. During calls, I was heard perfectly clear and did not encounter any issue once I altered some of the settings. Furthermore, I did not have to position myself directly in front of the microphone to be heard. All in all, if you are a fan of the Warcraft universe, and are in need of a USB microphone, the Yeti X Warcraft edition checks all the boxes. You should give one a summon! Recommended.
Mobile Submission: False
I would recommend this to a friend!


Share this review:
+1point
1of 1voted this as helpful.
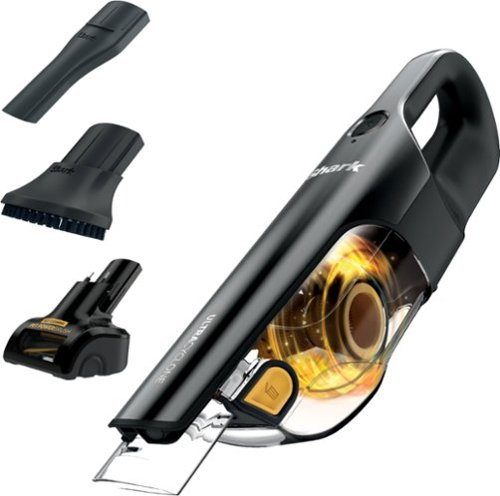
The Shark UltraCyclone Pet Pro+ is a cordless handheld vacuum designed for powerful suction. It comes with a motorized self-cleaning Pet Power Brush that eliminates hair wrap, a lithium-ion battery, CleanTouch dirt ejector, and more, at only 2.8 lbs.
Posted by: Dragonhunter281
The Shark Ultra Cyclone CH951 is the latest entry in portable vacuum cleaners from Shark. Featuring wireless operation and a compact design, the CH951 is positioned specifically to handle small vacuuming duties, especially households with pets. In addition, it includes a motorized pet tool that specifically targets pet hair removal. As such, I was excited to test the CH951 to see how it would perform given various cleaning tasks.
As one would expect, the CH951 is compact and easily fits in your hand. Clocking in at a mere 2.8 pounds, the CH951 is extremely light but definitely feels sturdy in its construction. It does not feel cheap at all. As for the various parts, everything should be fairly straightforward. On the front and back of the unit, you will notice the power button and charging port respectively. On the bottom, there is an eject button to access the small filter for cleaning. Additionally, on the button on the left side of the unit allows you to empty the dust collection bin. Furthermore, the Shark Ultra Cyclone includes three tools: the motorized pet hair removal tool as aforementioned, a tool for the baseboards, and lastly a brush tool. As for setup, you will need to charge the vacuum cleaner upon opening the unit. While the instructions note that it will take about six hours for a full charge, ours finished in roughly three hours. You will note the blue LED light will turn off once charging is completed. Moving on, I could not wait to test out our new vacuum cleaner.
As for performance, the Shark Ultra Cyclone overall does what it was designed to do. Naturally, one should not expect the same suction as your larger vacuum cleaner, but given its wireless operation and size, the CH951 does extremely well. My first test was to see how much cat hair I could collect on our staircase. Using the pet hair removal tool, I proceeded to vacuum the first two stairs. On the corners of each stair, I applied a bit of pressure to lift up some more hair. Additionally, I ran the vacuum over each stair several times. Surprisingly, I was able to fill the whole dust bin after a few minutes of cleaning which was amazing. I also detached the pet hair removal tool and tried the baseboard tool around each stair to great results. Overall, it seemed to do a decent job. I also tried the pet removal tool on one of our chairs and once again I was able to collect quite a bit of hair, though not much as the staircase. I am fairly confident that most will be quite pleased with the results. Afterwards, I did not observe any hair clogged in the tool pet removal tool. In addition, I then proceeded to try the CH951 in one our vehicles to see how it will fare in a different environment. I took the driver side floor mat out of the vehicle and proceeded to clean. On this test, the suction seemed to be a little more varied. I seemingly had to work it a bit more in the various areas around the seat but as for the floor mat, I was quite satisfied with the results. Comparing the before and after pictures that I took, the CH951 seemed it was up to the task. Conclusively, I think the CH951 excels in small areas that are in need of cleaning. Overall, most will be happy with their purchase, provided that you understand the suction is limited when compared to larger cleaners.
As for performance, the Shark Ultra Cyclone overall does what it was designed to do. Naturally, one should not expect the same suction as your larger vacuum cleaner, but given its wireless operation and size, the CH951 does extremely well. My first test was to see how much cat hair I could collect on our staircase. Using the pet hair removal tool, I proceeded to vacuum the first two stairs. On the corners of each stair, I applied a bit of pressure to lift up some more hair. Additionally, I ran the vacuum over each stair several times. Surprisingly, I was able to fill the whole dust bin after a few minutes of cleaning which was amazing. I also detached the pet hair removal tool and tried the baseboard tool around each stair to great results. Overall, it seemed to do a decent job. I also tried the pet removal tool on one of our chairs and once again I was able to collect quite a bit of hair, though not much as the staircase. I am fairly confident that most will be quite pleased with the results. Afterwards, I did not observe any hair clogged in the tool pet removal tool. In addition, I then proceeded to try the CH951 in one our vehicles to see how it will fare in a different environment. I took the driver side floor mat out of the vehicle and proceeded to clean. On this test, the suction seemed to be a little more varied. I seemingly had to work it a bit more in the various areas around the seat but as for the floor mat, I was quite satisfied with the results. Comparing the before and after pictures that I took, the CH951 seemed it was up to the task. Conclusively, I think the CH951 excels in small areas that are in need of cleaning. Overall, most will be happy with their purchase, provided that you understand the suction is limited when compared to larger cleaners.
In conclusion, the CH951 is designed to be the perfect compact solution that will facilitate cleaning in areas where larger vacuums cleaners are more difficult to use. With its compact design and wireless operation, you will no longer be limited in areas where you can vacuum. I was pleasantly surprised with the pet hair removal tool which did a exceptional job on both my staircase and various chairs. The best part was that I did not see any hair clog inside the tool. As for my recommendation, the CH951 is best positioned as a supplement with your larger household vacuum cleaner, as trying to use this as a main vacuum cleaner would be extremely difficult or impossible. This will ensure that where you need more suction than the CH951 can handle, you will not be disappointed. With all things considered, the Shark Ultra Cyclone CH951 does its job very well. In addition, the CH951 is perfect for when you need to clean your vehicle as well other small areas around the house such as couches or chairs. Thus, as the perfect companion to your larger vacuum cleaner, the Shark Ultra Cyclone CH951 is recommended.
Mobile Submission: False
I would recommend this to a friend!


Share this review:
+6points
7of 8voted this as helpful.
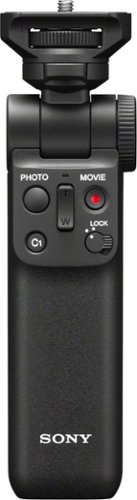
Take professional-grade pictures with this Sony wireless shooting grip. Bluetooth technology allows cable-free connection to compatible cameras, while the contoured design helps increase stability and comfort during use. This Sony wireless shooting grip has a flexible tilt function for positioning the camera, and the integrated legs spread to create a tripod for hands-free operation.
Customer Rating
4
Fabulous Compact and Unique Accessory
on February 6, 2020
Posted by: Dragonhunter281
As the newest camera accessory from Sony, the GP-VPT2BT shooting grip with wireless remote control hopes to expand your shooting capabilities and further enhance your camera experience. In addition, not only can you control your camera via Bluetooth, the GP-VPT2BT also acts as a stand, allowing further expansion in your shooting creativity. As such, I was excited to see how the GP-VPT2BT accompanies my newly acquired Sony a6100.
Upon opening up the box, you will receive the main shooting grip as well as a storage bag. In addition, the remote uses a standard watch battery (CR2032) and is included for your convenience. Lastly, there is a quick start guide included, though there is a full manual that you can find on the Sony website. As for installation, the process was fairly straight forward. To attach your camera, instead of manually screwing the stand into the camera, you place your camera on the screw and simultaneously secure the camera down by rotating the wheel directly below the screw. I was pleasantly surprised how quickly it was able to grab the camera and lock it into place. Furthermore, it is extremely sturdy and has a nice feel to it. Once your camera is attached (with the remote buttons facing you), you will notice just directly under the screw adjustment wheel, there is a rectangle button that allows you to swivel the camera side to side. Additionally, on the left there is a circular button that will allow you position the camera forward or back towards you, with an accompanying adjustment wheel on the right that will make it easier for that adjustment to maneuver. For the most part, the GP-VPT2BT was fairly straight forward to set up and I did not have any issues.
Once you have completed the physical installation, and the included watch battery was installed in the back of the remote, your camera must now be paired via Bluetooth. On my Sony 6100, I went to the main menu and clicked on network settings. From there, I went to the second page and turned on Bluetooth. Once that was done, I then clicked on the pairing option to set the camera ready to receive the transmission. On the remote, you will then need to hold the photo button and the top part of the zoom switch for a few seconds. Afterwards, the camera will prompt you to allow the pairing of the GP-VPT2BT. Once accepted, I then had to turn on the Bluetooth Remote Control option on my 6100 to allow the buttons on the remote to work. Once finished, I could take photos and record video using the remote, regardless if the camera was attached to the stand. I did not have any issues and all the buttons were extremely responsive. While I was taking various photos throughout our house, I was pleasantly surprised at how mobile the stand made my camera feel. I was able to capture different photos at varying angles that normally would have been quite difficult. In addition, this would definitely help in places where you would need to raise your camera up in order to capture photos such as in large crowds or concerts In that situation, the ability to zoom immediately with your thumb would prove extremely useful. You may also use the grip as tri-pod stand which I found extremely useful, especially if you need take delayed shots such as family portraits. It may also prove useful for capturing various videos such as instructional or blog videos. Given the compact nature of the GP-VPT2BT, the grip will be extremely useful if you wanted to get creative in various shot such as nature, self-portraits, or the ability to record long video clips with one hand. Overall, most will be pleased with the GP-VPT2BT.
In conclusion, the Sony GP-VPT2BT shooting grip with wireless remote works extremely well. I did not have any installation issues or any difficulty pairing my Sony a6100. Once attached, the shooting grip allowed me to shoot various angles without difficulty. In addition, shooting video was also facilitated by the grip as I did not have to hold the camera with two hands to record. Lastly, the ability to fold out into a tri-pod is also a huge plus, as you now have essentially two accessories in one. The tri-pod will certainly make taking portraits and videos even easier. As far as value, I believe my expectations were met as it accomplishes everything it was designed to do. Overall, the grip and stand works as intended and should please everyone who decides to invest in one. Thus, the Sony GP-VPT2BT shooting grip with wireless remote come recommended.
Mobile Submission: False
I would recommend this to a friend!
Share this review:
+2points
3of 4voted this as helpful.
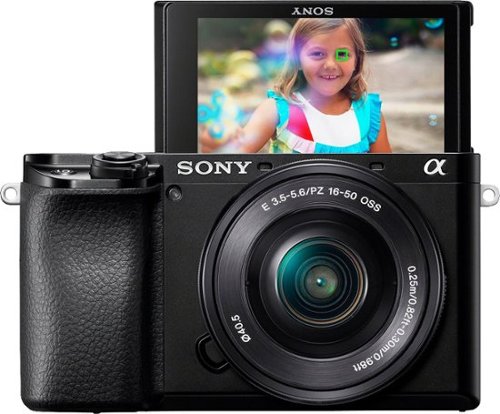
Take eye-catching photos with this Sony Alpha 6100 mirrorless digital camera with 16-50mm lens. The BIONZ X image processor coupled with the 24.2MP CMOS sensor ensures images of the highest quality. The 16-50mm lens offers a 24-75mm equivalent focal length range, making this Sony Alpha 6100 mirrorless digital camera ideal for portraits and even nighttime photography.
Customer Rating
5
Excellent Camera Quality From Sony
on January 7, 2020
Posted by: Dragonhunter281
Despite the ubiquity of the camera, standalone digital cameras are still very much a necessity, providing us with advance features that phones do not have. With a wide range of price points and features, it can be daunting to choose one that will suit your particular needs. Thus, enter the Sony 6100 that hopes to provide great performance with a relative moderate cost. Regardless, if you are a professional photographer or just beginning a new hobby, the 6100 hopes to find its place in an already competitive series from Sony. While the 6100 is a cut down of higher models such as the 6500 or 6600, it is still powered by the same APS-C Type Exmor CMOS sensor that will certainly make it an attractive option for those shopping for a new camera. Naturally, I was excited to try Sony’s latest offering.
Once received, the Sony 6100 comes in a rather compact looking box. Inside, you will note several standard accessories such as the shoulder strap, the battery, eye piece, an AC adapter, and a USB cable. Unfortunately, there is only a quick start guide, forcing you to download the full manual. In addition, the 6100 comes in three different kits; my particular kit, the 6100L, comes with the 16-50mm lens pre-attached. As for the body, the 6100 is quite captivating. It has a nice black polish and is smooth to the touch. It is definitely of high quality. Overall, the 6100 feels quite solid and compact. Additionally, it does have a bit of weight to it but nothing that would cause issue. Furthermore, the rubber grip on the right has a nice rugged feel. Looking down from the top, the camera you will notice a slit for the multi-interface slot for optional accessories. Next to that you will see the flash compartment, which will automatically pop up when you press the flash button. Next, you will note the On/Off switch as well as the shutter button on top. To the right, you will see the custom button (C1). The mode selection wheel is next to that, where you can select various modes depending on your needs such as automatic, aperture priority, movie, or scene selection. When you select scene selection, you can further choose from an additional ten different modes such as sports, night scene, or landscape. When the dial is set to automatic, you can choose from either intelligent or superior. On the back, you will notice several standard buttons such as menu and the main control wheel. You will also note the delete button, which also acts as the second custom button. On the top left of the display, you will note the viewfinder that automatically sleeps the main screen when you look through it. Additionally, to the right of the viewfinder is the adjustment wheel for its display. To the right of the display, you will see the AEL button that will also zoom in on your pictures after you have pressed the playback button (you will use the wheel to zoom out and the buttons to position your view). Moving to the bottom, you will see the battery and SD card compartments. On the left side of the body, you will note the USB and HDMI compartment as well as a 3.5mm microphone jack. To open the compartment, slide the compartment lid towards you. Do NOT pry it open! Overall, the layout is fairly straightforward, though may take some time to get use to it. Lastly, you will notice that the 6100 is missing auto/manual focus switch that is found on the 6500/6600.
Once received, the Sony 6100 comes in a rather compact looking box. Inside, you will note several standard accessories such as the shoulder strap, the battery, eye piece, an AC adapter, and a USB cable. Unfortunately, there is only a quick start guide, forcing you to download the full manual. In addition, the 6100 comes in three different kits; my particular kit, the 6100L, comes with the 16-50mm lens pre-attached. As for the body, the 6100 is quite captivating. It has a nice black polish and is smooth to the touch. It is definitely of high quality. Overall, the 6100 feels quite solid and compact. Additionally, it does have a bit of weight to it but nothing that would cause issue. Furthermore, the rubber grip on the right has a nice rugged feel. Looking down from the top, the camera you will notice a slit for the multi-interface slot for optional accessories. Next to that you will see the flash compartment, which will automatically pop up when you press the flash button. Next, you will note the On/Off switch as well as the shutter button on top. To the right, you will see the custom button (C1). The mode selection wheel is next to that, where you can select various modes depending on your needs such as automatic, aperture priority, movie, or scene selection. When you select scene selection, you can further choose from an additional ten different modes such as sports, night scene, or landscape. When the dial is set to automatic, you can choose from either intelligent or superior. On the back, you will notice several standard buttons such as menu and the main control wheel. You will also note the delete button, which also acts as the second custom button. On the top left of the display, you will note the viewfinder that automatically sleeps the main screen when you look through it. Additionally, to the right of the viewfinder is the adjustment wheel for its display. To the right of the display, you will see the AEL button that will also zoom in on your pictures after you have pressed the playback button (you will use the wheel to zoom out and the buttons to position your view). Moving to the bottom, you will see the battery and SD card compartments. On the left side of the body, you will note the USB and HDMI compartment as well as a 3.5mm microphone jack. To open the compartment, slide the compartment lid towards you. Do NOT pry it open! Overall, the layout is fairly straightforward, though may take some time to get use to it. Lastly, you will notice that the 6100 is missing auto/manual focus switch that is found on the 6500/6600.
Next, I would like to go through the main menu and briefly go through its organization. Once you press menu, you will notice six icons across the top: Quality/Image, Move, Network, Playback, Setup, and My Menu Setting. Additionally, each one of these has multiple pages that you can access by highlighting a setting below and pressing right on the control button. There are a total of 30 pages across these six categories. On the quality/image page, you will note several main settings including your picture format (JPEG, RAW, or RAW+JPEG), aspect ratio (3:2, 16:9 or 1:1), JPEG quality (Extra Fine, Fine, Standard), and image size. As expected, your image size presets will change when you change the aspect ratio. For example, when you set your aspect ratio to 16:9, your image size presets are 5.1, 10, and 20 megapixels. In addition, if you set your image to a 3:2 aspect ratio, your presets will now change to 6, 12 and 24 megapixels respectively.
As for image quality, I wanted to run through a test that would be the equivalent of an out of box experience with the least amount of settings changed as it would be nearly impossible to test every single setting. For my test, I used a Sony 32 GB UHS-II SD card (model SF-G32T). I first set the file format to JPEG with an aspect ratio of 16:9, with the quality set to large (20 megapixels) and JPEG quality set to standard compression. Lastly, I set the mode selection dial to auto and set the camera to intelligent auto. For the most part, the images produced are quite exceptional and should speak for themselves. Given maximum compression, I was extremely pleased with the results. In the picture with our Christmas tree, you can see quite a bit of detail on the decoration. In addition, you can see the glitter as it glistens quite nicely next to the lamp. In the next image, you can see our new holiday hat! For this picture, I reduced the lighting in the room, but as you can see it still came out fairly vibrant. Lastly, in our third picture, I like that you can distinguish the different lighting of the ornaments in our holiday decorations! Overall, I think most people will be extremely pleased with the image quality, though do keep in mind that your results will surely differ. Nonetheless, the images were stellar.
Additionally, I did a quick movie test by filming a quick one minute video. For my test, I left everything at default but changed the codec to 4K XAVC S and set the quality to 24p/100M. In addition, the audio was automatically recorded in uncompressed PCM at 48 KHz/16 Bit. Furthermore, I used the same Sony SD card from before as it has the V90 certification for video recording. During the test, I captured different speeds of motion while moving the camera throughout our house. Connectively, I occasionally picked an object to zoom in on for a few seconds then zoomed out. I was extremely impressed with the stabilization the 6100 showed. Additionally, I did not see any lag or skipped frames while recording. Also, during recording you will see two bars on your display for each audio channel. I was quite impressed that the integrated microphone was quite responsive, as it was able to pick up audio from the next room. I am also relieved that the audio was recorded uncompressed, so every intricate sound is captured! I think for the most part everyone will be quite pleased. The recording was extremely smooth as well as video playback. Lastly, I want to mention that the memory card you use will make a big difference. It is absolutely imperative that you use the fastest card you can afford, preferably one with a V60 or V90 rating to provide you with that extra speed just in case. In addition, I want to caution that your results will likely differ than what I have listed here depending on your SD card and settings, but hopefully this can give you some idea on what to expect.
In conclusion, the Sony 6100 is a fabulous camera that certainly deserves the attention from those who are looking to purchase a new digital camera. While the 6100 may receive criticism for being a cut down model of higher ones within the 6 series, I believe it can still be an attractive alternative especially if you are planning to purchase one of the bundles that includes additional lenses. Connectively, the 6100 uses the same exact sensor as the other models. In addition, I was extremely impressed with the 16-50mm and how smooth I was able to zoom in and out with ease. As for image quality, I was extremely impressed with the color as well as a plethora of settings that will allow you to take breathtaking photos. As for video, I was impressed with how flawless the recording was. Regardless of your experience in photography, or if you are seeking a new hobby, the 6100 has enough features that should please both enthusiasts and the average user. With that said, the 6100L bundle is a fairly competitive package that comes highly recommended.
Mobile Submission: False
I would recommend this to a friend!


Share this review:
+7points
7of 7voted this as helpful.
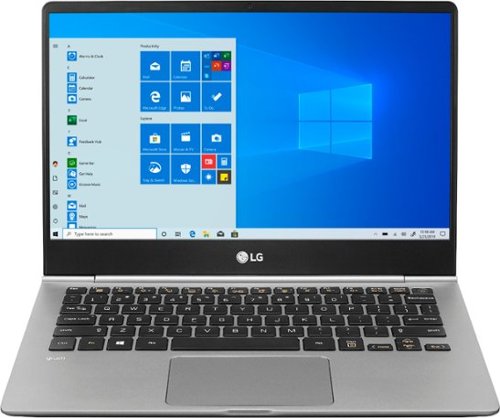
View photos, watch videos and get work done on this LG gram 13.5-inch laptop. The Full HD resolution provides stunning visuals, while the IPS panel lets you see contents. This LG gram 13.5-inch laptop has an Intel Core i5 processor for powering through intensive tasks, and the 256GB SSD offers fast load times.
Posted by: Dragonhunter281
For laptops, portability and screen size often take precedent before the internal hardware is considered. The LG Gram 13 inch attempts to tackle both, offering both performance and portability in a sleek well designed package. Clocking in at roughly two pounds, and combined with a quad core i5-8265U, a 256 GB SSD and 8 GB DDR4-2400 MHz, the LG Gram presents a fabulous opportunity to get the performance you desire without sacrificing portability. In addition, the LG gram is powered by a spacious 70Wh battery that should provide ample amounts of power on a single charge!
Once unboxed, the LG Gram is sure to impress. Physically, the LG Gram is quite sturdy for its size. It is extremely light; no doubt the LG Gram would be perfect for travel. In addition, the laptop has a nice brushed feel to it. It is smooth, yet somewhat rugged. I was also quite impressed with the silver color as it is darker in person as opposed to the stock photos online. As for the keyboard, everything should be quite familiar. There are various function keys at the top, such as adjusting screen brightness or disabling the touchpad. You can also access the LG control center (FN + F1) for even more settings. In addition, the LED keyboard backlight has two different modes: low and high. Between low and high, the increase in backlight is minimal but nonetheless gets the job done. On the left side of the unit, you will note the charge port, an HDMI port, 1 USB 3.1 Type-A, and one USB 3.1 Type-C port. On the right side, you will note the security lock, 1 USB 3.1 Type-A, a 3.5mm headphone jack, and a micro SD card slot. Also, LG included a USB Type-C to RJ-45 adapter so you can use a wired internet connection. Despite its small size, there are plenty of port options available. In addition to the physical aspects, I was quite impressed with the 13 inch IPS display. Even at 1080p, the colors are absolutely vibrant and presents strong contrast throughout. Ironically, our other laptops look washed out in comparison. By default, the computer is set to scale the display at 150%. I did not have any trouble reading text, looking at pictures, or watching video. As for size, I felt that 13 inches is the perfect size as it is big enough for daily use, yet small and compact enough that it does not feel bulky. Furthermore, the LED backlight is extremely bright, especially in a dark room or environment. Personally, this is the brightest screen I have used. Overall, everyone will be pleased with the display quality.
As for performance, the LG Gram is extremely fast out of the box. As one would expect, one of the main reasons for this speed is the included 256 GB SSD, which is listed as a Samsung MZNLN256HAJQ that is a SATA drive connected via the M.2 form factor. The drive easily saturates the SATA 3 interface. I decided to run Crystal Mark 6.0.2 and the results are quite impressive:
Sequential Read: 549.459 MB/s & Sequential Write: 516.022 MB/s
Random Read 4K QD=32: 249.451 MB/s & Random Write 4K QD=32: 224.102 MB/s
Random Read 4K QD=1: 12.737 MB/s & Random Write 4K QD=1: 49.693 MB/s
Furthermore, I also ran two manual transfers from my SanDisk Extreme 500GB external SSD over USB 3.1 Type-C. For the first test, I copied one file that was 28.3 GB. My second test was one more indicative of the drive’s 4k performance. I copied one large 27.9 GB folder that is comprised of 6,147 files scattered through an additional 1,141 subfolders. At the start of the first transfer, I was able to spike up to 480 MB/s before it held consistently at 300-310 MB/s. The 28.3 GB file finished after 1 Minute and 33 Seconds! The second test was naturally slower and not as consistent, but nonetheless still extremely fast. After starting off slowly, the transfer shot up to almost 300 MB/s and then bounced around between 170 MB/s - 210 MB/s, with occasional spikes up to 245 MB/s or higher. The transfer ended at 2 Minutes and 32 seconds. Overall, the performance of the SSD should be more than enough for most users. Additionally, I would like to mention that the LG Gram can be upgraded to a larger capacity drive, however, this is only recommended if you are comfortable with upgrading the laptop or have done it before. Naturally, this not necessary and is completely optional.
In addition to the SSD, I wanted to test the i5-8265U to see how the CPU performs when stressed to its full potential. For a multithreaded test, I used Handbrake 1.2.2 to encode a 28.3GB .M2TS movie file to MP4. I ran the test using the very fast 1080p preset, but changed the frame rate to 24 fps to match the source. The audio was set to match its source. For comparison, I ran the same test on my HP X360 Envy that is powered by the Ryzen 2500U since they are fairly close in specifications. Both chips are quad cores with eight threads and have a TDP rating of 15 watts.
In addition to the SSD, I wanted to test the i5-8265U to see how the CPU performs when stressed to its full potential. For a multithreaded test, I used Handbrake 1.2.2 to encode a 28.3GB .M2TS movie file to MP4. I ran the test using the very fast 1080p preset, but changed the frame rate to 24 fps to match the source. The audio was set to match its source. For comparison, I ran the same test on my HP X360 Envy that is powered by the Ryzen 2500U since they are fairly close in specifications. Both chips are quad cores with eight threads and have a TDP rating of 15 watts.
I5-8265U – 47 Minutes 4 seconds (46.8 FPS)
Ryzen 2500U – 42 Minutes 45 seconds (51.6 FPS)
Both CPUs perform similarly, though the Ryzen 2500U edges out slightly for several reasons. First, the Ryzen was able to sustain a turbo frequency of 2.9 GHz, while the i5-8265U was running at 2.0 GHz. Second, the HP is a bigger laptop (15 inches) and ran cooler due to a larger fan. Since the LG is a smaller laptop with a smaller fan, the i5 had to throttle more aggressively. However, keep in mind that encoding video is well beyond what this laptop is designed for. Overall, the CPU performs exceptionally well.
In addition to the multithreaded test, I ran a single thread test by converting a 24 minute WAV file to MP3 using MusicBee 2.4. The LAME encoder was set to a constant bit rate of 320 Kbps. The quality algorithm was set to 0 for the highest quality setting by using the –q switch. I also set MusicBee to run the encode on one thread.
In addition to the multithreaded test, I ran a single thread test by converting a 24 minute WAV file to MP3 using MusicBee 2.4. The LAME encoder was set to a constant bit rate of 320 Kbps. The quality algorithm was set to 0 for the highest quality setting by using the –q switch. I also set MusicBee to run the encode on one thread.
I5-8265U – 1 Minute and 44 Seconds
Ryzen 2500U- 2 Minutes and 6 Seconds
Unlike the multithreaded test, the i5-8265U was able to stretch its legs a bit and hold a turbo frequency of 3.8 GHz since the temperature and load was low. Using HW Monitor, I noted the temperature around 50-55 degrees Celsius which is well within a respectable range. Overall, I believe the i5-8565U is more than enough to handle everything you throw at it.
In addition to performance, the battery is another area of importance. For my test, I left the power options alone and disabled all of the unnecessary startup items as well as all of the non-Microsoft services. With a fully charged battery, I ran a 28.3 GB .M2TS movie using VLC player. For the whole 90 minutes, I ran the screen at full brightness as well as the keyboard’s LED on its highest setting. After the movie, there was 83% battery left. I then proceeded to browse a couple of websites for about an hour and noticed that the battery had dropped to roughly 77%. I also want to mention that by default Windows 10 has the fast startup enabled in the power options. This setting also affects shutdown, as it does not shut the computer completely down but rather forces it to an extremely low power state that appears to be off (you will notice that your uptime counter in task manager does not reset after you turn it back on). However, I was able to note that after not using the laptop for 9 days while in this low power state, the battery still had 34% left of its charge remaining when I did turn it back on. I must absolutely stress that your battery results will differ than what I have observed here, though hopefully this can give you an idea of what to expect. Depending on your usage, you may even exceed these results. Also, I want to stress that you should watch your CPU/RAM usage as some services and background processes sometimes hog resources, which will have a detrimental effect on battery life. While LG claims that the battery can last 20.5 hours, I can't fully say that this is true for every charge, but it does seem that as long as your usage is within reason, it is possible you could see a single charge last that long. Overall, the battery performs exceptionally and it is definitely the longest lasting battery I have personally used.
In conclusion, the LG Gram is the perfect laptop for those who want strong performance without sacrificing portability. At two pounds, it is extremely lightweight and portable. In addition, the 13 inch IPS display is one of the brightest screens that I have used. The color was incredibly vibrant and text was sharp and easy to read. Internally, the i5-8265U, 8 GB DDR4, and the 256 GB Samsung SSD performs with blazing speed. As for drawbacks, some might be disappointed with the initial size of the SSD or that half of its RAM is soldered down to the motherboard. However, these issues are minor enough that should not bother most users. As for affordability, the LG Gram sits at an upper price point. While there might be cheaper options, the LG Gram easily provides what it was designed to do. With exceptional battery life and an attractive design, the LG Gram comes highly recommended provided that it is well within your budget.
Mobile Submission: False
I would recommend this to a friend!


Share this review:
+10points
10of 10voted this as helpful.
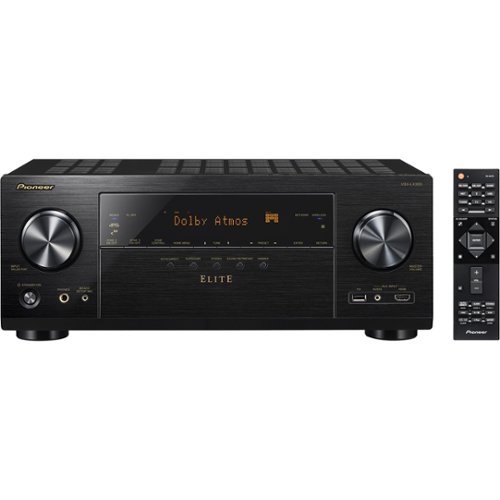
Discover incredible sound and playback from this Pioneer Elite 9.2-channel network A/V receiver. The unit supports 4K video and incredible multidimensional audio so that you can enjoy movies, TV shows and everyday media with a cinema-style experience. This Pioneer Elite 9.2-channel network A/V receiver works with Google Assistant to play on vocal command.
Customer Rating
5
Excellent Elite Receiver
on January 15, 2019
Posted by: Dragonhunter281
At the heart of the home theater experience, the main receiver will determine all of the sound features within your setup. Aside from your speakers, it is arguably the most important component that you will purchase. Recently, with the advent of object based codecs such as Dolby Atmos and DTS: X, new receivers are much more equip to handle a wide range of different audio and video sources. Thus, enter the VSX-LX303, one of three new models within Pioneer's prestigious Elite line of receivers. With support up to 9.2 channels as well as Dolby Atmos and 4K support , the VSX-LX303 is sure to attract audiophiles looking for a new receiver. As such, I was quite excited to see how the VSX-LX303 performs within an Atmos enabled environment.
Upon opening the unit, the quality of VSX-LX303 is quite stunning. The brushed black appearance is elegant and it has a nice smooth texture. In addition, the overall unit has a strong construction and clocks in at roughly 24 pounds. Owners of past Pioneer receivers should feel right at home. Internally, the VSX-LX303 is powered by two DSPs: one quad core 32 Bit processor supplied by Cirrus Logic and an Aureus floating point processor handled by Texas Instruments. In addition, Pioneer lists two DACs: an AK4458 supplied by AKM and a PCM5101 supplied by Texas Instruments. On the back of the VSX-LX303, you will note a plethora of connections, starting with two HDMI outputs (one being ARC compatible). Moving on, you will also notice six HDMI inputs. All connections support 4K and are fully HDCP 2.2 compatible. In addition, they all support both Dolby Vision as well as HDR. All ports are based on the HDMI 1.4 specification. The HDMI on the front also adheres to the 1.4 revision and HDCP 2.2, but it does not support all of the color outputs that the back ones do. Specifically, it is limited to 8 Bit RGB/YCbCr 4:4:4 at 4K. In addition, the VSX-LX303 fully supports 3D at 1080p so you can still enjoy your 3D movies. Underneath the HDMI ports, you will note the nine speaker terminals each corresponding to your speakers. The VSX-LX303 supports standard configurations up to 9.2 channels. For Dolby Atmos, the VSX-LX303 supports only 5.2.4 and 7.2.2 configurations. Furthermore, if you are looking to Bi-Amp your front speakers, you will only be able to do this in standard 5.1 and 7.1 configurations or 5.2.2 for Dolby Atmos as it reduces the available terminals. I strongly recommend to plan accordingly! Below the terminals, you will see two pre-out jacks for your subwoofers. In addition, you will also notice several standard analog connections on the VSX-LX303. There are two composite inputs as well as one component input. There are also two digital optical inputs as well as one digital coaxial audio in. Lastly, there are four analog audio in ports. There is also a phono input for record players that lack one built in. These ports are all assignable within the receiver settings. In addition, you will also notice the antenna jack for radio connectivity. To the left of the HDMI inputs, you will also note an Ethernet jack. Additionally, the VSX-LX303 also supports internet connectivity through Wi-Fi (802.11n). There are also two USB 2.0 ports (one on the front and back) and a headphone jack. Lastly, the VSX-LSX303 supports audio playback through Bluetooth as well as over home network.
For codec support, most should be quite familiar with most of them. Popular lossless codecs such as Dolby Atmos, DTS:X, Dolby TrueHD, DTS HD-Master Audio, and Multi-Channel PCM are all supported. In addition, audiophiles will be pleased that audio formats such as WAV, FLAC, AIFF, Apple Lossless, and DSD are supported though there are some limitations. For USB playback, all of the aforementioned formats are supported, with most supporting up to 192 KHz/24 Bit (ALAC is capped at 96KHz). However, remote playback of FLAC and DSD are not supported. For DSD digital file playback, Pioneer has listed both 5.6 MHz and 2.8 MHz (.DSF/DFF containers) in their instruction manual. However, the specifications on their website mentions that only 2 channels can go up to 5.6 MHz and multichannel is capped at 2.8 MHz via SACD over HDMI (as long as your player can support this). Overall, the VSX-LX303 should support everything most people will need, though I strongly recommend you double check the specifications!
In addition to the technical aspects, there are several features of the VSX-LX303 that I would like to highlight. The first is the Zone feature that will allow you to enjoy 2 channel audio in two different rooms while the room with the receiver can listen to a 5.1 channel sound source separately. You will notice on the back of the unit, the height and surround terminals are marked Zone 2 and 3 respectively for this feature. Another feature is the MCACC Auto Room Tuning. The receiver is bundled with a special microphone that will allow you to setup the acoustics of the room by detecting speaker sizes and distance from each other. The VSX-LX303 also supports various smart features such as Sonos Connect and Google Chromecast with Google assistant. It also supports various applications such as DTS Play-Fi, Flare Connect, and the Pioneer Remote application. Lastly, it also supports various audio subscription services. Personally, these features do not interest me nor do I stream anything so I cannot comment on how they work, but nonetheless they are there.
Aside from the features, I would like to discuss the graphical interface. Overall, everything is straightforward and organized quite well. The first screen is organized into three categories: System Settings, MCACC, and Network/Bluetooth. Once you click on system settings, you will see familiar categories such as speaker configuration, where you can set the number of channels, the size of your speaker, and speaker impedance. For impedance, you can only set either 4 ohms or 6 ohms. My speakers were rated for 8 ohms so the setting was set to 6. Moving on, the crossover option will allow you to set the crossover frequency for the subwoofer. Moving on, the channel level setting will be used quite a bit as this will allow you to boost individual channels. For each speaker, you can reduce the output to -12.0 dB or increase to a max of +12.0 dB in 0.5 dB increments. Also, corresponding tones will be heard from each speaker that you highlight on screen so you can adjust accordingly. Under the input/output assign menu, you can customize your devices and assign the analog connections as well as the HDMI ports. Contrastingly, on the TV Out/OSD option, you will also be able to upscale 1080P content to 4K as well as control which HDMI will output Dolby Vision. Personally, the menu was quite easy to navigate.
As for setup, the VSX-LX303 should be straightforward for most people. Personally, I did not encounter any issue with my new speakers. For my audio test, I wanted to see how the VSX-LX303 performed using a standard 5.1.2 Atmos configuration. For my speakers, I used two Klipsch RP-8000 as the front channels. For my Dolby Atmos speakers, I used two Klipsch RP-500SA speakers placed on top of the front speakers. I connected these to the height terminals on the back of the VSX-LX303. For my surround sound speakers, I used a pair of Klipsch RP-600M and for my subwoofer I used the Klipsch R-115SW. All speakers were connected to the receiver using Audioquest 14 AWG X2 speaker wire that was manually cut from a 100ft spool. The VSX-LX303 receiver was also plugged up to the wall using an Audioquest NRG-Y3 AC cable. Additionally, my R-115SW subwoofer was connected via an Audioquest Irish Red subwoofer cable. For movie playback, I used my Sony Ultra Bluray UBP-X800 player, with audio set to bit-stream directly to the receiver. Lastly, I set my speaker configuration to 5.1.2 and also set the height speakers to Dolby Front. I also tested each one in the channel level menu to make sure they were all working. Surprisingly, the VSX-LX303 immediately recognized all the speakers!
Upon loading my first Atmos encoded title, John Wick 2, the VSX-LX303 immediately clicked and registered Dolby Atmos across its display. I was actually surprised it worked so flawlessly, as typically there is always some issue that arises. As for the sound, the VSX-LX303 powered everything without any issue. As for the movie, there are a couple of great examples that caught my attention, particularly at the 24:38 mark where explosions are heard with loud ferocity. In addition, the broken glass was isolated on the right speaker to correspond where Wick was propelled on screen. At 58:21, gunshots ring with accurate precision. In the glass exhibit, at 1:38:50, there is a loud barrage of breaking glass on the right speaker to match its placement on screen! Overall, I believe the VSX-LX303 performed exceptionally well and met expectations. Most people should be quite pleased with the sound quality.
In conclusion, the Pioneer VSX-LX303 is an exceptional audio receiver that performed flawlessly and exceeded expectations. It was easy to setup and immediately powered my 5.1.2 Dolby Atmos setup with great finesse. In addition, with HDR and Dolby Vision 4K support through HDMI, the VSX-LX303 is ready to tackle the demands of high definition content. Furthermore, by adding Dolby Atmos and DTS:X support to existing codecs, Pioneer has solidified the new Elite models for the future. In addition, the VSX-LX303 can also support standard configurations up to 9.2 channels if you are not interested in the object based setups. For audiophiles, I believe most will be quite pleased with the features the VSX-LX303 has to offer. With a large selection of features and an attractive design, the Pioneer VSX-LX303 comes highly recommended.
In conclusion, the Pioneer VSX-LX303 is an exceptional audio receiver that performed flawlessly and exceeded expectations. It was easy to setup and immediately powered my 5.1.2 Dolby Atmos setup with great finesse. In addition, with HDR and Dolby Vision 4K support through HDMI, the VSX-LX303 is ready to tackle the demands of high definition content. Furthermore, by adding Dolby Atmos and DTS:X support to existing codecs, Pioneer has solidified the new Elite models for the future. In addition, the VSX-LX303 can also support standard configurations up to 9.2 channels if you are not interested in the object based setups. For audiophiles, I believe most will be quite pleased with the features the VSX-LX303 has to offer. With a large selection of features and an attractive design, the Pioneer VSX-LX303 comes highly recommended.
Mobile Submission: False
I would recommend this to a friend!


Share this review:
+38points
42of 46voted this as helpful.

Enter a new world of sound with this Klipsch Reference Premier Atmos surround speaker. The high-performance 1-inch tweeter features a vented design and hybrid Tractrix horn for clean, natural sound, while the 5.25-inch woofer features a spun copper cerametallic cone for detailed bass. This Klipsch Reference Premier Atmos surround speaker delivers immersive, cinematic audio with Dolby Atmos Elevation effects.
Customer Rating
5
Excellent Atmos Performance
on December 12, 2018
Posted by: Dragonhunter281
In the past, the evolution of the home theater was contingent upon adding more speakers (channels), where setups such as 5.1 or 7.1 were most common. Recently, with the advent of Dolby Atmos, there seems to be a shift towards object based placement - enhancing sound through physical placement of Atmos enabled speakers to seemingly create a new experience. Nonetheless, it is still unclear if this is actually a superior experience or are we just renaming what we have done all along: adding more speakers? Thus, enter Kilpsch's new entry in the award winning Reference Premiere line, the RP-500SA. With an all new tweeter design, the RP-500SA are sure to catch the attention of audiophiles! Given this, I was excited to finally be able to test Dolby Atmos certified speakers!
Upon inspection of the RP-500SA speakers, I was pleased to note that they were packaged extremely well. The speaker was completely enclosed with a soft cloth cover, with a second set of plastic on top of that. Additionally, the RP-500SA is supported by a Styrofoam block. Once opened, you are treated to one of the most beautiful piano black appearances you will ever see. To the touch, the speakers are extremely smooth and rounded perfectly on all sides. The gloss is just impeccable and absolutely gorgeous. In addition, the piano black finish surprisingly did a fabulous job of concealing the fingerprints, though you will notice them up close. The included cloth easily wipes them away. Nonetheless, the speakers are absolutely stunning to see in person; no picture will be able capture the full elegance of the glossy finish. If you are on the fence on which variant to pick (Ebony, Walnut, Piano Black), I would strongly suggest the piano black variant, if of course your budget allows for the extra cost. Physically, the speakers are quite heavy for such a compact speaker, coming in at roughly 8 pounds. Additionally, I was also extremely impressed with the unique triangle design of the RP-500SA. On the back of the RP-500SA, you will note a crossover switch that will allow you to switch the mode of the speaker to operate either as an Atmos speaker (default) or as a standard surround speaker. Lastly, the protective grill magnetically clips on to the front of the RP-500SA. Overall, the RP-500SA are sure to impress and were fairly easy to setup!
For my audio test, I wanted to see how the RP-500SA performs in a multichannel environment. For a standard 5.1.2 Atmos configuration, I used two RP-8000 as the front channels with the RP-500SA placed on top. The RP-500SA were connected to the height terminals on my receiver. For my surround sound speakers, I used a pair of RP-600M and for my subwoofer I used the R-115SW. To power the speakers, I used a Pioneer Elite VSX-LX303 receiver, tied together using Audioquest 14 AWG X2 speaker wire that was manually cut from a 100ft spool. The VSX-LX303 receiver was also plugged up to the wall using an Audioquest NRG-Y3 AC cable. Additionally, my R-115SW subwoofer was connected via an Audioquest Irish Red subwoofer cable. For movie playback, I used my Sony Ultra Bluray UBP-X800 player, with audio set to bit-stream directly to the receiver. I also made sure that the receiver's listening mode was set to Dolby Atmos. In addition, I verified that Atmos was correctly displayed on the status overlay of the receiver. Lastly, I would like to note that depending on your receiver, speakers, and your personal settings, the perceived audio quality will more than likely differ than what I have described here. You may have to configure more or less to get the speaker to sound to your liking. I would also like to note that for my surround speakers (RP-600M), I had to manually add +4.0dB (+0.5 dB increments) in the Pioneer VSX-LX303 setup to bring them slightly up with my front speakers. Lastly, I also replicated this with the RP-500SA and added +4.0 dB in the setup. Every other speaker was left at default with no changes made.
For my movie tests, I selected three Dolby Atmos encoded movies to give you an idea of what one may expect. On John Wick 2, the movie itself is quite exhilarating so naturally its Atmos presentation should be similar. With the opening car chase scene, the RP-500SA begins with strong reproduction of the background music. At 7:22, when the car is started, both speakers roared as the engine started. I also heard people shouting in the background. Starting at 8:19, the multiple car crashes are extremely potent! The high frequencies were quite stunning. At 24:38 mark, and lasting for eleven seconds, the explosions are heard with loud ferocity. In addition, the broken glass was isolated on the right speaker to correspond where Wick was propelled on screen. At 58:21, gunshots ring with accurate precision. In the glass exhibit, at 1:38:50, there is a loud barrage of breaking glass on the right speaker to match its placement on screen. It is still present on the left speaker, but at a much lower volume. Lastly, both speakers are used to great effect at 1:46:10 to replicate a ferocious gunshot. Conclusively, the RP-500SA performed extremely well in every situation; standard affair such as gunshots, glass, and explosions were all of incredible quality when the RP-500SA were used. However, despite some instances throughout the movie where the RP-500SA are not used, it would not surprise me if this particular movie ended up being one of the more aggressive Atmos titles.
With Annihilation, I was curious to see how the RP-500SA would handle such contrasting styles of sound within an Atmos experience. At 20:52, you can hear quite a bit of thunder and rumbling activity from the mysterious void that is seen on the horizon. The rumbling is exciting and extremely clear. From 29:50 and onward, you will notice various sounds of the rainforest such as water in the background and the gradual chirping of birds. Starting at 35:50, there is more ambient activity from both speakers - increasing in volume as the duration progresses. Another place worth noting was between 46:11-46:22, where the speakers moan horrifically in a monk like chant! Without spoilers, the lighthouse scene is both an audio and visual delight and will probably stand out for most people. The electronic sound effects are extremely potent here, with loud pulsating periods of sound and varying tones. Starting at 1:35:12, there is a strong propeller sound that lasts for ten seconds. The clarity is quite breathtaking! Additionally, at 1:37:15, I noted some strong chime effects that are handled flawlessly; four seconds later you will hear an absolute crushing electronic tone! Conclusively, the RP-500 contributed extensively to the overall depth and clarity of sound, echoing at times the rest of the speakers, but was rather reserved on its own. Nevertheless, this was an exciting and unique experience with this particular movie as I believe the audio greatly adds to the captivating visuals.
As an older Dolby Atmos encoded title, I was curious to see how the sheer chaos in San Andreas would translate within an Atmos environment. Contrasting the other movies, there were instances where the RP-500SA actually had its own sound rather than echoing sounds from the two front channels. During a scene at the college (30:20 mark), the Atmos speakers shrieked as the glass shattered around the building. As expected, the RP-500SA was amazingly sharp and clear. Another instance at 38:11, I heard tree branches snapping and debris falling from the ceiling. A few seconds later, at 38:26, I heard additional breaking glass and debris from the collapsing structure. Contrastingly, I also noted an instance where only one speaker was used. At 43:40, the helicopter door is ripped off its hinges on the left side of the screen. Only the left speaker is used to reproduce the effect. Both speakers resume seventeen seconds later (43:57) as the helicopter tries to escape. Once again, the RP-500SA reproduced everything with stunning results. Another cool effect was during the car rescue scene. On the left speaker only (47:02), I heard the falling debris from the parking garage that corresponded to what I saw on the left side of my TV screen. Two seconds later (47:04), the right speaker resumed as the debris now encompassed the rest of the viewing area. Overall, the RP-500SA performed exceptionally. High frequencies were reproduced with stunning clarity; middle channels were handled with finesse to great delight. Perhaps contrary to expectation, there was a good portion of the movie where they are not used, though this is not necessarily a bad thing as it certainly validates that less is certainly more. Nevertheless, the RP-500SA thoroughly impressed with the sound.
In conclusion, the RP-500SA is a fabulous choice for any audiophile looking to add Dolby Atmos to an existing home theater as an upgrade or as part of a new system. Physically, the RP-500SA is absolutely stunning with its reflective piano black finish and impeccable craftsmanship. Additionally, the sound quality is equally impressive, easily reproducing middle and high frequencies with ease. As for Dolby Atmos, the enhancing capabilities by using sound with regards to its placement on screen is quite exciting to say the least. As for a completely new experience, I feel that it is somewhat inaccurate to describe it as such; more accurately, it is certainly a refinement of sound - adding layers to fully complement the movie for more depth. In other words, you should only expect small nuanced improvements, and naturally it will depend on the movie. Therefore, we can be certain that the RP-500SA emphatically creates an environment that it was designed to do. If the budget allows, and you would like to have an exciting Dolby Atmos experience, the RP-500SA is an excellent choice. Thus, the RP-500SA comes highly recommended.
Mobile Submission: False
I would recommend this to a friend!


Share this review:
+19points
22of 25voted this as helpful.
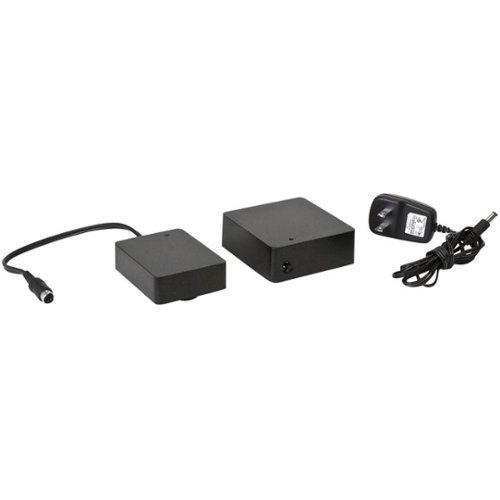
Enhance the quality of your home theater or audio system with this Klipsch subwoofer kit. It adds to the capabilities of a WA port-equipped Klipsch subwoofer (not included) by extending the powerful bass anywhere you want for the best possible sound quality. This wireless Klipsch subwoofer kit is easy to set up thanks to its plug-and-play technology.
Posted by: Dragonhunter281
Most people, especially audiophiles, will always prefer to connect their home theater equipment by physical cable. However, there are instances where having both options may prove beneficial, such as having the ability to move your subwoofer around. Thus, enter the WA-2 Wireless Kit, an optional accessory that will allow you to add wireless capability to select subwoofer models from Klipsch, Energy, Mirage, and Jamo that have a WA-2 port. Given this, I was excited to try out the WA-2 adapter to see how easy it would be to setup on my Klipsch R-115SW!
In the box, you will note two pieces: a transmitter that connects to your receiver and the wireless receiver that connects to the back of the subwoofer. Also included is a standard RCA cable as well as the power adapter. Additionally, the power adapter required you to clip on the prongs that fit into the wall. As for setup, everything was easy and straightforward. On the transmitter, I used the white RCA plug to connect it to my subwoofer out jack on the back of my Pioneer Elite VSX-L303. Next, I connected the matching white end to the corresponding jack on the transmitter. Lastly, on the front of the transmitter, you will note the gain switch that will add or lower the bass output in 12 dB increments. Please note that by default, the gain switch should be set 0 gain (middle position) when you first setup the adapter! Moving on to the wireless receiver, you will note the WA-2 cable that plugs into the back of your subwoofer. There is also a pair button on the front that will allow you to pair the device if it fails to connect automatically. Furthermore, on the back of my R-115SW, there are protruding screws that are designed to lock with the grooves on the back of the adapter, easily storing the adapter on the back of the subwoofer. Overall, I do not think anyone will have an issue, as I was up and running in a few minutes. Once I powered everything on, the LED lights flashed green a couple of times and then stopped once it paired automatically with the transmitter. As for sound quality, the WA-2 wireless receiver performed as it should. At first, the bass was a little hard to hear, even with the volume knob maxed out. However, once I flipped the gain switch to +12 db, the bass was felt immediately. I was able to get the room to shake and vibrate as I had with a physical cable. However, be sure to dial back your volume knob on the subwoofer before you flip the gain switch! The gain adds an extreme amount of bass and is extremely loud! Furthermore, I could not detect any lags or skips in the sound as both movies and music rattled my room. Overall, the experience was excellent!
In conclusion, the WA-2 Wireless Kit is an ideal solution! The adapter was easy to install and the bass was loud and ever present as it was before. I was extremely impressed even though I still prefer a wired connection! In addition, I am confident that if you need, or would just like to have a wireless option available to your subwoofer, the Klipsch Wireless WA-2 Kit will surely impress you. Overall, the Klipsch WA-2 Wireless Kit comes recommended!
Mobile Submission: False
I would recommend this to a friend!
Share this review:
+2points
2of 2voted this as helpful.
Discern crisp movie dialogue with this Klipsch Reference Premiere center channel speaker. Four 4-inch Cerametallic cone woofers deliver distortion-free low-frequency details, and the 1-inch Linear Travel Suspension diaphragm tweeter reproduces clear vocal nuances. The Tractrix technology of this 125W Klipsch Reference Premiere center channel speaker ensures a natural frequency response.
Customer Rating
5
Stunning Klipsch Center Clarity
on November 17, 2018
Posted by: Dragonhunter281
One of the most critical pieces when creating any home theater configuration is the center channel, though often times it is overlooked. If your center channel speaker is not up to par with the rest of your speakers, it effectively renders the rest useless as crucial dialog will not be heard. With the all new reference premiere series from Klipsch, the brand new RP-404C clocks in as the second tier model, just slightly under the new RP-504C. With an all new tweeter design, and an elegant glossy piano black finish, the RP-404C is positioned to provide audiophile level sound to any home theater system. Thus, I was quite excited to test the RP-404C to see how it performs.
Upon receiving the RP-404C, the first thing you will notice is that the RP-404C is quite heavy. The packaging was also of worthy praise and seemingly protected the RP-404C quite well. The RP-404C was wrapped twice, first with a soft cloth cover and then an additional plastic cover over that. After removal, the RP-404C treats you to an absolute gorgeous high quality glossy finish. The craftsmanship is of the utmost highest quality, with a deep dark black color and a reflective coating that just captivates you. The corners transition perfectly with all sides of the speaker and are smooth to the touch. No picture will not be able to capture just how good the RP-404C looks in person. It is simply jaw dropping. If you are on the fence on which variant to pick (Ebony, Walnut, Piano Black), I would strongly suggest the piano black variant, if of course your budget allows for the extra cost. Moving on, located on the back, you will notice one set of speaker terminals. Physically, the RP-404C is quite massive in size. With a width of 26 inches and a depth of 13 inches, there might be some issues fitting the RP-404C on some entertainment centers. Weight wise, the RP-404C clocks in at roughly 28 pounds, yet is of good sturdy quality. Lastly, the front grill cover does not snap in place but rather magnetically clips on and aligns with the front. Overall, I do believe the RP-404C has set a standard here. The RP-404C displays impeccable craftsmanship, combined with an absolute elegant piano black finish that just begs for more attention. I think most people will not complain here.
For my audio test, I wanted to see how the RP-404C performs in a multichannel environment. For a standard 5.1 configuration, I used two RP-8000 as the front channels. For my surround sound speakers, I used a pair of RP-600M and for my subwoofer I used the R-115SW. To power the speakers, I used a Pioneer Elite VSX-LX303 receiver, tied together using Audioquest 14 AWG X2 speaker wire that was manually cut from a 100ft spool. The VSX-LX303 receiver was also plugged up to the wall using an Audioquest NRG-Y3 AC cable. Additionally, my R-115SW subwoofer was connected via an Audioquest Irish Red subwoofer cable. For movie playback, I used my Sony Ultra Bluray UBP-X800 player, focusing specifically on lossless playback. Lastly, I would like to note that depending on your receiver, speakers, and your personal settings, the perceived audio quality will more than likely differ than what I have described here. You may have to configure more or less to get the speaker to sound to your liking. I also would like to note that for my surround speakers (RP-600M), I had to manually add +4.0dB (+0.5 dB increments) in the Pioneer VSX-LX303 setup to bring them slightly up with my front speakers. Every other speaker was left at default with no changes made. I also tried to keep my receiver volume between -40.0 dB and -30.0dB (once again 0.5 dB increments).
Beginning with a couple of robust soundtracks, the first movie that I tried was The Patriot (2000) to see how the RP-404C handled the dialog with respects to large scale battle scenes. The result was quite exciting! Dialog was pushed forcefully to the center with absolute stunning clarity. During battle sequences, the RP-404C was still able to reproduce some of the explosions of musket fire as well as cannon blasts, though it still maintain strong separation of the main dialog. The surround channels did a fabulous job of complimenting the main dialog of the RP-404C by providing echoing dialog between the movie extras during combat. While my two main front channels focused mainly on the soundtrack and background sounds, the RP-404C clearly provided the missing piece between them. During more dialog heavy scenes, the sound was punctual and clear just as the battle sequences were. On my next movie, I switched to Gladiator (2000) to see how consistent the RP-404C would perform. Overall, dialog was clear and crisp as was before. Once again battle scenes were quite clear and loud, especially sword strikes between soldiers. Middle and high frequencies were seemingly reproduced with fabulous results. In some of the heavier dialog sequences, there were some periods where I had to turn it up just a bit, but overall the RP-404C did a fabulous job. During the arena fights, as the subwoofer rumbled, the RP-404C managed to keep the dialog loud and crystal clear over the subwoofer. The immersion was an absolute blast! Simultaneously, the surround channels rattled with the crashes of chariots as well as the whistling of arrows! Lastly, the front channels provided the last missing element to the setup with an absolute killer soundstage! Overall, I could not find any complaints. While The Patriot (2000) was encoded with uncompressed 5.1 Channel PCM 48 KHz/16 Bit and Gladiator (2000) used a 5.1 Channel DTS-MA 48 KHz/24 Bit encode, both soundtracks responded similar as the RP-404C handled the dialog for each movie effectively. Switching to more dialog driven movies, in particular the court room drama, Primal Fear (1996), the RP-404C was crisp and clear as before though I had to turn up the volume quite a bit on this movie as opposed to the others. Naturally, some movies are not going to be as loud as others. The varying dynamics on this movie really shined on the RP-404C, such as when people raised their voices in the court room. In addition, there was never any muddiness in the dialog. Switching to another favorite, Let Me In (2010), I noticed similar results as I had in Primal Fear, where I had to turn up the volume a bit to match the dynamics of the movie. Once done, the RP-404C handled everything with ease, showcasing both crisp and clear dialog isolated perfectly center in my room. Additionally, I did notice that both of these movies were encoded in Dolby TrueHD, which might be of coincidence, though it does seem that the mastering for them was slightly lower in volume than other lossless codecs. Nonetheless, this is merely an observation and is in no way a fault of the RP-404C. Overall, I am quite pleased with the performance of the RP-404C, which performed exceptionally well across a wide variety of movie genres. The RP-404C demonstrated why a high quality center channel speaker is an absolute necessity.
In conclusion, the RP-404C is a fabulous center channel speaker choice for any existing or new home theater system, providing excellent dialog reproduction. Middle and high frequencies were punchy and exciting, all the while the RP-404C was able to isolate dialog with razor sharp precision over the rest of my speakers. Physically, the piano black finish is exquisite and is an absolute sight to behold. The craftsmanship is impeccable! As audiophiles demand nothing but the best, you can be rest assured that the RP-404C checks every desirable feature. With that said, the RP-404C comes highly recommended!
Mobile Submission: False
I would recommend this to a friend!

Share this review:
+7points
12of 17voted this as helpful.
Dragonhunter281's Review Comments

Share no-filter moments with this Sony Xperia XZ smartphone. Its 23-megapixel camera has triple image sensing technology to enhance the focus and balance of objects despite movement, distance and low-light conditions for sharper, brighter results. This water-resistant Sony Xperia XZ smartphone has 3GB of memory and 32GB of storage to let you save 4K recorded videos and download apps.
Overall5 out of 5
5 out of 5Great, Unique Phone
By Jstar
This review turned out a lot longer than originally thought but this is a big purchase so I did not want to miss anything and wanted to share my experience with you. I know I would appreciate what I have to say below :)
I bought this phone to replace my 4.5 year-old lg optimus that had grown outdated but still was in great working condition. As I have an iPhone for work and do not care for it much, I researched phones heavily this past year and narrowed it down to making the tough choice between the Xperia XZ and the Galaxy s7 Edge. Since I was finally getting a new phone I did not just want to get the one everyone said was the 'best', I wanted to put my money towards the phone that would provide me with a unique experience with top of the line specs and I am very happy I went with the Xperia XZ.
First off the phone is beautiful. Many online reviews said this phone was not particularly attractive to non-Sony Phone buyers and after having the phone for a few weeks I respectfully disagree. Maybe it is just the Forest Blue color, but I have repeatedly been asked what kind of phone I had while at work or in-line in stores by people who think the phone is "really cool" or in another case "super cute". It is a design/color that seems to appeal to a lot of people. I thought I would have a problem with the increase in screen size from my old phone, but I am a tall guy with big hands and have no problem reaching the entire screen with my thumb while holding it in one hand. My girlfriend uses two hands but she does so with her iPhone as well so I would not hold that against the Xperia but just thought I would note it because the one hand use was important to me.
As for the phone itself I have no complaints. Again I note the age of my old phone, so any phone would probably be a nice change in speed and such, but it was very easy to transfer my old data to the XZ and it is incredibly quick and responsive when using apps. The display is stunning with excellent color contrast. The camera takes excellent pictures, haven't tried too many selfies but scenes look great and capture motion very well. I am a big fan of the camera shutter button and notification light, quick charge is nice. The battery goes a day of occasionally gaming and internet browsing once you fine-tune the settings. I was initially upset about the lack of the fingerprint scanner but I saw the hardware for it is on the US version and you can enable with a little software work around, but it will void the warranty so I have not gotten around to trying that yet. But honestly with the smart-lock and security settings, the phone is unlocked whenever it is near me so it is really not a big deal at all. The Lifelog and Xperia Lounge apps are cool and provide great exercise feedback and free perks respectively. I am also happy to report the water proofing does work to at least some degree as the first thing I did when I received the phone was run it under the sink for a while and it worked no problem.
I am a big Sony fan so I was very interested to see how it faired remote playing my ps4. Once I paired my controller with my phone it was smooth sailing and playing Dark Souls was far easier than I expected it would be. I did not try playing online multiplayer through remote play yet but even with my Vita that can be very leggy so I expect it would be similar with the XZ.
In conclusion, I love my other Sony products and am happy to have the Xperia XZ join that list of awesome products. I disagree with the professional reviews about the phones appearance design wise as well as their BIG issue with lack of fingerprint reader. It's design seems to draw lots of appeal in my experience and is a welcome change to the similarly designed Galaxy, iPhone, and Pixel. The phone is definitely not cheap, but if you are looking to upgrade your old phone and want to put your money towards a phone that is at the very least equivalent to if not better than the other flagship phones out there in addition to catching peoples attention and providing a more unique experience, than the Xperia XZ is the perfect choice. As I said my old phone was outdated and I am a big Sony fan so I may be bias, but comparing this to my friends new galaxy and my girlfriends iPhone 6s, I know I made the right choice going with the Xperia XZ.
As an added note, I will say finding special cases will be hard for the XZ as it is not a very common phone, but if you get the Forest Blue I would recommend a clear color because the phone looks great as is.
Dragonhunter281
October 31, 2016
Thank you for review. I never understood why the "professional" reviews always trashed Sony. Their designs had always been different and for once where innovation could be actually used appropriately, they are criticized for it. If you look at user reviews of this phone elsewhere, you will see how rampant this is as they just repeat the same complaints reviews have. The fingerprint scanner is extremely overrated and glad you mentioned this because it really isn't a needed feature as the media makes it out to be. If swiping is hard to unlock the phone, then people have really lost it. Anyways, glad to see a fair review and hopefully I can try this phone out if I decide to replace my Z3+, although so far I have had zero issues with it.
+4points
4of 4voted this comment as helpful.
Dragonhunter281's Questions
Dragonhunter281 has not submitted any questions.
Dragonhunter281's Answers

Conquer virtual enemies with this Dell Inspiron desktop. It has an AMD Radeon graphics card with 8GB of dedicated video memory for fast image rendering, and its powerful AMD Ryzen 7 processor and 16GB of DDR4 RAM run multiple programs, games and browsers simultaneously. This Dell Inspiron desktop has a 1TB hard drive for plenty of long-term game storage.
This Desktop Says, It doesnt have a mouse included, Can you please recommend me a mouse for this? Also How many watts for the psu? And is it a 80+ Psu atleast?
The desktop does come with a basic USB mouse and keyboard. The power supply is total 460 watts and there is no 80 plus certification logo on the power supply itself. As for a mouse, I currently use the Razer Taipan 8200 DPI mouse and its pretty comfortable.

6 years, 8 months ago
by
Dragonhunter281
Conquer virtual enemies with this Dell Inspiron desktop. It has an AMD Radeon graphics card with 8GB of dedicated video memory for fast image rendering, and its powerful AMD Ryzen 7 processor and 16GB of DDR4 RAM run multiple programs, games and browsers simultaneously. This Dell Inspiron desktop has a 1TB hard drive for plenty of long-term game storage.
What is the power supply for this pc
The power supply of this particular unit is total 460 watts.
6 years, 8 months ago
by
Dragonhunter281
Nothing puts a vacuum to the test quite like a home with pets. That's why the BISSELL® Pet Hair Eraser® was developed from the ground up by pet parents for pet parents. Whether it's shedding season for your dog or your cat tracks kitty litter all over the house, this revolutionary vacuum is designed to make cleaning up after pets and the people who love them a breeze—from beginning to end. Say goodbye to hair wrap with its Tangle-Free Brush Roll, remove embedded hair everywhere with specialized pet tools, help capture allergens and eliminate odors with the SmartSeal™ Allergen System, and when you're finished cleaning, enjoy a hands-free tank empty with our patented Cyclonic Spooling System™.BR>
Does this unit have an off/on switch for the roller bar? Bissell's website says yes, but Best Buy & Lowes websites say no.
Yes, the vacuum cleaner does have an on/off switch for the roller bar. It also shuts off when it is shifted back to upright position.
Hope this helps !
Hope this helps !
7 years, 7 months ago
by
Dragonhunter281