Samrio's stats
- Review count229
- Helpfulness votes1,009
- First reviewMarch 20, 2015
- Last reviewDecember 5, 2023
- Featured reviews0
- Average rating4.7
Reviews comments
- Review comment count0
- Helpfulness votes0
- First review commentNone
- Last review commentNone
- Featured review comments0
Questions
- Question count0
- Helpfulness votes0
- First questionNone
- Last questionNone
- Featured questions0
- Answer count14
- Helpfulness votes105
- First answerMarch 20, 2015
- Last answerMay 21, 2021
- Featured answers0
- Best answers3
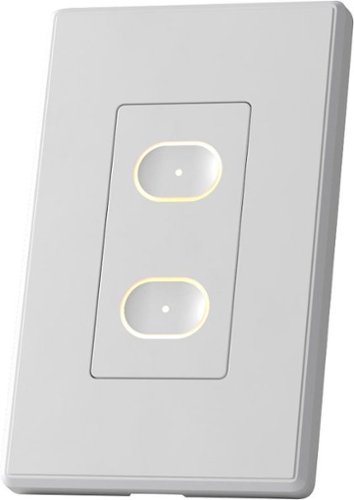
Where the simplicity of a standard wall switch meets the brilliance of advanced smart tech. This LIFX Smart Switch is installed in-wall and features 2 buttons, 1 physical relay, haptic touch, and backlit design. With convenience at its core, you can use this Smart Switch to control both your smart lights and average lightbulbs at the source. That means you can upgrade to a smarter home at your own pace, in your own way.
Customer Rating

4
Great Switch, especially if you use LIFX bulbs!
on October 31, 2021
Posted by: Samrio
from Austin, TX
LIFX is known for their smart lights with many bulbs having customizable colors. What you often run into, is the need to use the LIFX app to control the smart light, while most smart switches will simply power on your ceiling fan or standard lighting. LIFX looks to bridge this gap, by offering a switch that will not only perform the basic power on/off functions of other switches, but also offer independent control of your LIFX bulbs on other fixtures.
In the box you’ll find the switch, with an attached wall plate, screws for securing to your wall socket, and four twist on wire connectors. Installation will require a Philips screwdriver to secure the switch to your wall. You’ll need to remember to turn off the power to your light switch, to ensure you eliminate the risk of electrocution during installation. I made note of the current wiring, as you’ll need to identify the hot, lead, neutral, and ground wire. If you’re in a newer home, you’ll either have a red wire for the switch, black for the lead, green for ground (or exposed copper wire), and white for neutral. If you’re already comfortable with installing light switches, installation will only take a few minutes. After which you can power the switch back on, and begin set up in the LIFX app.
There is an indicator light in the upper left which will provide you with a status during boot and setup. In my case, the switch wouldn’t properly start up and broadcast its initial Wi-Fi signal but was able to get around this by resetting the switch by pressing and holding both buttons until the status lights flashed green. I should note the status light will only flash or show the light for about a minute, and then will display the status light about every half hour until the connectivity issue or setup is complete. This is where the app setup was a bit finicky, as the device walk through would never display my Wi-Fi network (or any network), necessitating that I hit “Other” and manually enter my network information. Once I realized it wasn’t scanning for Wi-Fi, entering the information took only a minute and it connected right away. IF you must manually enter the network name and password, you’ll need to know the security standard (WPA2, etc.) to properly connect. In my case, I didn’t run into any further issues once the device was properly set up in the app, and the device was up to date when installed.
Once the app has set up the switch, you’ll go through the process of confirming the groups and location of the device. The app will ask you about setting up the two buttons to control your normal switch function and add a smart bulb to the first button. In my case, I had an existing LIFX smart bulb installed another light fixture and was able to select this from the device list. Once you’ve programmed the two buttons, the device is essentially ready to go! If you’ve already setup LIFX with HomeKit and Alexa, the switch is immediately available using either Smart Assistant (Siri and Alexa), or you can set up your Google Assistant if you’re using their platform. The switch itself displays a nice warm amber glow on either button when they’re turned on, and a slightly dim amber light when powered off; making the switch easy to find in the dark. I found the LIFX button (topmost button) for the bulb was instantaneously powering on/off my LIFX bulb without delay. The bottom button was used to power my ceiling fan, and unlike other buttons there is no click noise or any mechanical movement. It’s simply a touch panel, and when engaged will light up the button being tapped.
There is no dimming feature to this switch, as it’s simply turning on/off the connected bulb or fixture. If you’re using a LIFX switch for the top button, it will simply turn on the device on the most recent setting (for instance will turn on purple if it was set to purple when powered off). I have yet to experience any power loss issues and haven’t run into any connectivity problems with the switch. The switch also doesn’t benefit from “Power Restore” setting in the app, which would return the switch to its previous power state in the event of power loss. I can only assume if the power goes out, the switch will just turn back on. It will not, however, disable the feature on your existing LIFX bulbs if you’ve already toggled the setting on. The LIFX app does offer scheduling options for your switch and bulb; so, it’s easy to select times for power on/off events in the app (including sunrise/sunsets). If you’re already using Alexa or Siri to control your lights, you’ll find that you can add them to routines without any issues.
Overall, the LIFX switch offered more functionality than my previous smart switch, was easy to install, and had the benefit of controlling my LIFX bulb group in the process. The single gang size makes this ideal for multi-switch wall plates, alongside other switches, and worked well with my Mesh Wi-Fi network. Any issues seen during installation were easily rectified using the touch buttons to reset the device, and the switch has been very responsive in the LIFX app, with my Alexa voice control, and the warm glow makes it easy to see when walking into a dark room.
Mobile Submission: False
I would recommend this to a friend!


Share this review:
+2points
2of 2voted this as helpful.
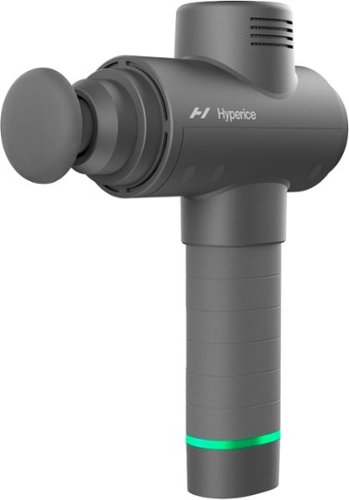
The original Hypervolt with some serious upgrades. The Hypervolt 2 helps you move the way you want to, when you want to with an updated design so you’re ready to tackle whatever comes next.
Customer Rating

5
Easily the best Massage Device I've ever used!
on October 30, 2021
Posted by: Samrio
from Austin, TX
There are a variety of devices you can buy to help with muscle aches and for considerably less. However, the Hyperice Hypervolt 2 Massage Device goes further than any other device I’ve ever used. Even having a free companion app, which can be used to fully take advantage of every attachment with the use of your smartphone.
In the box you’ll find the Massage Device, five different attachments, a charger with attachments with different power plugs for international travel, and a case for the accessory attachments. The device has only one button for function, which can be pressed to set the speed, the device lights will indicate level of pressure applied, and the light on the handle will change color as the battery begins to drain. When power on, and paired to your smartphone with the app, you’ll unlock a variety of routines to help with recovery and even for relaxation.
While the smart app isn’t required, you’ll find the automated routines, with video guidance, easy to follow and provide you with a great understanding of how to use each attachment. The device will automatically start and end each routine, even able to react to the amount of pressure you apply to set the speed. Each routine will advise you of which attachment to use, how to move along your muscle for best results, and even recommends various routines based on your activity when paired to Apple Health, Strava, or a Garmin device. The App immediately detected when my Hypervolt was powered on, even offering to jump back into my most used routines.
Over the course of a month, I found myself using this more and more at the end of long workdays and to provide nighttime relief. All of this clearly had a benefit, as I found fewer and fewer instances of pain my lower back, shoulders, and even my feet! You don’t realize just how much stress you feel standing and walking around all day, until you get used to the satisfying massage provided by the device. Over time, I began understanding each of the attachments use, and would use the device throughout the day during breaks and my lunch period. Each attachment is easily removed and being installed with some slight pressure to lock it in place. You’ll notice a pop, as the attachments are held in place with tension and suction, with a cork removal like sound when you remove them. If you’re having trouble pushing them into place, you can use a flat surface and push the attachment into place with minimal pressure applied. Most attachments don’t require a specific orientation, with the fork attachment having a guiding notch for proper placement. I also appreciate the softer attachment for more sensitive areas, such as around your neck, which provide a softer feel without the uncontrollable vibration of the harder attachments. This was also the first massage device that provided the best relief around my knee, which has been a constant pain area since I injured it several years ago.
Overall, the device does more than any other Massage Device I’ve ever used and easily out shined any lower cost alternative I’ve ever used. While most of the marketing is geared toward active individuals, and athletes, you’ll find this works effectively even for those working from home or in an office where you stand or sit all day. The stress relief I’ve felt from just a month of use has made me more conscious of areas of stress on my body and having the Hypervolt has been a real game-changer for my nightly routines and lead to a better quality of life for me personally. Given the variety of functions you get from just this one device, and the companion app, I’d highly recommend the Hyperice Hypervolt!
Mobile Submission: False
I would recommend this to a friend!


Share this review:
+1point
1of 1voted this as helpful.
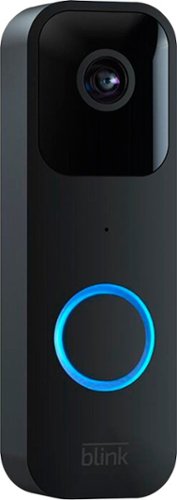
Smart security that is designed for every home. Set up in minutes, and receive notifications from the app whenever a visitor presses your Video Doorbell or motion is detected. You can also choose to wire it to sound your existing home chime. Blink Video Doorbell lets you answer your door no matter where you are. Receive customizable alerts right from the Blink Home Monitor app, and experience helpful features like HD day and night video and two-way audio. Best part – Blink’s long-battery life technology provides peace of mind for up to two years.
Customer Rating
4
A great doorbell, with a Sync Module.
on October 24, 2021
Posted by: Samrio
from Austin, TX
With more and more homes beginning to take advantage of smart home technologies, video doorbells tend to be one of the most impactful options to add first. It allows you to make an informed decision to open your door to visitors, communicate or avoid solicitors, and even provide instructions for deliveries. You can also use a variety of features to monitor motion and protect packages sitting at your doorstep, acting as a deterrence against theft.
In the box you’ll find the video doorbell, a mount plate, two AA lithium batteries, a removal tool that looks like a SIM card style key on a paper mount template, power posts for wired installations, and some mount hardware screws. Setup requires the use of the free Blink App, a wireless router, and an active internet connection on the device being used for setup. The installation instructions also advise you to have a power drill, screwdriver, and some tape handy for use when mounting to your desired location. If you’re using an iPhone or Android device, you can use the camera to scan a small barcode on the back of the doorbell, or simply type in the serial number to add the device in the app. I did encounter a couple of odd hang ups when initially adding the doorbell but was easily resolved with a simple reset of the device and the app. Assuming you don’t encounter a similar app lock up, the setup will finish in just minutes. If you have an existing wired doorbell, you’ll use the included posts to attach the wire and install the device.
While this isn’t the only Amazon owned doorbell brand, the Blink Doorbell offers the flexibility of using their subscription-based cloud recording service or using a Sync Module to store them locally to a USB drive (both sold separately). The Doorbell included a 30-day trial to give the cloud recording a test run. While the Sync Module isn’t required for installation, there are some limitations, which you’ll likely find annoying without having one. In my quest to see the differences, I set up the doorbell without the Sync Module 2 first.
Without the Sync Module, you’ll be required to use the cloud service to store recordings, there won’t be any live viewing available on your Amazon Echo Show devices and are limited to a 60 second response to answer the doorbell via the app. If you don’t answer within the set time, your doorbell goes back into a sleep state waiting for the next doorbell press. These limitations exist to prolong the battery life over time by disabling the Wi-Fi connection until it’s actively engaged. You’ll also have to push the doorbell button to save any setting changes done in the app every time you hit save (with a 24-hour window to do so). Due to these limitations, I would highly recommend the Sync Module for anyone wanting to take advantage of motion detection, live viewing, or alert scheduling.
If you have an existing Sync Module 2, you’ll need to make sure it’s setup prior to adding the doorbell to your account. With the module setup, you’ll be able to enable a live viewing session in the Blink App or your Amazon Echo Show devices on demand. It’s important to note that the Blink Doorbell will only allow for one live viewing session at a time, so you’ll need to decide on answering via the app or your Echo Show at any given moment. Otherwise, you’ll get a connection or busy error when trying to view a live feed simultaneously on one of the devices. The Sync Module 2 has a USB slot for use with USB drives, up to 256 GB, to store recordings locally or save backups of your daily cloud-based recordings with the subscription service. You can decide to either store every live session or toggle a button in the app to save recordings at your discretion when viewing in the app. The USB drive makes it easy to remove the drive and plug into a PC/Mac and view or download the recordings at any time.
You also get the option of scheduling arming and disarming throughout the course of the week. This essentially allows you to turn on motion detection within the time windows you set and disarm alerts to during later times in the evening or overnight. I love the schedule feature, as I arm the doorbell during peak times during the day when deliveries are more likely to happen and keep the alerts quiet during the nights and weekends when visitors are less likely. You will need to enable and link your accounts in the Alexa App if you want Alexa Echo/Show to call out doorbell presses or motion alerts. If you install the doorbell without the Sync Module, Alexa will still announce, but won’t be able to answer. So, for the best experience, I’d highly recommend picking up the Sync Module 2 along with the doorbell.
The variety of features and their settings can be enabled or disabled in the app. The blink app will give you general health of the battery life, your Wi-Fi connection, and connection strength to your Sync Module. You can turn on detection zones using a simple to use grid, enable motion activated LED to illuminate the button when someone approaches, set the clip length, and even set the night vision IR intensity. Video quality was better than my last video doorbell, capturing recordings at 1080P, and you can even set the speaker volume to ensure the entire neighborhood isn’t hearing the doorbell ring. If you forgot how to install the device, it even includes the same doorbell installation instructions in the settings within the app. I rarely encountered false motion alerts, with every motion even captured and easily viewed in the app.
I found that live viewing was quick on my Echo Shows, and in the App, compared to another popular doorbell I replaced. The flexibility of the local recording was a feature I plan to take full advantage of, and the size of the doorbell was about 2/3 the size of the previous video doorbell I was using. This can use off the shelf AA lithium batteries, versus needing to purchase more expensive proprietary ones, and the longer battery life means fewer need to take the doorbell off the mount to replace them. The price point feels right, but you will need to invest in a decent storage size USB drive and a Sync Module 2 in order to take advantage of all the features available and on-demand live viewing without significantly impacting battery life. Removing the device from the mount does require the small key tool but can be removed with a smaller flat head screwdriver if you’re having issues gripping the small tool it comes with. Overall, after a week of use, I’m happy with the performance of the device, even if you do need to invest in an another accessory.
Mobile Submission: False
I would recommend this to a friend!


Share this review:
+49points
69of 89voted this as helpful.

Coffeehouse Versatility meets Pod Convenience with the Ninja DualBrew Pro Specialty Coffee System. Included 12-cup, double-walled thermal carafe is perfect for both hot and over-ice beverages, with an ergonomic handle and spout allow for easy control of pouring. Tackle grounds and pods with 9 grounds brew sizes from small cup to full carafe, and 4 pod brew sizes from 6 to 12 ounces. Brews a coffee pod faster than a leading Keurig coffee maker upon startup. With Thermal Flavor Extraction DUO technology, perfect flavor for grounds and pods is delivered with even saturation and precise temperature control for ultra-flavorful coffee. Separate from the coffee system is a dedicated hot water line. Using a separate line eliminates flavor contamination and delivers clean water. 2 temperature settings, hot and boil, allow you to make tea, hot cocoa, instant soups, and oatmeal. Brew a super-rich coffee concentrate that you can use to create delicious lattes, macchiatos, cappuccinos, and other coffeehouse-style drinks. Use the built-in, fold-away frother to transform hot or cold milk/milk-alternatives into silky-smooth froth in seconds. Top your Specialty brew with frothed milk for a coffeehouse-style drink. The frother is also removable for easy cleaning. Choose from one of four different brew styles; classic or rich for a traditional hot cup of coffee, over ice for an iced coffee that's never diluted, or specialty to make a cappuccino or latte. Clean function, dishwasher-safe parts, removable Ninja pod adaptor and frother allow you to easily deep clean your unit.
Customer Rating
5
Easily replaced two previous coffee makers!
on October 23, 2021
Posted by: Samrio
from Austin, TX
I love coffee and have owned a variety of coffee makers over the last four years. I currently have two different coffee makers, one for popular K Cups, plus another for full carafes, lattes, and espressos. So, when I had the chance to try out the new Ninja DualBrew Pro, I jumped at the chance to free up some space on my counter given its ability to perform all the functions of the other two makers.
In the box, you’ll find the Ninja DualBrew Pro, with a removable water reservoir, an attached scooper, the installed pod holder, a Carafe, a sample set of paper filters for brewing ground coffee, an attachment for use with the hot water dispenser for frothing, the owner’s manual, and warranty information. Set up required a simple hand wash of the reservoir, removal of the protective plastic and some tape that kept the accessories in place in the packaging. The first thing I noticed was how much smaller this maker was compared to my previous one. If you’re going to use the carafe right away, you’ll need to make sure to wash it, as well, to ensure you rid of the fresh packaging/plastic smell.
After a simple test brew, I opted to brew a 12 oz brew, using the pod attachment. I didn’t notice any chemical like taste and was surprised with how quickly it started brewing. Compared to my previous popular K Cup coffee maker, there was no substantial pre-heat cycle, and the brew cycle was easily monitored using the digital display. The use of the machine is simple, using both the touch and physical buttons located on the machine. If you’re going to use the hot water dispenser, you simply need to turn a knob, and pull the dispenser out. You can also easily install the froth attachment for those specialty brews. I’m also happy to report that the hot water system is independent of the coffee ground holder, making this preferrable for making tea or other hot drinks without the left-over coffee taste. The froth attachment can either be left on and tucked away with the dispenser or removed from cleaning and storage for use later.
The reservoir will hold 60 oz of water, is easily removed for filling or cleaning, and can even be re-positioned to the rear of the coffee maker if you have limited space. To reposition, you will need to remove a plastic clip on the rear, and then simply move the water reservoir to the desired position at the rear. TGiven the Ninja DualBrew Pro is already half the size of a much larger coffee maker, this makes it ideal for smaller counter spaces, without losing any capacity. If you’re making a full-size carafe, you can easily “unlock” and remove the pod adapter, revealing the space for the filter, and as easy to slide over cover that’s hidden away. You’ll notice the options change on the coffee maker to select the appropriate brew size, and you can easily reference the markings on the reservoir to ensure you have enough water.
Controlling the coffee maker is easy, using the turn dial you select the of the brew (from 4 oz to 12 oz pours), and then use the touch buttons to select the brew types. There are several options to choose from, and the display is easy to read to determine the current setting used. It even has a progress bar around the dial, so you know what the status of the brew at any point while it’s working. There is also a fold away cup holder, which also has some rubber grips to keep your coffee cup in place during brewing. The carafe uses a twist top and does a great job keeping coffee hot for your next pour, even if it’s a couple of hours later. When the cap is removed, you’ll find the wider opening makes it wasy to rinse out and clean after each use. I also noticed that the pod adapter makes three holes in the K-Cup, which made great tasting coffee, with a much faster brew cycle compared to my other maker.
The Ninja DualBrew Pro does exactly as it’s designed to do, providing better tasting coffee than my previous makers, and was half the size of both. The space saving design makes this a great option for those with limited counter space, and the hot water dispenser didn’t suffer from any residual coffee since it works independently of the brew area; easily tucking away when not in use. The only thing to consider is whether you want to buy a permanent filter for re-use/cleaning or continue to use paper filters. While I wished this came with a permanent filter, the cost to purchase one was minimal and I easily ordered it directly from Ninja, since my local Best Buy store didn’t carry it. Overall, this is an excellent coffee maker, and if you’re looking to replace your K-Cup maker with a hybrid option, you won’t go wrong with the Ninja DualBrew Pro.
Mobile Submission: False
I would recommend this to a friend!


Share this review:
+25points
26of 27voted this as helpful.
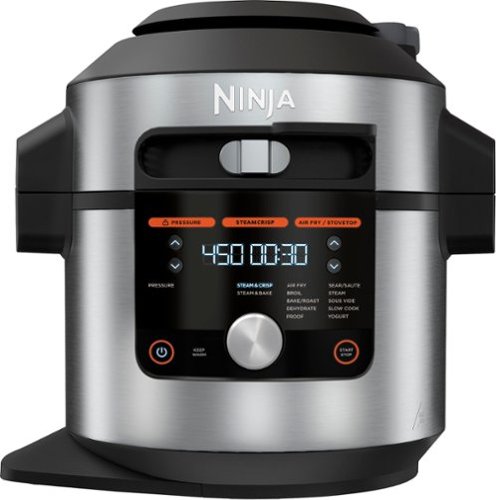
Meet the Ninja Foodi 14-in-1 8qt. XL Pressure Cooker Steam Fryer with SmartLid. The pressure cooker that steams and crisps. SmartLid slider unlocks pressure cooking, air frying, and Steamcrisping - all under one SmartLid. SteamCrisp Technology steams and crisps at the same time for faster, juicier, crispier results*. 14 one-touch programs unlock even more versatility. (*Vs. Ninja Foodi OL601 in dry mode only)
Customer Rating
5
Buy it and Enjoy the Easy Cooking!
on October 22, 2021
Posted by: Samrio
from Austin, TX
Ninja continues to release small appliances, with big features, making it easy to make free up space on your counter, while still having the versatility of multiple cooking methods. What sets this one apart from other similar small appliances, is the 14 different cooking methods you can use to make a large variety of meals.
In the box you’ll find the Foodi, with a pot, a steam/crisp basket, a reversible rack, a recipe book, and owner’s manual. The unit features a “SmartLid” slider, which allows you to activate the various cooking functions with the turn of the knob. The Pressure Cook function is the only option when slid to the left most point, and seals the lid to ensure the pressure builds up. There is also a steam release knob on the lid, which releases the pressure when you’re ready to open the lid. What amazed me about this Foodi, was just how quickly it pre-heated, and how fast it cooked items to near perfection.
The included recipe book provides you with some hearty meal options, and also serves as a guide for making various meals using recipes you likely use every day. The book provides you with basic measures for water and even provides you with instructions to determine how long you should allow the food to sit under pressure before you open the lid. After two sessions with the unit, I found myself exploring more and more meal options; including but not limited to Rice, Pinto Beans (some of the best I’ve ever made), Chicken, Burger Patties, and even steamed vegetables. You’ll also notice there are basically two cooking elements, one on top, and the other on the bottom, helping to evenly distribute heat to the pot. Making chicken, using the racks, produced better results than a grill, giving it a nice crisp and juicy finish. Air Frying was also faster at pre-heating, and made fries, tater tots, and even a baked potato with ease!
Over the course of a week and half, I solely utilized Foodi to make Steaks using the Sous Vide function, eliminating the need to use a separate appliance for every part of the meal. The included Pot was the easiest pot I’ve ever cleaned. Nothing, and I mean nothing, was sticking to it. A simple hand wash was enough to release any leftover crumbs of food within a couple of minutes. The Crisp basket was also coated with a non-stick surface and just as easily cleaned. It’s all even dishwasher safe!
Overall, I’m impressed with the various functions, as this eliminated the need for 4 other small appliances; thus, saving up counter space for more prep. If you’re in the market for an all-in-one cooker, or even just looking to replace a pressure cooker, this is a very worthy contender and deserves a buy. It delivers on the premium look and feel, the digital display is easy to read, has audible tones to alert you, and the countdown timer not only counts down, but also keeps the timer going up for those recipes that require you to wait before you open the lid. It’s easy to clean, and made me love cooking at home even more. I haven’t ordered take out since I unboxed this Ninja Foodi, and I couldn’t post enough pictures to show all the great meals I’ve made so far!
Mobile Submission: False
I would recommend this to a friend!


Share this review:
+6points
6of 6voted this as helpful.
Enjoy live TV broadcasts from your favorite local networks without the cable bill! The Core Innovations ANT100TCR Outdoor/Attic Amplified TV Antenna allows you to access HDTV channels up to 100 miles away, free of charge. The 360-degree motorized rotation delivers better range and reception in imperfect locations, and the wireless remote control gives you the flexibility to make adjustments from the comfort of your living room. Enjoy content in up to 4K full HD where supported, and mount the antenna to the included mounting pole to further boost signal strength.
Customer Rating

3
A good antenna for outdoor installations.
on October 19, 2021
Posted by: Samrio
from Austin, TX
If you’re trying to cord cut, you’ll often find that you tend to lose local programming with most streaming only TV options. With the shift from Analog to Digital Television, many are finding the ole’ rabbit ears aren’t as ideal as they used to be. You either get the picture or you don’t, and if you’re using an older analog TV, you’re likely now using an external digital set top box to get your favorite local channels. While there are many antennas available at most retailers, there seem to be fewer options for outdoor use, which often require some adjustments to get the signal right. Core Innovations is out to make this a bit easier, with a rotating outdoor antenna, which can also go up into your attic.
In the box, you’ll find the antenna with an attached cable and motor, a “J” metal rod, a base for mounting to most surfaces, various hardware for mounting, the controller box with two outputs, a wireless remote control, and a 25 ft Coaxial Cable to connect to the powered control box, and a power adapter. Once you’ve mounted the antenna in your desired location, you can use the “Rotation” button on the box to adjust the position for the best possible reception from your local broadcaster. The up and down angle is done manually, using a wing nut to adjust the degree of tilt, and will likely not need to be adjusted later during use. Mounting is straightforward, by simply using the twist knobs on the antenna to connect to the J post, and then using two screws with nuts to position the antenna once you’ve mounted the base. I went ahead an installed this in my attic, as it was designed for that purpose, and I didn’t want to have an antenna attached to the exterior of the home. The included cable also has a rubber seal, which can be slid over the cable connection to protect it from the weather, ensuring the cable won’t degrade quickly when exposed to the elements.
It’s important to note that you’ll need additional cable, if you’re connecting to two televisions, or your antenna mounting location is higher than a standard 1 story home or further than the 25 feet of cable can reach. In my case, it required the purchase of a 50’ cable to reach the desired location for the controller/amplifier. I use a digital HDHomeRun antenna tuner to provide Television to a variety of devices; therefore, it did not need to be plugged directly into a Television, as the signal is delivered through my home network. The rotation feature works instantaneously when the button is pressed on the box and will rotate in both directions to provide 360 degrees of coverage. I found the reception to be worse than an indoor antenna I was using previously, as I’d lose some channels depending on the adjustment. I just couldn’t find the perfect spot in my attic for all channels. I’m not sure if it has trouble getting signal in my attic, but when used inside my home, the signal wasn’t an issue, but the size of the antenna wasn’t ideal for indoor use. So, if you’re having issues getting a signal in your attic, you may have a much better result mounting this directly to the exterior of your home.
The remote allowed for adjustment without needing to be near the antenna, only having to point the IR remote to the controller box to use it. Although the buttons say "switch," they're simply the directional left/right rotation direction. Given the mount location in the attic, I found myself simply hitting the rotate button on the box rather than using the remote to make any adjustments, as the controller was upstairs to minimize a longer cable run. Ultimately, I ended up switching back to my previous antenna, which was was able to achieve a better signal without any adjustments for my area. The controller box also has three indicator lights, with red being power, green indicating the antenna is rotating, and yellow if there is a power supply issue or a problem with the cable.
So, who is this antenna for? This would likely work best for those in more rural areas, where reception may not be ideal, requiring adjustment of your current antenna often, or those wanting an outdoor antenna solution. The ease of installation and use would make this ideal for outdoor installation and may need a longer cable if you’re in a larger home, or your TV isn’t located near the exterior wall. Once you’ve found the proper adjustment, you’ll find that HD signals (and even analog) are easily attained, and the wireless remote can make it much easier to adjust the antenna and get most channels in your area. I should note, that you'll likely need to scan for channels after any adjustment, in order to find the station you're looking for. The box also comes with two outputs, to allow for connection to two tuners, as needed. One of the cables is attached to the controller box, making this ready to go upon installation if the mount location and cable is long enough to reach your tuner/TV. Ultimately, I would recommend this antenna, but only if your current indoor antenna needs to be replaced or your want a more permanent outdoor solution
Mobile Submission: False
I would recommend this to a friend!


Share this review:
+1point
2of 3voted this as helpful.
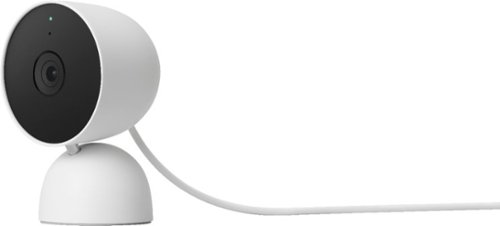
The indoor Nest Cam knows the difference between a person, pet, and vehicle, and alerts you about the things that matter to you, instead of the things that don't. 24/7 live view shows you what’s happening from anywhere.* With 3 hours of free event video history, you can go back and see what you missed. And it comes in different colors to fit your style. The indoor Nest Camera requires the Google Home app and a Google Account – it’s not compatible with the Nest app or the home.nest.com site.
Customer Rating
5
Easy Setup and Great Features!
on October 16, 2021
Posted by: Samrio
from Austin, TX
Nest (now owned by Google) has been releasing cameras since their acquisition of Dropcam circa 2014. Since then, they’ve launched a Home App, Smart Assistants in the forms of speakers with integrated monitors, and further developed their cameras to include more security features, with the ability to monitor them at the tap of an app or by asking your Google Home Hub.
The unboxing experience feels more premium, compared to nest cams in the past, and nicely packaged for easy removal. In the box you’ll find the camera, a power adapter, mounting hardware (screws and anchors), an attached long USB cable with plastic cable clips (no ties here), and a user manual. It’s important to note there is a QR code located on the sticker which protects the lens and is required for setup (don’t lose it). Plugging the camera in, and you’ll hear an audible tone and a slow pulsing blue light indicating it’s ready for setup. You can’t use the older Nest App for installation and will need to use the Google Home app with your Google login to start the setup.
I was pleasantly surprised to find the setup effortless, only requiring the use of the QR code on the camera to identify and connect to the camera, followed by confirmation of connection to your WiFi network, and a quick update to the camera. Once you’ve added the camera to the Home App, you’ll be asked if it’s going to be wall mounted, in which case you’ll simply twist the attached mount plate with a simple push and twist. The mount plate has two screw holes, and once mounted, the camera can be reinstalled to the plate with minimal effort.
Total installation time was less than 10 minutes, and the camera was ready to view immediately. You will be asked if you want to sign up for a 30-day trial of their recording service, “Nest Aware,” otherwise you’ll be able to view the most recent 3 hours of recordings. If you already signed up for their service, you’ll simply add this to your account, and it should be ready after setup. With Nest Aware, you also get advanced familiar face detection, 10 days of 24/7 recording, and 60 days of event recordings in smaller clips.
The camera itself is a nice soft white in color, with a metal hinge that allows for 180 degrees turn, and a slight tilt for positioning. This allowed for various positioning when installing the camera, and the base did a great job of holding the camera in the desired position with no identifiable shifting after installation. The camera light stays on and can be dimmed slightly if you’re placing this along a window to avoid a bright reflection. It blinks green when someone is watching, making this camera ideal for those worried about privacy while it’s on and a way to identify someone viewing. You have the option of using your smartphone’s location to automate home/away modes, in a same way it works with Nest thermostats, enabling recording only when you’re not home, plus you can also turn off the microphone to stop any audio recordings. You can also program activity zones, which will help mitigate false events; such as, near a busy roadway or walk space.
The speaker was loud enough to speak to any pets or people viewed in range of the camera, with no noticeable delay during real-time use. The video quality was probably the biggest upgrade from my previous generation Nest cams, with a wide-angle view to capture more the cameras surroundings. Pointing the camera out my front home office window, and I could easily see my entire front yard, and the approach up my driveway. The night vision is on by default to automatically turn on during lower light environments but can be toggled off to remove any glare if you’re placing this looking out a window. Compared to some other cameras, the color clarity in the dark isn’t as vivid, and with the night vision it does provide clear images.
It’s important to note that the Nest cam is only compatible with Google’s assistant hubs if you want to view the live feed outside of your smartphone app. Using a Google Nest Hub, you can simply ask to pull up your live feed or use the hub to view previous event recordings. If you already use Googles Nest doorbell or other cameras, you’ll use this in a similar way, by just asking for the camera by name. Overall, I’m really impressed with the ease of setup, and the wide-angle view shows even more detail around the camera.
Mobile Submission: False
I would recommend this to a friend!


Share this review:
-1point
0of 1voted this as helpful.
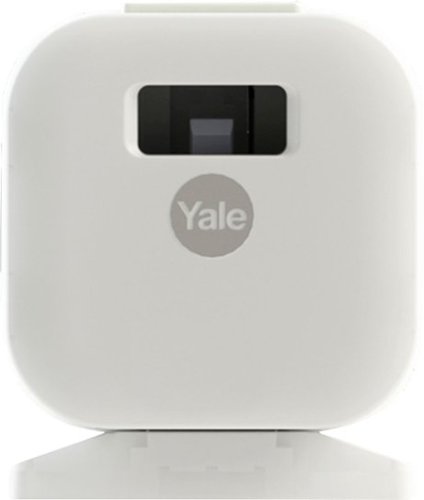
The Yale Smart Cabinet Lock mounts inside most cabinets and drawers to safely store medicine, cleaning supplies, liquor or important documents. With the Yale Access app, lock/unlock, share access and see access history, anytime, anywhere. *Access anywhere requires the Yale Connect Wi-Fi Bridge bundle
Customer Rating
3
A good option for a standard cabinet!
on October 15, 2021
Posted by: Samrio
from Austin, TX
There are plenty of products that offer a variety of lock options, but often require the purchase of a new lockbox, having to remember a combination, or know where you put the key. There are also many who have important medications, which can be within reach of small children, and you’d like some peace of mind with keeping them secured when you’re not watching.
Yale has released the Smart Cabinet Lock which provides you with a solution to lock up a cabinet using your iPhone or Android device with the Yale Access App installed. In the box you’ll find the smart lock, a CR2 battery, 3M mount tape, additional hardware for mounting and installation, a couple of short and one longer lock arm, and should include mount template for a standard install (note: mine was not included for some reason). Installation can be easy, if you use the template, have a standard flush cabinet door, and a shelf for the device to adhere to. The instructions also warn you that installing and causing damage to the device may void your warranty; so, be patient while installing.
The smart lock is about the size of a small USB phone charger, making this a good option for most installations in a standard medicine cabinet found in many homes. I wouldn’t recommend using this on a shelf that shifts position easily, or pulls out, as this could lead to misalignment of the lock arm, and/or failure to properly secure the door. Using in a drawer might be a bit tricky, as you’ll need to find the best way to mount the device. The lock arms have small magnets, which are used to detect its position into the device, and trigger the lock. You can have the device auto lock, or require you engaging the lock in the app or with the use of a keypad accessory (sold separately) if you don’t want this feature enabled.
I initially planned on installing this in a medicine cabinet, but with the mount template not being included with my device, I opted to install this in a different cabinet. If you’re installing this with the need to use the longer arm you may find the installation process takes a bit longer, and may frustrate some users in the process. Without a mount template, you’ll need to eyeball the device position and use the adhesion of the lock arm to find the right mount location. This took me about 10 minutes to get the location right, and I made sure not to fully adhere the device until I knew it was correctly placed. The installation manual gives you some measurements to try and keep the device within an optimal mount area. Once positioned, you can also use the included screws to further secure the device and lock arm in place.
The lock uses Bluetooth to perform the installation in the app and update the device. The App does require that you scan a QR code which is located on the back of the device (along with the HomeKit QR code) in order to identify it during setup. I would highly recommend you launch the app and scan the code before you begin installation, and will display a YouTube video with some basic installation steps, making the final installation easier. If you forget to scan the QR code, you’ll need to remove the device from the mount plate or reach around the back of the device to scan it. If you don’t want to scan the QR code, or have issues with accessibility to remove it, the app will allow you to use the Serial Number which can be found on the bottom of the box. If you have an existing August Smart Lock, you’ll be happy to see the Yale Access app uses the same login, and functions in a familiar way.
The device will pair with a Yale Connect for remote access using your Wireless Network connection, and can also be used with a Yale Keypad to allow for use with unlocking/locking without your phone. Please keep in mind, if you already have an existing smart lock using a Connect, you can’t pair more than one lock to it. So, you’ll need to purchase another Connect in order to enable to remote monitoring and lock operation if you’re not nearby. I was able to easily engage the lock with the app from about 10-15 feet away, which would allow for easy access if the smart lock isn’t right next to you. If you've set this up with a Yale Connect, you'll be able to perform functions with Alexa or with Google Home assistant products. Setting the device up with HomeKit was relatively easy, just follow the steps in the app and it helps complete the setup.
So, what happens if the battery dies or someone gets locked inside a cabinet? Once the battery is low, the app will provide you a notification to change it out, and will simply unlock the device before it completely discharges. It also has a small button on the top of the device, which can be used to unlock the device, should you or a child be locked inside a cabinet accidentally. You’ll notice an LED light on the button on top when it’s unlocked and locked and can be pressed to immediately unlock the device. Whether or not you use the lock frequently, using low energy Bluetooth should keep the battery lasting for some time before needing to be changed. The risk of not changing the battery, is having your cabinet door, or drawer, unsecured until you can replace the battery. This also limits the risk of someone being locked inside a cabinet when the battery discharges. With some applied pressure, you can also pry the lock open, although you’ll likely break the lock arm in the process. There is an extra short arm, if you have the need to pry it open.
Overall, the device functions well, it updated relatively quickly, and works best in a standard cabinet configuration. Installation can be a bit tricky if you’re installing this in a drawer or need to mount this in a way that isn’t similar to a standard cabinet that can use the included mount template. You do risk voiding the warranty if you damage the lock arm or device due to a bad installation, so I’d advise you be patient during install. The Yale Access app is easy to use, and setting up the device was fairly painless if you scan the QR code before fully installing. Keep in mind, you’ll need an additional Yale Connect for remote access as this won’t work with an already paired Connect being used by another lock device (unless you reset it), but isn’t required if you’re not worried about remote access.
Mobile Submission: False
I would recommend this to a friend!


Share this review:
+1point
1of 1voted this as helpful.
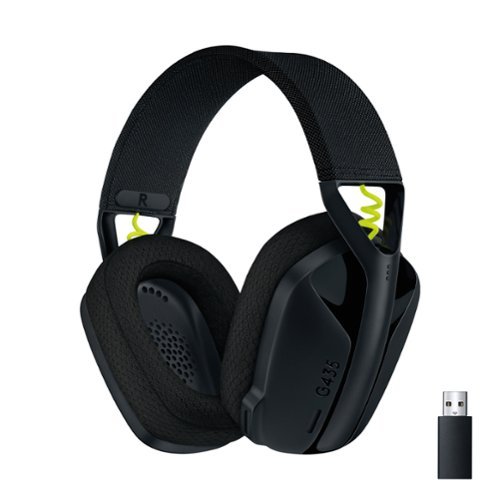
Play doesn’t end when the game does. You play games, play music, and play with friends. It’s who you are. All the time. That’s why we designed the G435 Headset for every aspect of your life. The combo of gaming-grade LIGHTSPEED wireless and Bluetooth give you the freedom to wirelessly connect to your PC, phone and other devices. Its 40 mm drivers deliver incredible sound while the dual beamforming mics eliminate the mic arm and background noise. Play never ends with G435.
Customer Rating
5
Surprisingly great sound for a smaller headset
on September 30, 2021
Posted by: Samrio
from Austin, TX
Logitech continues to evolve and release newer audio products for next gen consoles. So, happy to see they’ve released the Logitech G435 in time for the gift-wrapping season. In the box, you’ll find the headset, a USB Lightspeed adapter, a USB C cable, and a simple setup guide.
The headset has some basic functional buttons for power, volume, and a simple mute button on the bottom. Holding the mute button allows you to swap between using the USB Lightspeed adapter or with Bluetooth. Once paired, the device connects quickly when turned on. I was surprised with just how light the headset felt as I held it and was even more surprised with how comfortable it was during use. It’s designed a bit smaller than other headsets in the same price range, while offering similar audio performance. The lightweight allowed for longer gaming sessions and required almost no charging for almost 17 hours during my initial use. Using the USB C cable to charge the device took approx. 2 hours to reach full.
Pairing the headset with Bluetooth or Lightspeed on a PC running Windows 10 (at least in my case), and you have the option to use this with Dolby Atmos for Headphones. There was a couple of random instances when turning on the headset, where my PC was outputting simple mono audio, as if it were a phone call. This was immediately fixed by simply toggling the headset on and off. I’m not entirely sure why Windows would set it up this way, as there was no setting I could toggle to change the audio output, and it only happened a couple of times during the first day of use. If you’re using other Logitech accessories and have the Logitech G Hub app, you won’t see this show up on the main dashboard or in the “gear” section of the app (at least at the time of this review).
Seeing as this headset is smaller, I fully expected the audio to feel less satisfying, but was pleasantly surprised with the overall quality being output from the 40mm drivers. The headset sounded best with Dolby Atmos enabled on my PC, with fuller sound, deeper Bass response, and a surround sound effect that provides a crisp sound to anything you’re listening to. Music sessions during work hours were pleasant, and the long battery life meant I could easily turn off my PC and jump right into gaming. The headset paired quickly using the dongle, which is required for use on the console, once you hold the mute button to toggle over. I should note, this doesn’t allow for multiple Bluetooth connections, so if you’re needing to swap to another device, you’ll need to initiate pairing with the power/mute button until you’re connected.
The microphone implementation on the headset doesn’t require a connected boom mic arm, as it’s built directly into the earphone. I never once had anyone complain about my voice capture in gaming chats, or while using this with video calls. I was also surprised at how well it ignored background noise, as it didn’t constantly toggle voice output as my dogs were playing in the background. Not entirely sure if the software of the video calls or if the PS5 was helping but was happy to know it wasn’t an issue. I should note that sound will bleed out of the headset. So, I’d be mindful if you’re working or playing alongside someone, as they’ll be able to make out most any sound coming from the headset if volume is up enough.
Overall, I’d recommend this to any PS5 player looking for a comfortable headset for longer sessions without all the stress of a cord, a mic to move out of the way, and easy to find buttons. It’s lightweight without feeling cheap, has a long battery life, paired extremely well with Bluetooth 5 devices (with a longer range), and Dolby Atmos spatial audio really makes it stand out. The price seems to be in the sweet spot, and easily bests other headsets in the same price range.
Mobile Submission: False
I would recommend this to a friend!


Share this review:
0points
1of 2voted this as helpful.
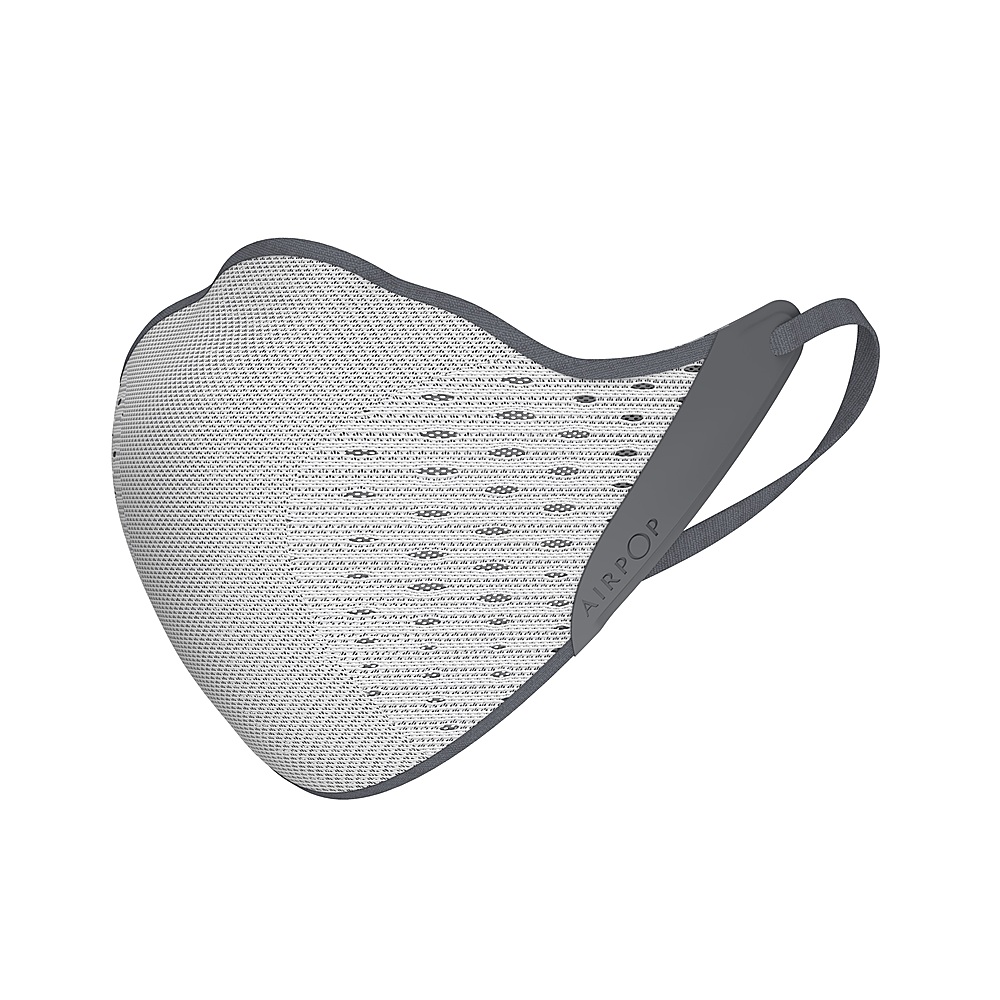
AirPop is the world’s first “air wearables” company. Since 2015, we’ve been leveraging anthropomorphic & material science with the latest technology to build ultra-high-performance products that provide an unrivaled breathing experience for millions of users around the world. Comprised of an award-winning team of experts in performance apparel, ergonomics, air filtration, material science, and advanced manufacturing. The foundation of our entire range of masks is class-leading filtration that works 2 ways. Every breath inward through AirPop masks is 97% filtered of particles and droplets and importantly today, every breath outward is filtered just the same. Your Air – Your choice. Designed to move with you. Engineered Airknit delivers advanced comfort, superior breathability and lightweight protection. The most advanced technical textile ever developed for a mask. Specific zones of high airflow are made possible through a combination of engineered knitting and compression forming. The result is our lightest weight, most breathable mask ever. Includes 4 replaceable filters.
Customer Rating
4
Great Protection. May annoy those wearing glasses.
on September 22, 2021
Posted by: Samrio
from Austin, TX
We’ve come a long way since having homemade cloth masks as one of our only options for filtered breathing in the US. While masks have become easier to buy from most retailers, it’s nice to see some options that offer comfort, reliability, and some longer lasting protection against airborne illness.
The AIRPOP Active serves to provide a more comfortable experience for the wearer, while offering even better protection from the air around you. In the box you’ll find the outer portion of the mask which houses the filter, four sealed filters which include a soft rubber like seal around your nose and mouth, a storage bag, and a manual. The outer mask has a mesh like look and feel, with a soft rubber portion nearest the elastic band. The band itself has two small adjustable bead like pieces that serve to adjust the fit around your ear. I should note, that it does come with some additional pieces, should one fall out during regular use.
The filters are each sealed, showing a manufacturer and use by date. Once opened, you’ll find they each have a nose/mouth gasket seal, which is attached to the filter, and can’t be removed. Each filter is designed to last up to 40 hours or so of use. So you can depend on the filter to last a standard work week, but will likely go through a couple a week if you’re more active in the general public. The outer shell has two notches where the filter is pushed into and held in place. Once installed, you can place the mask on your face for the best fit. The soft rubber like gasket does a great job of sealing your airflow within the filter, which has an almost flannel like feel. While you’ll notice some perforations along the mask lines, they also have micro mesh within them, appearing to block external droplets.
The downside to this mask is the overall fit to your face. The soft rubber gasket like seal also makes the external shell pop up away from your face a bit. This was a constant annoyance as I would put on my sunglasses and the top of the mask would obscure part of the lens. While they didn’t fog up from air being pushed up, I found myself constantly pushing the shell downward out of the way. The mask doesn’t have any type of shape support, like a small tin seen in the single use masks and takes time to really stay in place. I will say, you can breathe easily with the mask on, with the outer shell and filter molding out space in front of your mouth.
You’d also need to consider the cost of the replaceable filters based on how active you are and your use of the mask. Over time, the cost of ownership would surpass that of a traditional reusable mask, or even the bulk packs of disposable masks. You can’t use the outer shell alone for any type of protection, as it has much larger perforations throughout, allowing maximum airflow. It is intended to be used solely with the filter installed. The included storage bag does help with extending the life of the filter, and I’d strongly suggest storing it inside the bad during extended periods of non-use. If you’re going to be in an office, or other environment, most of your day that requiring the use of this mask, make sure to pick up some extra filters.
As the name suggests, this mask really does fit the style and fit of something you’d wear in an active lifestyle. It offers both style and function, performing the function effectively with a longer lasting filter. You’ll need to consider the on-going cost of ownership with replaceable filters required. Overall, this mask (with the filter) provides some much needed peace of mind, and just requires some time to shape into place. If you plan on wearing glasses with these, you'll be safe from fogging if worn correctly, but may have to adjust it often.
Mobile Submission: False
I would recommend this to a friend!


Share this review:
+1point
1of 1voted this as helpful.
Samrio's Review Comments
Samrio has not submitted comments on any reviews.
Samrio's Questions
Samrio has not submitted any questions.
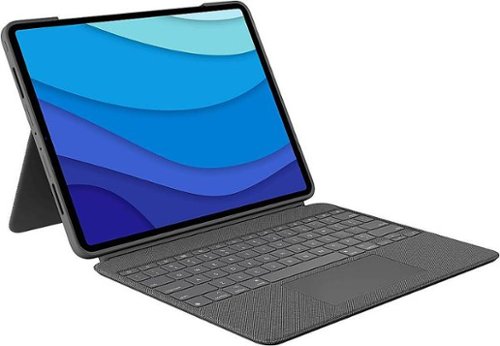
This is not a laptop. It’s so much more. Meet Combo Touch, the keyboard case with trackpad that enables new levels of versatility with iPad Pro. Navigate and work in apps like never before with a new click-anywhere trackpad — our largest ever* — that gives you more space and allows for Multi-Touch trackpad gestures. SMART CONNECTOR technology helps to deliver an incredibly responsive trackpad experience and also makes powering and pairing the keyboard instant. Type comfortably for hours with laptop-like backlit keys that automatically adjust to your environment. You can always see what you're typing thanks to 16 levels of brightness. Enjoy convenient access to volume controls and more with a full row of iPadOS shortcut keys. The iPad Pro meets its aesthetic match with a slim, sleek design — the thinnest keyboard case we've ever designed with a trackpad.* The elegant woven outer fabric feels as great as it looks and the case is molded to fit your iPad Pro, protecting the front, back, and corners from scrapes and bumps. Your iPad Pro is held securely in place so you can have peace of mind that it won’t slip out and focus on what matters most — getting things done. *Compared to Logitech keyboard cases with trackpad released in 2020.
Will this fit the gen 4 12.9 iPad Pro?
Having both the Gen 4 and Gen 5 iPad Pro 12.9, I can confirm this works on both.
2 years, 11 months ago
by
Samrio

Refreshed and ready to take its rightful spot atop a new generation of consoles, the Turtle Beach® Stealth™ 600 Gen 2 is the successor to the best-selling wireless gaming headset for PS5™, PS4™ & PS4™ Pro. The Stealth™ 600 Gen 2 wireless gaming headset is enhanced with a host of upgrades, including a larger high-sensitivity flip-to-mute mic that delivers improved chat clarity and now seamlessly integrates into the headset when muted. The headband and hinge design have been reinforced for added long-term durability, and soft, glasses-friendly ear cushions provide plush comfort while refined 50mm speakers produce high-quality, immersive sound and are optimized to unleash the power of Sony 3D Audio on PS5™. A user-friendly audio preset button on the headset allows for easy access to customize audio, and gamers can still count on Turtle Beach’s Superhuman Hearing® for an audio advantage on the battlefield. Finally, connectivity is made easy with the included, mini-USB Transmitter that wirelessly connects from your PlayStation® console to headset.
Is this Headset compatible with Apple Products?
I have been using this with my Mac Pro, using the included dongle.
3 years, 8 months ago
by
Samrio
Refreshed and ready to take its rightful spot atop a new generation of consoles, the Turtle Beach® Stealth™ 600 Gen 2 is the successor to the best-selling wireless gaming headset for PS5™, PS4™ & PS4™ Pro. The Stealth™ 600 Gen 2 wireless gaming headset is enhanced with a host of upgrades, including a larger high-sensitivity flip-to-mute mic that delivers improved chat clarity and now seamlessly integrates into the headset when muted. The headband and hinge design have been reinforced for added long-term durability, and soft, glasses-friendly ear cushions provide plush comfort while refined 50mm speakers produce high-quality, immersive sound and are optimized to unleash the power of Sony 3D Audio on PS5™. A user-friendly audio preset button on the headset allows for easy access to customize audio, and gamers can still count on Turtle Beach’s Superhuman Hearing® for an audio advantage on the battlefield. Finally, connectivity is made easy with the included, mini-USB Transmitter that wirelessly connects from your PlayStation® console to headset.
Can these be used with a PC?
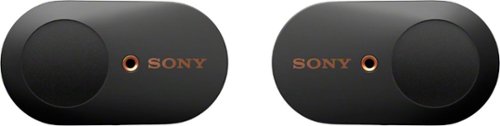
Get peace and quiet anywhere with these Sony truly wireless noise-cancelling earbuds. An advanced HD noise-cancelling processor blocks distracting background noise so you can focus in noisy environments, and Bluetooth connectivity ensures easy use with smartphones and other devices. These Sony truly wireless noise-cancelling earbuds include a convenient charging case that offers up to 24 hours of use per charge.
is this fully compatible with ios?
Yes, they support using Siri, and work flawlessly for me on iPhone X.
4 years, 9 months ago
by
Samrio
Get peace and quiet anywhere with these Sony truly wireless noise-cancelling earbuds. An advanced HD noise-cancelling processor blocks distracting background noise so you can focus in noisy environments, and Bluetooth connectivity ensures easy use with smartphones and other devices. These Sony truly wireless noise-cancelling earbuds include a convenient charging case that offers up to 24 hours of use per charge.
Can they work independently? Is there a microphone in each piece so you can just switch between the 2 to gain the most amount of battery time?
Yes, they can work independently. However, the battery time was approx 5 to 6 hours with non-stop noise cancelling use before I had to charge them. Even so, about 10 minutes in the case gave me another 1 to 2 hours of use without issue.
4 years, 9 months ago
by
Samrio
Get peace and quiet anywhere with these Sony truly wireless noise-cancelling earbuds. An advanced HD noise-cancelling processor blocks distracting background noise so you can focus in noisy environments, and Bluetooth connectivity ensures easy use with smartphones and other devices. These Sony truly wireless noise-cancelling earbuds include a convenient charging case that offers up to 24 hours of use per charge.
How comfortable are they? Do they feel like they're going to fall out with rigorous exercise (running) or do they have a secure fit a majority of the time?
Took these on a run outside, on a treadmill, on a bike ride, lifting at the gym, and never once fell out.
4 years, 9 months ago
by
Samrio
Get peace and quiet anywhere with these Sony truly wireless noise-cancelling earbuds. An advanced HD noise-cancelling processor blocks distracting background noise so you can focus in noisy environments, and Bluetooth connectivity ensures easy use with smartphones and other devices. These Sony truly wireless noise-cancelling earbuds include a convenient charging case that offers up to 24 hours of use per charge.
I can’t understand why it can’t be connected to Ps4. Any idea out here?
This is actually a limitation from Sony Computer Entertainment, in regards to the PlayStation 4. They only allow pairing of officially PlayStation licensed headphones designed for use on the console. Even though these were designed by Sony, they weren't designed for use with the console. There are various 3rd party dongles you can purchase to use unsupported bluetooth headphones, if this is what you're trying to do.
4 years, 9 months ago
by
Samrio
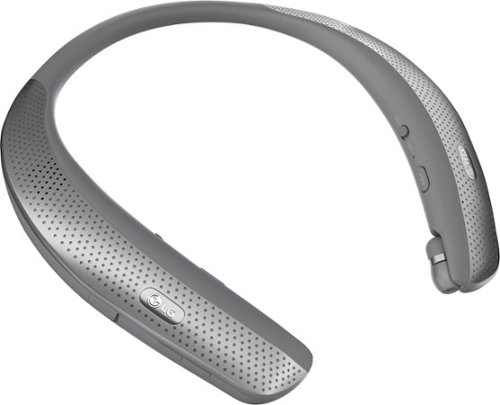
Immerse yourself in music or movies with this LG TONE Studio wearable speaker. It has four drivers to let you experience three-dimensional surround sound and feel low-frequency vibrations from the bass through your body. This LG TONE Studio wearable speaker is Bluetooth compatible for easy connection to your smart devices.
so this is a speaker that you wear around your neck? Does the sound work with and without the ear buds?
You can use either speaker mode, or ear bud mode. There is a toggle button on the device to select either sound option. If you're in ear bud mode, it shuts the speaker off. You just wear it the same way, no need to re-adjust the way it's sitting for speaker mode.
6 years, 10 months ago
by
Samrio
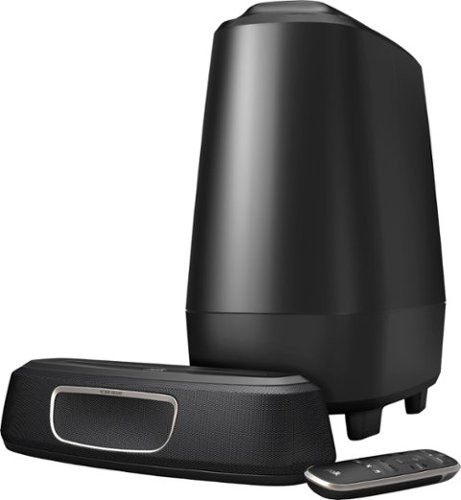
The Magnifi Mini home theater sound bar system delivers big room-filling audio and surround sound experience you’d expect from a full-size sound bar—all in an ultra-compact design that fits any space. Polk’s exclusive Voice Adjust technology dramatically increases vocal clarity and volume level for crystal clear dialogue no matter what you’re watching. Plus, our patented surround technology and Dolby Digital 5.1 decoding creates incredible room-filling surround sound all from a sound bar that is less than 15” long. Compatible with nearly all TVs, the universal sound bar works with your TV, cable box or satellite IR remote control and features simple setup in minutes with the included HDMI cable. The powerful wireless subwoofer delivers deep impactful bass to your favorite movies, TV, games, sports and music too. And if volume’s too loud during late night viewing, Night Mode lets you easily watch your favorite programs at night without waking the neighbors or other family members in your home. What’s more, bring the concert into your room with wireless music streaming via WiFi, Google Cast and Bluetooth. Whatever you do, just don’t let the MagniFi Mini’s small size fool you—this is that big Polk sound you love from a little bar.
I cannot connect directly to my TV because of location, can I connect this directly to the cable box?
You can, using the included optical cable. It's best to connect it to your TV if you have multiple sources (e.g. gaming consoles, DVD, Bluray players, etc.).
6 years, 11 months ago
by
Samrio
The Magnifi Mini home theater sound bar system delivers big room-filling audio and surround sound experience you’d expect from a full-size sound bar—all in an ultra-compact design that fits any space. Polk’s exclusive Voice Adjust technology dramatically increases vocal clarity and volume level for crystal clear dialogue no matter what you’re watching. Plus, our patented surround technology and Dolby Digital 5.1 decoding creates incredible room-filling surround sound all from a sound bar that is less than 15” long. Compatible with nearly all TVs, the universal sound bar works with your TV, cable box or satellite IR remote control and features simple setup in minutes with the included HDMI cable. The powerful wireless subwoofer delivers deep impactful bass to your favorite movies, TV, games, sports and music too. And if volume’s too loud during late night viewing, Night Mode lets you easily watch your favorite programs at night without waking the neighbors or other family members in your home. What’s more, bring the concert into your room with wireless music streaming via WiFi, Google Cast and Bluetooth. Whatever you do, just don’t let the MagniFi Mini’s small size fool you—this is that big Polk sound you love from a little bar.
Are there wireless rear speakers that can be added ?
No, it's not designed to have additional speakers.
6 years, 11 months ago
by
Samrio