callmeageeth's stats
- Review count375
- Helpfulness votes1,298
- First reviewJune 23, 2014
- Last reviewMarch 24, 2026
- Featured reviews0
- Average rating4.4
Reviews comments
- Review comment count0
- Helpfulness votes0
- First review commentNone
- Last review commentNone
- Featured review comments0
Questions
- Question count0
- Helpfulness votes0
- First questionNone
- Last questionNone
- Featured questions0
- Answer count27
- Helpfulness votes50
- First answerOctober 20, 2014
- Last answerDecember 15, 2021
- Featured answers0
- Best answers7

The DUEX Max DS is Mobile Pixels' most upgraded, portable dual-screen laptop accessory that makes multitasking effortless. It is ideal for 14" and larger laptops. The iconic portable, external monitors complement mobile work, entertainment on the go, and everything in between.
Customer Rating

5
Terrific productivity tool
on November 6, 2023
Posted by: callmeageeth
As one who is used to a wide screen monitor in the office and travels a lot for work, I dislike working on a laptop screen - it just feels cramped. I’ve tried traveling with free standing external monitors before, but they can be hit and miss depending on your workspace.
IN THE BOX
Inside the box you’ll first find some instructional pamphlets. There’s even a QR code to find instructions online, but I found that unnecessary. You’ll see the monitor, some magnets, extra adhesive pads for the magnets, and two cables. One cable is USB-A to USB-C/USB-A (USB 3.0) and the other is a HDMI to mini-HDMI (the monitor has a mini-HDMI port). Not only will it work with a computer via USB, but you can essentially plug any video source with HDMI into it.
Inside the box you’ll first find some instructional pamphlets. There’s even a QR code to find instructions online, but I found that unnecessary. You’ll see the monitor, some magnets, extra adhesive pads for the magnets, and two cables. One cable is USB-A to USB-C/USB-A (USB 3.0) and the other is a HDMI to mini-HDMI (the monitor has a mini-HDMI port). Not only will it work with a computer via USB, but you can essentially plug any video source with HDMI into it.
GETTING STARTED
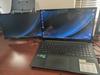
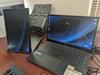
As a quick side note, this monitor is 14 inches. It will work with any laptop between 14-17 inches. How it works is that you attach magnets to the top lid of your laptop. The monitor then attaches to the top of the clamshell via magnets. You then slide the screen out.
As a quick side note, this monitor is 14 inches. It will work with any laptop between 14-17 inches. How it works is that you attach magnets to the top lid of your laptop. The monitor then attaches to the top of the clamshell via magnets. You then slide the screen out.
As I said, there’s some instructional pamphlets, with the most important being the template for where to place the magnets. If your monitor is 15 inches or less, you place the template (which has four holes the exact size of the magnets) in the middle of your laptop. If your screen is a little larger, you move the template a little closer to one side of the laptop. The one downside for using a larger screen laptop is that you are choosing up front, which side of the laptop you want the monitor to be on (left or right). For smaller laptops, the magnets are centered, so you can switch it to either side.
Before attaching the magnets, you’re told to clean the lid of your laptop with the included alcohol pad (to help with the adhesive backing of the magnets. After that, and after getting the template where it needs to be (there’s lots of easy to follow guidance in the pamphlets), you simply remove the adhesive backing from the magnets and place them where the holes are on the template. The monitor then attaches easily.
From there, I slide the monitor out and using the USB-C cable port in my computer (my computer also has HDMI but I didn’t use it), you plug it into both the monitor and the laptop and voila. The monitor powers on instantly. From there you can adjust your display settings so the external monitor extends your home screen.
DESIGN
The monitor is smartly designed. It’s very light, but when attached to your laptop, it will, as a full package, feel extremely heavy. It slides out on the tracks easily. The magnets on the monitor itself are oblong shaped, this allows the monitor to slide along the magnets attached to your laptop so that it reaches the edge of your laptop. You can even tilt the monitor towards you (similar to a curved screen I guess).
The monitor is smartly designed. It’s very light, but when attached to your laptop, it will, as a full package, feel extremely heavy. It slides out on the tracks easily. The magnets on the monitor itself are oblong shaped, this allows the monitor to slide along the magnets attached to your laptop so that it reaches the edge of your laptop. You can even tilt the monitor towards you (similar to a curved screen I guess).
The screen itself slides in and out of what can only be called a protective shell. When fully closed, however, there is about an inch worth of screen that is unprotected (meaning when fully closed, there’s a sliver of screen unprotected). I’m assuming this was designed out of necessity to allow the screen to tilt and flip.
Sometimes I found the screen to come off the hinge when trying to slide it shut. When laying flat, the monitor easily opens and closes, but when trying to close it while it’s vertical - i.e. attached to your open laptop screen - it sometimes doesn’t shut right. But all you have to do is pull it back out and gently close it with both hands to make sure it stays on the track.
As I said before, the magnets on the screen itself are oblong, so you can slide the monitor from right to left which allows you to have the display on either side of a 15 inch monitor or less. You can also use the monitor without it being attached to your laptop. For example, you can use the cover as a stand, and have the monitor positioned in portrait landscape. Extending that further, the screen fully rotates backwards, so you can have the display on the back of your laptop facing someone sitting behind the computer so they can see your screen. This is helpful for me as an attorney showing witnesses something on my computer screen - without doing the whole “turn my laptop” around and stand next to them awkwardly.
The screen is 1080p with 60hz. Nothing fancy, but more than adequate. It’s not meant for gaming, but for those that need/prefer an extra monitor when using a laptop.
I also have to add that it simply works. I’ve had zero issues with it not turning on. Once I plug it into my laptop, it powers up immediately without fail.
DRAWBACKS
I mention the word “drawbacks” loosely. For what it is, I think this monitor is about as good as you can get. But there are some things to consider depending on your use case.
I mention the word “drawbacks” loosely. For what it is, I think this monitor is about as good as you can get. But there are some things to consider depending on your use case.
It’s 1080p which can be disorienting when your laptop has a higher resolution. It’s also only 14 inches - when using a 14 inch laptop it’s probably not an issue, but mine is 15 inches and it looks small. Given its 1080p resolution and 14 inch size, the text and images can appear small. But, as recommended in the aforementioned information pamphlets included, you can simply change the scale of the monitor to 125% (or more) to make things easier to see.
It undoubtedly draws on your battery. I suspect that you, like me, would mostly use this monitor when you’re sitting down for an extended period of time - therefore using AC power - just know that it will substantially decrease your battery life.
The shell, if you will, of the monitor seems flimsy. Again, I think this was a conscious and necessary design choice, but I get concerned simply sliding this into a bag with other heavy items inside; I fear it will get crushed. I guess the only way to put it is that it feels delicate. Nothing, some precautions wouldn’t take care of, but I wouldn’t just “throw it” in my backpack. To that end, the one gripe I do have is that I wish it came with a protective sleeve; something to give me some semblance of protection.
There’s also the magnets. I’m not a huge fan of having magnets permanently affixed to my laptop, but they certainly are unobtrusive as a practical matter. They are short enough where they don’t get caught up when sliding my laptop into my bag.
CONCLUSION
If you’ve always wanted more screen real estate on your laptop, whether you work from home or frequently travel, this is one of the best solutions you can find. I’ve been extremely impressed with the versatility of this monitor and its easy plug and play use.
If you’ve always wanted more screen real estate on your laptop, whether you work from home or frequently travel, this is one of the best solutions you can find. I’ve been extremely impressed with the versatility of this monitor and its easy plug and play use.
I would recommend this to a friend!


Share this review:
0points
0of 0voted this as helpful.
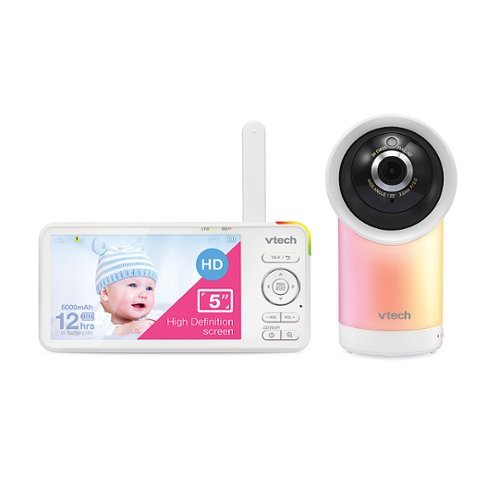
Watch over your little one at home on the 5-inch, 720p High-Definition LCD Parent Unit Display or remotely on your smartphone with the VTech RM566HD Smart WiFi video baby monitor. View rooms from top to bottom with the 100-degree vertical tilt angle and from side to side with the 360-degree horizontal pan capability. Enhance your baby~s sleep environment with a sound & light profile recommended by experts. Magnify details with the industry~s best 30x times zoom on the mobile app or 24 times on the viewer up to eight times and monitor room temperature and humidity levels directly from the Parent Unit Display. Plus, see your baby as clear as day, even in ultralow light, thanks to the automatic infrared Night Vision. Free professional in-app advice and videos provided by the experts at help assist in sleep and the growth and development of your baby.
Customer Rating
5
Full featured baby monitor with app access
on October 20, 2023
Posted by: callmeageeth
Standard baby monitors are typically limited to the signal between the camera and the monitor itself. For most of us, it’s likely not an issue, but it can restrict your movements (at least when wanting to view the baby monitor). This Vtech monitor solves that problem by connecting to your Wi-Fi. Gone are the days of a lost connection between the monitor and the camera. It also connects to an app on your phone for those times when you forgot to bring the monitor with you or the battery has died. But what I really like about this monitor is the visual clarity and the ability to tilt and zoom - which brings a lot of flexibility.
IN THE BOX and SETUP
You’ll get the camera, the monitor, and two power cables (one for each). The setup for the monitor and the camera is pretty straightforward. All you need to do is plug both items in and they will connect. Connecting the camera to the app wasn’t difficult, but I did accidentally download the wrong app (similarly named). Once I had the correct app on my phone, setup was relatively easy. It’s basically as simple as scanning the QR code on the camera, and typing in your WiFi password.
You’ll get the camera, the monitor, and two power cables (one for each). The setup for the monitor and the camera is pretty straightforward. All you need to do is plug both items in and they will connect. Connecting the camera to the app wasn’t difficult, but I did accidentally download the wrong app (similarly named). Once I had the correct app on my phone, setup was relatively easy. It’s basically as simple as scanning the QR code on the camera, and typing in your WiFi password.
After that, you’ll end up with a traditional baby monitor setup, with the additional ability to monitor (and control) the camera from the app on your phone.
The camera can be placed on a flat surface, or, you can use the wall mount to secure it to the wall. The latter provides better placement as - depending on your setup - you can have the camera above a crib/bed looking down. For example, in our house, we don’t have furniture that is above the railing of the crib, so placing the camera on the changing table nearby doesn’t provide us with much of a view (although we can obviously hear our baby, which is what matters). The mount attaches much like anything else you’d hang in drywall, but the mount can rotate down to provide that top down view. Of course, you’ll need to account for a plug. Luckily the power cord for the camera should be plenty long.
FEATURES
Other than the ability to view your camera from the app, this camera falls in line with what you’d expect. To me, the biggest step up from other monitors I’ve used is the image quality. The video is sharp, crisp and colorful. One can debate whether it’s necessary to have super sharp images on a baby monitor, but it’s better than grainy footage. The marketing claims it's 1080p, but there’s some limitations that are confusing. For example, I only get 720p when viewing on my phone (which is streaming over the internet) but you’ll get 1080p when viewing the camera on the monitor. It also has tilt and zoom, which again, provides flexibility that not everyone would necessarily need; but if you travel and take this with you, it’s nice knowing you can make these adjustments. Plus, tilting and zooming does give you a better view of the entire room (should that be something you’d want to do).
Other than the ability to view your camera from the app, this camera falls in line with what you’d expect. To me, the biggest step up from other monitors I’ve used is the image quality. The video is sharp, crisp and colorful. One can debate whether it’s necessary to have super sharp images on a baby monitor, but it’s better than grainy footage. The marketing claims it's 1080p, but there’s some limitations that are confusing. For example, I only get 720p when viewing on my phone (which is streaming over the internet) but you’ll get 1080p when viewing the camera on the monitor. It also has tilt and zoom, which again, provides flexibility that not everyone would necessarily need; but if you travel and take this with you, it’s nice knowing you can make these adjustments. Plus, tilting and zooming does give you a better view of the entire room (should that be something you’d want to do).
In addition to those features you get the standard fare: night light, music, (timers for both), night vision, sound and motion detection. I was unable to see if you could add your own music to the library, but there’s a decent selection of sounds from white noise to ocean waves. The night light can get pretty darn bright, but you can easily turn down the brightness levels on the monitor.
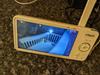
The motion detection can be adjusted on the monitor or even turned off. I noticed it can get pretty sensitive, so pay attention to that, you might want to adjust it. Our kid moves a lot while sleeping, so we’ve turned the motion detection off and react when we hear noise. The volume coming through the monitor is adjusted with hard face buttons. The speaker gets pretty loud, so if it’s turned up, you won’t have an issue hearing it. Sometimes, I will leave the sound muted (when I’m letting my kid self soothe). There’s a light ring in the top right corner of the monitor that lights up green/red when it detects sound and/or motion. This is a nice visual cue if you are trying to take a break from hearing crying.
The monitor’s default, at least for me, was set to have the screen always on. You’ll definitely want to get into the settings to adjust that - to save battery. I keep the timer on for the screen so that it turns off after a few moments of silence and/or no movement. Of course, when it picks up sound or movements the screen will turn back on.
The night vision is really nice. Most baby monitors have it, but this camera’s night vision really excels. Even in a pitch black room, you can see everything in the room where your camera is located.
In terms of distance, I didn’t walk down my street to see how far the monitor reached, but staying around my yard while sitting outside was not an issue. Not to mention, again, that even if your monitor were to lose connection or say you went to a neighbor’s house, you can always access the camera feed from your phone. I never lost connection from the camera to the monitor, but the range feels inconsequential given the app access.
THE APP
To me the real benefit of this particular model, in addition to the tilt/zoom feature is the app. Imagine you forgetting to charge your monitor; well all you need to do is go to the app. Your app can be accessed anywhere you have an internet connection. The app provides similar functionality to the monitor, although you can’t zoom as much (you pinch to zoom in). But you can still bring up a menu to pan and tilt, turn on/off the night light or play music. You can also take pictures and record videos if you so choose. The only downside is that the app has to be open to hear your baby. Unlike my old Arlo baby monitor (RIP) which allowed you to minimize your app, turn off the screen, and the audio would still come through. The app also has some helpful sleep tips for any new parents or parents struggling to get their child to sleep. We haven’t really used them, but I certainly appreciate those tips being there.
To me the real benefit of this particular model, in addition to the tilt/zoom feature is the app. Imagine you forgetting to charge your monitor; well all you need to do is go to the app. Your app can be accessed anywhere you have an internet connection. The app provides similar functionality to the monitor, although you can’t zoom as much (you pinch to zoom in). But you can still bring up a menu to pan and tilt, turn on/off the night light or play music. You can also take pictures and record videos if you so choose. The only downside is that the app has to be open to hear your baby. Unlike my old Arlo baby monitor (RIP) which allowed you to minimize your app, turn off the screen, and the audio would still come through. The app also has some helpful sleep tips for any new parents or parents struggling to get their child to sleep. We haven’t really used them, but I certainly appreciate those tips being there.
FLAWS
There’s very few flaws in this monitor. The only things that bug me are the charging cable for the monitor not being USB-C and the battery. First, I’m of the opinion that every personal electronic device needs to charge via USB-C. I hate having to keep track of proprietary cables. But you're stuck here. And the battery life is good, don’t get me wrong. It will provide 10ish hours of battery life. But in my experience, that’s total battery life irrespective of the screen being on or not.. As in even with the screen off - like when your child is asleep and sleeps through the night - it will drain. Since I primarily use this monitor in my house, this isn’t too big of a deal as I can always plug it in and keep the volume up high to hear if my baby cries. But I wish the standby battery life was much longer.
There’s very few flaws in this monitor. The only things that bug me are the charging cable for the monitor not being USB-C and the battery. First, I’m of the opinion that every personal electronic device needs to charge via USB-C. I hate having to keep track of proprietary cables. But you're stuck here. And the battery life is good, don’t get me wrong. It will provide 10ish hours of battery life. But in my experience, that’s total battery life irrespective of the screen being on or not.. As in even with the screen off - like when your child is asleep and sleeps through the night - it will drain. Since I primarily use this monitor in my house, this isn’t too big of a deal as I can always plug it in and keep the volume up high to hear if my baby cries. But I wish the standby battery life was much longer.
CONCLUSION
With a sea of options, this Vtech monitor should be towards the top of your list in searching for quality baby monitors. Vtech is a trusted brand and this model is worth it for the app access alone. And it just works, which at the end of the day, is all you need.
With a sea of options, this Vtech monitor should be towards the top of your list in searching for quality baby monitors. Vtech is a trusted brand and this model is worth it for the app access alone. And it just works, which at the end of the day, is all you need.
I would recommend this to a friend!


Share this review:
0points
0of 0voted this as helpful.
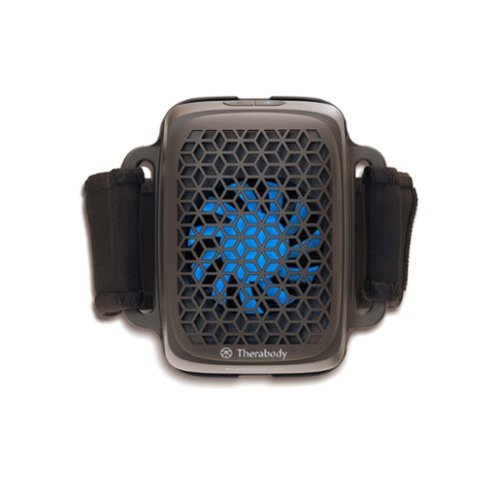
Say goodbye to messy, melting ice bags and scalding heating pads. Introducing RecoveryTherm Cube ~ one compact, reusable device that delivers instant cold, hot and contrast therapies scientifically-proven to more effectively support injury treatment, relieve pain, reduce inflammation and maximize muscle and joint recovery. Powered by our proprietary Cryothermal Technology~, Cube~s easy to use preset treatments use scientifically optimal temperatures and durations for effective relief and recovery anywhere on the body. Plus, it~s wearable, portable and convenient for relief anytime you need it.
Customer Rating
5
Fantastic ice pack/heat pad replacement
on October 16, 2023
Posted by: callmeageeth
This cube is an ice pack and heat pad built into one compact device. It quite amazingly goes from off to hot, then hot to cold, and vice versa in almost no time. Its only real downside is also its downside. The surface area of the contact plate that delivers the heat/cold is relatively small, so it doesn’t cover large areas, and it can be hard to use effectively on joints (at least using the strap to hold it in place). But a bigger contact plate would make this device too big, and even more difficult to use on joints (vs. large muscle areas like your quads).
IN THE BOX
In the box you get the cube, as well as a bracket that is used to attach the straps, a long strap (for going around your waist, shoulders, etc.), a shorter strap (for wrapping around legs, arms) and a USB-C charging cable.
In the box you get the cube, as well as a bracket that is used to attach the straps, a long strap (for going around your waist, shoulders, etc.), a shorter strap (for wrapping around legs, arms) and a USB-C charging cable.
OPERATION
It’s really simple to use. There’s a USB-C port on the same side as the two “power” buttons. I say “power” but really, there’s a button that turns on the cold therapy and another for heat. They’re easily distinguishable; one has a snowflake symbol, the other has a fire symbol. Below the buttons are three dots, which represent different temperature levels. Cold therapy for example, has a preset for 41 degrees, 54 degrees, and then 61 degrees. So it’s not really levels of coldness, but different presets. It’s a little unintuitive, but once you know it, it’s not a problem. Just know that one green dot is the coldest setting (46 degrees) and three dots is the highest cold setting (61 degrees). Which level of cold you use is really about personal preference. Heat therapy is the opposite - the more intuitive way IMO - whereby one dot is 95 degrees, and then the third is the highest at 109 degrees. There’s also a contrast therapy session whereby the cube alternates between cold and hot.
It’s really simple to use. There’s a USB-C port on the same side as the two “power” buttons. I say “power” but really, there’s a button that turns on the cold therapy and another for heat. They’re easily distinguishable; one has a snowflake symbol, the other has a fire symbol. Below the buttons are three dots, which represent different temperature levels. Cold therapy for example, has a preset for 41 degrees, 54 degrees, and then 61 degrees. So it’s not really levels of coldness, but different presets. It’s a little unintuitive, but once you know it, it’s not a problem. Just know that one green dot is the coldest setting (46 degrees) and three dots is the highest cold setting (61 degrees). Which level of cold you use is really about personal preference. Heat therapy is the opposite - the more intuitive way IMO - whereby one dot is 95 degrees, and then the third is the highest at 109 degrees. There’s also a contrast therapy session whereby the cube alternates between cold and hot.
To turn it on, you simply hold which button you want. After holding it for a few seconds it turns on. Once on, you hit the same button again to alternate through the presets. To activate the contrast therapy session, you simply hold both buttons at the same time. Then they’ll both light up.
The nice part is that it’s kind of set it and forget it. The heat therapy session lasts 24 minutes while the cold therapy is 18 minutes. Contrast therapy is 20 minutes. I like it because it takes the guesswork out of it, although I guess it really doesn’t matter, even if it didn’t turn off, it’s not like you’re going to forget you’re either holding it or it’s strapped to your body.
The straps are nice and sturdy. The velcro works well and I don’t worry about it loosening even while walking around with it strapped to my shoulder or even my ankle. In fact, it’s possible to overtighten the velcro and have it hold - without loosening and sliding down your leg for example. The long strap is long enough for even a big person like me; it gets around my shoulders. The short one is obviously for your limbs and you shouldn’t have any issues with the length.
The cube snaps in and out of the bracket which is where the straps go into. If you simply wanted to hold the cube in your hand, you could snap it out of the bracket or even keep the bracket on without the straps. The cube easily snaps in and out of the bracket. The only warning with the bracket is to pull it up from the ends and not the sides (the side being the loop the strap goes into). But there's a sticker warning on the device itself to remind you.
EFFECTIVENESS
I just so happened to finish running a long relay race the past weekend. Afterwards, my achilles, ankle, knee, and hamstrings were all sore. I typically would use a gel ice pack to ice my achy joints and muscles, but that obviously requires it to live in the freezer and then having to wait multiple hours to freeze it again for a second use. Not only does the cube not require to be kept frozen, it also heats. It’s tough to replace an ice gel pack’s ability to conform to your body for greater coverage - a limitation of the cube - but the convenience of the cube more than makes up for it. It really works well. And you don’t have to worry about frostbite, or burns. The contact plate can touch your skin directly, so there’s no worries about having an additional piece of fabric to protect your skin.
I just so happened to finish running a long relay race the past weekend. Afterwards, my achilles, ankle, knee, and hamstrings were all sore. I typically would use a gel ice pack to ice my achy joints and muscles, but that obviously requires it to live in the freezer and then having to wait multiple hours to freeze it again for a second use. Not only does the cube not require to be kept frozen, it also heats. It’s tough to replace an ice gel pack’s ability to conform to your body for greater coverage - a limitation of the cube - but the convenience of the cube more than makes up for it. It really works well. And you don’t have to worry about frostbite, or burns. The contact plate can touch your skin directly, so there’s no worries about having an additional piece of fabric to protect your skin.
I used this on my ankle, thigh and shoulders. I like strapping it on and going about my business at home. It does a great job of providing heat and ice therapy. I do find myself using it for multiple “sessions” mostly to treat larger muscles (like my hamstrings for example) which is necessary given that the plate is small, but as I’ve repeatedly said, this is both a necessary and welcome tradeoff given the cube’s versatility. Finishing a session on one part of your muscle, and then hitting the power button again to continue another session on a different portion of your muscle is not a hassle at all.
It does a great job icing your muscles when they’re injured and heating your muscles to help warm them up for any workout. It’s anecdotal, as I can’t scientifically verify it, but it’s really helped me during my recoveries from long runs.
I haven’t tested the duration of the battery, but I’ve gotten at least 5 sessions out of it without having to charge it. And it doesn’t take too long to charge.
CONCLUSION
If you’ve ever used an ice pack or heating pad, or ever find yourself needing help with your muscle recovery, this cube is a fantastic addition to your exercise routine (or even if you don’t exercise, just to ice/heat tired muscles). It’s portability is unparalleled. It’s truly a fantastic little device.
If you’ve ever used an ice pack or heating pad, or ever find yourself needing help with your muscle recovery, this cube is a fantastic addition to your exercise routine (or even if you don’t exercise, just to ice/heat tired muscles). It’s portability is unparalleled. It’s truly a fantastic little device.
I would recommend this to a friend!


Share this review:
+1point
1of 1voted this as helpful.
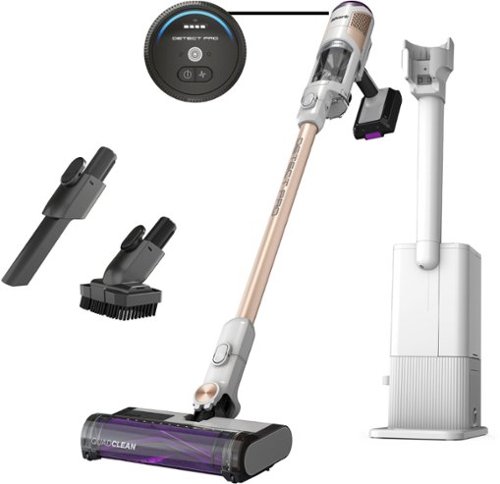
Meet the new Shark Cordless Detect Clean & Empty Auto-Empty System Vacuum. It features an ultra-intelligent Detect performance suite~4 deep-cleaning technologies that detect & react to your home to capture hidden dirt on every surface, corner, edge, and crevice. DirtDetect senses the hidden dirt that hides in your home, and automatically boosts power to pull it in. EdgeDetect senses edges and corners and doubles suction* power for more powerful cleaning* (vs. ECO mode). Floor Detect senses carpets and hard floors around your home, and optimizes your vacuum~s performance based on the floor type. Lastly, LightDetect automatically illuminates dark spaces, so you can easily track down hidden dirt. All four of these technologies combine to increase cleaning up to 50%* when carpet and dirt is detected (*Eco vs. Detect Boost (with both Carpet and Dirt), based on ASTM F608). Plus, the QuadClean Multi-Surface brushroll tackles four cleaning targets: fine dust, pet hair, large debris, and dust along edges. After every clean, Detect Clean & Empty Auto-Empty System brings you the ultimate convenience~it empties on its own. Return it to its base, and it charges and empties automatically, sealing in up to 30 days worth of dust & debris, so you can forget about emptying for up to a month, and leave behind the trips to the trash can after every use. Inside the base, Odor Neutralizer Technology guards against bad odors, for a fresh-smelling home. Change the way you clean with the Shark Cordless Detect Pro Auto-Empty System~the dirt-detecting cordless that empties itself.
Customer Rating

4
Good vacuum with high price
on October 8, 2023
Posted by: callmeageeth
There’s not much to complain about with the performance of this vacuum. It’s extremely lightweight, it doesn’t seem to clog, it works well on hardwood floors and carpet, and the auto empty system means you don’t need to empty the dustbin for weeks. The biggest drawbacks are the cost, and where do you store it? (I've also had concerns with battery life). Assuming you have the floor space and a nearby outlet to store it and you’re willing to shell out the money it should be at the top of your list when looking at vacuums.
IN THE BOX
In the box you get the vacuum (the handheld part with the small dustbin, battery), the extension rod, the brush base, two attachments, an odor neutralizing “puck,” and the auto empty system base. Piecing it together is simple and only takes a few minutes.
In the box you get the vacuum (the handheld part with the small dustbin, battery), the extension rod, the brush base, two attachments, an odor neutralizing “puck,” and the auto empty system base. Piecing it together is simple and only takes a few minutes.
PLACEMENT OF AUTO EMPTY BASE
My 8 year old Dyson stick vacuum is in my small laundry room and attached to the wall. I personally liked having it on the wall so it was out of the way. Here, you can’t really attach the Shark cordless vacuum to the wall (unless you’re willing to build a shelf that will support the weight). While the auto empty base isn’t terribly large, it wasn’t ideal for our setup to have it sitting on the floor. It takes up the limited amount of space in our laundry room. So for now, it sits in the corner of our relatively unused dining room. This isn’t ideal either. And putting it in a closet isn’t an option as we don’t have any outlets in our closets. Obviously, this issue is very specific to your house/apartment setup. But it's something you'll want to consider when considering this as an option.
My 8 year old Dyson stick vacuum is in my small laundry room and attached to the wall. I personally liked having it on the wall so it was out of the way. Here, you can’t really attach the Shark cordless vacuum to the wall (unless you’re willing to build a shelf that will support the weight). While the auto empty base isn’t terribly large, it wasn’t ideal for our setup to have it sitting on the floor. It takes up the limited amount of space in our laundry room. So for now, it sits in the corner of our relatively unused dining room. This isn’t ideal either. And putting it in a closet isn’t an option as we don’t have any outlets in our closets. Obviously, this issue is very specific to your house/apartment setup. But it's something you'll want to consider when considering this as an option.
PERFORMANCE AS VACUUM
This Shark brings plenty of power to pick up most messes. In my kitchen it's easily able to pick up food crumbs and in the living room, pet hair. It picks up most sized objects (within reason) with ease. The brush roll is a blend of foam and rubber blades that promise not to get tangled or clogged. I've yet to run into a vacuum that doesn't, at some point, get clogged with hair over time. But it's too early to tell at this point. Honestly, putting aside the advanced features this model brings, it's very similar in terms of performance from other stock vacuums on the market. Its own advantage might be the size and weight. It's very light and maneuverable.
This Shark brings plenty of power to pick up most messes. In my kitchen it's easily able to pick up food crumbs and in the living room, pet hair. It picks up most sized objects (within reason) with ease. The brush roll is a blend of foam and rubber blades that promise not to get tangled or clogged. I've yet to run into a vacuum that doesn't, at some point, get clogged with hair over time. But it's too early to tell at this point. Honestly, putting aside the advanced features this model brings, it's very similar in terms of performance from other stock vacuums on the market. Its own advantage might be the size and weight. It's very light and maneuverable.
I found that the tube can get clogged when trying to vacuum more than just small crumbs on the floor. I had to clean out the tube twice since I’ve owned it, but it could be more user error as I was trying to vacuum up bigger pieces of food (like chips) that I should have. The point is, it’s not infallible to clogging - like most vacuums.
But when I wasn’t vacuuming things too big for a vacuum, I was pleased with its performance, especially on deep carpets. And you know it’s working when there’s dirt/dust in the clear bin that you didn’t see on the carpet.
EXTRA FEATURES
With this model, you're getting the auto empty base, edge detection, odor eliminator, auto sensing (for power), lights, charging base/dock/auto empty system. Frankly it's a lot, and likely why the price is so high. But I really question the value and need for all of these features - outside the auto empty base, it's most obvious distinguishable feature
With this model, you're getting the auto empty base, edge detection, odor eliminator, auto sensing (for power), lights, charging base/dock/auto empty system. Frankly it's a lot, and likely why the price is so high. But I really question the value and need for all of these features - outside the auto empty base, it's most obvious distinguishable feature
Take the odor eliminator. Sounds great in theory but I could never smell any fragrance (not that I wanted to) which is what I would have expected to smell to know that it's working. I just don't know if it works and Shark now expects/wants me to buy an odor eliminator "puck" every so often. No thanks.
The edge detection is another feature whereby the suction power increases when the vacuum detects the side of a wall (say when vacuuming next to your baseboards). Sounds good, and actually seems to work well - obviously when vacuuming next to a wall, there's the plastic of the vacuum itself that doesn't quite allow the brush roll to get all the way to the wall. The increased power of the side detection seems to alleviate that problem by increasing the power.
There's also the auto detect function, where the vacuum picks up power depending on the amount of dirt on the ground that it detects. This is nice if for no other reason than you feel good about picking up dirt on the ground.
The battery life is also superb. It goes for about 60 minutes (which is what it’s rated for) which basically means you can vacuum your whole house without having to recharge it.
CONCLUSION
This is a nice vacuum with a lot of bells and whistles that you don’t really need. The auto emptying bin is nice, but I never had any issues emptying the dust canisters of other stick vacuums before. I mostly like the stand because it’s a nice way to store your vacuum and charge it so it’s ready to go when you need it. The other features, like odor control and edge detection are nice, but seem a little gimmicky. If you can find a good spot for the large auto emptying base in your home, and don’t mind the cost, this is a great vacuum to consider.
This is a nice vacuum with a lot of bells and whistles that you don’t really need. The auto emptying bin is nice, but I never had any issues emptying the dust canisters of other stick vacuums before. I mostly like the stand because it’s a nice way to store your vacuum and charge it so it’s ready to go when you need it. The other features, like odor control and edge detection are nice, but seem a little gimmicky. If you can find a good spot for the large auto emptying base in your home, and don’t mind the cost, this is a great vacuum to consider.
I would recommend this to a friend!


Share this review:
+5points
5of 5voted this as helpful.

The Arlo Home Security System makes protecting your entire home easier. Get greater protection from All-in-One Sensors integrated with 8 sensing functions, opt in for around-the-clock protection from 24/7 Live Security Experts that monitor your home, so you don~t have to, and experience better whole home protection with SecureLink.~ All-In-One Sensors have 8 sensing functions in 1 compact design to give you flexibility to place anywhere you need coverage inside your home. All functions are easily controlled through the intuitive Arlo Secure App, simply change or enable more detection functions anytime. Protect your doors and windows by combining open/close and motion detection, or protect areas under your sink by combining leak and freeze detection. You can also enable tilt, ambient light, smoke and CO alarm listening for any of your sensors for additional protection.~ Arlo~s All-in-One Sensor protects your everything. The Keypad Sensor Hub controls your security system, has an integrated siren, motion sensor, smoke/CO alarm listener, and pairs devices with SecureLink technology for extended range and a more secure connection.~ Change your security system mode or use One Tap Emergency Response buttons to send fire, police, or medical responders to your home, directly from the Hub or Arlo Secure App.~
Customer Rating
4
Works great, but made for those invested in Arlo
on October 8, 2023
Posted by: callmeageeth
Arlo has had some of the best consumer wireless security cameras on the market. In terms of visuals, battery life, versatility, they don’t get much better. The issue for me has always been the cost. Even more so, Arlo’s line of products have become increasingly more complex. I’ve also had issues with Arlo putting its older products out to pasture (like some of the original cameras I have). But, I feel somewhat trapped in its ecosystem after already having purchased many of its products - and paying for a camera subscription. So, the security system makes sense on some levels as it’s one less app to use and the cameras I have should work in sync with the security system. However, it’s hard to recommend the Arlo Security system, not necessarily because of the features or even ease of use, but because of the cost.
IN THE BOX and SETUP
In this box, you’ll get the security keypad, power cable/brick, and two all in one sensors. The setup is pretty easy - surprisingly actually. Reminder that I already have the Arlo app and cameras, so for me, I opened the app and clicked on “add device.” There I added the security system. First I had to “upgrade” the app. I didn’t have to redownload anything through the Google Play Store, the app just took a few minutes to update itself. From there, you walk through a tutorial like setting up your pin to unlock/arm the system. The app walks you through the various modes, like away and home and unlocked. From there, you add the sensors that are included in the box.
In this box, you’ll get the security keypad, power cable/brick, and two all in one sensors. The setup is pretty easy - surprisingly actually. Reminder that I already have the Arlo app and cameras, so for me, I opened the app and clicked on “add device.” There I added the security system. First I had to “upgrade” the app. I didn’t have to redownload anything through the Google Play Store, the app just took a few minutes to update itself. From there, you walk through a tutorial like setting up your pin to unlock/arm the system. The app walks you through the various modes, like away and home and unlocked. From there, you add the sensors that are included in the box.
As you add the sensors - by scanning the QR codes - you’re asked to name them, and asked how you will use them. Again, I was pleasantly surprised by the app’s helpfulness in showing/explaining how you could use the sensors so you could make the best choice to fit your needs.
SENSORS
The sensors really do it all. They detect changes in light, they detect motion, sound, they detect carbon monoxide, smoke, and can even detect water. They really do it all which is nice, because you don’t have to worry about what sensors to buy when expanding your system. You can put them flat on the wall, or in the corner. The app does a great job of calibrating them to detect doors opening, or where best to place them to detect motion in a room (i.e. height, angles). They can be installed using sticky adhesive (included) or a small bracket that you install with screws and anchors.
The sensors really do it all. They detect changes in light, they detect motion, sound, they detect carbon monoxide, smoke, and can even detect water. They really do it all which is nice, because you don’t have to worry about what sensors to buy when expanding your system. You can put them flat on the wall, or in the corner. The app does a great job of calibrating them to detect doors opening, or where best to place them to detect motion in a room (i.e. height, angles). They can be installed using sticky adhesive (included) or a small bracket that you install with screws and anchors.
KEYPAD
The keypad is really responsive. The buttons are clicky and consistently register each push. Given the cost, it would be nice if it had a small screen, but instead, there are lights indicating whether it’s armed or not. It should be noted that the keypad also has similar functionality to the sensors itself - so it can detect motion and carbon monoxide/smoke. This is useful because you don’t necessarily need a sensor in the same area as the keypad. The only real issue I have with the keypad is where to put it. Honestly, i prefer that it be on the wall which you can do, but you need a plug nearby. And even if you have a plug nearby, there’s the issue of having a cable hanging on the wall and the extra work required to hide it (if you so choose).
The keypad is really responsive. The buttons are clicky and consistently register each push. Given the cost, it would be nice if it had a small screen, but instead, there are lights indicating whether it’s armed or not. It should be noted that the keypad also has similar functionality to the sensors itself - so it can detect motion and carbon monoxide/smoke. This is useful because you don’t necessarily need a sensor in the same area as the keypad. The only real issue I have with the keypad is where to put it. Honestly, i prefer that it be on the wall which you can do, but you need a plug nearby. And even if you have a plug nearby, there’s the issue of having a cable hanging on the wall and the extra work required to hide it (if you so choose).
Based on my house’s setup, I don’t have a good spot to have the keypad in a location where it’s easily accessible by the door from my garage. That means I have to walk to a nearby room - tripping the alarm - which makes me feel a rush to get there and disarm it quickly. But this all depends on the setup of your house.
EASE OF USE AND THE APP
We don’t arm our security system very often, because one of us works from home most days, but when we have armed it when no one is home, it’s dead simple to use. The keypad has a microphone in it, which allows for voice commands which makes placement of the keypad a little easier (as I mentioned above).
We don’t arm our security system very often, because one of us works from home most days, but when we have armed it when no one is home, it’s dead simple to use. The keypad has a microphone in it, which allows for voice commands which makes placement of the keypad a little easier (as I mentioned above).
The Arlo app is surprisingly versatile. At first, I was burdened with what I believed to be unnecessary notifications - like change in ambient light as detected by one of the sensors. But spending a little time in the app, you can disable/enable specific notifications.
You can setup routines in the app, which will arm the house at specific intervals of the day which is nice for those you have a pretty consistent routine.
What I do love is the integration with other Arlo devices. They work well together, with sensors triggering cameras to record as one example. And being able to see all of your security devices (cameras, doorbells, sensors) all in one location, in one app, is very nice.
WHAT’S NOT INCLUDED
So one of the rubs with this system is that it’s entirely reliant on the internet. This obviously makes it easy to setup and monitor, but what about those times when your internet is out? There’s no cellular backup option, but you can purchase an accessory kit from Arlo. This is something that should be included in my opinion.
So one of the rubs with this system is that it’s entirely reliant on the internet. This obviously makes it easy to setup and monitor, but what about those times when your internet is out? There’s no cellular backup option, but you can purchase an accessory kit from Arlo. This is something that should be included in my opinion.
There’s also the issue of the limited number of sensors. For better security, you’ll want more than what’s included in this package. Luckily they aren’t too expensive, and one benefit of Arlo over other home security setups is that the sensors themselves are really versatile, which in some respect takes the guesswork out of your setup.
Professional monitoring will cost you extra, starting at $24.99 a month. This seems to be about in line with most companies, although Simplisafe is cheaper. I was already paying for multiple cameras in my house (Arlo Secure Plan) so I’m not thrilled with having to pay even more.
CONCLUSION
At the end of the day, this is an easy to use and easy to setup home security system. But if you don’t already have Arlo security cameras, I would consider staying clear as the upfront costs could get pretty steep depending on the number of cameras you need. But if you already are invested in Arlo, this is a great option to get even more security. You can get away without professional monitoring, but you’ll still need to pay a monthly fee depending on your cameras so there’s really no way to get home security without paying some subscription fee. But it is worth the feeling of security.
At the end of the day, this is an easy to use and easy to setup home security system. But if you don’t already have Arlo security cameras, I would consider staying clear as the upfront costs could get pretty steep depending on the number of cameras you need. But if you already are invested in Arlo, this is a great option to get even more security. You can get away without professional monitoring, but you’ll still need to pay a monthly fee depending on your cameras so there’s really no way to get home security without paying some subscription fee. But it is worth the feeling of security.
I would recommend this to a friend!

Share this review:
0points
0of 0voted this as helpful.
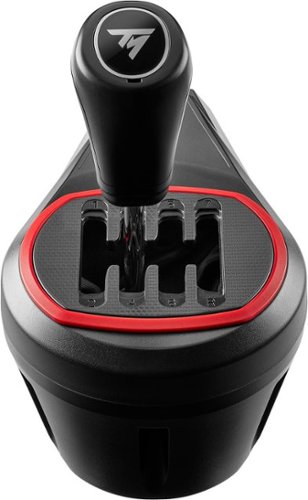
Push your gears to the red line with TH8S Shifter Add-On: the sim racing shifter for next-level racing immersion sensations. TH8S Shifter Add-On features an "H"-pattern shift plate with 7 gears plus reverse gear, with direct gear shifting, allowing it to adapt to all types of games and vehicles with manual shifting (rally, trucks, GT, NASCAR). The 1.6"/4 cm metal shift lever and its ergonomic "sport-style" shift knob ensure responsiveness and precision for clean gear shifting. The frictionless H.E.A.R.T technology derived from Thrustmaster's high-end shifter, TH8A Shifter Add-On, ensures the same extreme level of precision throughout the product's lifespan. TH8S Shifter Add-On is compatible on PC with all racing wheels, and compatible on PS5, PS4, Xbox One and Xbox Series X|S with Thrustmaster Force Feedback racing wheel bases.
Customer Rating
5
Crucial piece of your racing simulation setup
on October 8, 2023
Posted by: callmeageeth
I am not a great virtual racer, but ever since the PSVR2 was released, I’ve been dipping more into Gran Turismo 7 in VR. While the setup remains the same, when I’m racing, most of the time it’s with my Thrustmaster T128 connected to my PS5, and my PSVR2 headset. Sometimes though, I stick with driving on my TV. I also utilize a racing cockpit to hold my steering wheel and pedals. It’s a basic, cheap one, but luckily it has a spot for a shifter. It doesn’t have a built in seat.
I offer my opinions to those who are like me: someone who is a casual racer and wants a cost efficient racing cockpit.
As I said earlier, I have the T128 steering wheel. It’s a nice budget level steering wheel with force feedback. What it doesn’t have is a clutch pedal - just brake and gas. Honestly, I didn’t think this steering wheel could even accept a shifter because of the lack of a clutch pedal, but that’s luckily not the case.
The TH8S shifter utilizes a clamp - much like the T128 steering wheel. It’s dead simple to use, and can attach to most tables and desks if you don’t have a racing cockpit. I have to recommend investing in a cheap racing cockpit (one with or without a seat) for the best experience. If you’ve ever driven a stick shift car in real life, you know that the shifter sits below the steering wheel, so it feels odd to have your video game steering wheel and shifter on the same level as one another - although it works. Honestly, if you’ve gotten this far and own a steering wheel, and are considering the shifter, you might as well take the next step to enhance the experience.
In any event, onto the shifter. It’s mostly made of plastic, but it’s nice and sturdy. It’s not too large nor is it heavy. The shifting is smooth and easy. It goes up to 7 gears and has a slot for reverse as well. I wish there was a little more resistance in the shifting action to better mimic a real car, but that’s a minor quibble. When you’re in gear it doesn’t move much. And like a real car, when shifting up from your even gears (2nd to 3rd, 4th to 5th) it feels like it glides to the next gear. Basically, it’s really responsive when changing gears and I never had an instance where it didn’t move to the next gear.
The shifter comes with two cables, one is a proprietary cable on both ends (looks similar to an old S-video cable if you’re familiar with that). The other cable is a USB-A to USB-C cable. The latter allows you to plug into your computer (to be clear, I didn’t plug my shifter into the computer, I played on the PS5). The proprietary cable plugs directly into the shifter and your compatible steering wheel. I had some issues plugging the cable into the steering wheel, but that was mostly because of my fat fingers. Luckily, I keep my setup plugged into my stand so I don’t anticipate unplugging it again. The cables aren’t terribly long, they have enough length to put the shifter within arms length of the steering wheel. Unlike my steering wheel (which I won’t get into here) I had no issues getting setup and ready to use the shifter. When plugged in, the steering wheel controller immediately recognized it. Again, my T128 doesn’t have a clutch pedal, which I wish I had, nonetheless, it was very much similar to shifting with the paddles on the steering wheel. I had no issues getting used to the absence of the clutch pedal - it didn’t seem like it took too much away from the realism.
In the end, this is a useful addition to any racing simulation setup. It’s not too expensive and adds a certain level of realism that really makes simulation racing games - like Gran Turismo 7 - even more enjoyable.
I would recommend this to a friend!


Share this review:
0points
0of 0voted this as helpful.
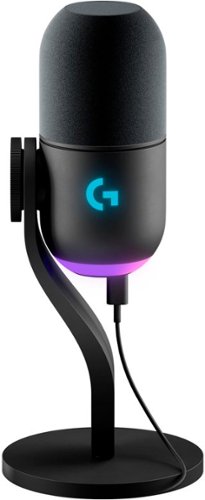
Yeti GX is a premium RGB gaming mic powered by LIGHTSYNC and designed specifically for game streamers. Combining a custom dynamic capsule with advanced software, this USB microphone rejects noise and key clicks, improves your sound and ensures consistent high-quality audio while you stream. Use LIGHTSYNC to control two separate RGB light zones on the mic and sync them with other G gear in G HUB, including mice and keyboards, for a fully immersive experience. Add fun vocal effects with Blue VO!CE software, and use Smart Audio Lock or set the gain manually with easy on-mic controls.
Customer Rating
4
Great sound, plug and play
on September 28, 2023
Posted by: callmeageeth
The Logitech Yeti GX is a sharp looking and high performance microphone. There are cheaper options out there, and if you already own a Blue Yeti microphone, there's little reason to upgrade unless you just have the RGB lighting.
It's a much smaller than most USB microphones I've used and takes up little space on your desk due to it's small footprint. It's small enough so that when you're streaming or otherwise on a video call it won't be seen, but given it's lighting, you might want to prop it up to show it off.
There's USB-C port on the bottom, RGB light ring on the bottom. On the back, the only buttons you get are a mic gain and a mute button. Honestly, it's really the lighting that sets this microphone apart from an otherwise plain black microphone.
I like that a red light comes on when you're muted, which is nice, although the light and gain dial are on the back. The lights on the gain dial will go red if it's too high and you have the option to push the dial in to hold the gain at a specific level (light goes blue) to prevent accidental changes.
It's purely plug and play. Plugging it in is really all you do to get up and going. You'll get great, balanced sound without doing a thing, although there are plenty of software options on Logitech G Hub to tweak the sound to your liking. G Hub is also where you'll go to change the RGB light ring at the bottom. It's a supercardiod microphone so it picks up the best sound when speaking to it through the top, and rejecting sounds from the sides. It picks up everything from whispers to harsh singing without being too close. It does a great job of not picking up extraneous sounds like game sounds and a clicky keyboard.
One minor hiccup was that I had a hard time getting Logitech G Hub to recognize it on my work laptop. It worked great on my laptop, just by plugging it in, but I wasn't able to to adjust the lights. It was however instantly recognized on my ASUS gaming laptop. It's a small sample size, and I wouldn't necessarily expect you to have the same issues, it was worth noting.
In sum, this is a nice sounding microphone with a small footprint that's dead simple to use (meaning you don't need to make any sound adjustments to get great sound IMO). Although I like it a lot, primarily because it matches the aesthetic of my Logitech gaming keyboard and mouse, other than the RGB lighting it does little to separate itself from the crowd. But it's competitively priced and has the sound you give to expect from Blue Yeti.
I would recommend this to a friend!


Share this review:
0points
0of 0voted this as helpful.

At the call of the Thunderbird, the adventurer awaken from her deep slumber. The fantasy continent is now different from the past, with ancient temples, magical forests, and floating islands situated under the vast blue sky, each full of numerous secrets waiting to be discovered. Pick up your Bravo 15, join the thunderbird and adventurer on a journey to explore the mystical fantasy world!
Customer Rating
4
Midrange performance with boring design
on September 5, 2023
Posted by: callmeageeth
In a time of gaming lights and feature rich laptops, this MSI Laptop is pretty basic. Borderline boring. But boring doesn’t mean bad. In fact, for the price this is a pretty compelling laptop. I was quite impressed with the performance. There are some things I wish it had, like higher resolution screen, but all in all, it’s a nice package - albeit in a slightly dull package. My perspective on this laptop is from a practical standpoint vs. a deep dive into performance metrics.
IN THE BOX
As one might expect, the only thing you get in the box is the laptop and the charger. The charging brick is relatively small, it’s big, but not unwieldy and there’s sure to be plenty of slack should your plug be far away.
As one might expect, the only thing you get in the box is the laptop and the charger. The charging brick is relatively small, it’s big, but not unwieldy and there’s sure to be plenty of slack should your plug be far away.
SETUP
While the experience setting up this laptop wasn’t unlike the setup of any other Windows laptop, I ran into a few delays. Nothing that really takes away from the experience, but it certainly felt like more of a bear than other computer setups. It could very well be user based or some one off, but it’s worth mentioning. There was an inordinate amount of updating, as one would expect, but the updates, both for Windows and the MSI Center didn’t work at first. I kept getting errors. Eventually the Windows updates went through (I can’t explain what happened or say that I did anything), but I was never able to resolve the issues with the MSI Center. Granted, it’s not necessary to have. But the MSI Center is where one might go to monitor the hardware. Of course there’s 3rd party apps that do this, and I’m not one to regularly use these computer maker’s software, but maybe that matters to you. In any event, it didn’t stop me from actually being able to game.
While the experience setting up this laptop wasn’t unlike the setup of any other Windows laptop, I ran into a few delays. Nothing that really takes away from the experience, but it certainly felt like more of a bear than other computer setups. It could very well be user based or some one off, but it’s worth mentioning. There was an inordinate amount of updating, as one would expect, but the updates, both for Windows and the MSI Center didn’t work at first. I kept getting errors. Eventually the Windows updates went through (I can’t explain what happened or say that I did anything), but I was never able to resolve the issues with the MSI Center. Granted, it’s not necessary to have. But the MSI Center is where one might go to monitor the hardware. Of course there’s 3rd party apps that do this, and I’m not one to regularly use these computer maker’s software, but maybe that matters to you. In any event, it didn’t stop me from actually being able to game.
DESIGN AND INTERNALS
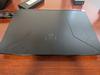
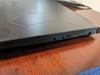
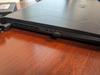
As I said, the design is pretty boring. It’s a thick black plastic laptop with lots of bezels. It’s not terribly heavy, but is much heavier than an ultrabook or the like - which is frankly to be expected. The lid has understated etched lines and an MSI logo that doesn’t pop. Again, not saying that’s good or bad. Frankly, this doesn’t scream gaming laptop, but from a distance looks like your standard corporated issued business laptop. It has sturdy raised rubber feet on the bottom that keep the laptop from sliding on your desk and elevated for airflow. There are 3 USB-A ports, one USB-C, ethernet, HDMI out, and 3.5 mm headphone jack. The USB-C port seems more recessed than the other ports, and I didn’t have any issues plugging a USB-C webcam into it, but I couldn’t make my USB-C thumb drive work. The USB-C prong in my thumb drive wasn’t long enough to make a connection. Seems like an odd design choice. Admittedly, however, I haven’t tried a whole lot of USB-C cables to see how many fit or don’t fit and whether my issues were specific to my one thumb drive.
As I said, the design is pretty boring. It’s a thick black plastic laptop with lots of bezels. It’s not terribly heavy, but is much heavier than an ultrabook or the like - which is frankly to be expected. The lid has understated etched lines and an MSI logo that doesn’t pop. Again, not saying that’s good or bad. Frankly, this doesn’t scream gaming laptop, but from a distance looks like your standard corporated issued business laptop. It has sturdy raised rubber feet on the bottom that keep the laptop from sliding on your desk and elevated for airflow. There are 3 USB-A ports, one USB-C, ethernet, HDMI out, and 3.5 mm headphone jack. The USB-C port seems more recessed than the other ports, and I didn’t have any issues plugging a USB-C webcam into it, but I couldn’t make my USB-C thumb drive work. The USB-C prong in my thumb drive wasn’t long enough to make a connection. Seems like an odd design choice. Admittedly, however, I haven’t tried a whole lot of USB-C cables to see how many fit or don’t fit and whether my issues were specific to my one thumb drive.
You get some decent gaming chops on the inside. There’s an RTX 4050 for dedicated graphics, and Ryzen 5 for processing. Note that the RTX 4050 is great for 1080p, which is what this laptop supports and brings with it NVIDIA’s advancements in ray tracing and DLSS. There’s 16 GB of RAM which is fine for this machine, Wi-Fi 6E for the fastest internet. The screen, however, is only 1080p but you do get a 144 hz refresh rate. Honestly, when using a 15 inch screen, 1080p is really all you need. MSI calls the screen a matrix display, and it looks good. Text and images are plenty sharp. So while we might be accustomed to higher resolution screens on big TVs, you realize you don’t need it on a smaller screen.
The keyboard is just fine. I’m not a big fan of the font MSI uses, it looks like a font in a sci-fi movie, but that’s just personal preference. It’s backlit, which isn’t always a guarantee on cheaper laptops. The lighting is plenty bright to use at all times. The WASD keys are translucent which is cool, and makes it easy to find when playing FPS games with a keyboard and mouse. I will always prefer a mechanical keyboard, so I use a separate keyboard with my laptops. But the typing experience was just fine, the keyboard is nice and quiet (vs. mechanical clickiness) and was very responsive. The touchpad was also very responsive and is plenty big IMO. What is a plus to me is the number pad to the right. I dislike when 15 inch laptops don’t take advantage of the space and put in a number pad. Again, this is personal preference.
GAMING PERFORMANCE
I play a wide variety of games on a wide variety of machines. I like playing Cyberpunk 2077 on PC, as well as some Xbox games through Xbox Game Pass Ultimate. I also have a whole library of games from Epic. To test out the capabilities, I opted to try Cyberpunk first. I just opened it up and went with the default settings at first (side note, I’m not one to really fine tune all my graphical settings on PC, it’s just not my thing, I have too little time to actually play games).
I play a wide variety of games on a wide variety of machines. I like playing Cyberpunk 2077 on PC, as well as some Xbox games through Xbox Game Pass Ultimate. I also have a whole library of games from Epic. To test out the capabilities, I opted to try Cyberpunk first. I just opened it up and went with the default settings at first (side note, I’m not one to really fine tune all my graphical settings on PC, it’s just not my thing, I have too little time to actually play games).
Most of the visual settings were on High or Ultra. When I started playing, my framerates averaged about 60 FPS, but when the action got heavy, it sometimes dipped into the 30s. It wasn’t unplayable, but it wasn’t ideal, especially when the screen supports 144 hz. I went back into my settings and turned on DLSS 3.0 - for those that don’t know, I’m sure most of you reading this do, that’s a feature in the newest NVIDIA 40 line of GPUs that utilizes AI, and software magic to increase your framerates. After doing so, I saw a marked improvement in my FPS (note in my pictures below, you might notice the average FPS is higher than what I cited, that’s because I paused playing to take a screenshot and there was no action going on when the screenshot was grabbed). But I was really impressed with the lighting and textures. The ray tracing was fantastic. All in all, even with just turning on DLSS 3.0 in the menus (again, I don’t really get into the fine tuning, it’s not my thing, but I know it’s important to a vast majority of PC gamers) I was able to get great performance out of Cyberpunk which is known to be graphically demanding.
I also tried one my favorite games, Lego Builder’s Journey. It’s a simple puzzle game, but it looks amazing on this laptop - primarily because of the ray tracing and high refresh rate. I was able to get FPS in the 100s.
All-in-all, as a 1080p gaming machine, you can’t do much better in terms of performance - without breaking the bank.
OTHER USES AND COMMENTS
It almost goes without saying that most gaming laptops are good all around laptops. If you can handle high demanding games, it can handle about anything else. When I’m not gaming, I mostly use computers for word processing and surfing the web. Of course this handles that just fine.
It almost goes without saying that most gaming laptops are good all around laptops. If you can handle high demanding games, it can handle about anything else. When I’m not gaming, I mostly use computers for word processing and surfing the web. Of course this handles that just fine.
The speakers are par for the course for a laptop. You’ll want dedicated speakers when in a serious gaming session but otherwise, they sound as good as you’d expect in a laptop. There’s little to no bass to speak of, but I found them to get plenty loud to hear spoken dialogue in games.
The battery life is rated at around 8 hours for web surfing or video playback. I didn’t perform a battery run down test, but I would be surprised if it lasted 4 hours with general use (which might include some gaming). I’ll also note that when I unplugged it after a full charge, went a few days and turned it on without plugging the power in, the power level was at 75%. I haven’t tested it thoroughly, but I hope this was an aberration in that I might have not fully turned it off before closing the lid. Otherwise, I would be concerned about relying on the battery.
CONCLUSION
If you are in the market for a gaming laptop that can handle most any game and is reasonably priced, this MSI is a good one to consider. I found no performance issues playing a wide variety of games on high visual settings. The 1080p screen is more than adequate on a 15 inch screen.
If you are in the market for a gaming laptop that can handle most any game and is reasonably priced, this MSI is a good one to consider. I found no performance issues playing a wide variety of games on high visual settings. The 1080p screen is more than adequate on a 15 inch screen.
I would recommend this to a friend!


Share this review:
+3points
5of 7voted this as helpful.

The Ninja Blast Portable Blender brings high-speed Ninja blending power on the go with a cordless, hand-held design. The 18-oz. vessel is perfect for smoothies, protein shakes, and frozen drinks. Blast through frozen ingredients with Ninja~s BlastBlade Assembly. Ninja Blast is rechargeable via USB-C. One-handed, easy-open sip lid and carrying handle make drinking on the go easier than ever.
Customer Rating
4
Works great, but use case is limited
on September 2, 2023
Posted by: callmeageeth
This is a fantastic little blender but won't be for everyone. It's really only meant for one person as you can tell by the size. You won't be making a picture of margaritas at your next house party with it for example, or smoothies for the entire family.. But for someone drinks their meals frequently, or even infrequently, this is a nice little option - especially when on the go. It's extremely portable and user friendly and the motor works well for the most part. There are a few little quirks, but nothing that would stop me from recommending it.
WHAT YOU GET AND GETTING STARTED
The blender comes in a little cardboard package in the shape of a big tube. There's not much in there, it's just the blender and inside of it you'll find an instruction manual and an extremely short USB C cable for charging. All in all everything you would need. Setup is pretty straightforward, one of the stickers on the blender itself tells you to charge it for at least two hours before the first use. But unlike other Ninja blenders, there's not 6 different types of preset blending options (like ice crush, smoothie, pulse etc.). There's a button to turn it on and off, and there's a button to start and stop the blending. Frankly, it’s all I ever want in a blender.
DESIGN
The blender is solid and well designed. It comes apart in three pieces. There’s the lid, which is both the lid of the blender (to prevent everything from shooting out) and has a flip top so you can drink from it, there’s the clear plastic container, and the motor base. The lid screws into the clear plastic body, which then screws into the motor base. The blender will not turn on unless the arrows on the clear plastic body and motor base are aligned (which requires you to twist/tighten them to a certain point). Again, it all fits well together and feels solid. I can’t speak to its durability if it’s, for example, dropped, but it at least feels like it should take a little beating. Especially since it’s meant to be portable, so drops are bound to happen.
The bottom of the motor base has a thick and sturdy rubber seal. This minimizes slipping and prevents the blender from dancing around on the table while in operation.
OPERATION
There’s no LCD screen or the like. There’s just a color ring around the power button. These lights can be thought of as error messages. If it’s white, that means the clear plastic body isn’t properly aligned with the motor base, so it won’t work. Orange means that the blades are blocked (this happened frequently to me). Solid red means it needs to be charged. There’s a handy sticker that you can remove from the motor base telling you what these colors mean, but I keep it attached so I can quickly reference it.
When you first use it, you’ll notice inside the clear plastic body a picture that shows you how to properly load the blender. 6 ounces of liquid are required, they go in first, then it’s recommended to add fresh fruit, maybe greens, then nuts/seeds/butter, and then finally ice or frozen fruit. This is an easily formula to follow but it took me a few tries to get the right amount of ingredients in there. I’m used to a larger blender and tended to overload it. I started to cut up some of my veggies (i.e. carrots) and fruits (i.e. apples) so I could fit more food in the body.
After it was loaded and the top was screwed on, it was time to turn it on. I kept getting the orange light, meaning the blades were stuck. But I learned to turn the blender upside down (leaving the blades untouched) and then when the motor started running I started to shake the blender (shaking it while in operation is actually recommended). The motor will run for 30 seconds before turning off automatically. All in all, I didn't have any complaints about its capabilities. So long as you don't jam it full with nuts, vegetables or firm fruits, it works just fine. No concerns there.
WHO'S THIS FOR?
The biggest question you have to ask yourself is who is this blender for? While you can blend on the go, do you really need that? You can't, for example, get your ingredients ready the night before, put it in the blender and then put the blender in the fridge (you're warned against putting the motor in the fridge). So it's not as if you save time. If you make a smoothie as a part of your morning routine, it's the same process. I guess the difference is, do you blend it right then, or do you take it on your morning commute?
If you make multiple smoothies in a day, I guess this makes sense, you can use it multiple times no matter where you are.
To me, the biggest benefit to having this blender is the small size. In my household, we have a giant blender. We barely use it and it takes up a ton of space. And when I did use it, it was for single person smoothies. So for me, this is a nice blender, it's small and doesn't take up a lot of space.
CONCLUSION
In sum, the blender works well for single person shakes - putting aside its portability. But the utility of having the ability to blend things on the go is a little hit and miss. All depends on your use case. It works well, so that shouldn't be your concern, the biggest question to ask is whether you can get by with a single person blender, which would save lots of space versus large blender.
I would recommend this to a friend!


Share this review:
+7points
7of 7voted this as helpful.

Zero in on a perfect aim with our first-ever glass gaming mouse mat~built to last with premium tempered glass. Optimized for optical sensors and specially treated for quieter swipes, stay in the zone with an ultra-smooth surface that makes your mouse feel like there is zero resistance.
Customer Rating
4
Great performance, but large and needy
on June 13, 2023
Posted by: callmeageeth
I’m a gaming enthusiast - meaning I keep up on the latest trends and games - but my kids and job (i.e. adulting) keep me from gaming as much as I’d like. Point is, I’m not someone looking at every angle for a slight advantage against my online opponents. But I always appreciate new tech and tech accessories that look good and provide certain advantages. I’ve been using the same cloth/rubber mousepad since 2011 (I know because the year is on it). It’s ugly. I own a few Razer peripherals and have always been impressed with their build quality and utility.
I never thought I’d want or even like a glasspad, but when I step back and think about it, most good laptop trackpads (specifically Macbooks) have glass trackpads which provide superior responsiveness, feeling and accuracy. But they have their drawbacks, namely they can break easily. That’s not to say it will crumble in normal use - even over time - but I certainly don’t have any worries dropping something on my rubber/cloth mousepad and it breaking. That’s something to at least think about with this Razer mousepad.
The things to know about this trackpad is that it’s large. Like really large. You will need to make sure you have ample space on your desk - you won’t want it hanging off the edge. It also comes with a large warning telling you not to put sharp objects on it, or hot or cold items. Good news is that it’s easy to clean, you simple wipe the dust off every month or so to prevent buildup.
In terms of performance, I love it. It’s truly frictionless, my mouse simply glides across it. I can say that it’s a noticeable difference from a traditional cloth mousepad, but I can’t say the performance bump is noticeable. Now again, true games that care about every little advantage might say differently, but day to day and casual gaming (like strategy games) it’s hard to say there’s a performance difference. But it certainly feels nice to use. The surface is so large your wrist inevitably ends up resting on it and it feels smooth to the touch. It also looks professional, it actually looks like it might have some texture or “grip” to it, but that’s just cosmetic. It truly feels, smooth as glass, pun intended.
The only reason I wouldn’t give it 5 stars is because it’s overpriced for a trackpad - not overpriced necessarily as a “glass” trackpad. And it’s extremely large, which is nice, but limits your placement options (of course there are smaller sizes). Plus the concern of it breaking. Of course, once it’s on your desk, that really shouldn’t be a problem unless you happen have a shelf with heavy objects next to it that might fall and break it. At the end of the day, it’s a pleasure to use both casually gaming and just day-to-day tasks.
I would recommend this to a friend!


Share this review:
0points
0of 0voted this as helpful.
callmeageeth's Review Comments
callmeageeth has not submitted comments on any reviews.
callmeageeth's Questions
callmeageeth has not submitted any questions.

The Lucyd Starman titanium frames weigh just over an ounce, and with their enhanced flexibility will fit most users out of the box. These patent-pending Bluetooth frames offer a unique mix of durable titanium, designer styling, optional vision correction, and smart features. All Lucyd frames include a 7-day moneyback guarantee and 1-year warranty against any defects in frame or lenses.
What are the glasses capable of?
That's a seemingly broad question, but they connect to any Bluetooth source device and can play music through the speakers embedded in the arms of the glasses. The sound is good based on the open speaker design, so the sound will bleed a little bit. But overall, I like them.
4 years, 3 months ago
by
callmeageeth
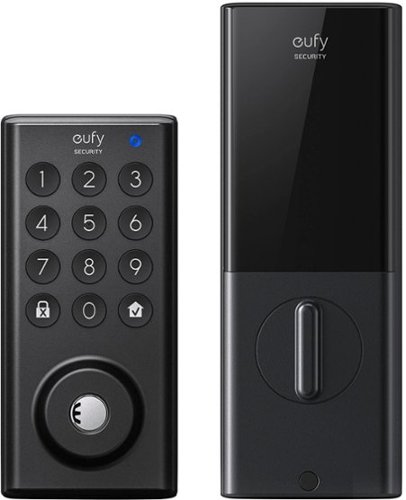
Feel safe and protected with eufySecurity Solo Smart Lock D20. Securely open your front door with built-in Wi-Fi to only let trusted friends and family enter your home when you allow it. And when you are outside your front door, connect with Bluetooth via the eufy Security app, so you don~t need to fumble for your keys. Solo Smart Lock is tough, too, with stainless steel construction that earned it a BMHA certification. Plus, the IPX3 weatherproof rating ensures it can endure wild temperature swings and heavy rain. Give yourself peace of mind with Solo Smart Lock, and you~ll always feel your home is secure.
Does it come with the lever handle? If not, how can one order the handle shown?
No, it does not come with a lever. You're stuck with what you have, or going to a home improvement store to get one.
4 years, 4 months ago
by
callmeageeth
Easily track you and your children~s (pediatric use) well-being with the ability to store up to 60 measurements for up to 2 users. A universal cuff is wearable on any wrist large or small. The Beurer BC57 synchronizes with your smartphone via Bluetooth~ technology so you can see your readings over time and share with your doctor. It also identifies arrythmia and alerts you of any detections.
How do you change the battery?
Underneath the monitor itself, where it attaches to the wristband, there's a cover you can pop open to replace the AAA batteries.
4 years, 6 months ago
by
callmeageeth
Your SWFT journey starts here. Wherever you~re headed, FLEET will get you there with style, safety, and a fresh design that~ll turn heads as you turn corners. Move ahead of the pack with a SWFT e-bike with a detachable, rechargeable battery. Multiple modes allow you to use pedal-assist or your throttle to propel you forward. With a 19.8 mph max speed, you can travel up to 37.2 miles on a single charge of your battery alone. A built-in monitor display indicates your battery output and speed. Let the journey begin.
Do you have to pedal this bike to make it work?
You have to pedal it to get it going, once you turn the pedal maybe twice, the motor kicks in and it will either assist your pedaling or you can use the throttle
4 years, 6 months ago
by
callmeageeth
Your SWFT journey starts here. Wherever you~re headed, FLEET will get you there with style, safety, and a fresh design that~ll turn heads as you turn corners. Move ahead of the pack with a SWFT e-bike with a detachable, rechargeable battery. Multiple modes allow you to use pedal-assist or your throttle to propel you forward. With a 19.8 mph max speed, you can travel up to 37.2 miles on a single charge of your battery alone. A built-in monitor display indicates your battery output and speed. Let the journey begin.
What if I purchase this bike now and and later is cheaper on Black Friday. Do I get the different?
Depending on your membership status, you can get a refund of the difference so long as you're in the return period.
4 years, 6 months ago
by
callmeageeth
GeoBook 120 is a 12.5-inch Windows 10 laptop complete with a 1-year subscription to Microsoft 365 Personal. Powered by an Intel Celeron Dual Core Processor and 4GB RAM, this lightweight laptop makes easy work of essential tasks, browsing and more. 64GB eMMC storage is built in and can be expanded with the addition of a MicroSD card (up to 64GB). GeoBook 120 also features a 2MP webcam, dual microphones and integrated speakers, plus reliable AC Wi-FI.
Can I play Roblox and Minecraft?
My kid has played both on it, and they run just fine.
4 years, 6 months ago
by
callmeageeth

Pixel Buds A-Series bring you rich, high-quality sound for a lot less than you~d expect. Their beamforming mics help make calls crystal clear.*** The flush-to-ear design is stylish, and the stabilizer arc keeps them in place so you can wear them even during the sweatiest workout.**
Does it have Noise Cancellation feature ?
No they do not have active noise cancelling. One of the drawbacks of the Pixel Buds (IMHO) is that they let in a lot of ambient noise, even with a good seal/fit in your ears.
4 years, 9 months ago
by
callmeageeth
Pixel Buds A-Series bring you rich, high-quality sound for a lot less than you~d expect. Their beamforming mics help make calls crystal clear.*** The flush-to-ear design is stylish, and the stabilizer arc keeps them in place so you can wear them even during the sweatiest workout.**
Does Google pixel buds pair with iPhones?
I haven't specifically tried it, but it's my understanding they do, but I do know you'll lose the ability to use/activate the Google Assistant through the Pixel Buds.
4 years, 9 months ago
by
callmeageeth
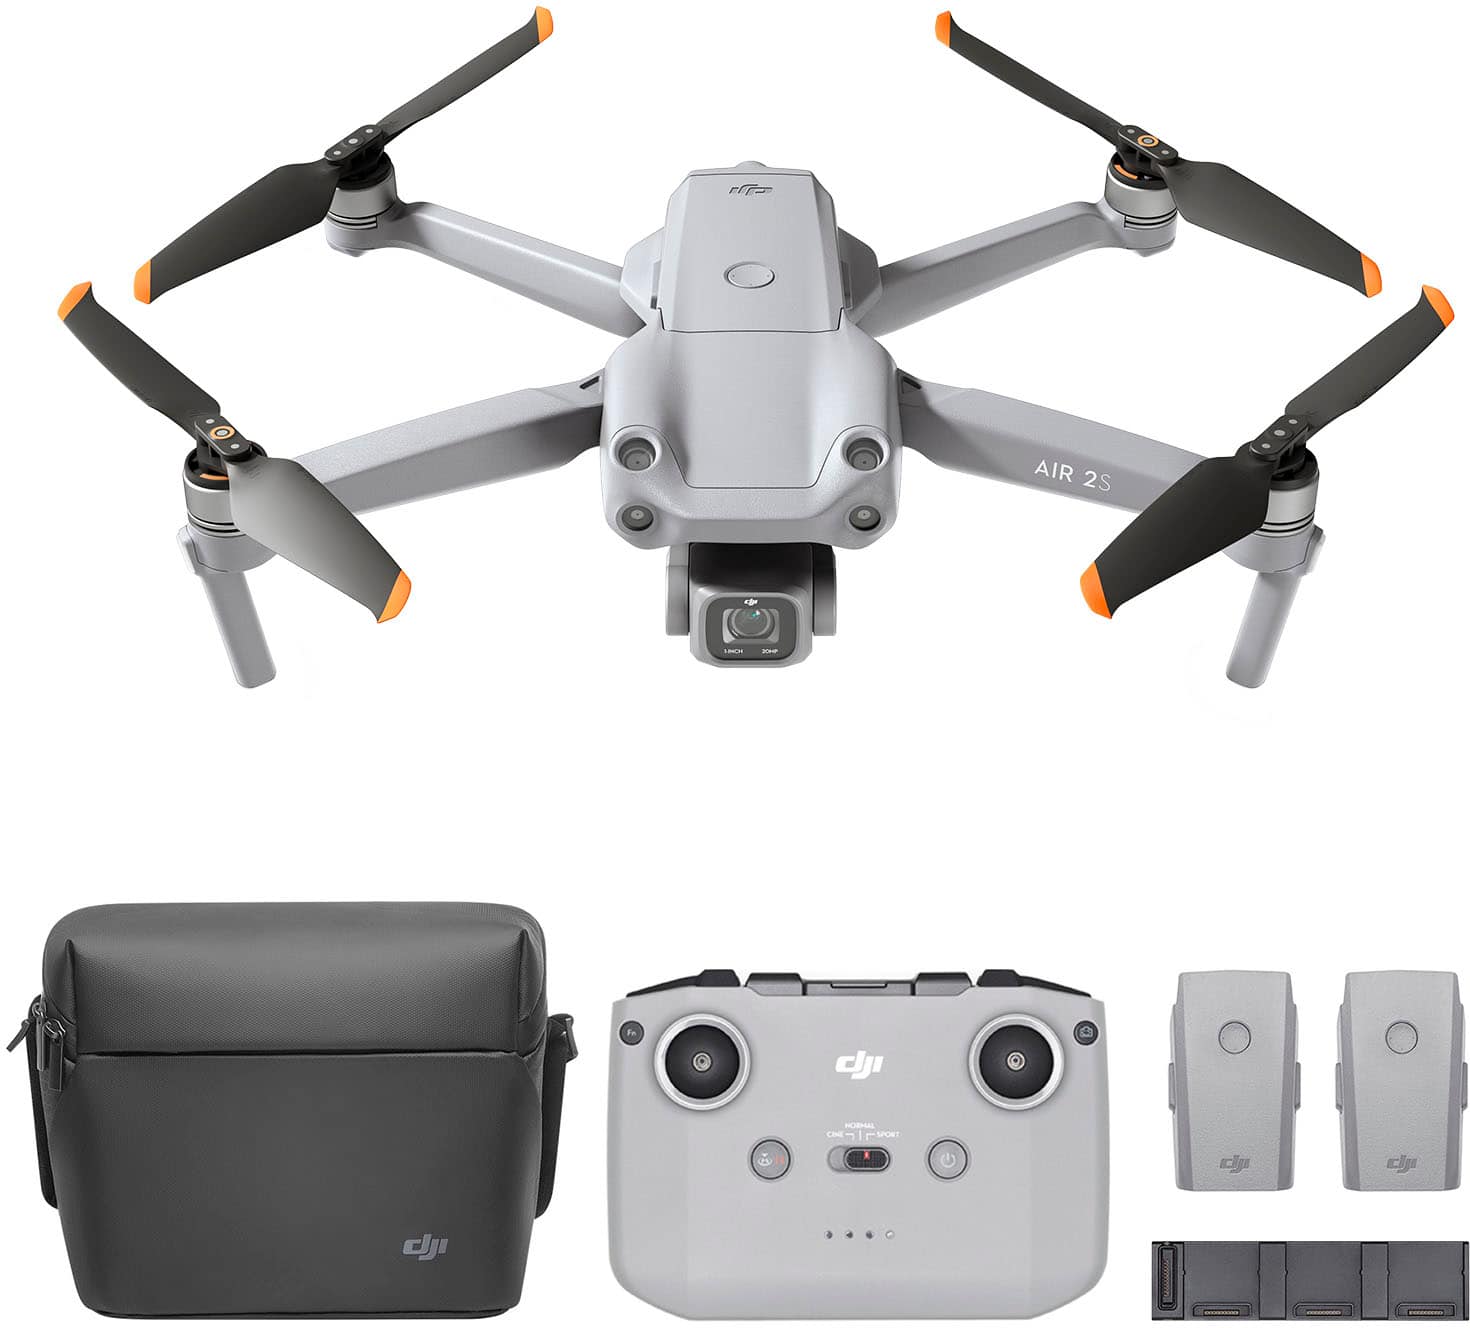
Featuring a 1-inch CMOS sensor, powerful autonomous functions, and a compact body weighing less than 600 g, DJI Air 2S is the ultimate drone for aerial photographers on the move. Take this all-in-one aerial powerhouse along anywhere to experience and record your world in stunning detail.
Can I use my Goggles with the DJI mavic air 2s?
I haven't tested it, because I don't own the goggles, but there's a setting to change the camera to FPV. And according to dronedj.com, it is compatible.
4 years, 10 months ago
by
callmeageeth
Featuring a 1-inch CMOS sensor, powerful autonomous functions, and a compact body weighing less than 600 g, DJI Air 2S is the ultimate drone for aerial photographers on the move. Take this all-in-one aerial powerhouse along anywhere to experience and record your world in stunning detail.
Will Air 2s work with note 20 ultra?
I don't own that phone, but I don't see why not. Biggest concern is size of the phone and whether it fits into the controller. I use a Google Pixel 4 XL and there's still a little more space for the "arms" of the controller to hold the phone. And in terms of the app itself, you'll need to download it straight from the DJI website (which is the same process for all Androids)
4 years, 10 months ago
by
callmeageeth