Share KusMoG's profile
KusMoG
KusMoG's stats
- Review count77
- Helpfulness votes316
- First reviewOctober 24, 2013
- Last reviewFebruary 13, 2026
- Featured reviews0
- Average rating3.9
- Review comment count1
- Helpfulness votes0
- First review commentMarch 29, 2017
- Last review commentMarch 29, 2017
- Featured review comments0
Questions
- Question count0
- Helpfulness votes0
- First questionNone
- Last questionNone
- Featured questions0
- Answer count1
- Helpfulness votes5
- First answerOctober 3, 2020
- Last answerOctober 3, 2020
- Featured answers0
- Best answers0
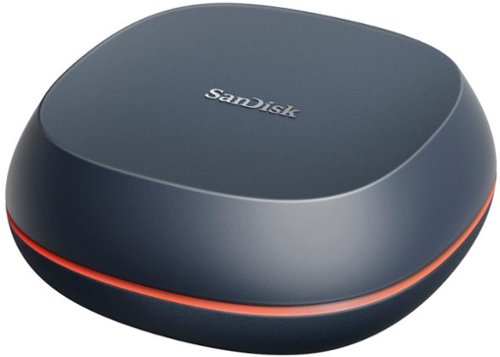
Introducing the SanDisk Desk Drive ~ a complete desktop backup solution. Designed with the higher capacity of an HDD, but with the speed and reliability of an SSD, it~s the perfect home base to quickly back up your favorite and important content. An immense capacity of up to 8TB will easily hold your photos, videos, music, and important documents, and read speeds up to 1000MB/s will help you access everything fast. With a compact design that fits naturally into any workspace, this drive helps protect your content ~ all in one place.
Customer Rating

5
Good value for high capacity storage & high speed
on April 24, 2024
Posted by: KusMoG
At about 4” x 4”, a height of 1.5”, and 13.7oz weight (with cable and power adapter), the SanDisk Desk Drive is actually portable if you need it to be. Its small footprint takes up little space on a desk or work environment.
The 12V power adapter is relatively slim at 2.5” x 1” x 1.5” (2.25” with the non-retractable prongs).
The cable length of the power adapter is 5.5’.
The length of the USB-C cable is 3’ 3”. With the USB-A adapter it comes to 3’ 4.5”.
Full disclosure: The adapter that came with mine was defective which caused the speeds of the drive to be dramatically slow (44MB/s read and writes instead of 1000MB/s). I don’t know how prevalent my issue is, but if you experience the same, exchange your drive at the place of purchase or contact SanDisk and they will replace it under its limited 3 year warranty.
The USB cable is pretty rigid, which is normal with high-speed cables such as this USB 3.2 Gen 2 cable, so you’ll need 2.5” of clearance space between the connection and an obstruction like a wall or the back of a desk. You might be able to flex the cable down to 2” of clearance, but I’d worry about the damaging of the cable at that point.
The bottom of the Desk Drive has a silicone feeling base that does a decent job of keeping the drive in place on a flat surface. It’s more likely to slip on laminated surfaces when the cable is tugged on but it’s still able to establish a grip and it’s nothing terrible.
Since the Desk Drive uses an SSD the drive has no moving parts. There is zero vibration and no noise while it is in operation, which tells me it’s probably not using a fan for cooling. I suspect it’s just using a heatsink, which probably accounts for most of the drive’s height and weight.
Besides the power and USB-C connector, the only hole in the device is located on the back-left corner of the drive. I suspect it’s the Desk Drive’s only vent but I’m not sure since there’s no air blowing out to feel, again suggesting that there is no fan.
Besides the power and USB-C connector, the only hole in the device is located on the back-left corner of the drive. I suspect it’s the Desk Drive’s only vent but I’m not sure since there’s no air blowing out to feel, again suggesting that there is no fan.
After a sustained use of the Desk Drive for 1 hour, the drive never gets hot to a point where I can’t handle it. During operation the Desk Drive is at its hottest on the top of the device, but it’s still safe to touch.
The Desk Drive is preformatted in exFAT so it’s compatible with Windows and macOS out of the box.
On the drive itself is a single folder labeled “SanDisk Software” and it’s only 1.49 MB with 3 files:
Software downloader for Mac (dmg), Windows (exe), and instructions for the software downloader (pdf).
It doesn’t host the actual software itself. You will need an internet connection.
You can always download the backup software, Acronis True Image, from Western Digital’s support website so you don’t need the included software downloader. Bear in mind that you’ll need almost 1 GB of free space to install Acronis.
-=CrystalDiskMark 8.0.5 x64 test=-
Sequential speed is the speed of a transfer of a single file.
Random speed is the speed of a transfer when transferring many different files at once.
Sequential speed is the speed of a transfer of a single file.
Random speed is the speed of a transfer when transferring many different files at once.
Using the included USB-C cable plugged into Thunderbolt 4/USB 4 port:
Sequential read: 1050.12 MB/s
Sequential write: 1054.42 MB/s
Random read: 126.93 MB/s
Random write: 123.39 MB/s
Sequential read: 1050.12 MB/s
Sequential write: 1054.42 MB/s
Random read: 126.93 MB/s
Random write: 123.39 MB/s
Using the cable with included USB-A adapter plugged into USB 3.2 Gen 2 port:
Sequential read: 965.04 MB/s
Sequential write: 900.53 MB/s
Random read: 235.62 MB/s
Random write: 215.50 MB/s
Sequential read: 965.04 MB/s
Sequential write: 900.53 MB/s
Random read: 235.62 MB/s
Random write: 215.50 MB/s
Repeated tests will differ slightly but it lives up to its 1000 MB/s max read claim.
I find it curious that the random speeds were slower on a USB 4 port but this may be a case of “your mileage may vary (YMMV)” and could just be my motherboard (ASUS ProArt X570-CREATOR WIFI). It’s not slow by any means, but just a glaring difference to me. It’s still dramatically faster than any mechanical drive solution out there. SSD is on a different class.
-=Real life tests=-
My PC’s NVMe SSD used in the following tests does 5000 MB/s read, 2200 MB/s write so it’s significantly faster than the Desk Drive and won’t be a bottleneck (a bottleneck is the thing that causes an output to be less than what you expect it to be).
My PC’s NVMe SSD used in the following tests does 5000 MB/s read, 2200 MB/s write so it’s significantly faster than the Desk Drive and won’t be a bottleneck (a bottleneck is the thing that causes an output to be less than what you expect it to be).
34.4 GB of data comprised of 1095 files and 24 folders using USB-C cable:
Desk Drive to NVMe SSD: 45 seconds
NVMe SSD to Desk Drive: 57 seconds
Desk Drive to NVMe SSD: 45 seconds
NVMe SSD to Desk Drive: 57 seconds
The same test using the USB-A adapter with the cable were pretty similar:
SSD to NVMe SSD: 41 seconds
NVMe SSD to SSD: 53 seconds
SSD to NVMe SSD: 41 seconds
NVMe SSD to SSD: 53 seconds
784 GB of data comprised of 64 files and 13 folders using USB-C cable:
Desk Drive to NVMe SSD: 17 minutes
NVMe SSD to Desk Drive: 21 minutes
Desk Drive to NVMe SSD: 17 minutes
NVMe SSD to Desk Drive: 21 minutes
As you can see in all instances, the write speed takes slightly longer than the read speed.
My read speeds typically range around the 930-960 MB/s
My write speeds range around 575-700 MB/s
Over a 10 minute span, the speeds were consistent, not showing any sign of thermal throttling.
My read speeds typically range around the 930-960 MB/s
My write speeds range around 575-700 MB/s
Over a 10 minute span, the speeds were consistent, not showing any sign of thermal throttling.
Acronis full backup of 706 GB from the NVMe SSD: 25 minutes
Other external SSDs on the market at this price range with this storage capacity are only about half as fast as the Desk Drive (540 MB/s). The external SSDs that do run as fast as the Desk Drive typically don’t have a model with a storage capacity as high as the Desk Drive at 8TB. Spinning drives, while affordable, are nearly 5x slower than the Desk Drive.
The SanDisk Desk Drive is currently the best bang for your dollar when it comes to high capacity AND high-speed storage. I highly recommend it.
The SanDisk Desk Drive is currently the best bang for your dollar when it comes to high capacity AND high-speed storage. I highly recommend it.
I would recommend this to a friend!

Share this review:
+1point
1of 1voted this as helpful.

Enjoy your cookout with the fully connected Ninja Woodfire Pro Connect Premium XL Outdoor Grill & Smoker. With Ninja ProConnect, monitor and control the cooking of 2 different proteins, get real-time notifications to your phone, and even access recipes and cooking charts, all from the palm of your hand. Master Grill, BBQ Smoke, and Air Fry with 100% authentic smoky flavor you can taste.
Posted by: KusMoG
I live in an apartment building and in New York City, gas grills are illegal to have on a balcony or terrace, so electric grills are my only way to go. But you should also be aware of the rules of your building as it still may not be allowed. If you live in a building and are unsure if an electric grill is allowed, you should confirm with the building owner or landlord first before purchasing.
With that said, the Ninja Woodfire ProConnect XL was a great choice for me! I’m not much of a cook so anything so I’ll take any help I can get when it comes to cooking. I loved the app features and how I’m able to cook while I’m away from the grill and not have to babysit it. Connecting the app to the grill was easy with the guided instructions. With the app it’s almost like microwave cooking simplicity. It will tell me when preheating is done and to add food. When to flip the meat. When it’s done cooking. It allows me to set the temperate and the cooking time. It even has presets for meats.
There are 2 thermometers included to allow you to cook and monitor 2 different things at the same time.
The display on the grill is bright enough outdoors and easy to read.
There are 2 thermometers included to allow you to cook and monitor 2 different things at the same time.
The display on the grill is bright enough outdoors and easy to read.
Besides grilling, it’s also a smoker, which I’m completely new to, as far as wood flavoring goes. It comes with wood pellets, so that was nice to get me started because otherwise I’m not sure I would’ve ever tried the smoking feature if they didn’t include it and I was left to my own devices. The smoked chicken I made tasted great and was flavorful. Best of all, it was easy to make. You just put the wood pellets in the grill's separate pellet box, and set the grill to smoke.
The Woodfire ProConnect XL is also an outdoor air fryer. It’s pretty cool that I can make fried chicken with the same machine as well when I want to eat outdoors, instead of using my air fryer in the kitchen then bringing it out. I can even cook fries and fried chicken at the same time.
Cleaning is relatively easy. You remove the grease and grill tray from the grill and wash them with dish detergent and water in your sink or from a hose. The trays are non-stick, which helps with the cleanup. You can’t use abrasive pads, as tempting as it may be to remove stubborn stuck on food, or else it will scratch the tray and probably the non-stick coating along with it. You’ll also need to wipe down the inside of the hood. And that’s it.
Cleaning is relatively easy. You remove the grease and grill tray from the grill and wash them with dish detergent and water in your sink or from a hose. The trays are non-stick, which helps with the cleanup. You can’t use abrasive pads, as tempting as it may be to remove stubborn stuck on food, or else it will scratch the tray and probably the non-stick coating along with it. You’ll also need to wipe down the inside of the hood. And that’s it.
The cooking surface of the Woodfire ProConnect XL measures at 17.25” x 11”. This fits 8 of the 1/3 lbs Bubba Burger patties that you can buy from the supermarket.
The base isn’t flat. It’s supported by 4 legs on its corners, so you will need to put it on a flat surface that’s wide enough to support the legs. So you will need about 23” x 21” of flat surface space.
Unfortunately, the grill does not come with a cover, which is disappointing, since it’s an outdoor grill. Instead the cover is sold separately.
Another thing I found annoying was that the power cord was short at just 4 feet and 7 inches. Most of us will end up needing a heavy duty outdoors extension cord. The extension cord I went with was a 10 ft 12-gauge outdoors extension cord.
The ease of cooking with the app connectivity makes the Ninja Woodfire ProConnect XL worth it for me. Since I live alone, the size is more than big enough for me, but it’s welcome when my mom comes to visit and cooks for our family of 6 people.
I would recommend this to a friend!
Share this review:
0points
0of 0voted this as helpful.
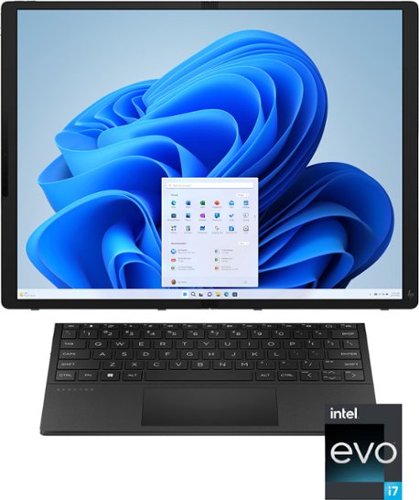
Don~t just raise the standard. Reshape it. The versatile HP Spectre Fold crushes the status quo thanks to its innovative design capable of multiple forms, functions, and uses that go beyond anything you~ve ever seen from a laptop. It's the world~s first 17-inch foldable PC with a wireless charging keyboard and pen. Give your powerful 12.3" diagonal laptop more screen space instantly just by quickly sliding the magnetic, auto-pair keyboard out. Detach the keyboard completely and flatten the screen to change it to an ultra-thin desktop with built-in kickstand one minute, to a 17" diagonal tablet.
Customer Rating

4
The future of PC is here and it's VERY expensive
on October 24, 2023
Posted by: KusMoG
***Design***
In its closed clamshell form, it’s very compact. It also doesn’t have anything around the hinge to add thickness. That integrated kickstand is buried inside the chassis, and pulls out when in use. Because it’s placed near the center, it is able to support itself on non-flat surfaces like my bed’s mattress without tipping over.
Bezels are ½” on the short side where the camera is installed, and 5/16” on the long side.
It looks really attractive in its dark blue color while also looking professional with branding that’s there but very inconspicuous.
That chassis feels nice to touch and solid. I’m not hearing any creaks or feeling any flexing weak points.
There is no looseness when adjusting the lid at any angle either. It stays in position tightly. I don’t have any worries of it accidentally opening when I have it closed.
When closed without the keyboard there is a gap that’s largest near the hinge. This could be a concern when storing it in a bag with other things and makes it more susceptible to debris.
Then pen is 5.75” long and 3/8” thick. It has the size and weight of a real-life pen.
The Bluetooth keyboard is 10.5” x 7”. It is a full-size keyboard, without a numpad. I never felt the need to adjust to it because the spacing of the keys felt natural to me. They keyboard doesn’t feel cheap either. The keys have satisfying travel that it feels like a real laptop keyboard and less like a tablet keyboard. There are also convenient function keys like a screenshot key, and media controls. Unfortunately, the keyboard has no backlighting.
The touchpad on the keyboard is 4.25” x 2.25”. The touchpad is silent when using tap to click. There are no loose feeling parts.
The press to click on the touchpad is meant to be done on its lower half. You will not be able to press to click on the touchpad’s top ½”.
The keyboard magnetically attaches to the tablet’s lower half and the hold is strong enough to prevent the keyboard from moving, even while typing.
While magnetically attached, it also charges the keyboard with wireless charging. You may never need to charge it using the included proprietary charging cable that connects to a USB-C charger or one of the Thunderbolt ports, but it’s nice to have that option. The keyboard also has an on/off switch.
The pen also magnetically attaches in 2 places.
1- on bottom of the tablet (when in laptop mode or the right side when in desktop mode). It also wirelessly charge the pen.
2- on the right side of the keyboard. This will not charge the pen.
On the top of the Spectre Fold in laptop mode is a 5MP 1080p infrared camera that works with Windows Hello. There is a physical switch near the power button that physically covers the camera as well, for privacy. Unfortunately, this placement makes it awkward for video calls in landscape because your eyes won’t be in focus. It also makes signing in with Windows Hello difficult. You will find your hands touching the camera when you use it as a tablet in landscape. You’ll need to clean it or else it could affect camera quality and Windows Hello effectiveness.
There are 2 Thunderbolt 4 ports, placed in such a way that there is always one port on the top, and one port on the bottom, whether in laptop mode (top-left and bottom-right), or tablet/desktop mode(top-center, or bottom-left). These ports are used for charging, display, and data. Almost any USB-C charger can be used to charge the Spectre Fold, but you’ll need a 100W charger to match the performance of the stock charger. You’ll get a notification suggesting that you use the included charger if you use a third-party charger. Lower powered chargers can still charge the Spectre Fold but at much slower speeds and may not charge fast enough if you’re using the device that the battery will still drain.
When the battery is low, the LEDs by both Thunderbolt 4 ports will blink amber, not only making it a useful reminder for you to charge the device, it also helps you quickly find the ports as well.
To make up for the lack of ports, the included 100W charger, also comes with a USB port.
The Spectre Fold also comes with a USB-C hub that has one USB-C port, 2 USB-A ports, and a HDMI port.
***Battery Life***
In all tests, brightness was 40%, HDR was on, and Wi-Fi was connected to Wi-Fi 6e.
Tablet mode/Desktop mode: 8 hours 34 minutes with looping 1080p YouTube video
Desktop mode with dual screen, using an external 2K monitor as the 2nd screen: 3 hours while streaming video on both screens
Laptop mode: 9 hours 23 minutes with Microsoft Word, Firefox with 7 tabs open, Edge, occasional online video
They fall short of HP’s claims because if you read the fine print, they’re testing it with wi-fi on, but not connected, and looping local video. That type of usage isn’t realistic.
Charging time from 0% to 100% with the stock or any 100W charger while the computer is shut down *and* even while powered on and in normal usage (no gaming, some video, mostly internet browsing, Microsoft Office): 2 hours and 45 minutes
To use quick charging so that it charges to 50% in 45 minutes, the Spectre Fold must be shut down while charging.
Otherwise, if you charge while using it, 45 minutes will give you ~32% battery life.
***Modes***
The Spectre Fold can be used in several different modes.
-Desktop mode (2560x1920), where you use the kickstand, and the keyboard is detached and used as a traditional Bluetooth wireless keyboard. While the touchpad can still be used, you can always use a mouth with this setup. It will feel like you’re working on a 17” all-in-one desktop PC. Unfortunately, the kickstand doesn’t support portrait mode. This doesn’t mean it’s not possible. You would just need to purchase a separate stand.
-Laptop mode (1920x1255), where you have the keyboard attached. Windows automatically recognizes the keyboard when snapped on, and adjusts the screen size accordingly. It feels like you’re working on a 12” netbook.
-Tablet mode (2560x1920 (landscape), 1920x2560 (portrait)). It’s almost the same exact size as a real-life copy of Interview magazine. The Spectre Fold is slightly taller. Thanks to its 4:3 aspect ratio magazines look completely natural. High-res photos look stunning! Unfortunately, the biggest setback of this mode is Windows itself. It still isn’t optimized very well for touch and tablet use. If you’re expecting something like Android or iOS you will be disappointed.
-Extended laptop mode (resolution: 1920x1820), where the keyboard attaches to just the bottom half of the bottom screen in laptop mode. The top half of the bottom is the extended part of the display. You could use the space for an entire window, but the fold would take getting used to. I found it more practical to move apps like music players and videos (as opposed to putting them in P-I-P) on the extended portion. With the touch screen, it makes the controls for media players rather intuitive as well.
-Extended desktop mode (1920x2560), where the screen is folded like in laptop mode but the keyboard is detached and you have the option of using the on-screen keyboard for the lower half or the wireless keyboard.
***Performance***
I didn’t experience any slow down while doing normal tasks like web browsing, and playing videos. It operates pretty cool and the fans don’t run unless you’re doing something intensive like gaming, or editing video. When the fan runs it’s audible but not overly loud. When heat is generated, it gets the hottest around the camera area. The only way to use it at full power is if it’s plugged into power.
While using a 12th Gen CPU seems disappointing it’s probably for the best at this point in time because there currently isn’t a 13th gen CPU that’s as low powered. If a 13th gen CPU needs to be throttled to get decent battery life, then what’s the point?
Gaming is possible on the Spectre Fold but performance will vary depending on the game. Forza Horizon 5 works fine on the lowest settings. However, the newest Forza Motorsport will not run properly.
Virtualization comes enabled, so running virtual machines is possible, including Windows Subsystem for Android (WSA). Android apps will run with some lag that varies depending on the app.
The SSD has sequential read/write speed of 6226.42/4129.62 MB/s.
It has a random read/write speed of 213.44/190.70 MB/s.
Over Thunderbolt 4 networking, connecting the Spectre Fold to a laptop with a NVMe SSD with a Thunderbolt cable, I was able to get read/write transfer speeds of 1.2 GB/s both ways.
***Camera | Pen***
The camera is great and works pretty well with low light, showing little to no obvious artifacts, although the image does appear softer. Windows Hello is very responsive as long as the lens isn’t dirty and your pupils are in the direct line of sight of the camera.
The microphone is decent. My voice is articulate but my voice does sound a bit digitally processed. No bad audio. It’s just obvious that I’m talking from a computer instead of sounding like I’m in the same room.
The pen feels like a normal pen. Thankfully I never accidentally pressed the buttons. Writing on the Spectre Fold’s plastic surface offers a more pleasant writing experience than writing on glass since you can feel some resistance. I’ve found pen performance to vary depending on the app used but it’s generally good.
***Conclusion***
The HP Spectre Fold is obscenely expensive, and I cannot recommend it to the average consumer. This device can depreciate quickly. But new innovations always start this way. A DVD player would cost $600-$1000 when it first came out. 2-3 years later they went down to $100-$200. If you’ve been looking into foldable PCs AND you have the expendable money to spend for it, the HP Spectre Fold is undoubtedly the best one currently on the market. Just be aware that Wi-Fi 7 is around the corner (Spectre Fold only supports up to 6e) and foldable PCs may be dramatically cheaper in 2 years or sooner. But HP has created a great blueprint for foldable PCs with this one.
Share this review:
0points
0of 0voted this as helpful.

Level up with QuietComfort Ultra headphones ~ immersive, personalized sound meets premium, next-level noise cancelling headphones in striking colors. Pushing the boundaries with breakthrough spatial audio, these wireless headphones take what you~re hearing inside your head and place it in front of you for more natural, real sounding music. Whatever your music source, it~s just like listening to it live when you~re wearing the QC Ultra headphones. Unique to Bose, the QC Ultra headphones feature CustomTune technology which analyzes your ear~s shape and adapts the audio performance so everything you listen to hits exactly as it should. You won~t want to take them off because of the refined and premium materials. The cushions wrap your ears in a soft hug. The headband spreads pressure evenly. And sleek metal arms add a statement of sophisticated design. Connect to your devices with advanced Bluetooth 5.3 headphones and keep track of what you have paired in the Bose app. It also walks you through setup, gives you access to Adjustable EQ settings, and more. The QuietComfort Ultra headphones, sound just got real.
Customer Rating

3
Immersive Audio- Gimmick not worth premium price
on October 23, 2023
Posted by: KusMoG
As someone who has always preferred black headphones this is the first time I have ever preferred the white headphones version over the black. In my personal opinion, the QuietComfort Ultra (referred to as QC Ultra going forward) in the white smoke looks very attractive. It goes nicely with virtually anything I wear without looking too loud or obnoxious. I think the silver aluminum contrasts really well with the white smoke color of the headphones. It’s a small detail but it gives it pop compared to the previous generations of Bose headphones with their uniform color. I have never been able to get over how great they look.
As the name suggests, and it has been a long time staple of Bose going back decades, the QC Ultra is very comfortable. Even if they may not as comfortable as some of Bose’s other headphones, they still are when compared to its competition of a different brand. I have worn the QC Ultra to sleep and besides the need to sleep on my back (I’m more comfortable as a side sleeper) I didn’t experience any discomfort from the headphones whatsoever. I have worn them all day, even while out and about, and never felt enough discomfort to take them off.
The Aware mode of the QC Ultra helps make this possible since it is easily the best hear through mode I’ve ever heard, with the headphones or earbuds I’ve tried. It almost sounds like I’m not wearing anything. Almost. You can still clearly tell as the surrounding environment’s volume does sound a tad lower than reality. But the huge selling point with Bose’s hear through mode is the clarity and the fact that my own voice does not sound digitally processed when I speak in Aware mode, unlike with another popular brand of ANC headphones I use.
Calls on the QC Ultra sounded comfortable since I wasn’t annoyed with my own voice when I spoke. I didn’t sound muffled. The caller on the receiving end had no issues with my voice either. It was seamless and unproblematic.
As far as ANC goes, it’s one of the best I’ve tried but other brands have caught up so it’s not THE best, but it’s in the top tier. Comparing the ANC between the top tier headphones would be nitpicking at this point as none of them hold a clear true advantage over the other. In most real world cases, they’re all roughly the same in effectiveness. When heard really closely QC Ultra does allow some low frequency sounds through. For example, with no music playing, I could hear a bus pull up to the curb even with the ANC on in Quiet mode with its rumbling engine. However, the ANC does cover high frequency sounds better than another leading brand of ANC headphones.
Unfortunately, you cannot turn ANC off to preserve battery life.
Unfortunately, you cannot turn ANC off to preserve battery life.
The sound quality of the QC Ultras are great, especially if you’re a fan of Bose’s signature sound. It’s around the neutral-bright area, with less emphasis on bass. However, if you’re a Bose fan that always found its lack of bass an issue, you’re in luck. The QC Ultra has the most responsive and engaging bass I’ve personally ever heard out of Bose headphones. With that said, the QC Ultra’s bass still doesn’t compare to under brands I’ve tried, even when I maxed out the bass on the EQ of the Bose app. The QC Ultra can thump, but you won’t be able to achieve an exaggerated thump if you wanted it. It’s probably not the best for strictly hip hop listeners or want that energetic thump engaging sound from your music.
However, the sound quality only goes as far as the codec’s capabilities. And for most people it will be AAC which is a standard resolution 16 bit codec. Curiously, the standard AptX codec doesn’t exist on the QC Ultra. Instead, it has the premium versions, AptX Adaptive for high resolution 24-bit audio, and AptX Adaptive Low Latency for audio with low latency that virtually eliminates audio delay with video. The problem is, these premium codecs are not available in most devices. Supported devices are listed on Qualcomm’s website. No Apple, Samsung, or Google device support these premium codecs. PCs, Macs, TVs, PS5, Xbox Series X or S, and Switch all do not support them natively. For most people, you will need a USB-C adapter, which is not only an additional cost on top of an already expensive QC Ultra, but you’ll need to live with connecting a dongle to the device you want to use the QC Ultra with. This makes it virtually impractical for phone use, which you would almost certainly need to use without a phone case installed as well. So it’s unfortunate that it doesn’t have LDAC codec support, which Android phones now natively support for years, since Android 8.
With my lossless FLAC audio, the degraded sound quality is obvious on the QC Ultra. When paired with a Creative BT-W5 adapter to leverage the QC Ultra’s AptX Adaptive it sounds virtually identical to what I hear with my headphones capable of LDAC.
The low latency of AptX Adaptive LL also delivers on the QC Ultra. I was able to play a music rhythm game while wearing the headphones and didn’t experience any lag issues. Normally the game is unplayable with wireless headphones since it requires precise timing. Not the case with the QC Ultra on AptX Adaptive LL.
Immersive Audio. Unfortunately, I am sad to say that I found this feature to be a total (and absurdly expensive) gimmick. Make no mistake, you will NOT get realistic sound with this feature. I would describe them as a glorified adaptive EQ with head tracking. I’ve read other reviews talking about Immersive Audio uses spatial cues. They’re making stuff up to hype up something they apparently like. And like all gimmicks, it doesn’t necessarily mean it’s bad. Just not real or factual to claims that you’ll hear or read. What quickly exposes Immersive Audio is video, which is why Bose exclusively uses music to highlight its Immersive Audio feature. It even prepared a demo on its app despite the fact that it’s supposed to work with all audio. When you listen to any video with close-up speech or whispering with Immersive Audio on, it sounds ridiculous as it has no sense of spacing. It sounds far away and echo-y when it’s supposed to be immediately in front or behind you. It’s just as bad with gaming. In Shadow of the Tomb Raider there is a jukebox playing. Without Immersive Audio, you can hear the jukebox isolated to one location like it’s supposed to be. With Immersive Audio, the jukebox sounds like it’s hooked up to surround sound, which is absurd, especially within context of the game’s location and story.
That’s exactly what Immersive Audio does. It will successfully widen your audio’s soundstage. The problem is, it will do regardless of whether it needs to. It’s like a better version of a virtual EQ setting. It applies that virtual spacing to everything you hear. And unlike Bose’s claim, it makes a lot of audio sound unrealistic. With less complicated audio productions, like orchestral music, Immersive Audio can sound very pleasing to the ear. But with some pop music, like Dua Lipa’s Don’t Start Now, or One Kiss, where the sound was already engineered in stereo for with special effects to make it sound spatially dynamic, Bose’s Immersive Audio, with its algorithm or whatever it uses to modify the sound to create a spaced out sound, makes a complete mess of the original work. A lot of the clear engaging effects are softened for the “wideness” effect.
On top of this, Immersive Audio uses drains the QC Ultra battery life faster than if you didn’t use it.
Battery life remains disappointing compared to its competitors even with Immersive Audio disabled. It last me about 23 hours with my usage. Charge time is noted to take 3 hours, but with a 45W Samsung fast charger, I was able to cut that time to 2 hours and 20 minutes. Still, unlike its competitors it doesn’t have a quick charge for quick listening. When I charge the QC Ultra for 3 minutes from 0% battery, it still leaves me with battery life of 5% and warns me of low battery.
The QC Ultra is that it uses a 2.5mm jack on the earcup. Given how few devices use 2.5mm, it will feel like a proprietary cable even though it isn’t. You’ll be hard pressed to find any use for the 2.5mm to 3.5mm for anything other than the QC Ultra in wired mode.
The controls are physical buttons that are loud and clicky. I’m not a fan, as they feel cheap. The volume is controlled using a touch-sensitive strip on the right earcup. It will take a while for your muscle memory to adjust but you’ll probably get the hang of finding it like I did. The assistant button is activated by holding the volume touch strip.
Unfortunately, unlike Bose’s QC 35ii, there is no native assistant on the headphones. It uses the phone’s assistant, which sounds like no big deal at first, until you realize how intrusive this can be. Every time you activate the assistant it’s just as you would on the phone itself. This means having the Google Assistant app minimize the app you’re using to be in focus. You will need to manually switch back to your app each time you activate Google assistant from the QC Ultra. This isn’t true when the assistant is built-in like on the QC 35ii, where the Google Assistant app does not show up on the phone at all when the assistant button is used.
The Bose app is basic without any real features that you can’t already do on the headphones themselves. You’re basically using it for the EQ. The EQ is then saved on the headphones themselves.
The Bose app is basic without any real features that you can’t already do on the headphones themselves. You’re basically using it for the EQ. The EQ is then saved on the headphones themselves.
As nice as the QC Ultra sound, and as comfortable as they are, other companies have caught up (including nearly matching the comfort of Bose) and offer more useful features for less the price of the QC Ultra, especially since competing brands have had their headphones out for a while, and the QC Ultras have just released.
No, I would not recommend this to a friend.
Share this review:
-1point
7of 15voted this as helpful.
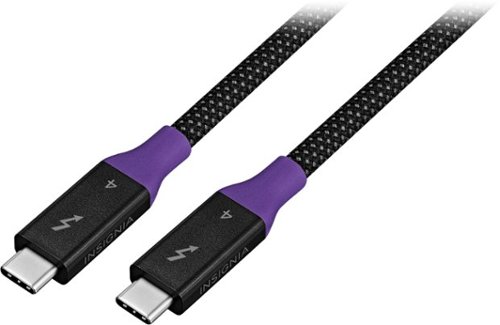
Whether you need to charge your devices, transfer data, or connect to a display, the Insignia 3.28' 8K Male USB-C to Male USB-C Thunderbolt Charge-and-Sync Cable with Braided Nylon keeps you connected. It lets you power devices and transfer files with your USB-C computers, smartphones, tablets, docking stations, and more. Data transfer speeds reach up to 40 Gbps using Thunderbolt technology. The cable also carries both audio and video signals, reaching up to 8K Ultra HD resolution for an incredible viewing experience.
Customer Rating
5
Durable, fast, & legit 3.28 ft Thunderbolt 4 cable
on October 23, 2023
Posted by: KusMoG
Time will tell if the quality of the cable holds but from my short time with it, it looks and feels very high quality. It is indeed braided and it doesn't feel stiff unlike some other high speed cables out there. I'm able to flex the cable area, although the purple-colored shield is solidly stiff. It's there to serve 2 purposes- to prevent the cable damage inside while supporting the weight of the cable while it's plugged in and hanging from a port, and as a place to grip the connector with your fingers. The purple portion has a very slightly grippy feel.
The 3.28 ft is the measurement of the cable without the connectors, so it starts from the bottom end of the purple shielding, to the opposite end's. So you're not being cheated of length with this cable. With the connectors, the total length is 40", or 3.33 ft.
Unfortunately, I don't have any Thunderbolt 4 devices capable of achieving the max speed of 40Gbps so I wasn't able to test that. However, when I connected 2 Windows PCs with Thunderbolt 4 ports I was able to establish a Thunderbolt Network connection. Under Windows' Network adapter status for this connection, it shows the connection speed as 20 Gbps for both ends. From my understanding however, the max speed for Thunderbolt Networking is 10Gbps.
While transferring data between my PC and laptop's Thunderbolt 4 ports I was able to achieve Read and Write speeds of 1.2GB/s.
A 5GB video transferred in just under 5 seconds.
A 33.6GB video transferred in about 33 seconds.
While transferring data between my PC and laptop's Thunderbolt 4 ports I was able to achieve Read and Write speeds of 1.2GB/s.
A 5GB video transferred in just under 5 seconds.
A 33.6GB video transferred in about 33 seconds.
The most demanding devices I have that's powered by USB-C are 2 laptops that charge with a 100W power adapter. So I'm unable to test the full 240W claim. However, I was able to charge the laptop from a Thunderbolt 4 port in the same time I would when using the stock 100W charger, so the cable does support USB power delivery of 100W at the very least.
When used with my Thunderbolt 3 monitor (which was made for the previous generation Thunderbolt in mind), the cable was able to distribute power and picture off the one cable. On the monitor itself I could use HDR, the maximum resolution of 2k, and use 120Hz refresh rate while powered by my PC and my laptops without any issue.
I'm satisfied with this cable and would totally recommend it to anyone looking for a Thunderbolt 4 cable.
I would recommend this to a friend!
Share this review:
0points
0of 0voted this as helpful.
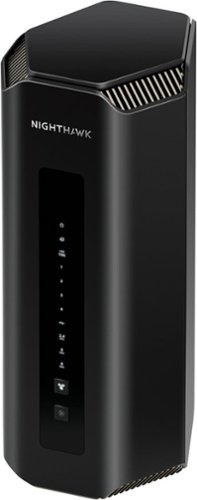
Spearheading the Wi-Fi 7 revolution with cutting-edge technology and unimaginable power, the NETGEAR Nighthawk RS700 harnesses the power of Wi-Fi 7 to unleash speeds up to 19 Gbps. Leveraging NETGEAR's over 25 years of Wi-Fi expertise, the RS700 features a sleek body with high-performance antennas and a significantly smaller footprint. A 10 Gigabit Ethernet port unlocks fast speeds of today and tomorrow. Experience the next-generation gaming, AR/VR, and 8K video - all streaming flawlessly in your home.
Customer Rating
4
Sleek, fast, Wi-Fi 7-ready with 10Gbps WAN and LAN
on October 23, 2023
Posted by: KusMoG
A little disclaimer: It’s a Wi-Fi 7 router (a.k.a. 802.11be) but I don’t have any Wi-Fi 7 devices to test the RS700 with. You’ll want to pay attention to reviews with the Google Pixel 8 and 8 Pro for insight regarding the routers Wi-Fi 7 performance as that appears to be the only mainstream device available in the US with Wi-Fi 7 support.
***Connections***
1 x 10Gbps WAN (internet) port
4 x 1Gbps LAN ports
1 x 10Gbps LAN port
1 x USB 3.0 port
1 x 10Gbps WAN (internet) port
4 x 1Gbps LAN ports
1 x 10Gbps LAN port
1 x USB 3.0 port
Most people can’t even afford gigabit internet but the RS700 will cover you up to 10Gbps internet, which will eventually become affordable with time.
With the one 10Gbps LAN port it ensures you have at least one wired device able to get 10Gbps speed, either over internet (thanks to the 10Gbps WAN port) or Wi-Fi 7 devices on your local network. Everyone loves to associate routers with the internet, but forget that they affect your local network just the same.
Imagine this: You’re trying to transfer that 12GB 4K video file on your phone to your PC.
With Wi-Fi 7, the max speed you can get for a single transfer is 362MB/s. That’s roughly the max speed of a SATA II SSD. 12,000 / 362 = about 33. That’s 33 seconds to transfer a 12GB file *wirelessly*.
And with the recent release of Google’s Nearby Share for Windows, it has never been easier to do Wi-Fi transfers between Android devices and Windows PCs.
People will find it disappointing that the 4 other LAN ports are gigabit ports and not multigig, but I think doing so would either bring the price up or offer less LAN ports to even out the cost. Assess your equipment that you would have wired. Not many devices out there support multigig. So for the immediate future, your gigabit LAN devices like a PS5, Xbox Series X or a smart TV will be fine.
But with the 10Gbps LAN port it does future proof the RS700, should and when you do have multigig devices. You’ll have to connect a multigig switch to the 10Gbps port, which is an additional expense, but at least you’re spending that money when you actually need it instead of up front when you don’t, and at a time when multigig ports sell at premium prices (Google prices for a 2.5Gbps and 10Gbps switch to see what I mean). Also, be mindful that you’ll need Cat6a ethernet cables or better to get a stable 10Gbps connection.
The USB 3.0 port is capped at 2Gbps. I discovered this by transferring a 5.65GB file from an external SSD from the RS700’s USB 3.0 port with nothing in between (no USB hub, no adapters) to my desktop PC’s 10Gbps port connected to the RS700’s 10Gbps port using a Cat8a cable. Then I repeated the transfer with the same file on my desktop PC’s USB 3.0 port. Keep in mind, USB 3.0’s max theoretical speed is 5Gbps, which translates to a transfer speed of 625 MB/s.
RS700 USB 3.0 port: 260 MB/s
ProArt X570-CREATOR WIFI’s USB 3.0 port: 425 MB/s
2Gbps is still good enough to accommodate my needs as I use mechanical drives for larger storage capacity at a reasonable cost, and they don’t have read/write speeds that quick.
However, if you plan to use external SSDs, depending on their max speed, this could be an issue for you.
You can use a USB 3.0 hub to add more network drives but keep in mind that the router can only supply power to one device from its port. If you’re using a hub, it will need to be powered or the external hard drives themselves be powered to make up for what the port isn’t able to accommodate.
Hard drives must be in the following formats to be recognized by the router:
FAT16, FAT32
NTFS
NTFS with compression format enabled
Ext2, Ext3, Ext4
XFS
HFS
HFS+
FAT16, FAT32
NTFS
NTFS with compression format enabled
Ext2, Ext3, Ext4
XFS
HFS
HFS+
The RS700 allows you to run a DLNA media server with the attached USB storage.
The real selling point for me was the fact that I experienced NO issues with my remote clients (Nvidia SHIELD Pro, Meta Quest Pro, Plex Media Server) seeing my hard drives that were connected to the RS700. With my previous router from Linksys I experienced constant loss of connection with my Nvidia SHIELD, which required me to restart the router, which is incredibly intrusive.
The real selling point for me was the fact that I experienced NO issues with my remote clients (Nvidia SHIELD Pro, Meta Quest Pro, Plex Media Server) seeing my hard drives that were connected to the RS700. With my previous router from Linksys I experienced constant loss of connection with my Nvidia SHIELD, which required me to restart the router, which is incredibly intrusive.
***Wi-Fi***
I live in a 700 sq ft apartment, and in all corners of it I’m able to get a 100% 6GHz band signal, the band that 6e and 7 use. Running a speed test with my 200MBps down/30MBps up Optimum Online cable internet connection I was able to achieve the max speeds with no drops, although my internet connection tier is the bottleneck in the test here.
Kitchen: 33ft away, 4 obstructions (drywall) -68dBm
Entrance: 26ft away, 6 obstructions (4 drywall, 2 porcelain) -76dBm
Bedroom (router’s location): 6 ft away, no obstruction, -35dBm
Bedroom (right next to router): Less than 1 foot away, no obstruction, -16 dBm
Living room: 7 ft away, 1 obstruction (drywall) -49 dBm
However, I have a steel front door and metal is a signal killer. On the 2.4GHz band it averages around -74 dBm but the connection is unstable and dips to -83 dBm every now and then. I wouldn’t feel confident using this router alone if I installed a wi-fi doorbell. So be mindful of obstructive material because they will shorten your signal distances *dramatically*, especially brick and metal.
***Design***
The RS700 is very table top friendly looks very sleek with its black tower design, but not very wall mount friendly.
Although officially listed as 5.59”x4.88”, because the base is angled on its edges, the actual footprint that makes contact with the surface is smaller, which was important for me because I had little desk space with a 3 monitor setup, and the router it was replacing was placed in the corner and was slimmer than the RS700. The surface contact footprint of the RS700 is 5”x 4.5”, which made it safe to place in that same corner with the entire base surface atop my desk. The height of the tower-design RS700 is 11”.
There are grills on the top and base edges of the router for ventilation. I’m not sure how it cools itself but I don’t hear any fans running. It’s dead silent during operation. At the same time, I’ve never felt it hot either.
In the front are a bunch of status LEDs which show Power, Internet, all the LAN ports, the USB port, and each band- 2.4, 5, and 6. There is also a WPS button to allow WPS-enabled devices to connect to the router without a password. And there is an LED on/off button, which allows you to turn off all LEDS except for the Power LED.
The LEDs are white but not overpowering since they don’t project a shine. I have it practically at my bedside, and it never bothers me when I go to sleep. Nevertheless, you still have the option of turning off the LEDs, save for the one Power LED, using the LED on/off button OR by software within the router’s management page.
In the back are the Ethernet ports, USB 3.0 port, a reset button, a power button, and the power cable port.
In the back are the Ethernet ports, USB 3.0 port, a reset button, a power button, and the power cable port.
***Setup/Software***
Setup is extremely simple with the app as it walks you through each step with useful suggestions along the way, such as changing the SSID and Wi-Fi password to make it the same as your previous router to keep your wifi devices connected. Like most modern routers, it has the option to automatically select the band while connected to a single SSID (called Smart connect), which is by default. However, I prefer to split the bands to have their own SSID so I have control over which band my devices connect to.
Setup is extremely simple with the app as it walks you through each step with useful suggestions along the way, such as changing the SSID and Wi-Fi password to make it the same as your previous router to keep your wifi devices connected. Like most modern routers, it has the option to automatically select the band while connected to a single SSID (called Smart connect), which is by default. However, I prefer to split the bands to have their own SSID so I have control over which band my devices connect to.
With a Netgear account, the RS700 can be managed from anywhere using the app or an internet browser. Likewise, it can still be managed by connecting directly to the router using its local IP.
The app is missing many of the router’s administrator settings and just covers basic monitoring such as:
Router information and Internet Port: which shows useful information for troubleshooting with support, such as your serial number, MAC address, External IP, Gateway, etc
Device Manager- to see what devices are connected, but it won’t tell you what band wifi it’s on, unlike the browser version
Internet Speed- to run a speed test
WiFi Analytics- To monitor the router’s WiFi signal strength as well as other WiFi signals in your area and channel interference to identify congestion
Parental Controls-which requires a subscription; When managed from the browser, you can block sites and ports without a subscription
WiFi Settings, including Guest WiFi- allows you to change the SSID, change the password, share wifi connection by displaying a scannable QR code, or by using the Share option, which sends the SSID and password by text
Traffic Meter- monitors your downstream and upstream traffic and set a monthly limit, which is useful if you’re on a metered internet connection.
You can also reboot the router and check for firmware updates from the app.
When the router is managed via the browser you have control over nearly everything the app does (except Netgear Armor). You can even access the router’s browser management using a mobile browser. Unlike other brands, it will allow you straight access to router management without deterring you to download the app instead.
When the router is managed via the browser you have control over nearly everything the app does (except Netgear Armor). You can even access the router’s browser management using a mobile browser. Unlike other brands, it will allow you straight access to router management without deterring you to download the app instead.
From the browser, under Advanced Setup, you can set up port forwarding/port triggering; set your router to AP mode (access point) and easily turn it into a wireless access point/switch with one switch of an option; set up VPN so you can access your local network from the outside.
The browser is also the only place where you can manage the USB port. By default, Samba and HTTP (port 80) connections are enabled for access to the router’s USB drive(s). You also have the option enabling HTTPS and FTP as well.
The browser is also the only place where you can manage the USB port. By default, Samba and HTTP (port 80) connections are enabled for access to the router’s USB drive(s). You also have the option enabling HTTPS and FTP as well.
The RS700 comes with a free 1 year trial of Netgear Armor security (powered by Bitdefender), which is basically a firewall. It scans all your devices for potential vulnerabilities and brings them to your attention via Netgear’s Nighthawk app. I personally found Armor way too aggressive and intrusive to my browser experience, without being particularly effective at blocking out some threats that otherwise would’ve been blocked with the software I already use.
I would recommend this to a friend!
Share this review:
+1point
1of 1voted this as helpful.
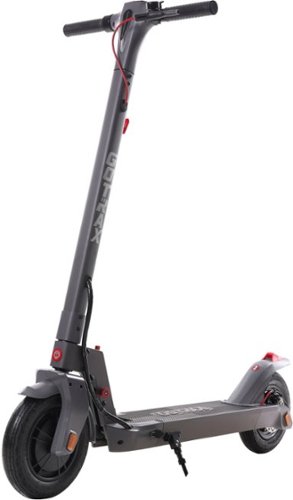
Elite for a reason. The XR PRO was designed for the inner-city commutes. Foldable in one step, take it on the bus, the train or in a taxi if you need to make a bit longer of a commute. Weighing less than 32lbs means carrying is no issue when stairs or other obstructions get in the way.
Posted by: KusMoG
First off, the “Specifications” and “Features” listed for the GoTrax Xr Pro has a lot of incorrect information.
-It does NOT have 8.5” tires, it has 10” tires. I measured them.
-The max speed is not 15.5 mph, it’s 18 mph.
-The color is not black, it’s clearly gray, as seen in the pictures they provided. It’s even listed as gray in its model number.
-The maximum weight capacity is NOT 220 lbs, it’s 264 lbs as printed on its retail box and included manual.
-Their listed product dimensions are wrong. It’s:
-Product Height 47.5 inches (measured from floor to digital display)
-Product Length 47.5 inches (measured from back tip of back wheel to front tip of front wheel)
-Product Width 18.625 inches (measured from one end of the handle bar to the other end of the handle bar on opposite side)
Maybe this was just the information given to Best Buy by GoTrax because the included manual was just as bad. It is littered with mistakes of all sorts: spelling errors, grammatical errors, missing pictures that the instructions refer to, and inconsistent use of terms (e.g.: in the scooter’s parts diagram what’s listed as a “safety latch” is called a “spring pin” in the printed instructions. Nowhere in the manual is the “safety latch” ever referred to again aside from the diagram that lists the parts of the scooter).
When I received the product, what should’ve been a 5-10 minute installation took me about 8 hours. The reason for that is because the brake cord was too short out of the box for me to latch on to brake lever and thread through the handlebar. The instruction manual was worthless, offering no guidance whatsoever should something like this occur during installation. If you read other reviews, you’ll see that this issue has happened to others as well. I had to be careful as to not be reckless and end up voiding the warranty. It wasn’t until hours later that I figured out for myself that the brake cord’s length can be adjusted from the rear wheel’s disc brake. You have to loosen the Allen screw that’s closest to the brake cord until it eases up the grip on the cord to a point where you can adjust the length of the brake cord. This allowed me to have enough length to finally install the brake cord on the handlebar.
When I received the product, what should’ve been a 5-10 minute installation took me about 8 hours. The reason for that is because the brake cord was too short out of the box for me to latch on to brake lever and thread through the handlebar. The instruction manual was worthless, offering no guidance whatsoever should something like this occur during installation. If you read other reviews, you’ll see that this issue has happened to others as well. I had to be careful as to not be reckless and end up voiding the warranty. It wasn’t until hours later that I figured out for myself that the brake cord’s length can be adjusted from the rear wheel’s disc brake. You have to loosen the Allen screw that’s closest to the brake cord until it eases up the grip on the cord to a point where you can adjust the length of the brake cord. This allowed me to have enough length to finally install the brake cord on the handlebar.
Adjusting the length of the brake cord will also adjust the tightness of the brakes when you squeeze the lever. I’ve read some reviews complaining about the responsiveness of the brakes. The make them more responsive, you’ll want to make the brakes tighter by shortening the length of the cord on the left side of the Allen screw before clamping it down by fastening it.
With that sour first impression out of the way, I love the look of the Xr Pro. It loses the super cheesy block of white that highlighted the GoTrax branding on the scooter’s tiller the old models had. The GoTrax branding is still on the tiller but now it’s more unassuming and looks more professional. Even the splashes of red on the scooter is unassuming and provides a nice subtle contrast to the grey for its look. I personally think it looks really nice.
The Xr Pro has 2 speed modes, which some people like to call “gears” since they familiarize them with switching gears on a car. However, the scooter’s 2 modes aren’t gears, and I wouldn’t recommend switching between the modes while in motion because the sudden difference in the handling of speed could knock you off your balance.
The 2 speeds are P1 and P2.
P1 runs at a max speed of 15 mph.
P2 runs at a max speed of 18 mph.
Its acceleration will vary depending on weight. I’m 170 lbs and on a flat surface it accelerates pretty easily. However, when I’m on the sidewalks of Brooklyn, NY where it’s not always flat, accelerating from a low speed, and maintaining speed did feel like an issue to me. I felt like it was lacking power. My best case scenario was riding on the bike lanes. Unfortunately 15mph doesn’t seem fast enough to ride with the flow of traffic on some NYC streets. P2’s 18mph does help but not on larger streets like Ocean Parkway where cars can easily go 25 mph while you’re only maxing out at 18 mph. Of course, Ocean Parkway does have a bike route, but there are other similar streets like Flatbush Ave, Ocean Ave, Coney Island Ave. And aggressive drivers will be agitated with you sharing the same street and incessantly honk at you instead of just passing you. The Xr Pro is best ridden on local roads or dedicated bike paths. Technically, riding an e-scooter on sidewalks is illegal. The only reason why it’s so prevalent is similar to jaywalking. It’s not seriously enforced.
At about 35 lbs, it’s not exactly light. But it’s probably as light as you can get for an electric scooter because a lot of the weight is from the battery. I think the 35 lbs is the sweet spot for compromise for weight and mileage/power. If you can, try lifting 35 pound dumbbells and see if it’s something that’s manageable for you.
I got about a total of 18 miles on a single full battery charge with the Xr Pro, while mostly riding in P1 mode. It was 2 mile trips each way, making it 4 miles round trip, per day. So it nearly got me through the weekday. Charging it overnight would make any worry about the battery for this sort of routine a non-issue though.
Charging takes about 6 hours from 0 to 100%. The battery is non-removable.
The display is clear and easy to read even in sunlight, at least for me. It operates with a single button through a combination of holds, single, double, and triple presses. It’s very easy to get the hang of it. There is no electronic lock to prevent theft. To the right of the display is the throttle button. You accelerate as fast as how much the throttle button is depressed. To the left of the display is the bell and brake lever.
On the tiller is a bag hook, which I found pretty useless. It’s at an angle any bag you hang on it is prone to swinging around. I put my dinner on that hook, a takeout order from Popeyes, and the bag fell off the hook while I was riding. Fortunately a pedestrian was kind enough to let me know my bag fell. There’s no tension clip for the hook, and the hook’s opening is rather wide.
On the tiller is a bag hook, which I found pretty useless. It’s at an angle any bag you hang on it is prone to swinging around. I put my dinner on that hook, a takeout order from Popeyes, and the bag fell off the hook while I was riding. Fortunately a pedestrian was kind enough to let me know my bag fell. There’s no tension clip for the hook, and the hook’s opening is rather wide.
The Xr Pro folds and unfolds easily but because the handlebars from end to end take up more than 1.5 feet it’s still not that compact. The only thing you’re really reducing by folding is its height, from 47.5 inches to 16 inches. When folded, the front wheel is lifted off the ground and the bottom-side of the front of the deck touches the ground. This causes that bottom of the deck to scratch against abrasive ground, like concrete. And New York City isn’t known as a concrete jungle for nothing.
You also can’t roll the scooter when it’s folded so you can’t roll it while holding it vertically or horizontally. Your only way of transporting it safely while folded is by lifting it while held horizontally.
You also can’t roll the scooter when it’s folded so you can’t roll it while holding it vertically or horizontally. Your only way of transporting it safely while folded is by lifting it while held horizontally.
Because of the way the Xr Pro unfolds, by pressing down on the plastic back fender, you cannot place your foot on the back fender while riding. There is even a sticker on the back fender warning you not to step on it. This also means there’s no back fender brake. There’s only one way to brake, which is using the lever on the handlebar, and it controls the brake on the rear wheel. I found the brakes to be responsive. You may need to adjust the tightness to your liking. Refer to manual on page 13 to see how to do this.
There is no suspension for the wheels but the pneumatic tires seemed to handle bumps on the road pretty well for me. I got nervous when I saw garbage and debris in front of me on the road, but I was able to ride over flattened cups, a sock (smh… NYC), twigs, and pebbles without a hop or jump.
I wear a men’s size 10.5 sneakers and the deck doesn’t give me enough room to put one foot straight in front of the other. It’s about an inch short. So, I’m forced to tilt my back foot for my riding stance. If you wear a men’s size 10 or smaller, you may be able to ride one foot in front of the other, both facing straight.
I found the LED headlights and brake lights adequate for NYC streets, where they’re all lit up at night. Pedestrians and drivers could easily see me. There are no turn indicators on these lights though. Both wheels have reflectors on the side, so in case the lights fail, there’s that. I couldn’t find any real dark streets to test in my area. Turning on the lights in my pitch black apartment lit my living room up, but it’s no comparison for the real roads where you’ll want to see a few more yards out ahead of you.
Unfortunately, I’ve never had the chance to test the scooter out in rainy conditions. However, the scooter is rated IPX5. So it wasn’t rated for resistance against any solid objects or dust. The 5 liquid resistance rating means “Protected from low pressure water jets from any direction.” GoTrax’s website claims it can withstand up to mild rain, although riding on a wet surface is always a hazard due to the risk of slipping. You won’t be able to ride it during a downpour/storm since that’s probably more than the scooter’s water resistance can handle, and may end up damaging the electronics. Weather related issues with the scooter voids your warranty.
It's a decent scooter for short mileage commutes that looks great at a fair price. Just be aware of its shortcomings: non-replaceable battery; cannot roll for transporting while folded and 35 lbs may be still be too heavy to carry for some; a largely useless bag hook; no security features.
Spending a little more can get you a faster 20 mph scooter that handles longer distances per charge if 35 lbs is too heavy for you to carry so you were never going to anyway.
Spending a little less can get you a lighter scooter you can carry at the cost of a slower scooter.
It's all up to you.
Spending a little more can get you a faster 20 mph scooter that handles longer distances per charge if 35 lbs is too heavy for you to carry so you were never going to anyway.
Spending a little less can get you a lighter scooter you can carry at the cost of a slower scooter.
It's all up to you.
I would recommend this to a friend!
Share this review:
+3points
3of 3voted this as helpful.
Design meets function in the most powerful, premium cordless stick vacuum with auto empty. Bespoke Jet AI Cordless Stick Vacuum includes our most powerful HexaJet 2.0 motor, and delivers up to 100 minutes of runtime in a single charge. AI Cleaning Mode automatically senses floor type and optimizes suction whether on carpet or hard floor for efficient cleaning performance on any surface. Innovative design combines with the All-in-One Clean Station which auto-empties, charges, and stores your vacuum, for one show-stopping solution.
Posted by: KusMoG
For the first time in my life, vacuuming doesn’t seem like such a chore. And it’s all thanks to the Bespoke Jet AI. It’s cordless, powerful, versatile, lightweight, has great battery life, and looks great!
The obvious convenience about cordless vacuums is not having to worry about cords getting in the way of your path while cleaning. Best of all, I don’t have to worry about the shortage of length of the power cord. At least not for the stick vacuum itself. The cord length of the Clean Station, where you charge the stick vacuum, is roughly 68” (5’ 8”). Underneath the base of the Clean Station, there are 4 toothed rubber feet. The teeth help keep it from moving around on carpet. The rubber helps keep it from moving around on hard floors.
And that’s just the thing: this is also the first vacuum cleaner I don’t have to worry about finding closet space for. Looks are always a subjective thing, but for me, I think the Bespoke Jet AI docked into its Clean Station looks great. The black color matches my black sofa set and my black surround sound speakers. It feels right at home out in the open in my living room. Which is perfect because whenever I need to use the vacuum it’s just out there ready for me to use.
And that’s just the thing: this is also the first vacuum cleaner I don’t have to worry about finding closet space for. Looks are always a subjective thing, but for me, I think the Bespoke Jet AI docked into its Clean Station looks great. The black color matches my black sofa set and my black surround sound speakers. It feels right at home out in the open in my living room. Which is perfect because whenever I need to use the vacuum it’s just out there ready for me to use.
The height of the Clean Station with the vacuum docked is 47” (3’ 11”).
The length and width of the Clean Station are both 12” (1’).
The length and width of the Clean Station are both 12” (1’).
On the top of front of the vacuum itself is an LCD display that displays the charge percentage while it’s charging. On the top of vacuum’s handle in the back is the battery with a bright horizontal LED battery level indicator. It’s red when it’s low on battery, orange when it isn’t low on battery but charging, and green when fully charged. Unfortunately, I haven’t found a way to turn this LED off, so if you plan on storing it in your bedroom be mindful of this. Otherwise, the light from the LED is actually kind of convenient in the dark because it makes it easy to find and use since it’s located on the handle. The included brush has an LED light so you can clean in spaces where it’s dark, or just clean in the dark with no lights on. It would just be difficult to place the vacuum back in its station in the dark since there are no lights on the outside of the Clean Station itself.
The inside of the Clean Station is accessible from the front’s magnetic cover, which is easy to open and close. Inside it is a button to toggle the “Auto Empty” function of the vacuum’s dustbin. There are also 2 LED indicators that are labeled. One indicator shows whether “Auto Empty” is enabled or not. The other indicator shows whether it’s connected to WiFi or not.
Let’s talk about the “Auto Empty” feature first because it’s really interesting. The Bespoke Jet AI is a bagless vacuum cleaner. But the Clean Station uses bags, making it a bagged system… right? Not quite.
The Bespoke Jet AI is a bagged vacuum system BUT it does NOT have to be if you don’t want it to be and save yourself from spending money on new bags. To make the Bespoke Jet AI a bagless system, simply turn off the “Auto Empty” feature. You can still empty the vacuum’s dustbin manually just like other bagless stick vacuums. You simply press a button in the front of the vacuum to remove the dustbin from stick vacuum, then press the button on the back of the dustbin top release the dustbin’s bottom door to empty out the dust inside. It’s so simple. But I won’t sugar coat it either. By cleaning it out manually, you are paying for an expensive feature you’re not using. But at the same time, you’re saving money by not needing to continuously buy new bags. OR you can have the luxury of doing both and lessen the frequency of buying new bags. Or when you’re out of bags, you’re still able to use the vacuum.
When the “Auto Empty” feature is disabled, you can manually start the process where the vacuum empties the dustbin into the Clean Station’s bag by pressing the Start/Stop button in the front of the Clean Station. If connected to Samsung SmartThings via WiFi, you can also empty the dustbin from the SmartThings app, even remotely when you’re not at home, to remove the unsightly dust from the dustbin if you don’t want it to be seen by people while you’re away, since the dustbin is clear. This is just one of the many ways the Bespoke Jet AI is versatile.
The Bespoke Jet AI is powerful when set to its highest setting, “Jet”. It actually feels as powerful as my corded canister vacuum that I’m replacing. I can tell by how aggressive it is with my carpet on the Jet setting. The trade off is battery life. The vacuum has a countdown timer on its LED display while you are cleaning which displays in hours and minutes. Using the Bespoke Jet AI’s main brush, the Active Dual Brush, Jet mode lasted 12 minutes 50 seconds when I timed it with a stopwatch. When I started, the LED display said I had 13 minutes. So, it’s fairly accurate.
But something I learned too late and what my mom tried to warn me was that vacuuming often can damage the carpet over time. All that aggressive vacuuming from my old heavy duty upright vacuum cleaner and canister vacuum that replaced my upright afterwards destroyed the plushness of my carpet. It's gone. My carpet is now flat and lifeless. Underneath my sofa, my carpet is as plush and soft as the day I first moved into my apartment.
That’s where the Bespoke Jet AI comes in. I *WISH* I had this vacuum when I first moved here, but it didn’t exist. The Bespoke Jet AI has 5 modes: MIN, AI, MID, MAX, and JET. It has a 6th mode if you’re using the optional (must be purchased separately) Spray Spinning Sweeper tool: WET.
MIN, MID, and MAX modes are self-explanatory. It’s low, medium, and high power, respectively. MAX is a misnomer because it’s not the vacuum’s maximum power. The JET setting is.
It's the AI mode that’s the shining feature with the Bespoke Jet AI. It senses the type of surface its on and automatically adjusts the suction power and the brush rotation speed. This really would have helped preserve the life of my carpet while it was still new and while still cleaning my carpet. AI mode doesn’t necessarily sacrifice cleaning power. For the times when it is underpowered and not sucking up dirt you’re trying to clean up, you can manually increase the suction power on the fly with the + (plus) button located conveniently on top of the vacuum. You can also decrease the power with the – (minus) button.
When you lift the vacuum head off the ground in AI mode, the brush will stop rotating.
My only really gripes about AI mode is:
1) that sometimes it doesn’t detect the surface correctly or misinterprets it. So, the brush would stop rotating, thinking it’s on a hard surface when it’s still on carpet, albeit with very low pile. But it doesn’t happen often for me. Your mileage may vary. You still have the option of manually selecting the power yourself. Again, versatility.
2) it takes 1-2 seconds for the AI to process a surface change and change its mode accordingly. When it’s 1 second it’s not so bad, but when it takes 2 seconds, it’s noticeable to me.
Operation is easy. Thankfully, there is no trigger. To start the vacuum, you simply press the On/Off button that is easily accessible on the top of the vacuum while you are gripping the handle. To stop the vacuum, simply press the On/Off button again. Above the On/Off button is a clear, easy-to-read informative LCD display. While the vacuum is turned on, there is a countdown timer that automatically adjusts depending on the mode you’re using. No more guessing how much time you have to clean with the vacuum before the battery dies. With the Bespoke Jet AI you have the peace of mind of knowing.
With the included Active Dual Brush, MIN lasts about 58 minutes. MID, about 40 minutes. MAX, about 24 minutes. JET, about 14 minutes. In AI mode, the time will vary depending on surface and conditions.
The display will also alert you with messages and troubleshooting tips when things go wrong. Like if hair gets tangled on the brush heads roller and stops the roller from moving. The LCD display will tell you. When docked in the Clean Station, it can tell you when to clean your filter or replace your dust bag.
The display will also alert you with messages and troubleshooting tips when things go wrong. Like if hair gets tangled on the brush heads roller and stops the roller from moving. The LCD display will tell you. When docked in the Clean Station, it can tell you when to clean your filter or replace your dust bag.
The Active Dual Brush head effortlessly twists 90° in both left and right directions and has a bright LED flashlight that automatically turns on while in use.
The Bespoke Jet AI also includes an Extension Crevice Tool that can telescopically extend for those hard-to-reach places.
It comes with the Pet Tool+ head that specializes in picking up pet hair.
The last head that comes included is the Combination Tool for dusting and cleaning furniture/upholstery, even tables and window sills. When you don’t use the telescopic pipe, and attach the brush head directly to the main vacuum, you basically got yourself a superpowered dustbuster! Compact, lightweight- perfect for vacuuming your car, and powerful.
With the SmartThings app, you can empty the dustbin, set the default suction power setting, view battery status, monitor electricity usage & cost, and information about your vacuum like dust bag status, how long ago the dustbin was last emptied, and how long you've used it for each day of the current week.
The Bespoke Jet AI is lightweight because it is mostly made of plastic. But it’s high-quality plastic that feels durable and premium. The bulk of the weight is from the motor, making it top-heavy. But the top is where you hold your grip, so when you’re pushing around the vacuum it actually feels lightweight thanks to the weight distribution.
The battery is replaceable, and you can buy a spare with its own external charger. It’s worth the money for all the power and convenience it gives you. You may not be buying a new vacuum for the next decade, if ever again.
Easily the best vacuum I have ever used.
I would recommend this to a friend!
Share this review:
0points
0of 0voted this as helpful.

The Pixel Tablet is engineered by Google to be more helpful at home ~ and in your hand. Place it on the Charging Speaker Dock for great-sounding music and video streaming.[1] Control your smart home, and say ~Hey Google~ for hands-free help.[2] It~s all powered by the Google Tensor G2 chip, and it~s the perfect companion to your Pixel phone.
Posted by: KusMoG
When the Pixel Tablet was first announced I thought it would just be a Next Hub Max with a removable screen to double as a tablet and this concerned me. I thought the tablet would be of cheap quality considering the price of the Pixel Tablet, which is around the starting price of a decent tablet alone. But from the first moment I had the tablet in my hands- how light it was; how solid and premium it felt- I realized I was probably wrong. And then when I powered it on and found out it had a 2560x1600 resolution screen, not the 1280x800 of the Nest Hub Max or 1080p, which was the resolution bump I expected from the Nest Hub Max. I was shocked! On top of that, it’s an IPS display! You can view the display from all angles without much distortion. I was wrong. The Pixel Tablet’s tablet isn’t a cheap quality tablet AT ALL. It’s a high quality mid-range Android tablet.
Build
The tablet is lightweight at 480 grams. It’s slightly heavier than an iPad Air, but slightly lighter than the Galaxy Tab S8. Yet not as expensive as either.
The tablet is lightweight at 480 grams. It’s slightly heavier than an iPad Air, but slightly lighter than the Galaxy Tab S8. Yet not as expensive as either.
It’s made of metal so it’s solid- no creaks or flex. But the back is coated with a material that feels grippy but not sticky. It has a very satisfying feel because it’s smooth but it has friction and doesn’t feel slippery. I don’t feel worried about accidentally dropping it from slickness. Thanks to this unique texture, it isn’t a fingerprint magnet.
The power button is nearly on the same level as the edges of the tablet for some reason. Normally buttons stick out of the edges like the way the volume rocker buttons do on the Pixel Tablet. Not this power button. It made it a bit tough for me to find at times. On that power button is a fingerprint reader that is very responsive and quick. My only issue is finding it at times.
It’s the volume rocker buttons that I’m not the biggest fan of. If I lightly tap on it, the button makes that cheap rattle sound from it being loose. It feels cheap. Thankfully, the actual button presses don’t feel as cheap though.
Display
It’s an LCD display but it’s gorgeous! First off, for an always-on smart home display, you wouldn’t want OLED since the clock text doesn’t change often, especially the hour. You’d risk burn-in. LCD is the smart choice here until there’s a better solution. Its resolution is also 2560x1600 on a 10.75” viewable display. It makes the pixel density fantastic, to a point where it looks like the content is painted on the display. It’s tough to see a single pixel. As mentioned earlier, it uses an IPS display which allows you to view the screen at an angle with little distortion. The screen itself doesn’t attract fingerprints thanks to the coating on it.
It’s an LCD display but it’s gorgeous! First off, for an always-on smart home display, you wouldn’t want OLED since the clock text doesn’t change often, especially the hour. You’d risk burn-in. LCD is the smart choice here until there’s a better solution. Its resolution is also 2560x1600 on a 10.75” viewable display. It makes the pixel density fantastic, to a point where it looks like the content is painted on the display. It’s tough to see a single pixel. As mentioned earlier, it uses an IPS display which allows you to view the screen at an angle with little distortion. The screen itself doesn’t attract fingerprints thanks to the coating on it.
The one knock on it is that it’s a 60Hz display. But that’s what you would expect from a tablet of this price range. A popular tablet of this weight and size with a 120Hz display costs $200 more. With that said, if you’ve never used a 120Hz touch display, you won’t notice any issues because 60Hz is pretty much the standard. 120Hz is premium at the moment.
Performance
The Pixel Tablet comes equipped with a Tensor G2, which is the same System on a Chip (SoC) used on the Pixel 7, which is the current generation of Google’s line of Pixel phones. It comes with 8 GB of RAM which is what other tablets in this price range offer, and is enough to work with multiple apps open. I’m actually writing this review on the Pixel Tablet with Chrome open in a split window, and Twitter on the other side of the split window. I also have ESPN playing in PIP for a total of 3 apps running simultaneously. For input, I have a Bluetooth keyboard and mouse connected to the Pixel Tablet. I haven’t experienced any lag from normal use. However, if I push the processor with gaming while having another video app open, the tablet will eventually get warm and thermal throttling kicks in. This slows the tablet down. But this is an extreme case. The way I had it happen was by opening a Wii emulator with a game running, and a PS2 emulator with a gaming running, both in split window, and the HDHomeRun app playing TV in PIP. So, that was 3 apps running simultaneously, with the 2 emulators being CPU-hungry. It took a while for the tablet to get warm and have the throttling kick in too; not sure how long. I didn’t hear any fans, but when powered off, the tablet cools down rather quickly. It never gets hot to touch; just warm.
The Pixel Tablet comes equipped with a Tensor G2, which is the same System on a Chip (SoC) used on the Pixel 7, which is the current generation of Google’s line of Pixel phones. It comes with 8 GB of RAM which is what other tablets in this price range offer, and is enough to work with multiple apps open. I’m actually writing this review on the Pixel Tablet with Chrome open in a split window, and Twitter on the other side of the split window. I also have ESPN playing in PIP for a total of 3 apps running simultaneously. For input, I have a Bluetooth keyboard and mouse connected to the Pixel Tablet. I haven’t experienced any lag from normal use. However, if I push the processor with gaming while having another video app open, the tablet will eventually get warm and thermal throttling kicks in. This slows the tablet down. But this is an extreme case. The way I had it happen was by opening a Wii emulator with a game running, and a PS2 emulator with a gaming running, both in split window, and the HDHomeRun app playing TV in PIP. So, that was 3 apps running simultaneously, with the 2 emulators being CPU-hungry. It took a while for the tablet to get warm and have the throttling kick in too; not sure how long. I didn’t hear any fans, but when powered off, the tablet cools down rather quickly. It never gets hot to touch; just warm.
As for gaming, I’m not much of a traditional Android gaming. My preference is console gaming, or games ported over from consoles. So I deal with emulation. It can handle PS2 emulation and most of Wii emulation just fine (aside from the bugs associated with the emulation itself, not hardware) with up to 2x upscaling. The Pixel Tablet’s GPU is a Mali G710.
Storage
The model I have is 128GB but it also comes in 256GB. There is expandable storage, so I wish Google would have offered a 512GB model. You won’t need that much space if you’re mainly streaming your content, but not everyone uses a tablet that way. If you want to store your game library locally the extra space is invaluable.
The model I have is 128GB but it also comes in 256GB. There is expandable storage, so I wish Google would have offered a 512GB model. You won’t need that much space if you’re mainly streaming your content, but not everyone uses a tablet that way. If you want to store your game library locally the extra space is invaluable.
The internal storage speeds is as follows:
Sequential write: 208.38MB/s
Sequential read: 631.72MB/s
Random write: 43.99MB/s
Random read: 28.81MB/s
Sequential write: 208.38MB/s
Sequential read: 631.72MB/s
Random write: 43.99MB/s
Random read: 28.81MB/s
It’s fairly fast.
Sound
There are 4 speaker grills on the tablet itself but the sound from the tablet speakers really lack bass and has a poor sound stage. Everything sounds so internalized; compact. But they’re not the worst. They’re serviceable and decent enough for a tablet.
There are 4 speaker grills on the tablet itself but the sound from the tablet speakers really lack bass and has a poor sound stage. Everything sounds so internalized; compact. But they’re not the worst. They’re serviceable and decent enough for a tablet.
When connected to the magnetic speaker charging dock, that’s when the sound shines. It’s essentially like a Nest Hub Max. You can hear the bass and the sound stage is much more open now. It doesn’t sound like the sound is coming from inside the tablet, but it’s emitting out of it. The bass won’t please listeners that want the exaggerated thumping bass. It lacks the power. But the bass from the speaker dock sounds pretty clean, not muddy. Vocals are heard clearly and not masked by the bass.
Dock
The dock really unlocks the optimal sound of the Pixel Tablet. You can use the tablet in Hub mode without the dock, but the tablet’s speakers are lacking for a smart home display that would need to cover a whole room.
The dock really unlocks the optimal sound of the Pixel Tablet. You can use the tablet in Hub mode without the dock, but the tablet’s speakers are lacking for a smart home display that would need to cover a whole room.
The dock has 4 magnetic prongs which incredibly powerful. When you bring the tablet around its vicinity, the magnets will tug the tablet towards it to seat it properly for charging.
The angle is perfect sitting in front of it on a desk. While I’m typing this review it feels like I have a mini PC. When standing, it’s based viewed from a distance.
When you’re connecting the Pixel Tablet to its dock while playing sound on the tablet speakers, the Pixel Tablet will seamlessly switch the sound to the dock nearly instantaneously. There’s a slight pause when connecting to the dock because it plays a connection sound effect first, before resuming the audio you were listening to. When switching from dock to tablet speakers though it’s closer to instantaneous because it doesn’t play that connection sound effect.
Hub
Unfortunately, Google Assistant is pretty inconsistent when it comes to reliability. Some days it will respond to smart home commands quickly. Other days it will take up to 5 seconds sometimes for it to respond or carry out a voice command.
Unfortunately, Google Assistant is pretty inconsistent when it comes to reliability. Some days it will respond to smart home commands quickly. Other days it will take up to 5 seconds sometimes for it to respond or carry out a voice command.
The way Google responds to your inquiries can change without warning either. For what seemed like over a year, when I asked Google for store hours, it would do a Google Image search of the store instead.
Ironically, it can act erratic if you own other Google Nest Hub devices in your home. When I first set it up, every time I asked it to play music, my Nest Hub Mini from a different room intercepted the command even though my Pixel Tablet that was docked was only less than 1 foot away from me in a silent room. Eventually it corrected itself I guess because it doesn’t happen anymore. It’s frustrating as there appears to be no rhyme or reason to it.
So if you’ve never used a Google Nest Hub device before take that to consideration. My main reason for sticking with the Google Nest Hub was because I found the ability to cast video to the display with Chromecast invaluable. Unlike other mirroring solutions, which has the content playing on the host device too, Chromecast only plays the content on the display you’ve casted it to freeing up the device you’re casting it from. Now that the Pixel Tablet runs on full Android, I don’t even have to rely on Chromecast. I can play video from the apps on the tablet itself and enjoy a more reliable experience and access to more content since Chromecast is limited to apps that support it.
Camera
There is a front/selfie camera and rear camera and they’re decent. Not terrible or cheap. But also not meant for any meaningful photography by any means. The shots I took from both cameras were clear, and the colors looked accurate, but also looked soft and loses detail when zoomed it.
There is a front/selfie camera and rear camera and they’re decent. Not terrible or cheap. But also not meant for any meaningful photography by any means. The shots I took from both cameras were clear, and the colors looked accurate, but also looked soft and loses detail when zoomed it.
The front camera is great for video conferencing. It doesn’t display a lot of noise.
Both front and rear cameras take pictures in 6MP, and shoot video in 1080p.
Battery Life
While streaming video non-stop, 90% brightness, 75% volume, and occasionally opening some apps like Twitter in split window while the video was playing I got 9 hours and 49 minutes.
But realistically, no one is going to use their tablet that way, non-stop. Real life usage will last you longer than this.
While running 2 games in split window, and HDHomeRun playing TV, non-stop, I got 4 hours 25 minutes. If it were only one gaming running continuously, I’d have to imagine the battery would only last much longer.
Charging
from 0% to 100%
Dock: 3 hours 11 minutes
USB-C 45W charger: 2 hours 39 minutes
from 0% to 100%
Dock: 3 hours 11 minutes
USB-C 45W charger: 2 hours 39 minutes
So, using a 25W or better USB-C charger makes charging from 0% to 100% roughly 30 minutes faster.
The difference between a 25W and 45W charger is negligible though 45W is a hair faster. Anything above 45W has no added benefit.
The difference between a 25W and 45W charger is negligible though 45W is a hair faster. Anything above 45W has no added benefit.
I would recommend this to a friend!
Share this review:
+4points
4of 4voted this as helpful.
Officially licensed for the PlayStation5 console, the WD_BLACK SN850P NVMe SSD for PS5 consoles allows you to store more titles with worry free installation. Instantly add up to 4TB of storage to hold more of your favorite games. With an optimized heatsink built specifically for the PS5 M.2 slot, you won~t need to worry about compatibility. Experience uninterrupted gameplay as your WD_BLACK drive runs cool with quality you can trust. The WD_BLACK SN850P NVMe SSD for PS5 consoles is certified and tested for PlayStation 5 consoles so you can store more, play more, fast.
Posted by: KusMoG
There's nothing really too complicated about this M.2 SSD. It's not just PlayStation branding on a SSD. It takes away a lot of the guesswork with compatibility for the PS5 because it's made for the PS5. It's designed with a heatsink and fits inside the PS5 with no issues.
What's impressive is the speed! Everything loads up so quickly! Unfortunately, if you're transferring games from an external drive to the SSD, it will only go as fast as the external drive, so it'll be MUCH slower and not indicative of the speed performance the SN850P delivers, so keep that in mind.
Installing games after downloading them was noticeably quicker than the stock SSD the PS5 comes with. And playing them immediately after, I didn't experience any slowdown, not even after 2 hours of continuous gameplay of Spider-Man Remastered in 4K, 120Hz VRR.
To get a better idea of the SSD's capabilities, I temporarily installed the SN850P on my desktop PC to run a CrystalDiskMark benchmark test on it. The results were surprising.
Sequential Read:
SEQ1M Q8T1: 7377.19 MB/s
SEQ128K Q32T1: 7376.76 MB/s
SEQ1M Q8T1: 7377.19 MB/s
SEQ128K Q32T1: 7376.76 MB/s
Sequential Write:
SEQ1M Q8T1: 6693.06 MB/s
SEQ128K Q32T1: 6695.91 MB/s
SEQ1M Q8T1: 6693.06 MB/s
SEQ128K Q32T1: 6695.91 MB/s
Random Read:
SEQ1M Q8T1: 4816.91 MB/s
SEQ128K Q32T1: 88.99 MB/s
SEQ1M Q8T1: 4816.91 MB/s
SEQ128K Q32T1: 88.99 MB/s
Random Write:
SEQ1M Q8T1: 4718.49 MB/s
SEQ128K Q32T1: 300.34 MB/s
SEQ1M Q8T1: 4718.49 MB/s
SEQ128K Q32T1: 300.34 MB/s
The random write speeds are fantastic! So, not just for the PS5, it makes a great M.2 SSD for a PC as well. Be aware that the heatsink is just under 0.5" so you'll need the clearance. It's also slightly wider than the average M.2 SSD because of its heatsink design. I'd say about 1mm wider.
Price competitively, will absolutely fit the PS5, and just incredibly fast, I can definitely recommend getting this SSD. I'd even go as far as recommending it for PC. The fantastic random write speeds make transferring a large size of a numerous amount of small files more speedy and less of a chore.
I would recommend this to a friend!

Share this review:
0points
0of 0voted this as helpful.
KusMoG's Review Comments
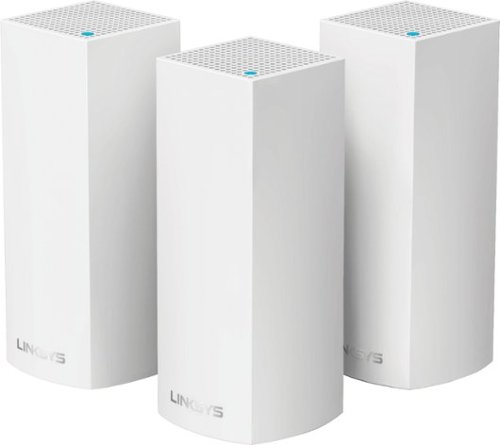
Make your home an internet haven with this versatile Linksys Velop wireless Wi-Fi system. Three identical tri-band dual-stream AC2200 routers, each equipped with a quad-core ARM Cortex-A7 processor, deliver lightning-fast internet. Equipped with Bluetooth 4.0/LE, this Linksys Velop wireless Wi-Fi system is simple to set up and pairs easily with computers, tablets and smart devices.
Overall3 out of 5
3 out of 5Optimized for distance, not speed. Limited admin
By KusMoG
First off, let me preface by saying that I'm coming off using an EA9500, a traditional router that costs $100 less than a Velop 3 pack. I also live in an apartment building with a highly congested 2.4GHz space; so bad it affects speeds dramatically and makes the connection highly inconsistent.
With that said, I wasn't really impressed with the Velop at all, for the amount of money it will cost you. It runs on 2.4 and 5.0GHz bands but which your device is connected to is entirely managed by the Velop mesh router themselves. You can't select it yourself. So for some *stupid* reason, even though my Galaxy Note 5 is capable of connecting to the 5.0GHz band, it connects me to 2.4. Because of this I get a slower and inconsistent connection due to the 2.4GHz congestion in my building.
There's also no web administration page, so you can't configure your Velop Wi-Fi from a computer. You need to do it through their app. That means your doing all the heavy lifting of port forwarding and such, from your phone. I'm not sure if they have an app for tablets.
As far as range goes, it will do the job. You will get a strong signal as long as you are near one of the nodes. But the catch is it only extends the wireless signal for as well as it currently performs in your environment at 100% signal and you have no control over which wi-fi band it connects to, like you do with a traditional router. So if your 2.4GHz band wi-fi is terrible to begin with at 100% signal, I suggest you stay very far away from this unless you want buyer's remorse.
I can only recommend the Velop wi-fi 3-pack to users, most especially with wi-fi dead spots in their home, that have great consistent connection in terms or speed and reliability on both 2.4 and 5.0GHz band with a traditional router at 100% signal. This mesh router will be music to your ears since it will be capable of extending your wi-fi range through your house with minimal signal loss.
I can't stress this enough but this router isn't 5.0GHz friendly. I suspect it recognizes when a device is a phone and connects it to the 2.4 GHz band to prioritize distance. It just doesn't offer the flexibility and power administrators want to manually control these connections. I'll be putting all my wireless devices back on my EA9500 because it clearly outclasses the more expensive, less admin-friendly Velop.
KusMoG
Attention Kristine the Linksys Support rep
March 29, 2017
Hi Kristine,
So I called the number you gave me and spoke with a Linksys representative named Kim (Badge ID# 21791) and she agreed with my review. She said it was a product limitation and that users are not able to select the wi-fi band since it's designed to run on a singular network. She also said there is a web UI but it's virtually the same as the app and offers no additional settings or features. So I stand by my review.
It's an awful lot of spend to spend to have so little control. 2 5.0 GHz bands exists on the node but it's USELESS if and when the Velop decides on its own not to connect using that band, instead choosing the inferior 2.4GHz band. This router is a huge step back for IT professional users.
0points
0of 0voted this comment as helpful.
KusMoG's Questions
KusMoG has not submitted any questions.
KusMoG's Answers
Bring your A-game anytime, anywhere. Introducing a universal mobile gaming controller that fits most smartphone devices, designed to bring console-level control to your on-the-go gaming. With this controller by your side, wherever you go, victory will follow.
Will it fit the Galaxy Note 20 ultra
Yes it will. The Galaxy Note 20 Ultra, while not officially listed as supported, probably because it wasn't available for Razer to test at the time, is the Kishi's limit.
5 years, 9 months ago
by
KusMoG