callmeageeth's stats
- Review count375
- Helpfulness votes1,298
- First reviewJune 23, 2014
- Last reviewMarch 24, 2026
- Featured reviews0
- Average rating4.4
Reviews comments
- Review comment count0
- Helpfulness votes0
- First review commentNone
- Last review commentNone
- Featured review comments0
Questions
- Question count0
- Helpfulness votes0
- First questionNone
- Last questionNone
- Featured questions0
- Answer count27
- Helpfulness votes50
- First answerOctober 20, 2014
- Last answerDecember 15, 2021
- Featured answers0
- Best answers7

Discover the magic of Meta Quest 3S and get ready to experience your favorite apps in a totally new way. The possibilities are endless when you can blend digital content into your physical space. Watch movies and shows on a vibrant screen that turns any room of your house into a giant theater. Bring games to life in your living room, or step right into the action with full immersion. Hang out with friends from anywhere, but feel like you~re in the same place, watching a concert or meeting up in Meta Horizon. Wireless and light, enjoy out-of-this-world workouts with Quest 3S that make fitness fun. With unreal experiences at an unreal price, where will you begin? See child safety guidance online; Accounts for 10+.
Customer Rating

5
Great fun at a great value
on December 11, 2024
Posted by: callmeageeth
While I’ve owned many VR headsets, from cheap cardboard versions with mirrors, PSVR and PSVR2, Meta Quest Pro, and now the Meta Quest 3s, I admittedly don’t use any of them as often as I’d like. The Meta Quest 3S is different and has me wanting to jump into VR more. Part of my issue is the inherent privacy of VR. Meaning, it’s a solo and engrossing endeavor. With 3 small kids it’s hard to find time where I can disassociate from the world for a chunk of time - I typically need an eye and or ear on my environment. But that issue is there (at least for me) regardless of the VR platform. Again, what brought me in and hooked me was the experience on the Quest 3S, primarily, Batman Arkham Shadows.
First, and for those who have yet to purchase a VR headset, what’s in the box and the setup process. Inside the box you’ll obviously get the headset, two controllers, a USB-C charging cable and brick. There’s some helpful literature to help you navigate the basics. Setting up the headset is equally simple. You place the headset on, turn it on, connect to the internet and then update it. From there, you’ll download the Meta app on your phone and connect it. Bottomline, the process took less than 10 minutes. The walkthrough was very instructive.
Then there’s the tutorial. If you’re new to VR, I highly recommend it. This was my second foray, as I own the Meta Quest Pro, but I nonetheless walked through it. You’ll be shown how to use the controllers, how to switch to pass through mode, how to use hand gestures, and how to move the menus. Basically, everything you need to know to navigate your way through the menus. Finally you’ll walk through creating a boundary. That process was super easy, even more so than the Meta Quest Pro. You simply look around your space and a boundary is created for you (which you can adjust with the controllers).
Once there you’re kind of left on your own. You can explore apps to download on your phone or directly on the headset. I was shocked to see how many apps and games were available. Finding games and apps that interest me wasn’t too difficult. Now, the problem becomes, what apps/games are worth it? What do I want to spend money on? Well that’s where Batman comes into play, at least to me. Playing the included Batman game just absolutely sold me on the types of experiences this headset can deliver.
I don’t want to spend a ton of time on the game itself, I haven’t finished it, but it has been quite the surprise. A fun and exciting adventure that places you as Batman in a first person adventure. The controls are simple and intuitive and the headset responded extremely well. You can play sitting down, or even moving around a little bit with your feet in open space. It was just an entirely unique experience that left me wanting more. From there I purchased the Star Wars Vader game, Table Tennis, and Beat Saber. While I’m certain there are other games out there worthy of your time and money, those interested me the most and truly highlighted how fun and unique playing games in VR is. I had absolutely no issues playing any game - no frame hiccups, no performance glitches, nothing. It worked smoothly.
As far as other fun things to do, it’s great watching a Netflix show in a feax theater, same for Amazon Prime. Of course, they no longer have dedicated apps, but you can still access the Meta Browser to go to the website and watch shows there. Like I said earlier, it becomes a personal experience where you aren’t watching shows with anyone at home, but if you are by yourself, I highly recommend it. There’s also content on YouTube, and while I definitely watched some videos to see what it’s like, you do realize some of the current limitations with VR fidelity as some of the videos are a little grainy. At least those publicly available for free. There is a Meta TV channel where you can see curated programs, like Mythbusters, which I like, but a lot of that is content dependent. Bottomline is that most of your 2D entertainment can be enjoyed in a VR headset.
There’s lots of other things to mention as to what this headset can do. Some interest me while others don’t. I like to cast my screen to my TV so my kids can watch me play some games (they like it for a few minutes). That’s easily accomplished through my Google Chromecast and works well.
I really like that you can link it to your computer, either wired or via Remote Desktop. I didn’t connect it to my desktop via wire, but I did setup remote desktop connection which is pretty nifty. Now, my home desktop has a large monitor, so I personally wouldn’t go to my Meta Quest to use my computer, but if I were traveling I might use it for a “bigger” monitor. The point is, it’s easy to setup and works flawlessly. It operates in passthrough mode, meaning you can see your surroundings like your keyboard and mouse, but you see a virtual computer screen in front of you. Frankly, it’s just darn cool. The mixed reality part has me really excited, I like being able to interact with virtual “things” while still seeing my surroundings. The idea of playing a board game on a table is fun (but you’d be doing it solo).
There’s a lot of social aspects with your headset, including multiplayer, (it is Facebook/Meta after all) but that’s not really for me. I like the intimacy of a VR headset to escape the real world and experience others. I’m not very interested in creating digital avatars and interacting with other people I don’t know (maybe it’d be different if I had real friends that owned a Meta Quest).
I don’t wear glasses, so I can’t comment how the fit works with glasses, but it does include some type of special mount that attaches to your headset if you have glasses. But there are a few downsides to this headset vs. others, including Metas other headsets. The glass in the center is adjusted at a certain distance and has three levels of adjustment. Basically it’s the width between your eyes. The Meta Quest Pro, and I believe the Meta Quest 3, have sliders for micro adjustments. With the 3S, there’s only 3 distinct distances; they snap into place when pushing them wider or narrower. This can affect your ability to get a clear image. Every time I put the headset on, I have to raise and lower it, along with the angle, to find the clearest image. The headset is comfortable, it has nice padding, but when I find the best, clearest picture for me, the headset puts a little extra pressure on my forehead. I typically don’t notice it after a few minutes, but it could bother others. I would also comment, similar to what I said earlier, if you’ve never used VR don’t expect 4K visuals. This isn’t a negative on the headset, the picture quality is quite good, but it’s not the same 4K that we’re accustomed to from our big screen TVs. The battery life is pretty good. I think it’s rated for about 3 hours which for me, is way longer than I would ever wear it at once.
I wanted to mention eye strain. When I don’t have passthrough on, my eyes don’t bother me at all. But when passthrough is on, and I try to read objects, like my phone, it really starts to strain my eyes after 10 minutes or so. Again, no issues when I’m just looking at a virtual world, but does have me concerned for what I would be able to comfortably do when in mixed reality.
I wish the controllers had rechargeable batteries, but it takes AA batteries. I also wish a charging dock or some type of stand was included (like the Quest Pro) but I’m sure it wasn’t to keep costs down. There are plenty of options for purchase out there, it’s just an additional purchase.
All in all, I am really enjoying this headset. The experience with Batman is what sold me. It really highlights the types of gaming experiences with VR and shows it at its best. I still don’t think VR is ready to move into the mainstream for work related tasks, but when it comes to gaming experiences, and entertainment in general, it’s definitely refreshing and exciting.
I would recommend this to a friend!


Share this review:
0points
0of 0voted this as helpful.

Wireless Earbuds, Now Playing. For Glory. Arctis GameBuds for PlayStation bring gaming-grade 2.4GHz wireless with Quick-Switch Wireless for Bluetooth. Easily connect to PlayStation, PC, handhelds, Switch, and more with a slim USB-C dongle. Tune out the noise with active noise cancellation and immerse deeper with 360~ Spatial Sound while enjoying 10-hour sessions.
Customer Rating

4
Good ear buds, but not sure who they're for
on December 9, 2024
Posted by: callmeageeth
I play PS5 with my friends several times a week. So audio quality and microphone quality are a big deal to me. While there’s a lot to like about these earbuds, but for me, I just can’t recommend them over a solid pair of over the ear headset.
IN THE BOX
It comes in a small box, you get the earbuds in the case along with a USB-C dongle, a USB-C cable for charging, a USB-C to USB-A adapter, and large and small ear tips (the medium ones come preinstalled on the ear buds).
It comes in a small box, you get the earbuds in the case along with a USB-C dongle, a USB-C cable for charging, a USB-C to USB-A adapter, and large and small ear tips (the medium ones come preinstalled on the ear buds).
DESIGN
I like the color scheme as it matches the Playstation 5’s white vibe. The case is light and pretty small (as you’d expect). At first I was bummed that the lid wouldn’t stay open, then I realized it kind of clicks into place while open. Inside the case are the earbuds and the USB-C dongle for your PS5. The earbuds themselves look pretty good, they’re light, and I found them to be pretty comfortable for ear buds. I don’t plan on exercising in them, but they seemed secure enough that I could if I wanted to. Of course, fit with earbuds is entirely subjective and always depends on your own anatomy (not to mention the different size earbuds).
I like the color scheme as it matches the Playstation 5’s white vibe. The case is light and pretty small (as you’d expect). At first I was bummed that the lid wouldn’t stay open, then I realized it kind of clicks into place while open. Inside the case are the earbuds and the USB-C dongle for your PS5. The earbuds themselves look pretty good, they’re light, and I found them to be pretty comfortable for ear buds. I don’t plan on exercising in them, but they seemed secure enough that I could if I wanted to. Of course, fit with earbuds is entirely subjective and always depends on your own anatomy (not to mention the different size earbuds).
SETUP
Now, there’s not much to say anymore about setting up Bluetooth headphones or using a dongle, as we’ve all by now paired something to our phone. But here you’ll want to download the Arctic app on your phone (that’s where you’ll make any adjustments). I couldn’t pair the earbuds through the app, it couldn’t find them, but I was able to easily pair them through my phones settings and then the app found them. The first thing I was told to do - no surprise - was to update the firmware. It took me a minute to realize that you can’t update the firmware from your phone. You actually have to download the Arctic app on your computer and then update the firmware that way. Luckily the program shows you exactly what to do, but it requires plugging the case into your PC, as well as the USB-C dongle for the PS5 and leaving the case open. The update process took about 10 minutes. I wouldn’t expect to have to do this very often, but it was a tad bit inconvenient. If you’re using these on PC it’s a little less of an inconvenience.
Now, there’s not much to say anymore about setting up Bluetooth headphones or using a dongle, as we’ve all by now paired something to our phone. But here you’ll want to download the Arctic app on your phone (that’s where you’ll make any adjustments). I couldn’t pair the earbuds through the app, it couldn’t find them, but I was able to easily pair them through my phones settings and then the app found them. The first thing I was told to do - no surprise - was to update the firmware. It took me a minute to realize that you can’t update the firmware from your phone. You actually have to download the Arctic app on your computer and then update the firmware that way. Luckily the program shows you exactly what to do, but it requires plugging the case into your PC, as well as the USB-C dongle for the PS5 and leaving the case open. The update process took about 10 minutes. I wouldn’t expect to have to do this very often, but it was a tad bit inconvenient. If you’re using these on PC it’s a little less of an inconvenience.
But once the firmware was updated and the earbuds paired, everything is set up and good to go.
CONTROLS
A few comments about the controls. With earbuds, there’s not a lot of space for buttons, so you have to navigate the controls by clicking the buttons on either ear bud. The important ones are turning on and off active noise cancellation and switching between Bluetooth mode and “wireless” mode (which connects to the dongle in your PS5). You have to click the right earbud 3 times to switch modes, and pushing once on the left earbud will switch between ANC and transparency. The sides of the earbuds aren’t touch sensitive, so you don’t swipe up or down to adjust the volume (like some earbuds like my Pixel Buds Pro). So to increase the volume you click and hold the right earbud button and to lower you click and hold the left. Of course, on your phone listening to music or on a call, you can adjust the volume with your volume rocker. Muting the microphone was a little dicier as it’s similar to adjusting the volume, you just don’t hold the button in as long.
A few comments about the controls. With earbuds, there’s not a lot of space for buttons, so you have to navigate the controls by clicking the buttons on either ear bud. The important ones are turning on and off active noise cancellation and switching between Bluetooth mode and “wireless” mode (which connects to the dongle in your PS5). You have to click the right earbud 3 times to switch modes, and pushing once on the left earbud will switch between ANC and transparency. The sides of the earbuds aren’t touch sensitive, so you don’t swipe up or down to adjust the volume (like some earbuds like my Pixel Buds Pro). So to increase the volume you click and hold the right earbud button and to lower you click and hold the left. Of course, on your phone listening to music or on a call, you can adjust the volume with your volume rocker. Muting the microphone was a little dicier as it’s similar to adjusting the volume, you just don’t hold the button in as long.
When paired to your PS5, you adjust the settings in your quick menu. If you’re like me, when it comes to the PS5 you don’t really mess with the settings once you find the right one. Meaning once I had the volume and microphone sensitivity right, I just left it there. But I have to admit, I very much prefer turning the wheel on the earcup of my Turtle Beach headset when I need to adjust the volume. But that’s just a matter of practicality, so I’m not complaining.
SOUND QUALITY
I use my Google Pixel Pro buds a lot. I’m very fond of them. I found the audio quality of the Arctic gamebuds to be on par for listening to music and podcasts. The bass wasn’t as deep as the Pixel Buds, but all-in-all, I found the sound to be pretty good. Some of it was probably due to a better seal in my ears than with the Arctic Gamebuds. I took a phone call and heard no complaints about the sound from the other caller. To me, the call sounded good. In short, it works well as earbuds for your phone.
I use my Google Pixel Pro buds a lot. I’m very fond of them. I found the audio quality of the Arctic gamebuds to be on par for listening to music and podcasts. The bass wasn’t as deep as the Pixel Buds, but all-in-all, I found the sound to be pretty good. Some of it was probably due to a better seal in my ears than with the Arctic Gamebuds. I took a phone call and heard no complaints about the sound from the other caller. To me, the call sounded good. In short, it works well as earbuds for your phone.
Video games, however, was a little bit more nuanced. In terms of sound quality, I found these earbuds to be close to my Turtle Beach headset. I mean that in terms of spatial surroundings and clarity. But the volume doesn’t get particularly loud. At first, I was disappointed, trying to turn it up as loud as I could. It seemed like the volume didn’t get close to what my Turtle Beach gets to - at least in terms of menu sounds. But when I was actually playing a game, I forgot about the volume. In other words, I was engrossed in the game with the sound and the volume issue I thought I had, was of no concern. Playing Call of Duty and College Football, I thought the spatial sound and recognizing sounds behind you, for example, was pretty good.
Now, the microphone was a different story. My friends described me as sounding like I was in a “tin can.” I’m told the Turtle Beach headphones (from the other person’s perspective) sounded more full and balanced. They could hear me and I could hear them, but I was a bit disappointed they could tell I swapped headsets (I was hoping they couldn’t tell the difference).
There is side tone, which I love and almost need in my headsets. That’s hearing you talk in the ear buds. You can adjust sidetone and turn it on within the app. It’s not terribly loud, but it’s enough to get a sense of how loud you’re talking (for those that don’t know, not being able to hear yourself chat is a bit annoying as you can’t regulate how loud you’re talking).
I have to say that there’s many automatic EQ adjustment for games, but I’m a person that doesn’t typically fiddle with EQs (it’s just an extra step to take when I finally get time to sit down and play a game). So with all my headsets, I typically set it and forget it. I did go into the app and manually change my EQ settings for College Football, but I couldn’t tell any difference between it and the default. That could just be me, maybe I’m not that sensitive to it, but overall I think it’s nice to have EQ adjustments for those that really care about it.
CONCLUSION
All in all these are really good earbuds. I just don’t know who they’re for. I don’t mind wearing earbuds and carry them with me everyday, but I carry them because they’re small. I always prefer the cushion of ear cups in over the ear headsets. The advantage of these earbuds to me is the convenience of travel, but I rarely travel (if ever) with my PS5. So they end up sitting next to my PS5 where I game. And like I said, in terms of comfort, I’m going for my over the ear headset over earbuds every time. But that’s personal preference. But the microphone quality as told to me by my friends was a bummer; I don’t think it’s a dealbreaker, but it’s one less reason for me to use them while I game.
All in all these are really good earbuds. I just don’t know who they’re for. I don’t mind wearing earbuds and carry them with me everyday, but I carry them because they’re small. I always prefer the cushion of ear cups in over the ear headsets. The advantage of these earbuds to me is the convenience of travel, but I rarely travel (if ever) with my PS5. So they end up sitting next to my PS5 where I game. And like I said, in terms of comfort, I’m going for my over the ear headset over earbuds every time. But that’s personal preference. But the microphone quality as told to me by my friends was a bummer; I don’t think it’s a dealbreaker, but it’s one less reason for me to use them while I game.
No, I would not recommend this to a friend.


Share this review:
0points
0of 0voted this as helpful.

The HyperX Cloud Mini~s a comfortable wireless headset built for the younger generation of gamers~. It~s lightweight and appropriately sized for younger gamers, and more importantly, it~s designed to keep audio levels below 85dB~. The clear, flip-to-mute mic lets younger gamers chat with their friends online, and it conveniently tucks away. Cloud Mini easily pairs to Bluetooth compatible devices and connects to devices with a 3.5mm connection~, so wherever your young gamer plays; mobile, Nintendo Switch, PlayStation, PC, Chromebook, or Steam Deck, this headset~s ready~.
Customer Rating
5
Quality headset for young kids
on December 4, 2024
Posted by: callmeageeth
My 9 year old son enjoys playing some multiplayer games with his friends. In the past, he used my headphones which were just a little too big for him (but they worked). This headset is a reasonably priced one that is the perfect size for him, with lots of versatility. It’s designed to protect young kids’ ears, with a volume restriction (big plus, as I’ve known my son to jack the volume up in headsets). The only minor downside is no USB transmitter, which would have been helpful for connecting to Playstation and PC a bit easier. Of course, you can still use it via 3.5 mm connector.
I, and my son, like the design of the headset. It’s plenty light, and the ear cups swivel so you can lay it flat. The microphone can twist out of the way when not in use or when you want to mute your voice chat. As a parent who knows kids can be rough with their devices/toys, etc., I have some concerns about how long it will last before a piece of plastic might break, but that’s all kid dependent. My son takes pride in his headphones and takes great care of them. But, this isn’t unlike any problem you might run into if kids treat things without the proper care, so I can’t knock it. It also probably helps keep the price down.
The headband has a nice soft pad that my son tells me is comfortable (it’s too small for my big head). The ear cups are plenty plush and feel similar to the standard (i.e. non-premium) headset. In short, my son reports that they are extremely comfortable.
The mic is smartly designed in so much as it’s not too long and can “flip” out of the way. The boom is flexible which allows you to move it closer/further away from the mouth and I think helps with durability (a hard, stiff, microphone might be more prone to break off). Smart design choice in my mind.
While I will (sadly) admit that I don’t always think about loud volumes in my son’s ears, I certainly appreciate that HyperX has thought of it and built it into this headset. The volume level stays below 85dB which ensures that kids aren’t listening to too high of volume for a lengthy time.
In terms of set up, it’s like any Bluetooth headset that we’ve all grown accustomed to. It pairs quickly and easily by holding the power button to put it in pairing mode. We’ve had no issues connecting it to a PC with Bluetooth, a phone, and Kindle laptop.
He’s plugged it into the PS5 controller and it works just fine, but I wish it came with either a 3.5 mm cable (it doesn’t) or a USB dongle. I’m assuming it’s to keep the price down, but honestly my son just plays single player games on PS5 so it hasn’t been an issue for us. It’s really only a minor complaint.
My son, who is no audiophile, really enjoys the sound quality. He tells me everything sounds good and offers no complaints when playing games, watching his tablet, or otherwise talking to his friends. In terms of comfort and fit, again, my son says they’re extremely comfortable.
Finally, battery life. It’s rated for 25 hours which is plenty for several listening sessions over a number of days. My son, being who he is, charges it almost daily so we’ve never tested the full battery capacity, but even if it gets close to its rated hours, I’m satisfied. Importantly, the battery made it over a long drive to see family - there and back - without needing to be charged.
All in all, I think this is a good value proposition. It’s a quality headset with a sharp, but not too over the top design, that’s comfortable for young kids. The limit on volume is a big plus, and while I would consider purchasing it just for my son to use during long road trips, I really like the versatility of what you can use it with (i.e. PS5, Switch, PC, tablets, phones, etc.). One kids headset to rule them all.
I would recommend this to a friend!


Share this review:
+1point
1of 1voted this as helpful.

Small but mighty, the Nextbase Piqo 2K delivers premium performance in an ultra-compact design. This dash cam captures every critical detail in stunning 1440p HD, whether you're driving in bright sunlight or on dark roads. With built-in Wi-Fi, Bluetooth, and GPS, the Piqo 2K offers seamless connectivity and real-time tracking, letting you easily access, edit, and share footage through the Nextbase App. The Piqo 2K goes beyond capturing footage~it's designed to be your complete driving companion. Smart Parking ensures your vehicle is monitored while you're away, automatically recording any knocks or bumps and notifying you via Wi-Fi and Bluetooth. Guardian Mode Lite allows you to set limits for anyone borrowing your car, so you're always in control. In emergencies, the Piqo 2K~s Emergency SOS system contacts services and sends your GPS location, while Witness Mode Lite alerts a loved one if something goes wrong. Piqo 2K doesn~t just provide protection~it offers peace of mind every time you~re on the road. With its powerful features, the Piqo 2K is more than just a dash cam~it~s a smarter, simpler way to safeguard what matters most.
Customer Rating
4
Easy to use, lots of features, awkward shape
on November 2, 2024
Posted by: callmeageeth
I’ve owned a Nextbase dashcam before and I was always impressed with the camera quality and durability. But after 3 years, it finally kicked the bucket and just wouldn’t turn on. To sum up this camera, you get a high quality camera with lots of features - behind pay walls - and a much easier way to access your videos.
Included in the small packaging is the camera itself, a long USB-C cable, a car charger, an extra sticky pad (to install on the windshield), and a plastic device (I don’t know what it’s called) to help shove the wires inside your car panels to hide the wires.
The first thing you need to do is download the app. The quickest way to find it is to scan the QR code in the packaging. Even though you can probably just jump straight to attaching the dashcam in your car, I suggest going through the app. Because the first thing you’ll need to do is to connect it to your phone and download a firmware update. I did this in my house before installing it in my car - but it really doesn’t matter, so long as your car is on when you do it if you do this in your car.
Unlike most dashcams I’ve seen, there’s no suction cup. It’s an adhesive pad. This had my worried only because I’ve seen heat take off my suction cup. It happened infrequently, but my concern is if it gets too hot and the adhesive pad comes off, I’ll have to use another adhesive pad (vs. just putting the suction cup back on the windshield). But I can’t speak to whether that would happen, I haven’t had it long enough and it’s been cold. The installation of the adhesive pad is simple, you simply clean the windshield, and then use the alcohol pad. Obviously you’ll want to know where you want to put it.
In my car, I have to put it almost in front of the passenger side of the windshield. That’s because of the black “bumps” that exist to help with glare in all windshields. I was too afraid to try and stick it to that portion of my windshield for fear it wouldn’t stick well.
I like the design of the camera, it looks fine, but it’s tall. Unlike my last dashcam which was horizontal I could get the lens right in front of the windshield for the best view. This one sticks down from where it’s mounted meaning the lens is further away from the windshield. This is only a problem insomuch as when I look through the camera feed, I can see the edge of the plastic on the inside of my car’s windshield. My preference would be to see only the outside of the car, but it’s not that big of a deal, the image quality is still great.
It takes a little bit of time to hide the wires, but in my Honda Pilot that wasn’t that difficult.
Once it’s connected to your phone’s app, your phone will notify you when your car is on and it’s connected (at least on my Pixel). It beeps pretty loud when it turns on so you know it’s on. From there you just drive. When you want to access the footage you open up the app. Now you can only access the footage when the dashcam is on and your phone is nearby. It connects via WiFi and you can look at the footage and download it directly to your phone. This is so much more convenient than taking out an SD card and plugging it into your computer. The video quality is 2K which is pretty sharp, but more importantly allows you to zoom in.
But I mentioned earlier, this dashcam has some extra features. But they’re behind paywalls. You can set up Emergency SOS so that it will contact emergency services automatically if you ever get into an accident. There’s also a witness mode whereby you can contact a trusted contact if you get pulled over, or are in a road rage incident. Luckily it’s voice activated so long as you say the magic words. Me personally, I’m not going to pay for yet another subscription to have this in my car, but I can certainly see the benefit of these features to some. It can also start recording if your car is hit while parked (i.e. in situations where you aren’t in the car) but this requires it to be hard wired - some optional accessory I know little about.
One other thing to keep in mind is that this camera tracks a lot of data. It can record your GPS, speed and time, and audio. This is great when you need to prove something, but as an attorney, it makes me worried in terms of being able to track your driving habit. It goes both ways. Of course you can turn some or all of these features off. But again, I like having these options available and the flexibility for some people to turn things on and off. I personally just like having the video recording, but I could see parents wanting all the features on to track their kid’s driving for example.
CONCLUSION
In some, this is a great quality camera that’s easy to use. Accessing the footage through the app and the video quality is all you need. It tracks a lot of data and has lots of extra safety features for those that need it. Its only drawback is the design, I would have preferred a horizontal design that would allow the lens to be closer to the windshield. As it stands, at least in my car, it’s definitely in the passenger’s field of vision.
In some, this is a great quality camera that’s easy to use. Accessing the footage through the app and the video quality is all you need. It tracks a lot of data and has lots of extra safety features for those that need it. Its only drawback is the design, I would have preferred a horizontal design that would allow the lens to be closer to the windshield. As it stands, at least in my car, it’s definitely in the passenger’s field of vision.
I would recommend this to a friend!


Share this review:
+2points
2of 2voted this as helpful.

Oura Ring 4 brings you closer to what matters most ~ your health. With an updated all-titanium design, this smart ring features Smart Sensing, a new sensing platform that doesn~t just measure your biometrics but also adapts to you. It provides insights into over 50 biometrics including sleep, readiness, activity, heart health, stress, metabolic health and women~s health.
Customer Rating
5
Accurate, looks great, a lot of helpful info
on November 2, 2024
Posted by: callmeageeth
I’ve always worn some kind of smart watch to monitor my fitness. Mostly Fitbits. The biggest drawbacks to a smart watch is battery life - frequent charging - and not tracking my health when I wear an actual watch (which I like doing when going out or attending a formal event). There’s also a question of what to do with all the data your watch gathers? What really separates the Oura ring from other health trackers I’ve used is the helpful advice it gathers. In some ways it takes the data and gives recommendations (vs. just telling you how long you slept or how many steps you made). But it requires some work. While it does a great job of automatically tracking activities/sleep and HR, to really take advantage you have to go into the app and tell it what you’ve done. That can help establish patterns, matching what activities you’ve done one night that might mean you’re going to sleep worse.
IN THE BOX AND SETUP
In the box you’ll get your ring, charging base and charging cable. Setup is dead simple. You pop the ring on the charger and download the app. I was up and running in no time. Of course there was a firmware update, but it didn’t take long.
In the box you’ll get your ring, charging base and charging cable. Setup is dead simple. You pop the ring on the charger and download the app. I was up and running in no time. Of course there was a firmware update, but it didn’t take long.
It takes a week or so to track your vitals to get a baseline. But it’s awesome being able to wear a device that doesn’t have a screen and has long battery life, so you literally just wear it and forget it.
DESIGN
I’ve been super impressed with the design and durability of the ring. I opted to wear it in lieu of my wedding band. My wedding band has lots of signs of wear and tear on it (mini scratches that could be polished out). I’ve worn the Oura full time doing everything I would normally do, other than lifting weights. It is recommended that you don’t wear it while lifting weights. But I’ve been seriously impressed that it’s shown no signs of scratching. It’s a small sample size, but still, I would have expected some scratch by now. Point being, it’s a well designed, and great looking ring.
I’ve been super impressed with the design and durability of the ring. I opted to wear it in lieu of my wedding band. My wedding band has lots of signs of wear and tear on it (mini scratches that could be polished out). I’ve worn the Oura full time doing everything I would normally do, other than lifting weights. It is recommended that you don’t wear it while lifting weights. But I’ve been seriously impressed that it’s shown no signs of scratching. It’s a small sample size, but still, I would have expected some scratch by now. Point being, it’s a well designed, and great looking ring.
ACCURACY
It’s difficult for me to say how accurate it is, the best I can do is compare my vitals between my Oura ring and my Pixel Watch. It’s incredible how similar they are. It’s amazing all the sensors and battery fit in such a small device. In any event, I can at least say that the Oura ring’s accuracy is just as good if not better than my Google Pixel (and you’ll have to assume the Pixel Watch is accurate).
It’s difficult for me to say how accurate it is, the best I can do is compare my vitals between my Oura ring and my Pixel Watch. It’s incredible how similar they are. It’s amazing all the sensors and battery fit in such a small device. In any event, I can at least say that the Oura ring’s accuracy is just as good if not better than my Google Pixel (and you’ll have to assume the Pixel Watch is accurate).
USE
Like I said, you simply wear this device. There’s obviously no screen, no distractions, no extra device bugging you. I love the simplicity when I want to track my activities without getting notifications from a watch or phone. But you can’t talk about the use without talking about the app itself. The app, to me, was a little overwhelming at first. There’s a lot there. Like most apps, however, you spend a little time in it, and it will make sense. I wouldn’t say it’s the most intuitive app I’ve ever used, but the layout makes sense. The Oura ring can automatically track activities. So if you go for a run, it knows you went for a run and will track your stats. Same goes for cycling. It’s a bit hit and miss on indoor cycling in terms of automatically recognizing it. But if you were to open up the app, it will typically ask you to confirm or edit activities. Sometimes I’ll know I went for a walk, sometimes it will detect an activity that I didn’t remember as an actual activity. You’re able to edit activities or add them. The idea is that it helps keep track of your activity level, offering advice as to things you can do to improve your activity level.
Like I said, you simply wear this device. There’s obviously no screen, no distractions, no extra device bugging you. I love the simplicity when I want to track my activities without getting notifications from a watch or phone. But you can’t talk about the use without talking about the app itself. The app, to me, was a little overwhelming at first. There’s a lot there. Like most apps, however, you spend a little time in it, and it will make sense. I wouldn’t say it’s the most intuitive app I’ve ever used, but the layout makes sense. The Oura ring can automatically track activities. So if you go for a run, it knows you went for a run and will track your stats. Same goes for cycling. It’s a bit hit and miss on indoor cycling in terms of automatically recognizing it. But if you were to open up the app, it will typically ask you to confirm or edit activities. Sometimes I’ll know I went for a walk, sometimes it will detect an activity that I didn’t remember as an actual activity. You’re able to edit activities or add them. The idea is that it helps keep track of your activity level, offering advice as to things you can do to improve your activity level.
Sleeping, it measures your total sleep, efficiency and REM sleep. It gives you all this data in a nice chart - similar to other sleep trackers. But it automatically keeps track of when you go to bed and wake up, and then will be proactive in sending notifications to your phone to let you know when you should start winding down to make sure you get enough rest. Again, this is all automatic. The non-automatic part, is that you can go in and for each day select 2 dozen or so different options (like late workout, caffeine late in the day, etc.). If you stay diligent about this, the app will recognize patterns to help coach you on what you should or shouldn’t do to get a better night’s sleep.
What I like the most is recognizing stressors. It will flag when your vitals spike and identify stressors throughout the day. I found these to be pretty spot on, when I braked hard in my car and my adrenaline spiked, it recognized it as a spike. It measures all this in 15 minute intervals.
In short, think of Oura as a comprehensive device that includes the app and the ring, that offers coaching to better help you meet your goals, whether it’s to get better sleep, workout more, or lower your stress. But the app does require a subscription to take full advantage of all these features. The only other downside I see is getting locked into the one size ring (obviously it’s not adjustable like a watch). So you’re kind of stuck with using whatever finger you sized it for.
CONCLUSION
In some ways, the Oura is similar to most fitness trackers. I get similar data between my Pixel watch and the Oura. But the big difference is the app itself, which offers great advice (and it reminds you to give yourself grace). It unfortunately requires a subscription to get the most features, but the price is in range with what you’d expect (but something to consider for the price conscious). The ring itself is pricey, but you’re getting a well designed, durable, and sharp looking ring. While the price is subjective as to what you can afford, as a value proposition, taking into account everything it offers, it’s well worth it. No more do you have to find time to charge a device every single day to track your sleep, you need only charge this once a week and it charges fast. The downside of no screen on your tracker is that all the notifications come through your phone (i minimize my app notifications as best I can) but I’ve yet to find a wasted or otherwise notification that bothered me from Oura. I’m extremely pleased.
In some ways, the Oura is similar to most fitness trackers. I get similar data between my Pixel watch and the Oura. But the big difference is the app itself, which offers great advice (and it reminds you to give yourself grace). It unfortunately requires a subscription to get the most features, but the price is in range with what you’d expect (but something to consider for the price conscious). The ring itself is pricey, but you’re getting a well designed, durable, and sharp looking ring. While the price is subjective as to what you can afford, as a value proposition, taking into account everything it offers, it’s well worth it. No more do you have to find time to charge a device every single day to track your sleep, you need only charge this once a week and it charges fast. The downside of no screen on your tracker is that all the notifications come through your phone (i minimize my app notifications as best I can) but I’ve yet to find a wasted or otherwise notification that bothered me from Oura. I’m extremely pleased.
I would recommend this to a friend!


Share this review:
+5points
5of 5voted this as helpful.
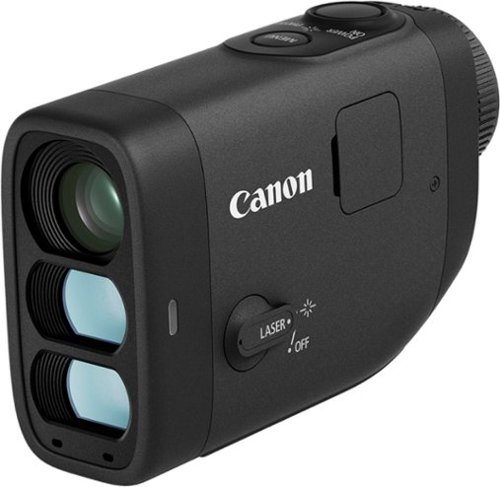
It~s time to lower your golf score! Introducing the PowerShot GOLF Digital Laser Rangefinder from Canon. Able to quickly measure distance and slope to the pin, you~ll now have the tools you need right in the palm of your hand to improve your game. The PowerShot GOLF is small, lightweight and water resistant, making it perfect to easily carry around the course, even in a little sprinkle. Plus, you can take photos and record video to review after the game to keep learning and improving even off the course.
Customer Rating
5
Great optics and accuracy
on October 28, 2024
Posted by: callmeageeth
I’m a casual golfer who’s never owned a rangefinder before. I found this Canon rangefinder to be pretty easy to use, small size, with great quality optics. It also has the ability to take pictures. And while I won’t be using this to take family portraits, the camera quality was pretty decent - with adequate lighting.
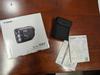
Inside the box you’ll find the rangefinder and a case. There’s also an instruction manual that like most Canon products, is of little help (IMO). But luckily, rangefinders are relatively simple to use, so there’s not much of a learning curve other than just using it.
It charges via USB-C which is accessible under a flap that also has space for a microSD card. This is obviously for storage of photos. I’m not certain how many golfers will want to take a picture at the course with this, primarily because there’s no screen to view your photos on site. But the feature is there. And I’m sure in some circumstances, you might be able to make use of it. While not necessary for its intended purpose, I guess I’d say it’s nice to have. I should also add that it records videos as well.
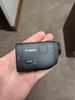
It’s smartly designed and looks like most rangefinders I’ve seen, so no complaints there. While I appreciate its compact size, I wouldn’t have been opposed to it being a tad bit larger given my hand size. But I had no issues handling it. On the side is a conspicuous switch to turn on and off the laser - I’m assuming if you just wanted to view and/or take photos without the distraction of the distances in your picture. On the top is the Menu button, Power On/Photo button, and on the back, underneath the viewfinder you’ll find a Zoom button and red recording button (for videos).
It has approximately 700-800 yard range with digital magnification. Obviously it uses a laser to measure distance. It also has a built-in slope compensation to account for distances based on the elevation of the course. It has 2-axis image stabilization which works pretty well. You’ll notice the stabilization as it helps minimize micro movements and steady the image. It also has a flagpole lock function; you’ll hear it beep when it locks on the flag pole and you’ll see a flagpole icon appear in the viewfinder when it locks in.
The electronic viewfinder is extremely clear in daylight. On a sunny day at the golf course it looks crystal clear. But in low light settings, the image gets extremely fuzzy. But this isn’t much of an issue given its purpose of measuring distances. It still works well measuring distances in low light situations where the image in the viewfinder gets fuzzy.
The menu system is a bit clunky, only because of the lack of buttons. The menu is designed like any other Canon camera if you’re familiar with it. But you use the record and zoom button in the back to navigate between the options. Luckily, other than adjusting the date and time during the initial setup, maybe looking at a photo through the viewfinder you won’t want to or need to access the menus. There’s some basic recording settings you could change, format the SD card, reset settings, etc. But again, I wouldn’t think most people would access the menus much.
It’s tough to say how accurate the rangefinder is, without having something to compare to. But anecdotally, I found it to be pretty spot on based on the information available at the golf course where I used it. In terms of ease of use, it’s pretty straight forward, although at times it would lock onto the flagpole and give me bizarre distances. It locks onto the flagpole most of the time, but if you don’t have the reticle at the base of the pin at the hole, I found it to give me incorrect readings. Some of it was user error as I got accustomed to using it. I couldn’t see a formal power on and off button. It seems to go in what I would describe as a “rest” mode. You simply hit the power button and it turns on and it simply goes to sleep a few minutes after use. I couldn’t get a sense of the battery life as I’ve only played golf with it once, but I’ve had it for a little while now and played around with it and the battery life is at full power. I would imagine it would last a while and so long as you don’t go a year in between uses without charging it, it shouldn’t die on you.
The slope feature was a big benefit. The display will give you the direct distance and beneath it, the distance in yellow to signal the true distance when accounting for elevation. Again, anecdotally I found it to be pretty accurate.
The biggest issue with the rangefinder is the price. It’s pretty expensive for its limited use case, but if you’re in the market for one, I would definitely recommend it based on its accuracy, ease of use, and the slope compensation. The fact that it takes pictures is nice, and I do like using it as a monocular as it’s fun to use.
I would recommend this to a friend!


Share this review:
0points
0of 0voted this as helpful.

The Ninja Flip Toaster Oven & Air Fryer is a convection oven, air fryer, and toaster that crisps and flips up and away. Get extra-large capacity without sacrificing counter space with its unique design that allows you to flip it up against your backsplash when not in use so you can save 50% more space on your countertop. OvenCrisp Technology combines infrared heat with rapid, circulating hot air all around your food for quick, edge-to-edge even cooking providing you with optimum cooking results. The Ninja Flip includes 8 functions so no matter what you~re craving, you can make it all in this countertop appliance~air fry, roast, broil, bake, pizza, toast, bagel, dehydrate all in one.
Customer Rating
4
Works great, but kind of gimmicky
on October 13, 2024
Posted by: callmeageeth
I’m a big fan of Ninja products. I’ve owned lots over the years and have been pleased with all. However, some of their products try to do too much. Don’t get me wrong, I’m a fan of versatile kitchen appliances (you only have so much kitchen space) but they can sometimes feel gimmicky. You might need a replacement air fryer, and then you think, why not get a 8-in-1 device that air frys and does other things. So you spend the money for the all in one product and don’t find yourself using it other than air frying. That’s how I feel about the Ninja Flip Toaster Oven and Air Fryer. It works great, but I don’t find myself using all its features (like dehydrating). I feel like if you’re into that, you already have your own means, devices to dehydrate food.
In any event, inside the box you’ll find the oven, air fryer basket, sheet pan, wire rack, crumb tray and a quick start guide. Luckily, when not in use, you can store all these items inside the oven. The quick start guide is unlike some other guides from Ninja - I’ve been spoiled by Ninja giving a lot of recipes for specific kitchen appliances - here, there’s only one recipe and an air frying chart (both of which are still appreciated). The quick start guide is just that, it’s there to give you a lay of the land so to speak on how to use the various functions. It’s less about recipes and more of giving you concepts. For example, it gives you a template to build a sheet pan meal (which would be a protein and vegetable starch). It helps explain the different types of cooking methods, like air roast, which is for a crispy outside and juicy inside, or broil which provides top down heat for a crispy finish. And it shows you what pans to use depending on how you’re cooking food. For the experienced cook, you might already know this information. But I find it helpful.
The design of the toaster oven is nice, it looks modern, sleek and dare I say professional. The lid shuts via magnet and it holds up well whether the oven is sitting on the counter or tilted up on its backside. The buttons on the front are clear and easy to understand. So long as you know HOW you want to cook, figuring out the settings is simple. There’s a mode, time, temp, start/stop button. I very much appreciate this simplicity. There’s also a light, similar to that of an oven light that lets you see your food while it’s cooking. It has a big footprint however. It shouldn’t be surprising given the size of the oven. In short, it takes up a lot of counter space. Now you can tilt it up to lay on its backside (with the oven door facing up). I will say that I appreciate the design and ability to “flip” it up, but it still takes up some counter space. It’s better than having it sit on its bottom, but I wouldn’t one anyone to get the impression that it becomes invisible so to speak.
The big pros of this oven are the fast cooking times, large capacity and ease of cleaning. It’s large enough to fit a 12 inch frozen pizza, 6 slices of bread (for toasting), or up to 4 lbs of food. You should be able to feed a small family in one go. But even if you need to make more food, it cooks surprisingly quickly. I air roasted 2 chicken breasts and it took 20 minutes. All I did was put it on the sheet pan, turn it on air roast, set my temperature and “forgot it.” I ended up with two perfectly cooked chicken breasts. No preheating required. Cooking that chicken in my oven would have taken longer - not to mention preheating - and same goes for grilling. Cooking a frozen pizza, you still need to follow the packaging instructions, but a pizza that takes 16 minutes to bake in your traditional oven, might only take 12-3 minutes. And without preheating.
Cleaning is a cinch too. Once everything is cooled down, you can pull out the air fry basket, sheet pan, crumb tray and clean them with ease. I’ve cooked with mine several times - cleaning it after each use - and it still looks brand new.
The cons of this oven is the price. I don’t think this oven is overpriced, base on what it can do, but going back to my original comment, if you only use the air frying function, you could get a dedicated air fryer cheaper. Then there’s the complexity. Don’t get me wrong, this isn’t some complicated appliance. But it takes a little bit of trial and error cooking dishes as it cooks things differently (often quicker). I did burn a pizza once and had to throw it away - but I wasn’t watching it as I should have (when using it the first time). In short, it’s easy to use, so long as you know how you want to cook and realize that until you get the hang of it, you’ll need to monitor your cooking food.
I’ve only had it a short time and don’t really have any durability concerns. But that’s primarily based on my past experience with Shark kitchen appliances. I’ve never had any issues with them. I guess the only concern might be the constant flipping it up to store it, but I honestly don’t see that being an issue at all.
In short, this Ninja Flip Toaster Oven works surprisingly well. Again, I’m still blown away with the air roasting of my chicken. I would just want to make sure it works in your kitchen as some of its features can be found in your typical oven. But if you want something that can cook up some meals for one, 2 or maybe even a small family, and do it quickly this would be a great purchase. Storage is an issue, if you don’t have much counter space, and even with the flipping function, it will dominate your counter space. I find that if I don’t keep my appliances within easy reach, I get to the point where it becomes too much effort to get it out of storage. But everyone’s different.
I would recommend this to a friend!


Share this review:
+6points
7of 8voted this as helpful.

Oura Ring 4 sizes are slightly different from standard ring sizes, so it is important to size yourself using our tools and to follow our sizing instructions. The Oura Ring 4 Sizing Kit allows for you, and those around you, to find the ideal fit before purchasing. You can also size yourself in stores where there is an Oura Ring 4 display. A properly fitting Oura Ring will result in the highest possible data accuracy, comfort, and overall experience.
Customer Rating
5
Simple and easy
on October 10, 2024
Posted by: callmeageeth
When purchasing an Oura ring, you first must provide your ring size. If you're like me, you don't know offhand what your ring size is. Even if you think you know it, it's always beneficial to get measured to make sure your new Oura ring fits appropriately.
The sizing kit is quite simple. It's a small box that comes with 12 different size plastic rings. These rings range in size from 4 to 15. The plastic rings are attached to a 3x4 placard. You simply take the sizes off and try them on. You want to make sure it fits snugly, but not too much. Obviously it depends on what finger you want to wear your ring on. Nothing in the sizing kit indicates whether any finger is better than the other (i.e. ring finger vs. pointer). Given this lack of information, and the fact that promotional materials show people wearing the Oura ring on different fingers, I took it as safe to assume that it doesn't matter which finger you wear it on.
There's little information in the kit itself, and that's probably because there doesn't need to be. They simply recommend that you wear the appropriate size ring for 24 hours to ensure comfort. You do want to make sure that the size is ok given that your finger size can swell depending on your health and what you're doing.
Once you've worn the appropriate ring for 24 hours and are happy with the fit (the plastic rings are the approximate thickness of the Oura ring, which to me, is slightly thicker (but too much) than my wedding band) then you simple take it back to the Best Buy store where you made your purchase to pick out the color and size that you prefer.
Bottomline, it's extremely simple, only downside is that it does require two trips to the store (or one, depending if you order it online). But to me, that's worth it to make sure you get the appropriate size. And I highly recommend you wear it for the full 24 hours.
I would recommend this to a friend!


Share this review:
0points
0of 0voted this as helpful.
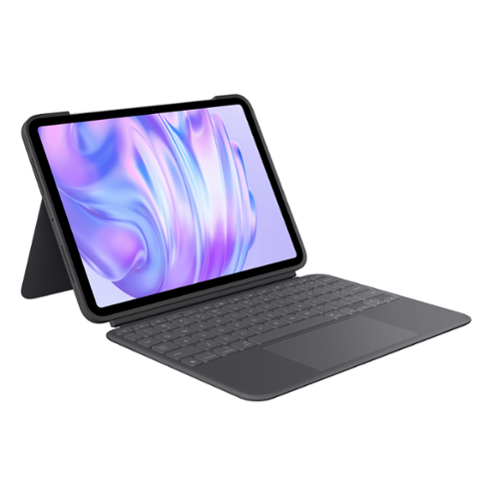
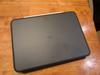
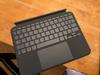
Type, sketch, view and read with the Combo Touch keyboard case. A flexible kickstand and a full-size, detachable keyboard give you multiple use modes for any task. Take iPad further with a bigger trackpad that gives you superior, intuitive tracking experience with familiar Multi-Touch gesture controls.
Customer Rating
5
Great protection, and increased productivity
on October 5, 2024
Posted by: callmeageeth
At the outset: I am primarily a Windows user - and Android - who recently got an iPad Pro M4 for work for specific uses. Point is, I’m not a wizard with Apple products, although I have owned an iPad before and am generally familiar with how to operate them. In my mind, iPads were designed to be used by children and are extremely intuitive and easy to use. However, as they’ve gained new features and capabilities, I’ve found myself wanting to replace my laptop - to handle emails, etc. - to reduce the amount of devices I feel like I need. But I’ve always hated typing on any touch screen (phones included). Apple of course sells a Magic Keyboard, but I was immediately turned off by the price. In comes Logitech with its Combo Touch. It’s not “cheap” but at the end of the day I think it’s a great value for what you get.
IN THE BOX AND SETUP
Quickly, inside the box you’ll find two pieces, the keyboard (which is very similar to the Surface keyboards) as well as a case for your iPad. Note that the case itself only covers the back, but all the edges. The keyboard attaches magnetically and when closed, serves to protect your screen. Set up is as easy as snapping your iPad into the case, and then attaching the magnetic keyboard. Note that you will be prompted to download the Logitech Control app. Best I can tell, you don’t do anything with this app, it just keeps your keyboard up to date and I’m confident allows the keyboard/trackpad communicate with the iPad.
Quickly, inside the box you’ll find two pieces, the keyboard (which is very similar to the Surface keyboards) as well as a case for your iPad. Note that the case itself only covers the back, but all the edges. The keyboard attaches magnetically and when closed, serves to protect your screen. Set up is as easy as snapping your iPad into the case, and then attaching the magnetic keyboard. Note that you will be prompted to download the Logitech Control app. Best I can tell, you don’t do anything with this app, it just keeps your keyboard up to date and I’m confident allows the keyboard/trackpad communicate with the iPad.
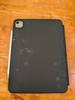
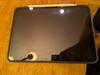
DESIGN/PROTECTION
Any case, whether it has a keyboard or not, first and foremost must be able to protect your expensive iPad. Of course, you may be a purest and prefer no case, but I digress. With the keyboard and case attached, you get 360 degree protection. Obviously if you don’t have the keyboard attached and you’re carrying the tablet around, the screen doesn’t have protection, but the case that covers the iPad itself does have a little bit of a lip, meaning if you set it down face down, the screen isn’t touching the surface.
Any case, whether it has a keyboard or not, first and foremost must be able to protect your expensive iPad. Of course, you may be a purest and prefer no case, but I digress. With the keyboard and case attached, you get 360 degree protection. Obviously if you don’t have the keyboard attached and you’re carrying the tablet around, the screen doesn’t have protection, but the case that covers the iPad itself does have a little bit of a lip, meaning if you set it down face down, the screen isn’t touching the surface.
I love the feel of the case itself, it feels like a durable rubber. The downside is that it shows smudges - and smudges easily. Taking it out of the box for the first time, I could see smears from my hands at the outset. So if you want to keep it clean, it will require constant wiping.
The case itself is light, and obviously the iPad is too, but it feels much heavier when inside the case. Don’t get me wrong, it’s by no means too heavy to carry around, its still lighter than most laptops, but the feathery weight of the iPad itself is gone. But the case looks good and looks very professional when shut. My biggest gripe about the case, and this is only because of my other Spigen case, is the spot for the Apple pen. The case has a cut out on the edge where the pen attaches and charges to the iPad, but it can be easily knocked off. My Spigen case, on the other hand, has an insert for the pen which I much prefer (even though it makes the case wider) so I know the pen won’t fall out when I’m pulling it out of bag or otherwise on the move.
When typing, you simply flip out the kickstand from the case. It’s very much like a Microsoft Surface. And like the Surface, it’s not the best typing experience on your lap as the keyboard tends to wobble. But I like having the kickstand when I just want to watch movies (detaching the keyboard). The kickstand and keyboard part of the case stay close (thru magnets I suppose) when it’s all closed up so there’s little concern of the keyboard flipping open by itself (except when dropped or something like that). There’s simply a little slot where you can insert your fingernail and pull the kickstand out and open the keyboard part of the case.
The trackpad is extremely responsive and works well, but it does have a hollow sounding click noise. It feels cheap for lack of a better word and makes me wonder how long it would hold up. I prefer tapping on my trackpads but I couldn’t get much of a response when tapping.
TYPING EXPERIENCE
I mentioned my experience with Windows because I’m a Mac newbie. So the keys specific to Macs and iPads are a little bit foreign to me. It’s a learning curve, but not a big one. It didn’t take long before I was switching between apps. The keyboard otherwise is very nice. I really enjoy the typing experience but it’s a bit cramped. Not unlike a Surface I used to own. The keyboard is backlit which is very nice and there’s a nice subtle clicking sound that at least to me, is satisfying (and not too annoying to those around you). Theres’s shortcut keys above the number row which is welcome, where you can easily adjust playback, screen brightness, activate Siri and take screenshots. They’re nice to have for those who don’t know all the shortcuts on the keyboard and it allows you to keep your hands on the keyboard. The downside of the cramped keyboard is that some of the keys, like delete, slash, quotation marks are REALLY small. Thankfully I don’t use them all that much, but my finger tends to hit 2 keys given their small size.
I mentioned my experience with Windows because I’m a Mac newbie. So the keys specific to Macs and iPads are a little bit foreign to me. It’s a learning curve, but not a big one. It didn’t take long before I was switching between apps. The keyboard otherwise is very nice. I really enjoy the typing experience but it’s a bit cramped. Not unlike a Surface I used to own. The keyboard is backlit which is very nice and there’s a nice subtle clicking sound that at least to me, is satisfying (and not too annoying to those around you). Theres’s shortcut keys above the number row which is welcome, where you can easily adjust playback, screen brightness, activate Siri and take screenshots. They’re nice to have for those who don’t know all the shortcuts on the keyboard and it allows you to keep your hands on the keyboard. The downside of the cramped keyboard is that some of the keys, like delete, slash, quotation marks are REALLY small. Thankfully I don’t use them all that much, but my finger tends to hit 2 keys given their small size.
BATTERY LIFE
Good news is that you do not need to separately charge your keyboard. It draws battery straight from your iPad. I haven’t used my keyboard for hours on end so it’s tough to say how much it affects the battery life, but I can say anecdotally that the battery percentage went down 3% points while I was typing out a few emails. I have zero complaints with the iPad Pro’s battery and while the keyboard by definition has to draw some of that power, in my experience it doesn’t seem to be that big of a drain. So not much concern there.
Good news is that you do not need to separately charge your keyboard. It draws battery straight from your iPad. I haven’t used my keyboard for hours on end so it’s tough to say how much it affects the battery life, but I can say anecdotally that the battery percentage went down 3% points while I was typing out a few emails. I have zero complaints with the iPad Pro’s battery and while the keyboard by definition has to draw some of that power, in my experience it doesn’t seem to be that big of a drain. So not much concern there.
CONCLUSION
I’ve grown accustomed to using my iPad more and more to replace taking my laptop with me on trips. It’s lighter, easier to use and allows me to have more “fun” when I’m not working. The only downside was always the keyboard issue. The Logitech Combo Touch really allows me to use the iPad to its fullest extent without sacrificing size and weight. Sure it’s a little bit thicker and little bit heavier, but not so much as to bother me. I think it’s a great alternative to the Apple keyboard, and while still pricey it’s a better value in my opinion. It offers comprehensive protection and I really like the built in kickstand - even when not typing. The typing experience really allows someone to get more done, assuming you need to type. If you don’t plan on typing much on your iPad, you could probably skip past this product. But even if you think you’ll use a keyboard, I’d highly recommend this keyboard over the competition.
I’ve grown accustomed to using my iPad more and more to replace taking my laptop with me on trips. It’s lighter, easier to use and allows me to have more “fun” when I’m not working. The only downside was always the keyboard issue. The Logitech Combo Touch really allows me to use the iPad to its fullest extent without sacrificing size and weight. Sure it’s a little bit thicker and little bit heavier, but not so much as to bother me. I think it’s a great alternative to the Apple keyboard, and while still pricey it’s a better value in my opinion. It offers comprehensive protection and I really like the built in kickstand - even when not typing. The typing experience really allows someone to get more done, assuming you need to type. If you don’t plan on typing much on your iPad, you could probably skip past this product. But even if you think you’ll use a keyboard, I’d highly recommend this keyboard over the competition.
I would recommend this to a friend!


Share this review:
+2points
2of 2voted this as helpful.
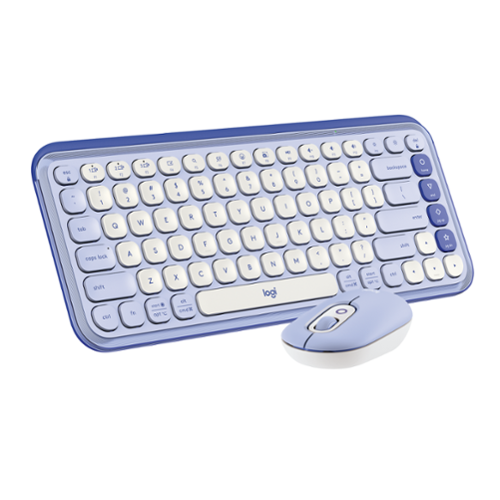
Add an extra pop to your desk with the POP Icon Combo, a contoured design with customizable Action Keys and Buttons. The low-profile keys give you a comfy typing experience. POP Mouse boosts productivity by 30%, compared to a trackpad. The Smartwheel speed scroll takes you where you need to go, fast.
Customer Rating
4
Quality Keyboard and Mouse with Fun Colors
on October 3, 2024
Posted by: callmeageeth
I’ve always enjoyed Logi devices, particularly their mice. Also, as a professional who is typing on a computer virtually everyday, the typing experience matters to me. I use several different keyboards (in different locations) opting for a mechanical keyboard experience. To me, keyboards and mice are very personal devices that should not only be functional, enjoyable, and fun - vs. a typical black keyboard with QWERTY layout that you’ll find packaged in a desktop PC. The Logi POP Icon manages to strike a good balance of price, typing experience, and personality. It’s not the best keyboard/mouse I’ve ever used - I don’t think anyone expects it to be - but it brings enough to the table to warrant your consideration.
DESIGN AND USE
First and foremost, the design is what makes this keyboard stand a part. Mine is a light purple, lilac, color. And I really enjoy it. Again, it’s different. But that’s all a matter of personal preference. Both the mouse and keyboard do have a “plasticky” feel to them. I don’t want to call it a “cheap” feel, because I still think they’re high quality, but there’s no premium materials or metal here.
First and foremost, the design is what makes this keyboard stand a part. Mine is a light purple, lilac, color. And I really enjoy it. Again, it’s different. But that’s all a matter of personal preference. Both the mouse and keyboard do have a “plasticky” feel to them. I don’t want to call it a “cheap” feel, because I still think they’re high quality, but there’s no premium materials or metal here.
For the keyboard, the keycaps are concave shape with a low profile. While they don’t “click” like my mechanical keyboard, they have a satisfying amount of give that’s enjoyable to use. It’s described as silent, and much like the Logi Master series keyboards, they are. In fact, it’s a very similar typing experience compared to the Master MX keyboard, albeit the materials used are a little different. If you have people next to you, they won’t hear you typing away. I’m not sure what percentage keyboard you’d call it, but there’s no number pad which is a little bit of a downer to me, I prefer a dedicated number pad but that’s personal preference. The “home” end” “pg up” and “pg dn” buttons are all on the right side placed vertically which is a little different than I’m accustomed to, but it took little time to get adjusted. And there’s lots of action buttons on your F buttons, including changing devices, activating speech services, mute, volume up and down. All of which are appreciated. The main downside, and likely a cost cutting measure, is that the keys aren’t backlit. That could be a deal breaker for some.
The mouse is a pebble shape, like the keyboard it feels a bit plasticky but is otherwise comfortable to use. Of course, it’s hard using it when I’m accustomed to the Master MX3 mouse, but it’s nonetheless easy to use and responsive. There’s the standard power slider on the bottom, button to switch between 3 different devices, there’s the left/right click, wheel, and then there’s an action button that you can program within the Logi Plus app. By default it opens up an “emoji” panel, which isn’t of much use to me, but that could be because of my age. Like the keyboard keys, it’s silent when clicking and very responsive. The one missing piece for me, is no side buttons (which I use almost exclusively when navigating the web, going backwards a page and forward).
SETUP/BATTERY LIFE
Setup is easy, assuming your device has Bluetooth. Most do, but my work desktop for example doesn’t. So check that before buying. If you don’t have Bluetooth you can still connect it with the Logi Bolt USB adapter, but that’s NOT included in the package. It would have been nice if Logitech could have thrown that in there - but I’m assuming it’s rarely a problem given the ubiquitousness of Bluetooth nowadays.
Setup is easy, assuming your device has Bluetooth. Most do, but my work desktop for example doesn’t. So check that before buying. If you don’t have Bluetooth you can still connect it with the Logi Bolt USB adapter, but that’s NOT included in the package. It would have been nice if Logitech could have thrown that in there - but I’m assuming it’s rarely a problem given the ubiquitousness of Bluetooth nowadays.
Once I pulled out the battery tabs, my Windows 11 desktop immediately recognized them and paired up. It was flawless. Do add another computer, you simply hit the second or third device option (there’s one on the keyboard and mouse) and then pair it through another device’s Bluetooth settings. They have a wide range of compatibility given that they have Bluetooth.
They take triple A batteries which is nice, except I prefer not to waste batteries and wish they had a rechargeable battery. They’re rated at 36 month battery life (for the keyboard) and 24 months (for the mouse). This does alleviate some concerns of needing to have batteries at your disposal.
LOGI PLUS SOFTWARE
This is the real magic of any Logi device, and that applies to the POP Icon as well. You don’t have to download the software, but it allows you to customize hot buttons. For example, you can change the button on the mouse to do more than bring up the emoji menu. There’s a ton of preset options, like opening the calculator or a particular program, but you can also create AI based shortcuts to do whatever you like. Say you want to quickly open several programs, you can program it to do that. It also has program specific actions. For example, while on Zoom, the action button on the mouse will mute/unmute your microphone. These take a little practice to figure out what works best for you, but if you invest a little thought and time into it, you can really make things easier and maximize your efficiency. And the best part is that it’s pretty intuitive to setup (some programs can be daunting in that regard).
This is the real magic of any Logi device, and that applies to the POP Icon as well. You don’t have to download the software, but it allows you to customize hot buttons. For example, you can change the button on the mouse to do more than bring up the emoji menu. There’s a ton of preset options, like opening the calculator or a particular program, but you can also create AI based shortcuts to do whatever you like. Say you want to quickly open several programs, you can program it to do that. It also has program specific actions. For example, while on Zoom, the action button on the mouse will mute/unmute your microphone. These take a little practice to figure out what works best for you, but if you invest a little thought and time into it, you can really make things easier and maximize your efficiency. And the best part is that it’s pretty intuitive to setup (some programs can be daunting in that regard).
CONCLUSION
If you are looking for a keyboard and mouse that has some personality without breaking the bank for an expensive mechanical RGB device, this is a solid option. While the lack of backlighting could be a dealbreaker, it’s a good value proposition and the Logi Plus software and ability to assign actions makes up some of the difference. And you can trust the Logi brand.
If you are looking for a keyboard and mouse that has some personality without breaking the bank for an expensive mechanical RGB device, this is a solid option. While the lack of backlighting could be a dealbreaker, it’s a good value proposition and the Logi Plus software and ability to assign actions makes up some of the difference. And you can trust the Logi brand.
I would recommend this to a friend!


Share this review:
0points
0of 0voted this as helpful.
callmeageeth's Review Comments
callmeageeth has not submitted comments on any reviews.
callmeageeth's Questions
callmeageeth has not submitted any questions.
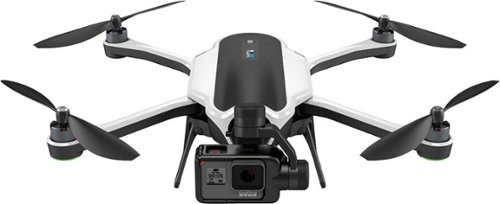
Take aerial shots with this GoPro Karma drone. Its Karma Stabilizer lets the included HERO5 Black action camera capture shake-free videos, while the Karma Grip provides reliable stabilization for handheld and mounted filming. The game-style controller with an integrated touch display makes Karma easy and fun to fly.Fly Responsibly:Before takeoff, update all software and firmware, and read the instructions thoroughly.See the FAA website for registration requirements and information about flying a drone safely: https://www.faa.gov/uas/getting_started/. Additional state or local requirements may apply. Check your local jurisdiction. The following websites may help you make informed decisions about flying your drone: www.knowbeforeyoufly.org and www.modelaircraft.org.
Just curious what the flight time experience has been like. Says 20 minutes with no payload; however, is the camera considered "payload"? Is it 20 minutes WITH the camera? Also, how close to 20 minutes is the "actual" flight time?
Given that the camera is required to fly I wouldn't think that the camera is considered payload. I've never tried to fly with any payload mostly because I haven't needed to and it doesn't seem equipped to hold anything (you would have to use some ingenuity to attach something to it). I can speak as to how long it flies without any payload but obviously with the camera. And in my use, it's been between 18-19 minutes of flight time. The very first time I flew it, it landed itself due to low battery around the 18 minutes mark, even though on the handheld controller, the screen said there was 2 minutes of flight time left. I haven't flown it enough while taking video/stills to determine how much that drains the battery. Hope that helps.
9 years ago
by
callmeageeth
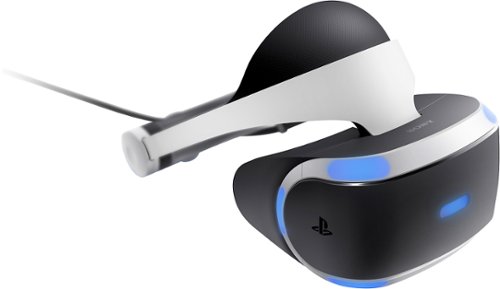
Sony PlayStation VR Launch Bundle:Immerse yourself in a virtual-reality gaming world with this Sony PlayStation VR bundle. Experience body-responsive gaming with the two PlayStation Move motion controllers. The built-in camera lets you take clear photos, and the stereo headphones provide rich sound. Challenge your gaming ability with the VR Worlds game included with this Sony PlayStation VR bundle.
Is the camera of this bundle the latest one? The ps4 camera? Or the ps3 camera?
Yes, the bundle comes with the newest model camera. The packaging and promotions for the PSVR actually show the older model (which as I understand, will still work). This camera is completely different than the PS3 version.
9 years, 4 months ago
by
callmeageeth
Bring the power of Google directly to your fingertips with the Google Pixel. A large 32GB of storage keep data secure, while unlimited cloud storage transfers data as needed, and it's completely automatic. The large 5-inch screen is protected by Corning Gorilla Glass 4 to ensure the Google Pixel remains scratch-free.
It is an unlocked phone, so I assume it is compatible with SIM card from other countries - is that correct?
I can't confirrm that it will work sims from other countries (depends on bandwidths) but I can absolutely confirm that putting a T-Mobile sim into this phone will work. Sorry couldn't give you a better answer!
9 years, 5 months ago
by
callmeageeth
Charge 2 GoPro lithium-ion batteries simultaneously with this GoPro AHBBP-301 charger that reliably draws power from select USB chargers, USB-enabled computers or GoPro wall or vehicle chargers (not included), so you can keep your camera ready for use.
Does this have the cable to connect charger to computer? Is there a cord that connects camera directly to computer or wall charger for charging? I think we lost ours.
It comes with a mini-USB cable which you can plug into your computer (I wouldn't recommend because of slow charging) and a wall charger. The same mini-USB cable plugs directly into the camera itself
9 years, 7 months ago
by
callmeageeth

Turtle Beach Ear Force PX22 Amplified Universal Gaming Headset: Enjoy more freedom and use your universal headset with more than one gaming console. Customize your audio and let it automatically boost online chatting so you hear every sound during your gaming session.
Does it work with party system on Xbox one
It is my understanding that this headset is not compatible with the Xbox one
10 years ago
by
callmeageeth
Play games, watch movies and more with this HP Pavilion 23cw 23" LED monitor, which features 1920 x 1080 resolution and IPS technology for clear visuals from a wide variety of vantage points. Enhance+ uses noise reduction to improve image quality.
Can i use apple tv on this monitor
As long as your monitor has an HDMI port you can.*
NOTE: that is the simplest answer, you can, theoretically, buy a couple different adapters to make it work.
NOTE: that is the simplest answer, you can, theoretically, buy a couple different adapters to make it work.
10 years, 4 months ago
by
callmeageeth
Louisville, KY
Expand the storage of your compatible device with this SanDisk Ultra PLUS microSDXC memory card that features a 128GB capacity to hold your photos and videos and a Class 10 rating to ensure speedy data transfer. The rugged design resists damage.
compatibility
I have a Dell Venue 8 Pro.Would this work with it for storage?also is it compatible with android devices?...thank you
Double check your specific Android device. Most newer devices accept it, I believe this card was intended for Android devices, but again, I know some devices only accept up to 64 GB card
11 years, 5 months ago
by
callmeageeth
Louisville, KY