Share Virginia's profile
Virginia
Virginia's stats
- Review count1
- Helpfulness votes25
- First reviewNovember 16, 2016
- Last reviewNovember 16, 2016
- Featured reviews0
- Average rating4
Reviews comments
- Review comment count0
- Helpfulness votes0
- First review commentNone
- Last review commentNone
- Featured review comments0
Questions
- Question count0
- Helpfulness votes0
- First questionNone
- Last questionNone
- Featured questions0
Answers
- Answer count0
- Helpfulness votes0
- First answerNone
- Last answerNone
- Featured answers0
- Best answers0
Virginia's Reviews
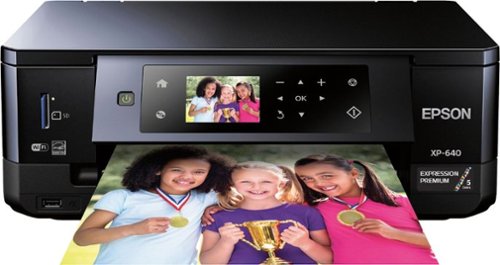
Make the most of your space with this Epson Expression inkjet printer. It lets you print, scan and copy, yet it takes up very little room thanks to its compact design, and it also includes a full-color screen. Enjoy printing speeds of up to 13 ppm in black or 10 ppm in color from this Epson Expression inkjet printer.

Posted by: Virginia
This is a review for the Epson Expression XP-640 that I received free of charge to do a beta test and review
I received the printer by Fed-Ex and the box was in perfect condition.
While easy to open, the printer came packaged with two pieces of Styrofoam, one on each side, so snug that I had to ask another person to hold on to the box while I was pulling the printer out. Meaning, the usual way of placing the box upside-down on a safe surface to allow the device slide down with the help of gravity, didn't work.
While easy to open, the printer came packaged with two pieces of Styrofoam, one on each side, so snug that I had to ask another person to hold on to the box while I was pulling the printer out. Meaning, the usual way of placing the box upside-down on a safe surface to allow the device slide down with the help of gravity, didn't work.
Inside the box were: The printer, a power cable without a separated AC adapter (that hard to place black box) as it is built into the printer, a CD including drivers and software but unfortunately NOT the user manual, (which I had the option to download as a PDF file from the printer software). While it did not include an USB cable to connect to a computer, the printer came with Wi-Fi connectivity so the cable is unnecessary if you have Wi-Fi in your place. BUT if you don't, make sure you save your previous printer USB cable. It came with 5 sheets (letter size) of each of the following: Premium Glossy Photo Paper, Heavyweight Matte Paper, Premium Semigloss Photo Paper and Borderless Glossy Photo Paper (5x6 in). And, of course, it came with ink: 3 color cartridges (Cyan, Magenta and Yellow) a larger in size black one and, a pleasant surprise of another black cartridge labeled "Photo Black" that I believe it could be a gray color to do high quality Black & White prints.
The ink compartment is very easy to access by just lifting the top portion of the device (scanning portion) and after it was in place and I turned it on for the first time, it took it seven minutes to be ready.
To set up the Wi-Fi was a breeze, except when I had to enter the Wi-Fi password: since the LCD display is not touchable, I had to use the Up, Down, Left and Right" buttons on the panel to enter each character and oh boy did I suffer... BUT, the good news is that this suffering was unnecessarily inflicted since the XP-640 comes with the option of pressing the button in your router (WPS) to connect without the need of entering the password manually.
Installing the software on my desktop computer (running Windows 7) was very easy too. It offered me to download a new installer and since I knew this would take extra time, I chose not to. This proved to be the wrong decision because a minute later, when I was trying to scan a page, the printer was having issues communicating with the computer and I think it was because I have another Epson scanner connected, that while on a different USB port, it was causing conflicts. So I ran the update on the software and it downloaded newer versions for most of the components including the scanning module and a new firmware for the device. This was pretty smooth too and it was very easy to do since it was telling me what to do for each step. This whole thing took about 5 minutes. After that, the scanning software asked me to choose from what device I wanted to scan from, which was not to easy to decide as, instead of a Model name, it was showing MAC addresses... not cool. I unplugged my other scanner and after refreshing the window still was showing me the same, so I picked the first one and it happened to be the right one.
NOTE: this will ONLY happen to you if you have another Epson multi-function or scanner plugged into the SAME computer.
NOTE: this will ONLY happen to you if you have another Epson multi-function or scanner plugged into the SAME computer.
Scanning a letter size page with text rendered a PDF with a missing inch at the bottom, since I placed the page aligned at the left side of the scanning bed instead of the right side... once fixed, it was OK. There is a mark on the scanning bed saying where to position the page and what's the maximum length (A4 in this case) but because they are made out of the same black plastic, they are hard to see. The same goes for many of the marks around the printer and inside the trays.
I placed four pictures in the scanning glass and it was able to scan them to four different files. I chose 300 DPI and the quality was very good and it was quick too. I did notice a bit of cropping in some of the images and I will have to further look into it to determine if it is a fault or a miss-configuration.
Trying to print a test page was pretty hard because I could not find the output tray!!! Turns out, this printer has several parts that look like trays: It has two real trays labeled "Cassette 1" and "Cassette 2", a bottom "tray-accessory" to print directly on printable CDs and a top tray hidden behind the liftable control panel housing the LCD screen, that is also used for printing the CDs by inserting the accessory from the bottom on it's top. This top tray happens to be the... OUTPUT TRAY!
The printer WILL tell you to open the output tray when you are printing and will show you even how to do it, but still, I found it hard to understand because I did not expect it to be behind the control panel.
The printer WILL tell you to open the output tray when you are printing and will show you even how to do it, but still, I found it hard to understand because I did not expect it to be behind the control panel.
NOTE: The Cassette 1 can be pushed accidentally all the way in, in a way to make it very hard to take back out. If this happens, all you have to do is to remove Cassette 2 and get your hand inside and grab that fleetly tray back outside.
To print border-less pictures, I had to use Cassette 1 and it was very simple to do to and the quality is JUST PERFECT! I noticed a bit of a resizing on the end result that is barely noticeable and it might be part of the method to provide a border-less result. IMPRESSIVE: just like the quality I get at Costco or Fuji Labs.
I was able to print on a printable DVD using the accessory tray that has to be inserted on top of the "closed" output tray and it took me a couple of attempts for the printer to be happy with my blank CD. I think that the holder for the CD could be a bit stronger as it was having problems staying in place. The good thing is that the printer knew at all times what was going on and led me each step in order to have it work. The result? A perfectly printed CD (I used Verbatim InkJet Printable) that while it was not border-less, the quality was par with professionally printed ones. I am very happy indeed.
I have still to print some black and whites or sepia images from Photoshop and will update this review when done, as I am eager to see what else this little wizard is capable of doing.
All and all, for a printer in the order of $100 or less, I am VERY pleased. :D
My Best Buy number: 2002675958
I would recommend this to a friend!
Share this review:
+15points
25of 35voted this as helpful.
Virginia's Review Comments
Virginia has not submitted comments on any reviews.
Virginia's Questions
Virginia has not submitted any questions.
Virginia's Answers
Virginia has not submitted any answers.