MarilynB's stats
- Review count63
- Helpfulness votes470
- First reviewMarch 5, 2013
- Last reviewApril 12, 2024
- Featured reviews0
- Average rating4.7
Reviews comments
- Review comment count0
- Helpfulness votes0
- First review commentNone
- Last review commentNone
- Featured review comments0
Questions
- Question count0
- Helpfulness votes0
- First questionNone
- Last questionNone
- Featured questions0
- Answer count26
- Helpfulness votes96
- First answerJune 20, 2014
- Last answerAugust 1, 2021
- Featured answers0
- Best answers6
Print documents in bold black or rich shades of gray with this high-yield HP original ink cartridge. It contains enough ink to produce approximately 600 pages, reducing printer downtime due to cartridge changes and increasing work efficiency. This HP original ink cartridge creates photos and documents with a professional appearance.›
Customer Rating

5
Great product
on January 12, 2018
Posted by: MarilynB
from Texas
Verified Purchase:Yes
I have never had any problems with HP brand ink jet cartridge and this one is also a high quality product. I am very pleased with the print quality.
My Best Buy number: 0326649051
My Best Buy number: 0326649051
Mobile Submission: False
I would recommend this to a friend!
Share this review:
+1point
1of 1voted this as helpful.
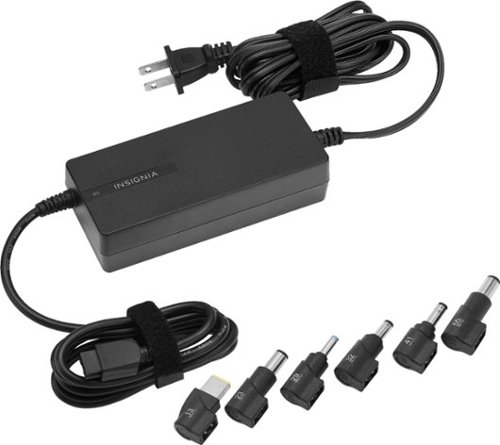
Power up your laptop with this Insignia 90W Universal Laptop Charger. The overvoltage, short-circuit and overheating protection reduces the risk of damage to your devices while several included tips enable compatibility with most laptops. This Insignia 90W Universal Laptop Charger has a super-long 10 foot cord to allow convenient placement of your laptop while powering up.
Customer Rating

2
Works, but the plug is a poor fit
on January 12, 2018
Posted by: MarilynB
from Texas
Verified Purchase:Yes
The only reason we bought this was because our power cord stopped working and we had to get a fast replacement. It does power up the laptop, but the adapter won't stay in the port. It is so loose that it falls out at the slightest movement. We ended up using a twist tie to attach it the end of the cord to a large, thick rubber band and putting the rubber band around the laptop to keep the cord from falling out. I would only recommend this in an emergency and not as a long-term replacement. We had to buy a better power cord online and have it mailed to us as soon as we could because the rubber band / twist tie rigging wasn't acceptable. If your laptop is a different brand, it may be a better fit. Ours is a Toshiba.
My Best Buy number: 0326649051
My Best Buy number: 0326649051
Mobile Submission: False
No, I would not recommend this to a friend.
Share this review:
-1point
0of 1voted this as helpful.
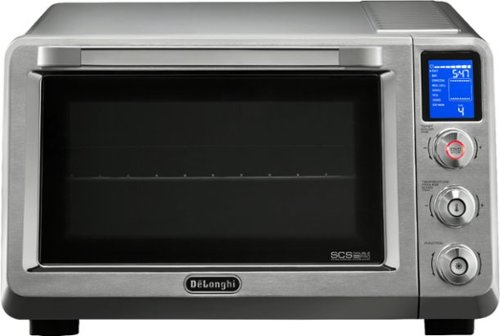
Prepare all your favorite dishes in this DeLonghi Livenza convection oven. Insulated construction helps maintain temperature, and the oven fan distributes hot air to facilitate fast and even cooking. This DeLonghi Livenza convection oven heats multiple dishes at one time in two specific heating areas with four adjustable rack positions that maximize space.
Customer Rating
5
Pleasantly impressed with all of the features
on December 20, 2017
Posted by: MarilynB
from Texas
The oven came well-wrapped with form fitting packaging inside a sturdy box. Inside the box were: the oven, the instructions and guides, the wire rack, crumb tray, baking pan, and pizza tray. The Get Started guide is probably all you need at first, but don’t forget to read the full instruction manual for more details. The Get Started guide includes 2 recipes and there are 7 more in the full instruction manual. After unwrapping, I made a plan to test the oven using as many features as I could within the next 24 hours.
The oven has several function settings which are: toast, bake, convection, broil/grill, defrost, pizza, cookies, and keep warm. There are 4 tray positions in the oven number 1 through 4 from bottom to top. A summary table in the Get Started guide tells you which tray to use and which position to put the tray on depending on what you are cooking.
The first function I tested was the toast function. I put the wire rack on the 2nd tray level, input the number of pieces of toast I was making, and chose the toast color time I wanted. There are 6 levels of toast color, so I chose the third level which turned out just right. You can make up to 6 pieces of toast at once.
Next, I tested the Pizza function. I bought a thin crust, 10 inch frozen pizza and put it on the pizza tray. The Get Started guide says to put the pizza tray on the lowest rack in the oven. After choosing the pizza function on the oven, all I had to do was input the pizza diameter, the crust type (using the toast color time dial), and whether the pizza was fresh or frozen. It turned out perfect. The crust was crispy, the toppings were hot, and the cheese was bubbling. I transferred my pizza to a different surface to cut it since I didn’t want scratches on my pizza pan on the very first day, but I could have easily cut it right on the pizza pan. You can cook 2 pizzas at once but it requires an extra pizza pan and an extra wire tray to do so.
Next, I tested the Convection function. I tried out the Mediterranean One-Pan Chicken with Lemon and Potatoes recipe from the Get Started guide. I lined the baking tray with foil and placed it on rack 3 in the oven. The convection setting circulates the hot air in the oven to cook faster and more evenly. I pre-heated the oven, then I followed the recipe and it turned out delicious.
The next function I tested was the Cookie function. The temperature and heating elements are automatically selected, but you can choose the cooking time you want. You choose whether you are cooking 1 or 2 trays. If cooking one tray of cookies, use the baking pan on rack 2. If cooking 2 trays, you can place foil on the wire rack to use as a second tray and use racks 1 and 3. Half-way through the cooking time, switch the position of the trays. I opted to make 2 separate batches of cookies with one tray each. I placed 8 cookies at 1 Tablespoon each of cookie dough, evenly spaced, on the baking tray and preheated the oven. I set the timer for 12 minutes because the instructions on the cookie dough said to cook 12 to 15 minutes. The oven beeped when it was preheated, then I placed the tray of cookie dough on rack 2. I noticed the cookies looked done at about 9 minutes so I took them out and they were great. Then I remembered that there are conversion charts for convection ovens that you can find on the Internet. The first one I found used an example of 12 minute cookies and the chart said to cook them for 9 minutes. I will print out that chart and use it until I get better at this. I set the second batch for 9 minutes and they came out great. If you aren’t sure about the time, set the time for less than you think it should be, because at the end of the time, the oven goes into a waiting mode for up to 5 minutes. You can either end the cooking or add more time (up to 10 minutes.)
During the Bake function, you can change the function setting to Convection and/or Broil/Grill without starting over. Use the baking pan or place your own baking dish on the wire rack.
When using the Broil/Grill function, place your food on the wire rack and place the baking pan under it to catch drips.
To use the Defrost function, make sure the oven is completely cool before starting. Use either the wire rack or the baking pan. Set the function to defrost and select the desired time.
The Keep Warm function will allow you to keep previously cooked food warm. The default setting is 30 minutes. The Keep Warm function can also be used as a slow cooker for up to 6 hours.
The crumb tray should be kept below the bottom burner coils and should be hand-washed for cleaning. All of the other trays may be washed in the dishwasher or they could be hand-washed too.
I was very happy with the results of the oven. I would probably have never made an entire meal in it if it weren’t for the easy recipes included, but now I will be looking for more recipes to make. I love the fact that you can just put in the type of crust and diameter of the pizza and it cooks it perfectly. I didn’t try the broil/grill feature, the Keep Warm feature, or the Defrost feature yet but every feature I tried worked very well.
My Best Buy number: 0326649051
Mobile Submission: False
I would recommend this to a friend!
Share this review:
0points
0of 0voted this as helpful.
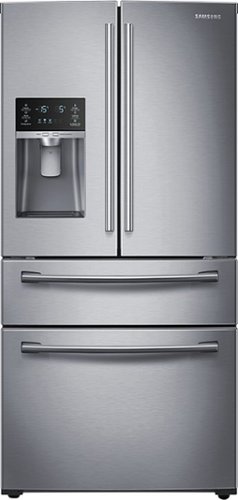
Samsung 28.2 Cu. Ft. 4-Door French Door Refrigerator: The Twin Cooling Plus System inside this Samsung refrigerator maintains optimal conditions in both the refrigerator and freezer compartments, so you can easily keep your groceries fresh. If stored containers accidentally leak, the 5 spill-proof, tempered-glass shelves make it easy to wipe away the spills. And you can access filtered ice and water right through the door, so you always have beverages on hand for guests.
Customer Rating
5
Glad I bought this one after reading many reviews
on December 9, 2017
Posted by: MarilynB
from Texas
Verified Purchase:Yes
I compared many refrigerators before buying this one. I have a refrigerator in the kitchen, and a smaller one in my garage for cold drinks and such. When the garage refrigerator started making unusual popping noises, we decided to move the kitchen refrigerator into the garage and get a French door refrigerator for the house.
Since I already had a 25.9 cu ft refrigerator, I did not look at any that were smaller than that. We recently had our son, his wife, and their 2 children move in with us for 8 months while their new home is being built, so having the Flex Zone drawer was a great feature for us. Right now, I am using it as a deli and meat drawer, as well as a central zone for the grandkids’ lunchbox items. Since the drawer can be divided up into 4 compartments which can be arranged according to the sizes you need them to be, we made the front left compartment as a “lunch box” area. This keeps all of their lunch box food in one place that is short enough that they can reach everything. I use the front right compartment for deli meats and cheese, and the back 2 compartments are for meat that will be cooked within a couple of days. I keep this drawer at 37 degrees to match my refrigerator since at this point in time, I need more refrigerator room. There are 4 different temperatures that I could set the flex zone drawer to. One is the 37 degrees which is the same temp as the refrigerator section, but the other 3 choices are: 42 degrees for wine and party foods, 33 degrees for cold drinks, and 29 degrees for meat and fish. You can change the temperature of this drawer at any time.
Another feature that I really love is the flexible shelf size of the right middle shelf in the main refrigerator section. This is a shelf that can be slid back allowing space to put tall items on the shelf below it. You can still use the back half of the shelf that you slide back.. This is a great benefit for us right now because my husband and I use 2% milk, but my son's family uses whole milk - which means we usually have at least 2 tall containers of milk in the refrigerator and when they get low, we can have 3 or 4 containers. Normally, I would be able to fit all of my taller items in the gallon-sized bin in the door, but while we have more people living here, we need more space for taller things. When our household returns to just the two of us, I will be able to slide this shelf back in place and use it as a full shelf. I like having the flexibility to use it either way.
I love the lighting in the refrigerator and freezer. I can see everything in the refrigerator and food in the back doesn’t get forgotten and later thrown out. I’ve noticed that we have much less waste because we can see everything and it gets eaten before it goes bad. I was more than pleased with the amount of light in the freezer section too. Also due the sliding drawer in the freezer, I can easily see all of the contents. In addition, because of its generous size, I was able to fit everything from my old freezer with room to spare. The bottom section has a divider that can be adjusted. I put frozen vegetables on one side, and frozen meats on the other. In the top section, I put bread, bagels, ice cream, and was also able to fit 10 of my daughter-in-laws frozen dinners. I wish I could upload more than 2 photos so that I could show the freezer, but I want to use my 2 photos for the main refrigerator and the flex zone drawer.
There is no butter bin, but the top shelf in the door actually holds a LOT more space than any of my older butter bins did, so now it holds all of my butter, cream cheese, horse radish, and small squeeze bottle of lemon and lime. I actually like this one much more.
Another feature that I really love is the 2 crisper drawers. I have fruit in one and veggies in the other. The humidity level can be set separately for each drawer. In every other refrigerator I’ve ever owned, I had 2 drawers but one was for fruits/veggies and the other was for meat. I’ve always had a practically empty meat drawer and the fruit/veggie drawer was overflowing and had to put some items on the bottom shelf since one drawer was not large enough. This is the first time I’ve had room for everything!
As with anything you buy, there are bound to be a couple of things you would change. First of all, I would like the front to be magnetic and it isn’t. I had a magnetic dry-erase weekly calendar on the front of my refrigerator that was highly used and I had to put it on the side of the refrigerator, where it is slowly being neglected and abandoned. This is a minor concern, however. The other thing I would change would be to put the ice maker in the door like some of the newer French door refrigerators made by other companies have done. The ice maker itself takes up room which shortens the top shelf of the refrigerator. Also, the ice chute takes up room in the door causing one of the shelves below it to be so tiny it is almost unusable. The Flex Zone drawer more than makes up for it though and at this time, Samsung is the only brand that offers it. Lastly, the shelves really aren’t adjustable in such a way that is useful for me. The upper left shelf is bolted onto the ice maker so it can’t be moved. The upper right shelf is supported on the left by the upper left shelf, so it can’t be moved. The middle left and right shelves also support each other, so if you want to move one, you really need to move the other for stability. The lower left and right shelves are the top of the crisper drawers, so they can’t be moved. I ended up keeping the arrangement the way it arrived. As you can see from the photo I attached, moving the middle shelf up or down would make either one of the other shelves too short, so I like it better the way it is now.
I did have trouble getting the ice maker turned on. The manual was slightly helpful, but every time I pushed the Ice Maker Off icon, nothing happened. I ended up going onto YouTube and quickly found a video. It turns out that I was doing the right thing in the wrong place because I was pushing on the icon instead of the words next to the icon. So if you use the panel on the front to do anything, make sure you push on the words and not on the picture.
My Best Buy number: 0326649051
My Best Buy number: 0326649051
Mobile Submission: False
I would recommend this to a friend!


Share this review:
+26points
29of 32voted this as helpful.

Automatically go from hundreds of mystery folders to a visual view in the photo and video Organizer. See your best photos thanks to auto-curation. Effortlessly extract candid photos from your raw footage. Make photos and videos look amazing with automated photo editing and video creation options. And create and share beautiful printed artwork, new dynamic slideshows, photo and video collages, animated GIFs*, and full-length movies. Being creative is even easier with the Elements bundle.
Customer Rating
5
Easy to use and does a great job
on November 24, 2017
Posted by: MarilynB
from Texas
When you open Photoshop Elements, the main screen shows 3 categories to choose from: (1) Photo Editor, (2) Organizer, and (3) Video Editor. There are several reviews on-line that go through each feature separately as well as several videos that can help you learn more about how to use this amazing program, so I was happy to be able to find so many resources to help me use this program to its full capability. (Although it is very user friendly without having to use any outside resources.)
Photoshop Elements lets you work with photos and Premier Elements lets you work with video. When you install both programs, you can go into either program to get you to all 3 categories (Photo Editor, Organizer, and Video Editor.)
(1) In the Photo Editor, you can use 1 or more of 3 different levels of editing.
a. In addition, there is an eLive tab which will take to you a page that will help you with ideas and techniques and includes many tutorials.
b. Quick: The Quick tab, brings you to a page that will help you with the most common basic adjustments such as Exposure, Lighting, Color, Balance, and Sharpen. It also has a Smart Fix function that will give you 9 choices as well as an “Auto” button to auto-enhance your photo.
c. Guided: If you want a little bit more control, you can use the Guided tab. The choices there are Brightness and Control, Correct Skin Tone, Crop Photo, Levels (shadows, mid-tones, and highlights), Lighten and Darken, Resize Your Photo, Rotate and Straighten, Sharpen, and Vignette Effect. The Levels section brings up a histogram which includes a quick tutorial on how to use this section. I was amazed at how well this section worked in correcting my photos. I took a photo of a covered bridge in Maine on a bright day. The sky and background was so bright that the inside of the bridge looked almost black. By using this adjustment, I was able to decrease the shadows and decrease the highlights so that the sky was still beautiful, but you could see the wooden beams inside the bridge.
d. Expert: For complete control, I like to use the Expert tab. There are so many different things you can do in this tab. All of the areas that are in the other 2 tabs are also in this tab, but you have precise control over each one. There are several other tools available here too. One of my favorites is the Spot Healing Brush. You can choose your brush size and brush over an area that you want to remove and the program picks out the pixels in the photos to clone over the area you brushed and removes it. During my Maine trip, I got a lot of dust inside my camera when I changed lenses and although I tried to clean it, many of my sky photos had small darkish dots that needed to be removed. I used Lightroom which did a good job but was still difficult and time consuming. I was able to quickly click on the dots using this program with excellent results. Another feature that you may like is the Eye Tool. If you have a couple of photos of a group of people and one person has their eyes closed in one of the photos, you can click on that tool and it will find another set of open eyes from your photos and lets you try to see if they work. This also happened on that same trip to Maine. The best photo of everyone in our group had one person with closed eyes. A quick click on this and the program found the other photos and let me click on the open eyes. Instant fix!
(2) Organizer Section: At first I thought I wouldn’t use this because I keep my photos very well organized using a file folder system. For example, they are organized by Year and then by month. Each final folder is labeled to say what is in the folder, so if I want to find a photo of my dog, Maggie, I can type Maggie in the search window and bring up every instance of “Maggie” photos. What I like about this organize feature is that you can put key words on each photo and then search using the key words. This eliminates the problem that I had using folder labels. If I had 20 people in a photo, it was inconvenient to label the photo’s file name or folder with all 20 of those names. Using this feature allows me to organize my photos in such a way that I can find the one I want within seconds. The feature doesn’t make copies of your photos, it just adds the information to a catalog. If you need to move a photo, just move it using the program and it will keep track of which folder you moved it to. However, if you forget and move it using File Explorer, you can click the “Reconnect” button to fix any unconnected photos.
(3) Clicking on the Video Editor will open up Adobe Premier Elements. This program lets you create movies from photos or videos. You can add media to the program, add audio files (such as background music), and add narration to your movie. This program also has the eLive, Quick, Guided, and Expert tabs.
a. eLive: Of course the eLive section brings you to tutorials and ideas.
b. Quick: The Quick Section includes categories such as Add Media, Create a template based movie, Tell your story using titles, and Learn video editing.
c. Guided: The Guided Section includes categories such as Getting Started, Trim and Split Clips, Add transitions between Clips, and Add, Animate, and edit Titles to Liven up your movie.
d. Expert: The Expert Section has the same categories as the Quick Section but with more control.
In the Tools tab of this program, you will find Freeze Frame, Candid Moments, Movie Menu, Narration, Pan and Zoom, Smart Mix, Time Remapping, Smart Trim, and Motion Tracking. You can use the Freeze Frame tool to capture a still image from your video.
I used this program to make a promotional DVD that included mostly still images with a few movie clips placed in specific spots. Then I played the movie while recording the narration. After the narration was complete, I added some soft background music ending up with a very professional looking video that was easy to make.
My Best Buy number: 0326649051
Mobile Submission: False
I would recommend this to a friend!
Share this review:
+15points
15of 15voted this as helpful.
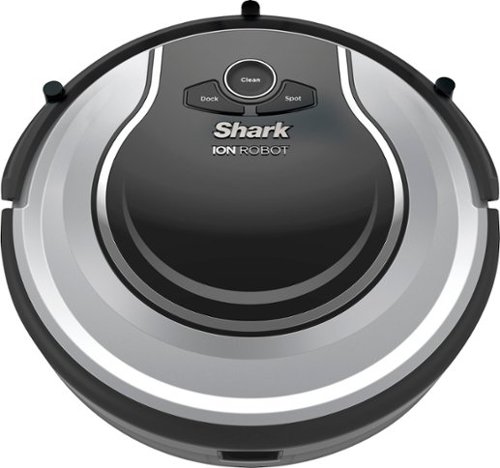
Keep floors and carpets clean with this SHARK® ION™ robotic vacuum. Its smart sensors navigate floors while adapting to and avoiding obstacles, and you can set up no-go areas with Bot Boundary strips. This SHARK® ION™ robotic vacuum has a long-life lithium-ion battery that keeps it operating for a full hour on a single charge.
Customer Rating
5
Does a great job! Quiet and thorough! Impressed!
on October 22, 2017
Posted by: MarilynB
from Texas
What’s In the Box: The Shark ION Robot vacuum comes with charging dock, BotBoundry Strip, Scheduling Remote, Cleaning Tool, 2 extra side brushes, 1 extra HEPA filter, instructions, and manual.
Assembly: The vacuum was easy to assemble. Just attach the 2 side brushes, plug the charging dock into a wall plug, and place the vacuum on the charging dock.
Charging: The vacuum charges up on the charging dock, or you can plug the cord directly into the vacuum. To use the charging dock, you can place the vacuum on the dock, or you can press the “Dock” button on top of the vacuum and the vacuum will travel to the dock and park itself on the dock.
Start Vacuuming: Once charged, press the CLEAN button on the vacuum. Alternately, you can use the remote that comes with the vacuum to clean it now or schedule a cleaning for later. You can schedule multiple cleanings with the remote.
Ease of Use:
We had several potential areas that we weren’t sure if the vacuum could handle them.
(1) A couple of thick extension cords across a small section of the floor: The vacuum traveled over these thick cords without any problems, but I would be worried about letting it loose over these cords if I wasn’t home. While I am at home, I will leave them there, but if I leave the house, I’ll either turn off the vacuum, or lift up the cords so they don’t touch the floor, or put up a barrier so the vacuum won’t go in the area,
(2) Different floor types: The vacuum was able to travel from hard floor to carpet, to throw rugs over the carpet without any difficulty. We have a much thicker transition bar leading from a hallway to our laundry room. The vacuum managed to get in that room the first time, but could not come back out. The next time, it didn’t make it in there at all. To solve this, I closed the door to the laundry room while running the vacuum.
(3) Getting stuck under furniture: Our sofa is low enough in the front, but in the back, it is just barely high enough so that the vacuum gets stuck under the edge. We placed the BotBoundry strip along the back of the sofa and that took care of it. We could have put the sofa on ½ inch to 1 inch risers, but we didn’t need the BotBoundry strip anywhere else, so that worked great.
(4) Drapes that are within an inch of touching the floor: The first time I tried the vacuum, I folded each side of the drapes over each other to hold them up off the ground. The next time, I left them down and just kept an eye on them when the vacuum was near. The vacuum didn’t have any problem around them and the drapes were not harmed in any way. I didn’t have any other areas of potential problem downstairs. Upstairs, I didn’t have any barrier problems and the vacuum won’t accidentally go down the stairs. I did notice in the bedrooms, that the vacuum went under the beds, so if you keep things under your beds, you may have to keep it out of those rooms. My suggestion would be to run it while you are able to keep an eye on things the first time and figure out if there are any hindrances; then fix those and see how it works.
Quiet: I was amazed at how quiet it was. I was watching a movie while it was running and it didn’t bother me at all. I could hear the movie just fine.
Maneuverability: It managed to go in-between the legs of the dining room chairs and vacuum under the dining table. It also managed to go under my breakfast room table which has always been difficult for me to clean under because it has a “shelf” under the table that is just a few inches off the floor. Also, as I mentioned above, it had no difficulty transitioning between different floor types.
Thoroughness: The vacuum moves in a random pattern but eventually gets the entire floor vacuumed. I could tell that it was doing a good job because most of the floor had vacuum patterns on it before it went to dock itself. I also noticed that it always came to about 3 inches from each wall and turned to change directions. At first, I thought this was going to be a negative factor, but I soon realized that this feature was good. It keeps the vacuum from bumping into things and makes it easier to turn. Since I had recently vacuumed, I was surprised how much dust was in the dust bin. I think the dust accumulates under the furniture where I don’t usually vacuum and it since it vacuumed there, it filled the dustbin on its first trial run.
Boundaries: It has a feature that keeps it from going down stairs or off ledges. In other words, it avoids “cliffs”. This would be a great feature for use upstairs. The BotBoundry Strip is very useful. I found that I only needed it in one place, so I had plenty of length of the strip. It stretched along the back of my sofa with more length to spare, but if you need it several places, you may want to consider purchasing more. It is not something that you need to install permanently. Just set it in place when your vacuum is scheduled to work and roll it up when you aren’t using it.
Cleaning the Vacuum: The dust bin is easily accessible and quick to empty. Even though the vacuum comes with anti-tangling technology, there is a tool for cleaning which includes a hook to pull out long fibers, hair, or threads in case it happens. I didn’t need to use it. Also, the filters can be rinsed and replaced once they dry.
Contols: The top of the vacuum has 3 buttons: Clean, Dock, and Spot. Using the Clean button starts the vacuum. Pressing it again will stop it. Pressing the Dock button will send the vacuum back to its dock. Press the Spot button for a more thorough cleaning of a concentrated area. If a blockage occurs, the “!” error indicator light comes on. Clear the blockage and/or clean the filters and empty the dust bin to make sure nothing is blocking the suction. There is also a Schedule Indicator on the top which tells you if there is a cleaning time scheduled. Lastly, there are battery charge indicator lights so you can see the amount of charge remaining in the battery.
Summary: Even though there were a few hiccups due to the way my house is set up, they were easy to overcome and well worth it to do so. Having a vacuum travel around the house on its own for a few hours once every week without having to lift a finger (except to empty the dustbin) has been a great time and labor saver. Also, I was surprised at how quiet it is and how much dirt it removed from my carpet.
I would highly recommend the Shark ION Robot Vacuum Cleaner.
My Best Buy number: 0326649051
Mobile Submission: False
I would recommend this to a friend!
Share this review:
+5points
5of 5voted this as helpful.
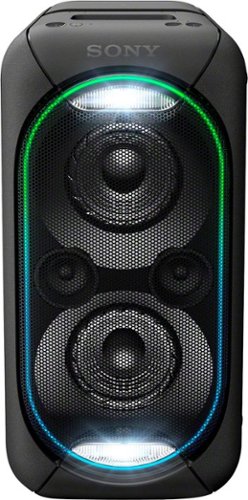
Enjoy up to 14 hours of battery life with this Sony portable speaker. Its multiple LED lights create a festive atmosphere, and the EXTRA BASS feature offers deep, resounding lows for best enjoyment of your favorite songs. This Sony portable speaker streams digital media through a compatible device thanks to its Bluetooth capability.
Customer Rating
5
Excellent sound quality, many ways to connect
on October 17, 2017
Posted by: MarilynB
from Texas
The Sony Home Audio System was a breeze to set up. At first I thought it was going to be difficult because the instruction book was rather long and detailed, but in retrospect, I realized that because it can be used with an audio jack, a USB port, or Bluetooth (both manual set-up and direct set-up), the book had instructions for each method.
I really got this because the speakers I bought for my iPod Nano were inferior. I had planned on using the iPod Nano and the audio port but after I got it, I planned on getting a new Bluetooth MP3 player so I could use the Bluetooth technology. After I received it, I decided to store all of my music on a micro-SD card that I can plug into my smart phone, so that’s what I ended up doing. That’s part of the beauty of this audio system; you have so many options! After I copied all of my music from my laptop to my smart phone’s SD card, I plugged in the audio system. Then I opened the Bluetooth list on my phone and immediately found the GTK-XB60 listed and clicked on it. Then I opened one of my music files and it began playing through the Sony speaker. I realized that the manual said that only mp3 and wma file extensions are supported using a USB device, but since I was using my Bluetooth connection, my m4a files were fine. The speaker was just acting as a speaker for my phone, so I tested it to see if I could listen to other file extensions. I played an mp4 movie and could hear it just fine. The I tried Pandora and it also worked.
My music files on my phone are organized by artist, but inside each artist’s folder are folders that have the name of the album and the songs are in those folders. I installed the Sony Music Center app and found that my music was organized similarly. If I click on “Artist” I can see the artists’ names alphabetically. For example, “Beatles, The” is located between “Beach Boys, The” and “Beck”. Inside the Beatles tab are the albums (Abbey Road, Magical Mystery Tour, etc.). Then if I change to the “Album” tab, Abbey Road is alphabetically arranged where it should be in the “A’s” and Magical Mystery Tour is in the “M’s”. I can also switch to the “Songs” tab if I want to find a specific song to play. I can also set up Playlists using this app. However, I only included this info about the app since it was recommended in the manual with the Sony Home Audio System. Back to the review of the system:
The unit can be plugged in the wall and played that way, or once it is charged, it will play for up to 14 hours on battery. It takes about 4 hours to charge up the battery. The unit will turn itself off after 15 minutes of non use. You can also reduce the power consumption by using the STAMINA mode. The unit will only play for about 3.5 hours on maximum volume, and 5 hours on maximum volume with the STAMINA mode turned on. The 14 hours is if the volume level is set at 17. Turning on the speaker lights will decrease the battery time.
The unit has a button you can use to give the Bass an extra boost. Another feature of the unit is that you can install the Fiestable app to control the party lights on the front of the unit. Different colors and strobe lights are features of the speaker. You can also set up multiple audio systems if they are Bluetooth. You just set one of the speakers as a Party Host and the other speakers as Party Guests and they will play simultaneously. This unit also has a microphone jack so you can listen to music and use a microphone at the same time. When using a microphone while in the Party Chain mode, the sound from the microphone only comes through on the speaker that it is plugged in to.
Because this speaker can be used as your smart phone’s speaker, you can use it for hands-free telephone calls or with other apps that you have on your phone (such as Pandora.) In addition, you can plug another device directly into this speaker. Devices such as a smart phone, Walkman, TV, DVD player, or other similar device can be plugged into the speaker and the sound will play through the speaker. Once you plug in the device, press the Function-Pairing button repeatedly until the “Audio In” indicator lights up, adjust the volume to your liking, and you’re done.
Summary: I’m really going to enjoy this audio system. The sound is wonderful and there are so many ways to connect to it which makes it multifunctional.
My Best Buy number: 0326649051
Mobile Submission: False
I would recommend this to a friend!


Share this review:
-19points
23of 65voted this as helpful.
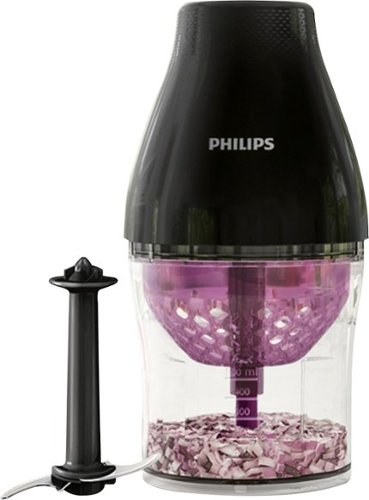
Save precious kitchen prep time with this Philips Viva multi-chopper. Its two functions provide coarse and fine chopping, and its automatic speed selection adjusts its performance to the type of ingredient. This 500W Philips Viva multi-chopper lets you achieve chef-quality results for coarsely chopped ingredients thanks to its ChopDrop technology.
Customer Rating
5
Works fast and easy to clean
on October 17, 2017
Posted by: MarilynB
from Texas
This multi-chopper arrived in 3 basic parts plus paperwork. (1) the motor, (2) the ChopDrop blade installed in the MultiChopper basket and clear Chopper bowl with the MultiChopper lid on top, and (3) the regular blade with a protective covering over the blade.
After unpacking the parts and reading the instructions, I washed all except the motor with liquid dishwashing soap and set them on a drying mat to air dry. I could have put those pieces in the dishwasher (the photo in the manual shows that the bottom rack is ok to use for this).
My main complaint with hand chopping is my eyes burn when I chop onions. My second complaint is the time it takes to hand chop food. So my ideal situation for this would be to stop my eyes from burning and get the job done quickly. The manual said to cut the food into 3/4 inch cubes or smaller. That would have been a deal breaker for me, so I decided to test the chopper with larger pieces. Otherwise, I know I wouldn’t use it. I cut an onion in half and cut one of the halves into 4 wedges. (This meant 1 cut to cut it in half and 3 more on one of the halves.) Then I decided to try the ChopDrop blade first. I set the MultiChopper basket in the Chopper bowl and then put in the ChopDrop blade, put in my 4 onion wedges, and covered that all with the Chopper lid. I set the motor onto of everything and plugged it in. Then I pressed down on the top of the motor. My 1/2 onion was completely chopped in just a few seconds. It chopped it much faster than I had expected. Since the Chopper bowl is clear, you can see your progress as you chop.
I decided to try the other blade for the other half of the onion. Three more cuts to get that onion half into 4 wedges. I removed the Chopper lid, Chopper basket, and ChopDrop blade and installed the regular blade. I dropped my 4 onion pieces into the clear Chopper bowl and placed the Chopper lid on top. Then I put the motor on top of that and pressed down. This time, the blade chopped most, but not all, of the onion. I went back to using the basket and ChopDrop blade to finish it and that worked.
All of the chopped pieces were of uniform size and you can see about what size that is by looking at my photos. I could easily see that using the ChopDrop blade will always produce that size because the pieces will fall through the holes in the baskets after they reach about that size. However, with the regular blade, since the blade is in the bottom of the Chopper bowl along with the food, you can chop for longer periods of time to get the pieces smaller or you could also chop it for a shorter length of time for larger pieces.
The manual says the ChopDrop blade is designed to cut onions, garlic, cheese, raw and cooked vegetables, cooked eggs, and fruits, etc. into small and evenly sized pieces. The regular blade is designed to cut nuts, raw meat, onion, hard cheese, boiled eggs, garlic, herbs, dry bread, etc.
The Multi-Chopper also comes with a recipe book with a few recipes for salsa, guacamole, hummus, and one or two more.
Clean-up was easy. I opted not to use the dishwasher again, but I could have. I rinsed the pieces (except the motor) to get the food off of them and swished them around in a sink with warm soapy water. I could have also used a dish brush but it just didn’t need that. Just be careful not to drop your blades in a sink of soapy water because when you reach in to retrieve them, you won’t be able to see the blades and they are extremely sharp. The manual recommends that you never touch the blades. I laid mine on a drying mat to dry, but I could have hand dried them with a dish towel being careful to only run the towel along the top and bottom sides of the blades and not the sharp edges. The manual also reminds you not to put away the Multi-chopper unless all of the pieces are dry. When storing the Multi-Chopper, reassemble it with the ChopDrop blade and store the regular blade with its protective cover in place.
Summary:
This multi-chopper will definitely replace my hand chopping for onions and other time-consuming items. It does a great job and does it much more quickly than I could do. The pieces are uniform in size as well.
This multi-chopper will definitely replace my hand chopping for onions and other time-consuming items. It does a great job and does it much more quickly than I could do. The pieces are uniform in size as well.
My Best Buy number: 0326649051
Mobile Submission: False
I would recommend this to a friend!


Share this review:
0points
0of 0voted this as helpful.
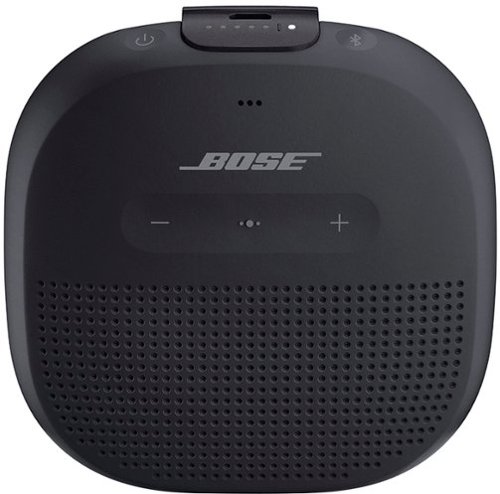
Whether you’re biking with your family, lounging by the beach, or hanging with friends — music makes the moment even better. That’s why the SoundLink Micro portable Bluetooth speaker was engineered to keep pace with your life and deliver unmatched sound for its size. This outdoor speaker is small but powerful. Thanks to proprietary Bose technology, the SoundLink Micro wireless speaker delivers huge sound and bass, even outdoors. Plus, it has a rugged exterior that resists drops, dents, and scratches, while the soft-touch finish makes it easy to hold in your hand. Attach this portable speaker to your backpack or cooler for on-the-go-tunes thanks to the included tear-resistant silicone straps. And it’s waterproof and dustproof, so you don’t have to worry about it getting accidentally wet or dirty. The rechargeable lithium-ion battery in the Bose SoundLink Micro portable waterproof speaker lets you enjoy up to 6 hours of music that’s deep, rich, and full of life so you can keep the dance party going. Got your hands full? The built-in microphone allows you to take phone calls through the speakerphone and access your phone’s Siri or Google Assistant. Get the most out of your wireless outdoor speaker with the Bose Connect app. Use the app to pair your smartphone or tablet and personalize your settings, unlock product features, keep your software up to date, and more.
Customer Rating
5
Excellent Sound Quality
on September 22, 2017
Posted by: MarilynB
from Texas
The Bose SoundLink Micro Bluetooth speaker is like a dream come true. Bose makes top quality audio products so pairing a company of its caliber with a portable Bluetooth speaker was bound to produce grand results and it did not fail in that regard.
The product came well packaged and secure. Setup was easy. Plug it in to begin charging, but you don’t have to wait for it to charge to begin setup. Download the app to your smart phone, push the power button on the speaker and hold in the Bluetooth button until you see a solid blue light on the speaker. Open your smart phone and go into your Settings to the Bluetooth menu. Find the Bose speaker on your list and click to pair the device. After pairing, my speaker immediately asked to download the latest update to the speaker. After the update was installed, I tested out the speaker by starting a music file on my smart phone. It worked easily and effortlessly.
Bose claims that this speaker is unmatched in sound quality for a speaker of this size and I agree! The sound is loud and clear and I was very surprised to hear such great bass in a speaker of this size. It is only 3.75 inches wide and deep and 1.5 inches high and with a weight of 0.64 pounds it is amazing how well it performs.
I like the tear-resistant strap on the back. It is stretchable to fit around bike frames or handle bars, but tight enough to not sag or come loose when strapped to a belt or backpack strap. This feature gives this speaker a huge added bonus since you can easily attach the speaker to so many different types of objects for complete portability.
It has a lithium ion battery that lasts about 6 hours before needing a recharge. It not only has a waterproof case, but every component inside the case has been sealed to make it waterproof inside too. It is waterproof in depths of 3.3 feet for up to 30 minutes, but it doesn’t float so you still have to make sure it is secure if you use it during water sports. It is also made to withstand extreme temperatures. The case is very rugged too. Bose says it can be dropped, stepped on, or sat on without breaking. I do wish it had an AUX port for wired connection since I have an older iPod that I would love to use it with. But it works with a Bluetooth connection at up to a 30 ft range.
In addition to enjoying your music, you can make or answer cell phone calls with this speaker, as with most mobile speakers. It also lets you talk to Siri or Google Assistant.
PROS:
Sound Quality
Volume
Portable
Tear-Resistant Strap
Waterproof
Battery Life
Sound Quality
Volume
Portable
Tear-Resistant Strap
Waterproof
Battery Life
CONS:
No AUX port
No AUX port
My Best Buy number: 0326649051
Mobile Submission: False
I would recommend this to a friend!
Share this review:
+1point
2of 3voted this as helpful.

Clean from floor to ceiling with this Shark ION Rocket vacuum cleaner. It quickly converts to a handheld unit to provide flexible cleaning options, and the 8-inch crevice tool lets you thoroughly clean hard-to-reach places. This Shark ION Rocket vacuum cleaner is equipped with a LiIon battery pack for cord-free cleaning.
Customer Rating
5
Excellent Stick Vacuum. Multi-functional!
on September 22, 2017
Posted by: MarilynB
from Texas
Shark ION Rocket Cord-Free Ultra-Light Stick Vacuum
The Shark ION Rocket Cord-Free Ultra-Light Stick Vacuum arrived well packed. It was held steady inside its box with fitted cardboard inserts to keep it secure during transport. All separate parts were wrapped in plastic bags and/or smaller cardboard boxes. The Shark box was also inside a slightly larger packing box.
The vacuum came unassembled, but there were only 3 “click” attachments necessary to assemble it. The wand clicked into the floor nozzle; the handheld vacuum clicked into the wand; and the rechargeable power pack clicked into the handheld vacuum. Also included in the box were: the power pack charger which is a wall plug that can be attached to the rechargeable power pack; a pet multi-tool; an 8 inch crevice tool; an anti-allergen dust brush; a quick start guide; and a more detailed user guide.
The handheld vacuum itself is the top piece that includes the power button, the settings buttons, the dust cup, the motor, and the handle. Below that is the wand. Below that is the floor nozzle which has wheels for rolling on the floor and has a brush roll in it. The handheld vacuum (top piece) can be used without the wand to vacuum short reach areas and it can be used with the wand to vacuum long reach areas. If used with both the wand and the floor nozzle, it will vacuum the floor while you are standing.
Charging: The power pack can be charged while it is inside the vacuum or out. You can also purchase a charging dock separately for the power pack as well as spare power packs to ensure you always have a charged battery. My power pack came partially charged but the instructions said to charge it fully before using. There are a set of battery indicator lights on the power pack to let you know how much charge is remaining. The instructions say after you first charge the battery fully, you need to let it completely discharge to condition the pack. The instructions also say that they battery takes 3.5 hours to completely charge and the battery can remain connected to the charger even after reaching full charge.
Use: The vacuum has 2 surface settings: carpet and bare floor. It also has 2 suction settings: “Extend Runtime” for everyday cleaning or “Max Power” for heavy-duty cleaning. The vacuum has a swiveling base on the floor nozzle which makes it easy to maneuver around furniture. The floor nozzle has forward facing lights so you can see in front of the vacuum in dark areas. To use, just press the power button and choose your surface and suction settings, then start to vacuum.
Emptying the dust cup is simple. Just press a button to remove the vacuum from the wand and press the dust cup release button over a waste bin. The bottom of the dust cup flips open and the contents fall into the waste bin.
Attachments: The vacuum also comes with attachments which can be used in either the long or short reach setup. The Pet Multi-Tool comes apart making it 2 separate tools. One is a stiff brush for stuck-on debris and the other is an upholstery tool for removing pet hair. The Anti-Allergen Dust Brush is used for removing fine dust on delicate surfaces. The 8 inch Crevice Tool is for baseboards and tight spaces. It can also be used to help to reach the ceiling for cobwebs. You can also purchase a Deep-Cleaning Motorized Pet Tool and/or an under-appliance wand but I already owned these with my upright Shark vacuum. You can also purchase an onboard storage clip to keep your attachments connected to the wand of this stick vacuum.
Storage: There is a place labeled on the side of the vacuum to show where you can hang it on a wall. I have wire shelves in my utility room and used an S hook to hang the vacuum on the side of one of the shelves next to my Shark upright vacuum cleaner. The vacuum will not stand up on its own. You can lean it against a corner wall but I preferred to hang mine so it doesn’t get knocked over accidentally. The manual says you can also purchase a wall mount for it on their web site.
Filters: There is a foam filter and a felt filter. These are located in separate locations on the handheld vacuum but can be easily removed for cleaning. To clean them, rinse them thoroughly until the water runs clear. Then let them dry completely before putting back inside the vacuum. Instructions for finding the release buttons to remove the filters are included in the user guide. The User Guide recommends cleaning the filters once a month.
I have been looking for a handheld cordless vacuum because I didn’t want to always have to use my larger upright for quick clean ups. I was considering a “dust buster” type vacuum but this is really so much more. You can use it as a regular vacuum cleaner, as well as a long reach ceiling cleaner, or also as a long reach baseboard cleaner, or you can just use the handheld vacuum piece for short reach cleaning. Keeping it charged means it’s always ready for use and it is light weight so it’s easy to carry from my utility room to any place in my home. I will still use my larger upright vacuum for my weekly whole house vacuuming but this will be a wonderful addition.
PROS:
Cordless
Light weight
Rechargeable power pack
Multi-functional with long or short reach cleaning setup plus regular vacuum setup
Attachments
Swivel maneuvering
Front lights
Powerful suction
Multi-surface use
Easy assembly
Cordless
Light weight
Rechargeable power pack
Multi-functional with long or short reach cleaning setup plus regular vacuum setup
Attachments
Swivel maneuvering
Front lights
Powerful suction
Multi-surface use
Easy assembly
CONS:
None
None
My Best Buy number: 0326649051
Mobile Submission: False
I would recommend this to a friend!
Share this review:
+9points
9of 9voted this as helpful.
MarilynB's Review Comments
MarilynB has not submitted comments on any reviews.
MarilynB's Questions
MarilynB has not submitted any questions.
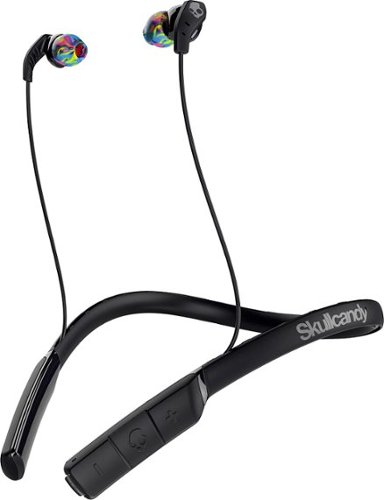
Work out to the beat with these Skullcandy Method headphones. The sweat-resistant design prevents them from slipping off when things heat up, and the flexible collar has built-in controls that are easy to locate and use. These Skullcandy Method headphones come with round earpiece covers that fit into the ear to block out external sound.
I'd like to Bluetooth this to my phone for driving, however, I'd also like to use them with my iPad to listen to music but not at the same time. I read once this is paired to one phone or such you can't pair with anything else? Help.
I haven't tried this, but I did notice that when using the app, there is something that says "Pair with another device", so I assume it will pair with more than one device.
6 years, 7 months ago
by
MarilynB
Work out to the beat with these Skullcandy Method headphones. The sweat-resistant design prevents them from slipping off when things heat up, and the flexible collar has built-in controls that are easy to locate and use. These Skullcandy Method headphones come with round earpiece covers that fit into the ear to block out external sound.
how to know charging is full
The battery case has 3 LED lights. The left and right light are green and pulse when the left and right earbuds are charging. The lights are solid when the earbuds are fully charged. In addition, the Jaybird app tells you the battery status of each earbud. The center LED light on the battery case also pulses when the case is charging and is solid when it is fully charged. The center LED light is red when the case's battery is low. You can charge the earbuds twice on a fully charged case. You can also keep the case plugged in when you are charging the earbuds. I just wrote a review that explains this more fully, so feel free to read it.
6 years, 7 months ago
by
MarilynB
Work out to the beat with these Skullcandy Method headphones. The sweat-resistant design prevents them from slipping off when things heat up, and the flexible collar has built-in controls that are easy to locate and use. These Skullcandy Method headphones come with round earpiece covers that fit into the ear to block out external sound.
Can you charge and use these headphones at the same time?
No. The earbuds charge only when they are inside their battery case.
6 years, 7 months ago
by
MarilynB

Call, text and capture your world with this Samsung Galaxy S8 smartphone. Keep personal data secure with the phone's security features, which include facial recognition and a fingerprint sensor on the rear panel. Equipped with a Super AMOLED screen and Corning Gorilla Glass 5, this Samsung Galaxy S8 smartphone wraps elegance and durability into one chic electronic package.
Is this item brand new, refurbished or secondhand? I see your price is one of the lowest, which company have you priced matched with? Do you offer 1 or 2 years guarantee?
Call, text and capture your world with this Samsung Galaxy S8 smartphone. Keep personal data secure with the phone's security features, which include facial recognition and a fingerprint sensor on the rear panel. Equipped with a Super AMOLED screen and Corning Gorilla Glass 5, this Samsung Galaxy S8 smartphone wraps elegance and durability into one chic electronic package.
Does this phone comes in a sealed Samsung retail packaging with following accessories at cost of 574.99$? 1. S8 2. USB type-C cable 3. fast charger 4. USB connector 5. micro USB connector 6. ejection pin 7. AKG earphone 8. Additional earphone gel tips

Yes. All of that came with my phone. Just be sure they are including a SIM card. My local store was out of Sprint SIM cards, so they didn't include one and didn't bother to tell me about it. I ended up having to go to 3 other Sprint stores before I finally found one for $10. Sprint credited my account for the $10 so it didn't end up costing me anything except time and gasoline until I finally found one.
6 years, 9 months ago
by
MarilynB
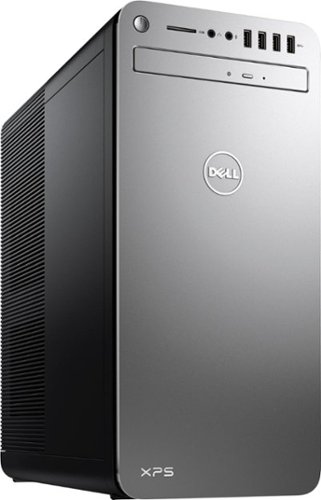
Take your productivity to a new level with this Dell XPS tower PC. The Intel i7-7700 processor and 16MB of RAM provide lots of power, while the easy-open chassis and expansion slots are ready for future upgrades. This Dell XPS tower PC has nine USB slots, including seven USB 3.1 ports, and a 1TB hard drive for ample file storage.
Which version of the I7700 processor is it? (e.g. I770K 4.2 GHz or I7700 4.2 or I770T @ 2.9GHz)?
Take your productivity to a new level with this Dell XPS tower PC. The Intel i7-7700 processor and 16MB of RAM provide lots of power, while the easy-open chassis and expansion slots are ready for future upgrades. This Dell XPS tower PC has nine USB slots, including seven USB 3.1 ports, and a 1TB hard drive for ample file storage.
What is the size of the Optane memory on this computer?
It has 16GB RAM. I hope that is what you are asking.
6 years, 9 months ago
by
MarilynB
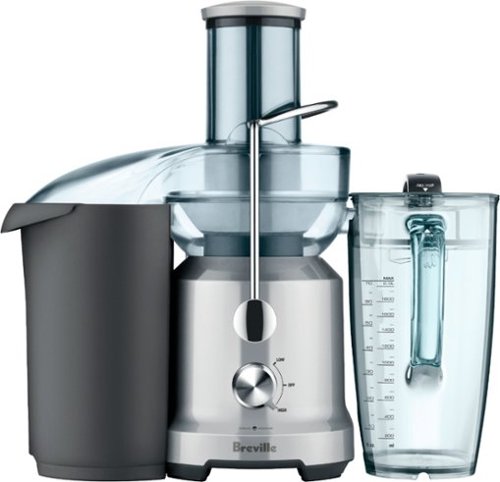
The Breville Juice Fountain cold electric juicer is powerful and efficient. The 850W, two-speed motor generates up to 13,000 rpm, processing even the toughest fruits and vegetables in less than a second. The Breville Juice Fountain cold electric juicer features cold spin technology that lets you make fresh, healthy juice full of vitamins and minerals.
i wish to buy the juicer for use in INDIA where the supply is 220 V. Please tell if this works out of box or any convertor is needed. quality juicers available in India are very high priced compared to here so i plan to get it thorugh one of my friend.
No, sorry. It only lists 120v on the bottom of the machine.
6 years, 9 months ago
by
MarilynB
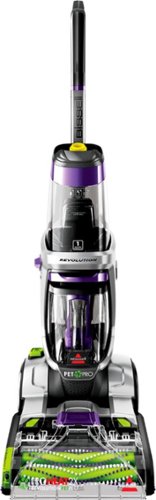
We know pets makes messes. Whether it's tracked-in mud or bathroom accidents, BISSELL® ProHeat 2X® Revolution® Pet Pro Plus carpet cleaner handles those though pet messes with its exclusive Pet Pro Cleanup System. This system includes a CleanShot® pretreater to remove spots and stains; the 2-in-1 Pet Upholstery Tool to remove pet hair, stains and odors from upholstery, a trial-size of BISSELL® PET PRO OXY Urine Eliminator formula, and an EZ Clean Brush Roll Cover to make maintaining the machine easy. When used in MAX Clean Mode, you get powerful cleaning that outcleans the leading rental*** and leaves carpet dry in about 30 minutes with Express Clean Mode.** All of this cleaning power comes in a lightweight and maneuverable machine with a low-profile foot that gets under furniture. But this machine doesn't just pick up after pets, it helps save them, too. BISSELL® proudly supports BISSELL Pet Foundation® and its mission to help save homeless pets. When you buy a BISSELL product, you help save pets, too. We’re proud to design products that help make pet messes, odors and pet homelessness disappear.***Cleaning results based on ASTM F2828 using BISSELL PET PRO OXY Urine Eliminator formula in MAX clean mode against the Rug Doctor Mighty Pro X3 carpet cleaner using their top selling formula.**Express Clean Mode (reference instruction in user guide). Tested on new carpet with protectant. Results may vary.
Can you use the pro heat 2x revolution pet pro upright deep cleaner-silver/purple on tile? I have ceramic, porcelain, laminate with this work on all of these types of tile?
Yes, it can be used on several types of hard floors. It mentions tile, linoleum, and laminate in the manual.
7 years ago
by
MarilynB
We know pets makes messes. Whether it's tracked-in mud or bathroom accidents, BISSELL® ProHeat 2X® Revolution® Pet Pro Plus carpet cleaner handles those though pet messes with its exclusive Pet Pro Cleanup System. This system includes a CleanShot® pretreater to remove spots and stains; the 2-in-1 Pet Upholstery Tool to remove pet hair, stains and odors from upholstery, a trial-size of BISSELL® PET PRO OXY Urine Eliminator formula, and an EZ Clean Brush Roll Cover to make maintaining the machine easy. When used in MAX Clean Mode, you get powerful cleaning that outcleans the leading rental*** and leaves carpet dry in about 30 minutes with Express Clean Mode.** All of this cleaning power comes in a lightweight and maneuverable machine with a low-profile foot that gets under furniture. But this machine doesn't just pick up after pets, it helps save them, too. BISSELL® proudly supports BISSELL Pet Foundation® and its mission to help save homeless pets. When you buy a BISSELL product, you help save pets, too. We’re proud to design products that help make pet messes, odors and pet homelessness disappear.***Cleaning results based on ASTM F2828 using BISSELL PET PRO OXY Urine Eliminator formula in MAX clean mode against the Rug Doctor Mighty Pro X3 carpet cleaner using their top selling formula.**Express Clean Mode (reference instruction in user guide). Tested on new carpet with protectant. Results may vary.
Is this machine designed to deep clean carpet that has heavy trafic?
I thought it did a wonderful job on my carpet that had heavy traffic patterns. It fluffed up the carpet to almost new. However, if you let it go too long before using, it make take a while to get it fluffed back up again. I also thought it did a good job of deep cleaning.
7 years ago
by
MarilynB