callmeageeth's stats
- Review count378
- Helpfulness votes1,300
- First reviewJune 23, 2014
- Last reviewJune 20, 2026
- Featured reviews0
- Average rating4.4
Reviews comments
- Review comment count0
- Helpfulness votes0
- First review commentNone
- Last review commentNone
- Featured review comments0
Questions
- Question count0
- Helpfulness votes0
- First questionNone
- Last questionNone
- Featured questions0
- Answer count25
- Helpfulness votes50
- First answerOctober 20, 2014
- Last answerDecember 15, 2021
- Featured answers0
- Best answers7
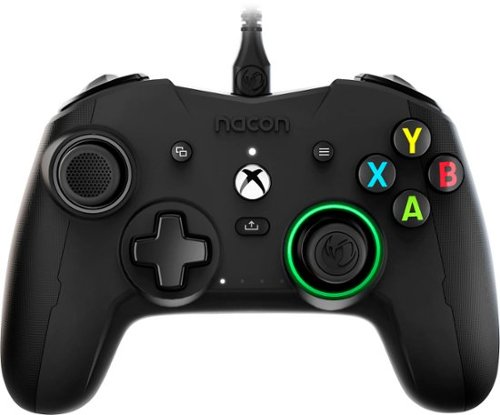
Designed for Xbox and PC, the Revolution X controller is built for competitive gamers looking for the ultimate in customization. Featuring a dedicated app from the Microsoft Store on Xbox Series X|S, Xbox One and Windows 10/11, the Revolution X App provides limitless customization options. Map buttons, set thumbstick sensitivity, trigger dead zones and much more. Create and store up to four game profiles in the controller to suit a range of games. Four programmable rear panel triggers for extra control. Seamlessly unlock Dolby Atmos for Headphones the moment you plug in your controller, giving you access to precise 3D Audio (headphones required). React faster and more accurately as you can detect the distance and direction of your threats.
Customer Rating

4
"Budget" Pro Controller for a Limited Audience
on July 12, 2022
Posted by: callmeageeth
I’m a long time gamer on all consoles and PCs. I’ve always been intrigued by “elite” controllers that offer additional buttons. But I’ve always been hesitant to test the waters because the controller that comes with my systems works just fine. Plus, it seems complicated and hard to master. I play a lot, but I’d still describe myself as a casual player, I’m not necessarily trying to climb the Call of Duty or Halo online leaderboards.
The Nacon controller can best be described as a budget elite controller - which isn’t a bad thing. The customization, at least on PC, seems endless (and in my opinion, too complex, but I know some people like that deep level of customization). But I really like the swappable concave and convex controller stems with adjustable height. That’s something I can get behind. Its only real downside is that it’s wireless, but the cable is plenty long to go from most consoles to the couch, and you never have to worry about batteries.
IN THE BOX
You get a case, the controller, a nice wired USB-A to USB-C cable, extra thumbsticks and height extenders as well as weights for the controller itself. What I absolutely love is that everything fits into the travel case, so there’s no worry about losing any of the accessories.
You get a case, the controller, a nice wired USB-A to USB-C cable, extra thumbsticks and height extenders as well as weights for the controller itself. What I absolutely love is that everything fits into the travel case, so there’s no worry about losing any of the accessories.
I should mention that you also get Dolby Atmos audio when you plug your headphones into the controller.
DESIGN AND BUILD QUALITY
This is a well made controller that in some ways feels “cheap and plasticky” but in others, it feels great. Do not get me wrong, it’s well built, you won’t hear any creaks of plastic or feel any give in it. It’s also extremely light, I’m sure in part because it doesn’t have any batteries. Even if you put the heaviest weights in the handles, it still feels like one of the lightest controllers I’ve held.
This is a well made controller that in some ways feels “cheap and plasticky” but in others, it feels great. Do not get me wrong, it’s well built, you won’t hear any creaks of plastic or feel any give in it. It’s also extremely light, I’m sure in part because it doesn’t have any batteries. Even if you put the heaviest weights in the handles, it still feels like one of the lightest controllers I’ve held.
Without doing a direct comparison, its size feels virtually identical to the standard Xbox controller. It has the standard button placement that you would expect of an Xbox controller, but it also has additional triggers along the backside (2 sets). There’s a switch to turn off the advanced controller mapping and a button to cycle through the profiles (more on that in a bit).
I like the placement of the additional triggers, but sometimes it feels like I’m hitting them by accident or I can’t find them when I’m purposefully trying to press them. I’m certain it’s something that takes a little time and muscle memory.
GENERAL USE
In most respects, this is just a typical Xbox controller that you’re already familiar with in terms of spacing of buttons, size of the controller and placement of the joysticks. I found the buttons to be extra “clicky,” almost akin to a mechanical keyboard, but they worked great. And I absolutely loved the D pad. Feels great and isn’t too wobbly.
In most respects, this is just a typical Xbox controller that you’re already familiar with in terms of spacing of buttons, size of the controller and placement of the joysticks. I found the buttons to be extra “clicky,” almost akin to a mechanical keyboard, but they worked great. And I absolutely loved the D pad. Feels great and isn’t too wobbly.
It worked on my Xbox just fine, but I did have some connectivity issues on my ASUS ROG laptop. I kept getting a notification that it was malfunctioning. Eventually after unplugging and plugging it back in several times, it worked. I just hope it doesn’t continue to be a problem.
CUSTOMIZATION
As I mentioned, this controller is highly customizable, especially on mapping buttons and adjusting the sensitivity of the buttons/triggers. I did this after downloading the software to my PC. The menu was pretty easy to navigate and I understood what buttons/sensitivity settings I was changing, but I found it daunting. There are so many different things you can do, and as a newbie to modifying controller settings, I was a bit turned off. If you know what you’re doing, however, then I’d imagine you’d be in heaven.
As I mentioned, this controller is highly customizable, especially on mapping buttons and adjusting the sensitivity of the buttons/triggers. I did this after downloading the software to my PC. The menu was pretty easy to navigate and I understood what buttons/sensitivity settings I was changing, but I found it daunting. There are so many different things you can do, and as a newbie to modifying controller settings, I was a bit turned off. If you know what you’re doing, however, then I’d imagine you’d be in heaven.
You can create up to 5 profiles (RIG has 5 default settings for different games, like FPS, sports, racing, etc). Once set up on your PC, you can change them on the fly with the switch on the back of the controller. You can even change the color of the ring around the right joystick which corresponds to the profile you’re using (or when you turn the advanced features off)
The controller itself has different weights that you can put inside the handles underneath a cover that pops off (with a little force). I still found the controller pretty light, even with heaviest weights in. You can also replace the concave sticks with convex sticks depending on your preferences, and install spacers so the joystick is taller. This is nice for finer movements like aiming in FPS. I was a little nervous about breaking the sticks when taking them off, but I didn’t break anything. They were just a little difficult to remove. They stay on really well.
CONCLUSION
This is for a targeted audience. While it’s not really a budget controller per se, if you are looking for an “elite” customizable controller that isn’t as expensive as the Microsoft branded one - and you don’t mind wires - this is certainly worth a look. If you don’t care one iota about customizing the controller’s settings or think it’s too difficult, then look elsewhere. While it’s a terrific controller in it’s own right, and while still “budget” for the features, it’s certainly meant to cater to the more pro-ish gamer communities who are looking to gain an edge anyway they can. Simply put, it’s a great controller for its intended but limited audience.
This is for a targeted audience. While it’s not really a budget controller per se, if you are looking for an “elite” customizable controller that isn’t as expensive as the Microsoft branded one - and you don’t mind wires - this is certainly worth a look. If you don’t care one iota about customizing the controller’s settings or think it’s too difficult, then look elsewhere. While it’s a terrific controller in it’s own right, and while still “budget” for the features, it’s certainly meant to cater to the more pro-ish gamer communities who are looking to gain an edge anyway they can. Simply put, it’s a great controller for its intended but limited audience.
I would recommend this to a friend!


Share this review:
-1point
0of 1voted this as helpful.

The Arctis Nova Pro wired gaming headphones raises the bar with the Nova Pro Acoustic System, immersive 360~ Spatial Audio, Sonar Software, GameDAC Gen 2 with Hi-Res Audio, ESS Sabre QuadDAC. Compatible with PC, PlayStation 5, PlayStation 4, Switch.
Customer Rating

5
One of the best gaming headsets you can buy
on July 1, 2022
Posted by: callmeageeth
Top notch gaming headset that demands consideration for those that demand the best. The sound quality is phenomenal and I’ve never worn a more comfortable pair of gaming headphones. The only downside is that this model is wired which presents practical limitations given your setup.
IN THE BOX
Inside the box you’ll find the headphones in a nice cloth bag. Behind it you’ll find the “GameDac Gen 2” which for ease of reference, I’ll refer to as the volume knob or controller. You’ll also find 2 USB-C to USB-A cables and a 3.5 MM audio cable. The latter plugs your headset into the volume knob controller and the USB-C cables are intended to plug into your systems (i.e. PS5/PS4, Switch, or PC). There’s also a microphone pop filter as well as removable magnetic ear plates (the ear plates come on the headset, I’m not sure of the purpose for taking them off, other than you must be able to get replacement designs somewhere - I’m new to Steelseries products).
Inside the box you’ll find the headphones in a nice cloth bag. Behind it you’ll find the “GameDac Gen 2” which for ease of reference, I’ll refer to as the volume knob or controller. You’ll also find 2 USB-C to USB-A cables and a 3.5 MM audio cable. The latter plugs your headset into the volume knob controller and the USB-C cables are intended to plug into your systems (i.e. PS5/PS4, Switch, or PC). There’s also a microphone pop filter as well as removable magnetic ear plates (the ear plates come on the headset, I’m not sure of the purpose for taking them off, other than you must be able to get replacement designs somewhere - I’m new to Steelseries products).
SETUP
The setup is simple, especially if you’re not one to mess with the EQ settings (I generally don’t). But word of caution, you can only adjust the EQ settings on PC. I haven’t tested to see if you can change the settings on PC and then have them apply to the PS5. I use these solely for use on the PS5.
The setup is simple, especially if you’re not one to mess with the EQ settings (I generally don’t). But word of caution, you can only adjust the EQ settings on PC. I haven’t tested to see if you can change the settings on PC and then have them apply to the PS5. I use these solely for use on the PS5.
None of the wires that are required for use, are permanently attached to the devices, which gives you some flexibility for the setup (and acquire longer cables if you so choose). To connect everything you plug the USB-C end of the cable into the volume knob controller and then the USB-A part into the console or PC. Then the auxiliary cable goes from the headset to the volume knob controller. Once you power on your console or PC, the volume knob controller powers on. This is all that’s required to get off and running.
DESIGN
Gaming headsets are a dime a dozen nowadays. The Arctis Nova Pro doesn’t look flashy, made of a combination of metal and mostly plastic. It doesn’t have a distinctive flashy design, nor does it have lights like other models. But frankly, I like the design. It looks premium and is extremely comfortable.
Gaming headsets are a dime a dozen nowadays. The Arctis Nova Pro doesn’t look flashy, made of a combination of metal and mostly plastic. It doesn’t have a distinctive flashy design, nor does it have lights like other models. But frankly, I like the design. It looks premium and is extremely comfortable.
The earcups are large enough to fit over my entire ear, so there’s no pinching. The cups themselves seem to be pleather, and are extremely soft and not too hot. There’s a flexible suspension band, which is the inner band. It has several adjustable heights, presumably for those with smaller heads(?). But it does a good job of keeping the headphones snug on your head. I truly cannot emphasize enough how comfortable these are to wear; I typically game 2-3 hours at a time and I almost forgot I was wearing them (not really, but I think you get my point).
The microphone hides away in the left earcup and you can easily pull it out when you need it. The microphone arm is sturdy, but flimsy. It stays in place, but the slightest bump moves it.
There’s a volume rocker on the headset, although I found it hard to find with my hand. Plus, I wasn’t entirely sure of its purpose since you have the volume knob nearby. There’s also a mute button.
All-in-all, it’s a sharp, professional looking design.
AUDIO PERFORMANCE
This headset has the latest and greatest audio features. What I care about most is the tempest audio compatibility with PS5. I play a wide variety of games, shooters, sports games, racing games, RPGs, and I thought the Arctis performed admirably in all scenarios. And that’s without tweaking the EQ settings. The bass isn’t overwhelming and the mids are crystal clear. Honestly, you won’t find better sound for your money. And laying COD was a treat, I could hear sound coming from all around me, it was great.
This headset has the latest and greatest audio features. What I care about most is the tempest audio compatibility with PS5. I play a wide variety of games, shooters, sports games, racing games, RPGs, and I thought the Arctis performed admirably in all scenarios. And that’s without tweaking the EQ settings. The bass isn’t overwhelming and the mids are crystal clear. Honestly, you won’t find better sound for your money. And laying COD was a treat, I could hear sound coming from all around me, it was great.
I play a lot online with my friends. They don’t hesitate to let me know if my headset’s microphone doesn’t sound great. From the get go, without making any adjustments, they told me that I sounded crystal clear. You can also hear yourself talking which I prefer. Otherwise I tend to talk louder. I couldn’t find away to adjust the volume of hearing yourself, but I didn’t find it distracting.
CONCLUSION
Look, these are expensive. There are tons of options that are cheaper. But when it comes to having he most comfortable, best sounding headphones, you can do no better. These truly are the most comfortable gaming headset I’ve ever worn. And the sound is terrific, even without tweaking it. It’s only real downside is that it’s wired. It’s not that it’s wired per se, it’s that you have to connect the volume knob controller to your console and then into your headset; all the while finding a place for the volume knob to sit. Of course, that’s if you’re like me and use this headset to game in a living room type setting. If you’re gaming at a desk, which is probably what these were meant for, then this is less of a problem. It’s just something to keep in mind when purchasing.
Look, these are expensive. There are tons of options that are cheaper. But when it comes to having he most comfortable, best sounding headphones, you can do no better. These truly are the most comfortable gaming headset I’ve ever worn. And the sound is terrific, even without tweaking it. It’s only real downside is that it’s wired. It’s not that it’s wired per se, it’s that you have to connect the volume knob controller to your console and then into your headset; all the while finding a place for the volume knob to sit. Of course, that’s if you’re like me and use this headset to game in a living room type setting. If you’re gaming at a desk, which is probably what these were meant for, then this is less of a problem. It’s just something to keep in mind when purchasing.
I would recommend this to a friend!


Share this review:
+1point
1of 1voted this as helpful.
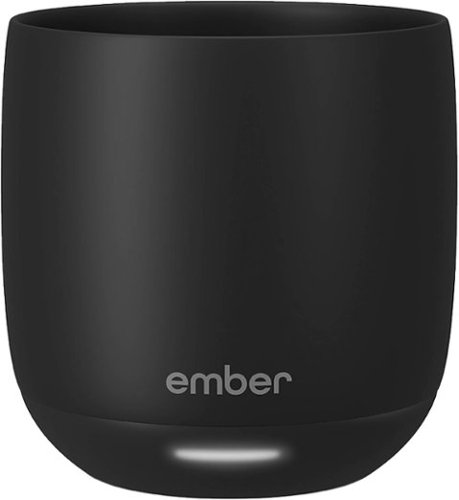
Ideal for espresso-based drinks such as cappuccinos, cortados, and flat whites, the new Ember Cup, 6 oz, offers a premium coffee experience that does more than keep your coffee hot. Our smart mug allows you to set your preferred drinking temperature, so you can enjoy your expertly crafted hot drink ~just the way you like it~ from the first sip to the last drop. Ember Cup~s built-in battery maintains your precise drinking temperature for up to 1.5 hours or all day with the included charging coaster.
Customer Rating
4
Cup that keeps your drink warm for hours
on June 17, 2022
Posted by: callmeageeth
The Ember mug does what it’s meant to do well, but requires some retraining and keeping your cup in one location (not that you couldn’t travel with it, just too cumbersome for me). And it’s pricey for being a cup. But if you are one to sip and enjoy a hot beverage over a longer period of time, this is something you should look at.
I haven’t seen anything else like it, so if you’re reading this and thinking about getting it, you’re likely already intrigued. But there are a few practical things I think one should know when considering purchasing this product.
IN THE BOX
Inside you’ll find the Ember cup, a charging “saucer,” instruction book, and wall charger. The charging cable is proprietary, at least, it’s not USB-C, so you have to use the included charger. The cable should be long enough for most people but with my setup in my office, I wish I had about an extra foot.
Inside you’ll find the Ember cup, a charging “saucer,” instruction book, and wall charger. The charging cable is proprietary, at least, it’s not USB-C, so you have to use the included charger. The cable should be long enough for most people but with my setup in my office, I wish I had about an extra foot.
SETTING UP
There are some stickers on the cup that tell you to charge fully before using. First thing, plug in the saucer to the wall outlet, then place the cup on the saucer to charge. The charging is similar to any wireless charging setup; there’s gold rings on the bottom of the cup that make contact with two gold pins in the saucer that charges it. There’s a light on the bottom of the cup that blinks red when it’s charging and glows green when it’s fully charged.
There are some stickers on the cup that tell you to charge fully before using. First thing, plug in the saucer to the wall outlet, then place the cup on the saucer to charge. The charging is similar to any wireless charging setup; there’s gold rings on the bottom of the cup that make contact with two gold pins in the saucer that charges it. There’s a light on the bottom of the cup that blinks red when it’s charging and glows green when it’s fully charged.
From there you download the Ember app. I’m one to loathe having dozens of unnecessary apps on my phone (at least apps I don’t use frequently) but nonetheless, this is an app you arguable don’t need to access once you set it up. Once the app is downloaded and cup is charged, you hold the power button on the bottom of it until the aforementioned light blinks blue to tell you it’s in pairing mode. From there, the app should find it pretty quickly. Once it’s connected, you’re all set up.
APP
The app is basic, there’s not much for it to do. You can slide the temperature bar on the app which tells the cup what to hold the temperature of your beverage at. There’s also presets for tea, coffee, etc. You can even make your own presets. I noticed a timer for steeping your tea, but I didn’t use that (I always “eye ball” the length of time to steep my tea). The temperature differences between the coffee preset and green/black teas are just several degrees. To me personally, that temperature difference doesn’t warrant me opening the app each and every time I pour something in it. The app will give you a notification when your drink hits the optimum level (you can disable this).
The app is basic, there’s not much for it to do. You can slide the temperature bar on the app which tells the cup what to hold the temperature of your beverage at. There’s also presets for tea, coffee, etc. You can even make your own presets. I noticed a timer for steeping your tea, but I didn’t use that (I always “eye ball” the length of time to steep my tea). The temperature differences between the coffee preset and green/black teas are just several degrees. To me personally, that temperature difference doesn’t warrant me opening the app each and every time I pour something in it. The app will give you a notification when your drink hits the optimum level (you can disable this).
USE
Pretty self explanatory, as long as your cup is charged, once you pour liquid in it, it will begin warming it up to the right temperature. The light blinks white on the cup to let you know it’s not quite to the optimal temperature yet and it’s working on it. It can detect if it’s empty and if so, it won't heat up. The cup itself gets slightly warm on the outside, but never does it feel too hot to hold. It’s pretty insulated.
Pretty self explanatory, as long as your cup is charged, once you pour liquid in it, it will begin warming it up to the right temperature. The light blinks white on the cup to let you know it’s not quite to the optimal temperature yet and it’s working on it. It can detect if it’s empty and if so, it won't heat up. The cup itself gets slightly warm on the outside, but never does it feel too hot to hold. It’s pretty insulated.
The battery purportedly lasts for 2.5 hours. I found this to be pretty accurate. I’ve left the cup off the charging saucer for a few days and used it without issue. But I keep the saucer near my desk (I use mine at work) so I’m always able to simply leave it on the charger.
By the time I bring my thermos of coffee into work and pour it into the cup, the temperature is usually in the 118 degrees range. The preset for coffee temp is about 134. I’d say it takes about 5 minutes to bring the temperature up 15-16 degrees which isn’t too bad. It’s not as if I don’t drink it as it’s heating up. As someone who brings in what seems to be a half cup of coffee to work, I really do enjoy the ability to keep it hot all morning. Otherwise, my last sips are almost cold coffee. So for me, this Ember cup is nice to have.
As I said, you don’t really need to open the app when you use the cup outside of the initial setup. So I don’t want to give the impression you’re constantly having to open your phone and the app to use the cup.
QUIRKS
A couple things to mention during my experience. It’s not necessarily advertised in the box, but if you Google search it you can easily figure this out, but it does not heat cold liquids to hot. So don’t expect to pour in a cold cup of coffee or tea and expect it to heat it. If the liquid is too cold, the cup will think it’s empty. Think of this cup as simply maintaining hot temperatures. I don’t know the effective range of the temperatures it will maintain, but something to keep in mind.
A couple things to mention during my experience. It’s not necessarily advertised in the box, but if you Google search it you can easily figure this out, but it does not heat cold liquids to hot. So don’t expect to pour in a cold cup of coffee or tea and expect it to heat it. If the liquid is too cold, the cup will think it’s empty. Think of this cup as simply maintaining hot temperatures. I don’t know the effective range of the temperatures it will maintain, but something to keep in mind.
The charging saucer can be finicky. There’s two gold pins at the bottom. There’s a sticker warning to not let it get wet. Easy enough. But I found the cup failing to charge at one point (after only having it a few days). I reset the cup and repaired it and it didn’t work. But at some point, it started charging again. I don’t know what happened, but it was a tad bit concerning to me when thinking about the device’s longevity.
CONCLUSIONS
Other than my last two observations, I must say, this cup works as intended and works well. Of course this particular model only holds 6 ounces, so it’s a bit small. But that doesn’t bother me. It’s clearly a luxury item, but if drinking hot liquids over a long period of time (when they would otherwise get cold) is important to you, I would definitely recommend this Ember cup - or any of them for that matter.
Other than my last two observations, I must say, this cup works as intended and works well. Of course this particular model only holds 6 ounces, so it’s a bit small. But that doesn’t bother me. It’s clearly a luxury item, but if drinking hot liquids over a long period of time (when they would otherwise get cold) is important to you, I would definitely recommend this Ember cup - or any of them for that matter.
I would recommend this to a friend!


Share this review:
0points
1of 2voted this as helpful.
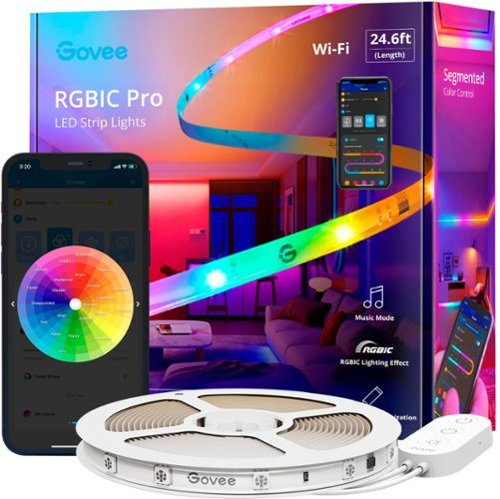
Add extra brightness to any room in your home. These LED strip lights use Wi-Fi and Bluetooth to easily control the colors and effects to personalize your lighting.
Customer Rating
4
Impressive lights at great price
on June 1, 2022
Posted by: callmeageeth
First, I want to say that I am heavily invested in my smart home. I have a multitude of devices that all sync with Google Home. When I look at any smart home devices I look for 1) ease of setup; 2) reliability; and 3) integration with Google Home. The last thing I want is 12 different apps controlling all of my devices. Google Home, if you didn’t know, supports a wide range of smart home devices (including Govee) but in my experience not all work reliably (not here to point blame, could be user error). This light strip hits the mark on all three of my prerequisites. It’s only real limitation, as what I wanted them to do, was to sync with my music. It does it, but it’s limited. Especially compared to the Phillips Hue Sync box. But all-in-all, if you’re looking to add to, or start with smart lighting in your home, this is a terrific option.
IN THE BOX
The box comes with the light strip (in a spool), a plug adapter that should have plenty of length for most situations, and some clips. I’m not 100% certain what the clips are for, I’m guessing they give you the option to install the strip on something other than a smooth surface (i.e. wall or ceiling).
The box comes with the light strip (in a spool), a plug adapter that should have plenty of length for most situations, and some clips. I’m not 100% certain what the clips are for, I’m guessing they give you the option to install the strip on something other than a smooth surface (i.e. wall or ceiling).
SETTING UP
First, putting the strip where you want it: the entire back of the full length of the strip has an adhesive backing. Obviously just peel it off and attach it to the wall. In the box are a few alcohol pads to help clean the area where you’re installing the strip (I highly recommend NOT skipping this step). As I said, there are some clips that have screws you could install on more porous surfaces, like wood beams, and you can stick the adhesive to the clips once they’re in place.
First, putting the strip where you want it: the entire back of the full length of the strip has an adhesive backing. Obviously just peel it off and attach it to the wall. In the box are a few alcohol pads to help clean the area where you’re installing the strip (I highly recommend NOT skipping this step). As I said, there are some clips that have screws you could install on more porous surfaces, like wood beams, and you can stick the adhesive to the clips once they’re in place.
Obviously the first thing you’ll want to do is make sure you have a plug where you’re installing them, preferably something out of sight. Of course, there’s a hard switch that turns it on and cycles through the colors and patterns of blinking. It too, has an adhesive backing. Even if you connect your lights to Amazon or Google, you’ll want it in an accessible place for turning it off/on when and if you need to. Of course, you could hide the whole thing and rely on your smart device.
THE APP EXPERIENCE
The second part of the setup is downloading the Govee Home app. You’ll need to create an account if you don’t have one. I found the user interface to be a little antiquated, but with most things, if you spend a little time looking at it and navigating through it, you’ll figure it out. It prompts you if you don’t have a device registered and there’s a plus button to hit to connect it. From there, your phone will look for the device over Bluetooth. The app found mine in seconds. Then I added the Wi-Fi network and I was off and running.
The second part of the setup is downloading the Govee Home app. You’ll need to create an account if you don’t have one. I found the user interface to be a little antiquated, but with most things, if you spend a little time looking at it and navigating through it, you’ll figure it out. It prompts you if you don’t have a device registered and there’s a plus button to hit to connect it. From there, your phone will look for the device over Bluetooth. The app found mine in seconds. Then I added the Wi-Fi network and I was off and running.
There are TONS of customization options. It was honestly overwhelming. But, it’s nice to know that if you care enough and want to, you can customize it to your heart’s content. Something that’s not available through the Google Home app (more on that below). For example, you can set schedules for the light strip to turn on at set times. There’s also preset lighting settings if you’re like me, and just want to pick something easily available.
THE LIGHTS THEMSELVES
They are super bright and have a terrific spectrum of light. This isn’t just red green blue, etc. The shades of color are remarkable. And like I said, it’s plenty bright. It lights up my room without the need for my actual lights. Of course, you can dim them, but I prefer having them super bright with the ability to dim. I was pleasantly impressed with the colors and light. And the controller itself was extremely impressive. Of course, I haven’t tested it for a long duration of time, but I don’t anticipate any issues or changes. It responds quickly, even from the app. Honestly, there isn’t much to say about them as full RGB lights. They work great as you would expect.
They are super bright and have a terrific spectrum of light. This isn’t just red green blue, etc. The shades of color are remarkable. And like I said, it’s plenty bright. It lights up my room without the need for my actual lights. Of course, you can dim them, but I prefer having them super bright with the ability to dim. I was pleasantly impressed with the colors and light. And the controller itself was extremely impressive. Of course, I haven’t tested it for a long duration of time, but I don’t anticipate any issues or changes. It responds quickly, even from the app. Honestly, there isn’t much to say about them as full RGB lights. They work great as you would expect.
FEATURES
I mentioned earlier that you can sync these with music. When I’m hosting, I like having the lights sync to the music playing. These lights have the option to do that, but there’s a small amount of lag. It uses a microphone, presumably in the controller, that listens to the music and reacts accordingly. I played some music and it seemed to respond appropriately but it was just a tad off. Probably not a big deal for most, but something worth mentioning. It’s not distracting, but for someone used to the high synchronization of the Philips Hue Box, it’s not quite up to par (however, the difference is in ease of setup and of course price).
I mentioned earlier that you can sync these with music. When I’m hosting, I like having the lights sync to the music playing. These lights have the option to do that, but there’s a small amount of lag. It uses a microphone, presumably in the controller, that listens to the music and reacts accordingly. I played some music and it seemed to respond appropriately but it was just a tad off. Probably not a big deal for most, but something worth mentioning. It’s not distracting, but for someone used to the high synchronization of the Philips Hue Box, it’s not quite up to par (however, the difference is in ease of setup and of course price).
SYNCING WITH GOOGLE HOME
I mentioned that syncing with my smart home is important to me. I turn all my lights off at night via voice command or through the Google Home app. I don’t always have the light strip on, but I want the option to turn it off without having to walk over and push a button or switch apps. Luckily, it was as easy as adding any other smart home service to Google Home. Then I assigned to the correct room and when I first tested it (asking Google to turn it on and off) it worked flawlessly. I haven’t had any issues on that front. You can also ask Google to change the colors. There are dozens of preset colors that you can set it to through the Home app or via voice. BUT, you can’t ask Google to set it to blink or pulse, etc. this may not matter, but the controls of the lights in Google Home are not nearly as robust as the Govee app. Of course, you can always switch to the Govee app when you need it. (and there might be a way within Google Home to give it more commands, I just haven’t found it).
I mentioned that syncing with my smart home is important to me. I turn all my lights off at night via voice command or through the Google Home app. I don’t always have the light strip on, but I want the option to turn it off without having to walk over and push a button or switch apps. Luckily, it was as easy as adding any other smart home service to Google Home. Then I assigned to the correct room and when I first tested it (asking Google to turn it on and off) it worked flawlessly. I haven’t had any issues on that front. You can also ask Google to change the colors. There are dozens of preset colors that you can set it to through the Home app or via voice. BUT, you can’t ask Google to set it to blink or pulse, etc. this may not matter, but the controls of the lights in Google Home are not nearly as robust as the Govee app. Of course, you can always switch to the Govee app when you need it. (and there might be a way within Google Home to give it more commands, I just haven’t found it).
CONCLUSION
While I have lots of Philips Hue lights, they are extremely expensive, especially their light strips. While my preference would keep my smart lights in the same ecosystem, the combination of price and performance make the Govee an extremely attractive alternative. If it didn’t sync to Google Home I might sing a different tune, but being able to control all my lights through Google Home renders the need to have Philips Hue lights moot. For the price of these lights, I can add as many lights and strips as I’d like without breaking the bank. If you are in the market for light strips, this should be high on your list; even if you can afford to splurge on more expensive brands.
While I have lots of Philips Hue lights, they are extremely expensive, especially their light strips. While my preference would keep my smart lights in the same ecosystem, the combination of price and performance make the Govee an extremely attractive alternative. If it didn’t sync to Google Home I might sing a different tune, but being able to control all my lights through Google Home renders the need to have Philips Hue lights moot. For the price of these lights, I can add as many lights and strips as I’d like without breaking the bank. If you are in the market for light strips, this should be high on your list; even if you can afford to splurge on more expensive brands.
I would recommend this to a friend!


Share this review:
0points
1of 2voted this as helpful.

The WH-1000XM5 headphones rewrite the rules for distraction-free listening. Two processors control 8 microphones for unprecedented noise Cancelling and exceptional call quality.
Customer Rating
5
The new gold standard in headphones
on May 31, 2022
Posted by: callmeageeth
There’s little to complain about with the MX5 headphones. They are comfortable and sound phenomenal. The biggest gripe would be the purchase price, but if you are looking for the best in class noise canceling with superior audio quality, these demand consideration.
IN THE BOX
The headphones come in Sony’s eco friendly packaging. Inside the packaging you’ll find the headphones in their case. The case has a large-ish footprint, but it feels slim. It’s made of high quality, durable materials. Unzipping the case you’ll find the headphones. They don’t fold like previous models (hence, the larger case) but the ear cups turn to make them flat. Inside the case is a magnetic flap that opens with a gentle pull that reveals a USB-C charging cable and 3.5 MM to 3.5 MM audio cable to connect your headphones to an audio jack. Unlike my older Bose models, the audio cable plug is full size on both ends of the cable. (making them interchangeable).
The headphones come in Sony’s eco friendly packaging. Inside the packaging you’ll find the headphones in their case. The case has a large-ish footprint, but it feels slim. It’s made of high quality, durable materials. Unzipping the case you’ll find the headphones. They don’t fold like previous models (hence, the larger case) but the ear cups turn to make them flat. Inside the case is a magnetic flap that opens with a gentle pull that reveals a USB-C charging cable and 3.5 MM to 3.5 MM audio cable to connect your headphones to an audio jack. Unlike my older Bose models, the audio cable plug is full size on both ends of the cable. (making them interchangeable).
SETTING UP
If you wanted, you could simply charge these headphones up, turn them on, connect to your phone and begin listening to music. But I recommend downloading the Sony Connect App as a part of this process. There, you can change some of the noise canceling settings (like adaptive noise canceling, turning off music when someone is talking, or change the EQ levels). More importantly, that’s where you get the firmware updates. I suspect they’re not necessary, but are highly recommended to keep the headphones operating at their best.
If you wanted, you could simply charge these headphones up, turn them on, connect to your phone and begin listening to music. But I recommend downloading the Sony Connect App as a part of this process. There, you can change some of the noise canceling settings (like adaptive noise canceling, turning off music when someone is talking, or change the EQ levels). More importantly, that’s where you get the firmware updates. I suspect they’re not necessary, but are highly recommended to keep the headphones operating at their best.
DESIGN
The MX5s updated their design from the MX3 and MX4. They now more closely resemble the new Bose headphones which isn’t really a bad thing. I didn’t hate the MX3 or MX4 designs, nor did I love them. They were headphones. The MX5s, however, look more sleek.But functionality is what counts, specifically comfort.
The MX5s updated their design from the MX3 and MX4. They now more closely resemble the new Bose headphones which isn’t really a bad thing. I didn’t hate the MX3 or MX4 designs, nor did I love them. They were headphones. The MX5s, however, look more sleek.But functionality is what counts, specifically comfort.
There’s seemingly no metal in these headphones. I’m guessing to keep their weight down. Part of me wishes the band was made out of metal, purely for durability’s sake, but these seem to handle what you can throw at them (within reason of course). You can grab the cans and twist and turn and the headband snaps back into place with ease.
The headband is obviously adjustable, like virtually all over the ear headphones. Here there’s no clicking, the band adjusts with virtually little friction as the arms slide in and out of the headband itself.
The ear cups are huge. I have a big head, thus big ears, and most ear cups lay partially on my ear which causes discomfort over time. With the MX5s, my entire ear fits inside the cup so there’s no pinch points. I’m not sure if it’s in my head, but my ears feel cooler too. Maybe it’s because they’re not getting squeezed? The cushions feel like some kind of pleather, you push in and and they feel like memory foam (they’re not, but do feel cushiony).
Last, I’ll just say that they are extremely light. So much so, you’d have no problem wearing them hours on end if you chose to. I don’t think you’ll ever forget they’re there, in my opinion, no such world exists where you don’t feel like you’re wearing headphones, but it comes close.
EASE OF USE
If you’ve owned a pair of MX headphones before, the navigation will be very familiar to you. The outside of the right ear cup is touch sensitive. You simply swipe left or right to advance (or go back) tracks, and swiping up and down controls the volume. I very much prefer this design over hard buttons because they have a little room for error in terms of locating any buttons. There’s a power button as well as an ANC button. Turning ANC effectively turns the outer microphones on and projects ambient noise inside your headphones. I try to avoid ever turning ANC off, but I can see where this is a neat or even essential feature for some, especially crossing crowded streets.
If you’ve owned a pair of MX headphones before, the navigation will be very familiar to you. The outside of the right ear cup is touch sensitive. You simply swipe left or right to advance (or go back) tracks, and swiping up and down controls the volume. I very much prefer this design over hard buttons because they have a little room for error in terms of locating any buttons. There’s a power button as well as an ANC button. Turning ANC effectively turns the outer microphones on and projects ambient noise inside your headphones. I try to avoid ever turning ANC off, but I can see where this is a neat or even essential feature for some, especially crossing crowded streets.
SOUND QUALITY AND NOISE CANCELING
The noise canceling is superb. It’s almost too good. Like, where do we go from here? Or, it seemingly feels so quiet it’s creepy. I don’t put on noise canceling headphones to simply cancel the noise, I use them in conjunction with listening to music or podcasts. But I tried it out and if that’s your thing (literally no noise) then these are the best headphones on the market now. Now, to be fair, it doesn’t eliminate all noise; I could hear a loud passenger jet pass over my head (I’m just a couple of miles from the airport). But everyday sounds essentially disappeared.
The noise canceling is superb. It’s almost too good. Like, where do we go from here? Or, it seemingly feels so quiet it’s creepy. I don’t put on noise canceling headphones to simply cancel the noise, I use them in conjunction with listening to music or podcasts. But I tried it out and if that’s your thing (literally no noise) then these are the best headphones on the market now. Now, to be fair, it doesn’t eliminate all noise; I could hear a loud passenger jet pass over my head (I’m just a couple of miles from the airport). But everyday sounds essentially disappeared.
In terms of sound quality, I have to say it’s great. I’m no audiophile by any stretch, but I can certainly appreciate quality sound. I’ve listened to everything from classical, to rap, to pop to 80s rock. And they all sound terrific. The default setting doesn’t have the deep bass the MX3s and MX4s are known for; the default seems to emphasize the treble and mid range. But if you were missing that deep bass, you can go into the Sony Connect app and can fine tune the EQ or preset EQs to get the sound you preferred. There’s a lot of customization in the app to make everyone happy. I stuck with the default settings because I liked the crisp sound.
OTHER FEATURES
I previously mentioned the app. It does a little more than push firmware updates and allow you to adjust the EQ settings. Here you can set up Sony’s 360 degree audio features. The headphones, through your phone, examines the shape of your ears and tweaks the settings for optimum performance. Unfortunately, I haven’t tried this feature because (my assumption) there’s a pay wall behind this content (and only select apps support it). Probably the coolest feature is adaptive sound, which tracks how you wear your headphones to optimize the noise canceling and sound settings.You can also turn on the feature that pauses your music automatically if the headphones sense you talking. For example, someone walks up to you and asks you a question while you’re listening to music, it will automatically pause so you can communicate with said person. The music will automatically continue after a set duration of time (which can be changed in the app). While I liked the feature as it was intended, it prevents me from singing along to the music. Once it detects your own voice, when you’re belting out your favorite song, the music will pause. So, unfortunately for me I had to turn that setting off.
CONCLUSION
There’s tons and tons of headphone options on the market. The Sony MX5s are certainly not cheap. But if sound and noise canceling matters enough to you, this is the pair to get. I’m sure there are other headphones that sound just as good, but you really can’t beat the combination of sound quality, noise cancelation and design.
Last, I’ll just say that the case is a tad bigger than previous Sony models or even the Bose QC45, but I didn’t find it to be that big of a deal. It would be nice if they folded up to a smaller package, I have to believe that the Sony engineers had good reason not to. Either way, I wouldn’t let the size of the case or the headphones inability to “fold up” sway your decision to get these or not.
I would recommend this to a friend!


Share this review:
+1point
2of 3voted this as helpful.
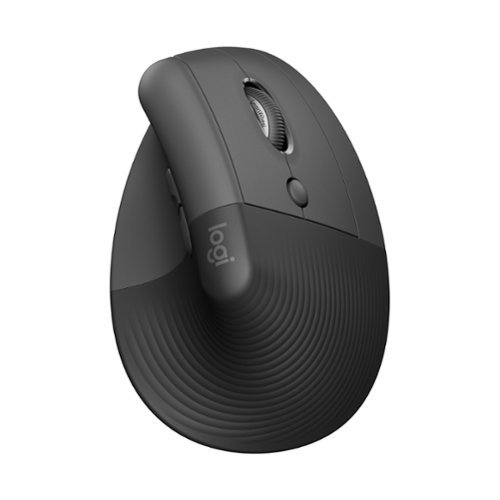
Desk life getting you down? Lift yourself up with Lift Vertical Ergonomic Mouse ~ a comfy and intuitive wireless mouse with quiet clicks crafted specially for small-to-medium hands. Available in right and left. Lift~s unique 57-degree angle elevates your wrist to give a feeling of relief ~ and sends a wave of comfort through the forearm and upper body. Scrolling feels second nature with SmartWheel, which easily shifts from precision to speed-scroll. Customize Lift ergo mouse using intuitive Logi Options+ Software.
Customer Rating
4
Quirky but comfortable, takes a little adjustment
on May 5, 2022
Posted by: callmeageeth
from Louisville, Kentucky
Budget quality vertical mouse that takes some getting used to. I’ve been using this mouse for a few days now and while it takes some getting used to, it’s starting to grow on me. Tough to say what health benefits it provides me (vs. a traditional mouse) as I haven’t experienced wrist soreness/stiffness in using a mouse before.
IN THE BOX
The Logitech mouse is smartly packaged. It’s just the mouse and a little instructional. It comes with a Logitech USB receiver which is stored inside the bottom of the mouse (smart). To use it, you simply open the base and pop the included single AA battery in and you’re good to go. I opted to use the mouse over Bluetooth vs. the USB receiver.
The Logitech mouse is smartly packaged. It’s just the mouse and a little instructional. It comes with a Logitech USB receiver which is stored inside the bottom of the mouse (smart). To use it, you simply open the base and pop the included single AA battery in and you’re good to go. I opted to use the mouse over Bluetooth vs. the USB receiver.
SETUP
I’m using a Windows 11 laptop. Once I put the battery in the mouse, and turned it on, my phone immediately recognized it over Bluetooth. After a couple of seconds, I was off and running.
I’m using a Windows 11 laptop. Once I put the battery in the mouse, and turned it on, my phone immediately recognized it over Bluetooth. After a couple of seconds, I was off and running.
I was then prompted to download the Logi Options plus app on my computer, which I did. It showed up on the app and allowed me to change the macros of what the buttons do in certain programs. It also allows me to change the DPI (i.e. sensitivity of the mouse cursor). The program was easy to use and adjust the settings.
DESIGN AND BUILD
This is the budget version of the first vertical computer mouse. That’s not a bad thing per se, but it doesn’t have a rechargeable battery (although AAs are easy to find and replace) and it looks “plasticky.” It’s lightweight and feels solid in the hand but it looks kind of cheap. Although as long as it works well, that’s not really a complaint.
This is the budget version of the first vertical computer mouse. That’s not a bad thing per se, but it doesn’t have a rechargeable battery (although AAs are easy to find and replace) and it looks “plasticky.” It’s lightweight and feels solid in the hand but it looks kind of cheap. Although as long as it works well, that’s not really a complaint.
You can probably tell by the pictures, but it’s essentially a mouse that allows you to hold it in a natural position; you don’t have to twist your wrist so that your palms face down. The buttons still fall under your fingers as if you were using a traditional mouse. I found it to be comfortable to hold and actually does feel more natural than a traditional mouse.
There’s your left and right click buttons, a scroll wheel, a button underneath the scroll wheel that changes DPI and two buttons on the inside towards your thumbs (which I use to go forward and back on webpages).
I also want to mention it’s pretty tall which makes it less than ideal to put in your travel bag. It’s definitely intended to sit on your desk given its size.
PERFORMANCE
The mouse was very responsive and works well like you would expect from Logitech computer mice. In terms of mouse performance, it works as you would expect. Honestly, there’s not much to say on this front.
The mouse was very responsive and works well like you would expect from Logitech computer mice. In terms of mouse performance, it works as you would expect. Honestly, there’s not much to say on this front.
Now, my performance was bit hampered as I acclimated myself to the new positioning. For example, I found my middle finger resting on the right click button and hitting it unintentionally. I also found the scroll wheel a tad cumbersome to use with my fingers. I found myself keeping my wrist on the ground, limiting the range of motion of the mouse to my hand. I eventually trained myself to hold my wrist off the desk to allow me better range of motion. After a few days of adjustment I was using it without issues.
OTHER FEATURES
I use two laptops and a desktop. You can connect your mouse to 3 devices at once and hit the button on the bottom of the mouse to instantaneously switch between the devices. I found this feature to work flawlessly.
I use two laptops and a desktop. You can connect your mouse to 3 devices at once and hit the button on the bottom of the mouse to instantaneously switch between the devices. I found this feature to work flawlessly.
CONCLUSION
It’s difficult to say whether a vertical mouse is better for the wrist of your health long term. We’ve all been using traditional mouses for a long time now. But if you have issues with your wrist, it’s worth giving it a shot. It has a relatively low price point. As just a mouse, it’s hard to recommend it over any other Logitech model. I still turn to my Logitech MX Master. However, if you have wrist issues or are in the market for a new, quality mouse that you can count on and want to try out the new form factor, you should certainly consider it. I can say that after my use, I can’t say that my wrist feels better, but your situation and experience might be different. I’m not ready to call the vertical design gimmicky.
It’s difficult to say whether a vertical mouse is better for the wrist of your health long term. We’ve all been using traditional mouses for a long time now. But if you have issues with your wrist, it’s worth giving it a shot. It has a relatively low price point. As just a mouse, it’s hard to recommend it over any other Logitech model. I still turn to my Logitech MX Master. However, if you have wrist issues or are in the market for a new, quality mouse that you can count on and want to try out the new form factor, you should certainly consider it. I can say that after my use, I can’t say that my wrist feels better, but your situation and experience might be different. I’m not ready to call the vertical design gimmicky.
I would recommend this to a friend!
Design

4
Ease of Use
4
Quality
4
Value

5


Share this review:
0points
0of 0voted this as helpful.
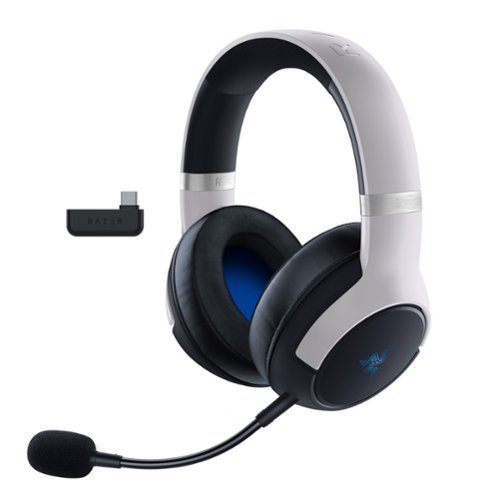
Unleash true console immersion with the Razer Kaira Pro for PlayStation~a wireless PS5|4 headset with haptics powered by Razer HyperSense. With the ability to feel what you hear and advanced connectivity to get you back in action seamlessly, you~ll have no trouble losing yourself in your game. Utlitizing the included USB-C dongle you can game exactly how you want on PlayStation, PC, Mac, Android, and Nintendo Switch.
Customer Rating

2
Too flawed for the price
on May 5, 2022
Posted by: callmeageeth
from Louisville, Kentucky
I’ve owned multiple Razer products, including headsets, and I’ve loved everything from that company. I was excited for the Kaira Pro because I loved the idea of force feedback in the headset. However, while I desperately wanted to love this headset, I cannot recommend it, especially at this price point.
I should note that you can use this headset with PC, PS5 or as a Bluetooth headset for your phone. I myself used it only for my PS5 and phone.
IN THE BOX
The box is compact and protects the headset. Inside is the headset, the microphone (which is removable, it plugs in what I will call an audio jack), the USB-C wireless adapter, a USB-A to USB-C charging cable and a USB extending cable. In typical Razer fashion, all of the cables are braided and high quality.
The box is compact and protects the headset. Inside is the headset, the microphone (which is removable, it plugs in what I will call an audio jack), the USB-C wireless adapter, a USB-A to USB-C charging cable and a USB extending cable. In typical Razer fashion, all of the cables are braided and high quality.
DESIGN AND BUILD QUALITY
As I said, the Kaira Pro is built well like virtually all Razer products. It’s made mostly of plastic which keeps it light, but it feels premium. The ear cushions are large and feel extremely comfortable. It just feels nice for lack of a better word. It looks great as well, matching the PS5 aesthetics. It’s white and black on the outside and blue is inside the ear cups. It looks great.
As I said, the Kaira Pro is built well like virtually all Razer products. It’s made mostly of plastic which keeps it light, but it feels premium. The ear cushions are large and feel extremely comfortable. It just feels nice for lack of a better word. It looks great as well, matching the PS5 aesthetics. It’s white and black on the outside and blue is inside the ear cups. It looks great.
There are a lot of buttons and several dials on the headset. I found them a little daunting at first, because when I was using them I forgot what buttons did what and I had to find them by feel, but after a little time, I memorized where everything was. There’s a dial for side tone (so you can hear yourself) the volume, slide button to mute microphone, a button to switch between headset and connect to your phone and yet another button to turn on/off the RGB lights and rumble features. I’ll just add that it’s extremely comfortable to wear, which is a plus.
FEATURES
This comes packed with features. I mentioned sidetone, which I’m a big fan of, as well as the ability to switch between your phone (if you get a call) and your PS5. But the one that gave me the most excitement - and ultimately disappointment - was the vibration feature in the headset. I love the rumble features in the Dualshock 5 and was excited to experience it in the headset.
This comes packed with features. I mentioned sidetone, which I’m a big fan of, as well as the ability to switch between your phone (if you get a call) and your PS5. But the one that gave me the most excitement - and ultimately disappointment - was the vibration feature in the headset. I love the rumble features in the Dualshock 5 and was excited to experience it in the headset.
Another small feature is the audio cues when you’re turning it on/off or changing audio profiles. When you turn it on a voice tells you the power is on, and when you switch the audio profiles, you’re told which one you’re on. This is a small, but very much appreciated design inclusion.
You can also change the EQ of the sound, but you have to both download the Razer Audio app on your phone and connect it via Bluetooth. Once connected with the app open you can adjust the EQ settings under the Custom profile. I must admit, I found this to be extremely unuseful. I’m no audiophile, and there were some 10 sliders that you can alter. But I didn’t have any sound to test the changes. I played some music, but that doesn’t help me when I’m trying to finetune the sound for playing on the PS5.
I do sometimes get calls during my gaming session and while the headset doesn’t allow you to talk on the phone AND hear your game at the same time, keeping your headset on does beat taking it off to answer your phone. All you need to do is hit the switch button and you can take the call while you continue playing.
SOUND QUALITY
I want to break up my comments between the sound and the microphone into two. I found the sound to be pretty good, but the microphone was a different issue. Just playing a single player game, I found the default sound settings to be adequate. There wasn’t a lot of bass, but I found the sound to be accurate. The FPS setting was nice because you could hear footsteps (it takes down the bass levels). I want to add that the 3D audio that the PS5 is known for, worked well. You could hear all around your character. I didn’t find too much to distinguish between the sound quality among the profiles other than the FPS setting which, as I said, drops the bass down.
I want to break up my comments between the sound and the microphone into two. I found the sound to be pretty good, but the microphone was a different issue. Just playing a single player game, I found the default sound settings to be adequate. There wasn’t a lot of bass, but I found the sound to be accurate. The FPS setting was nice because you could hear footsteps (it takes down the bass levels). I want to add that the 3D audio that the PS5 is known for, worked well. You could hear all around your character. I didn’t find too much to distinguish between the sound quality among the profiles other than the FPS setting which, as I said, drops the bass down.
All in all, the sound quality was pretty good, I really didn’t have any complaints there. I didn’t think it was any better or any worse than my PS5 Astro model.
MICROPHONE
This is the part that I can’t really get past. When I switched from my Astro headset to the Razer Kaira Pro, I got tons of complaints from my friends when chatting on PS5. They said it sounded like I was in a box. I moved the microphone closer to my mouth but all that did was make me sound louder, inside that box. Granted, I can’t really hear myself, but when my friends are complaining about how I sound, I take notice. Sure, they could hear me, but the point is that for $200 I expect to sound great on the other end of the line so to speak. This was basically a deal breaker for me.
This is the part that I can’t really get past. When I switched from my Astro headset to the Razer Kaira Pro, I got tons of complaints from my friends when chatting on PS5. They said it sounded like I was in a box. I moved the microphone closer to my mouth but all that did was make me sound louder, inside that box. Granted, I can’t really hear myself, but when my friends are complaining about how I sound, I take notice. Sure, they could hear me, but the point is that for $200 I expect to sound great on the other end of the line so to speak. This was basically a deal breaker for me.
HAPTIC FEEDBACK
I want to specifically mention the haptic feedback because it’s the first time I wore a gaming headset that vibrated. It has 3 different levels of vibration. While at first it’s cool, and makes the bass seem deeper, it becomes an issue after a while. Forget about the highest vibration setting, as it’s too annoying and distracting. At the lowest setting, however, it was still distracting. Call of Duty, for example, was cool at first. Feeling the explosions was an additional level of immersion. It was neat. But after a bit it was a bit annoying. When my friends talked however, was when I turned it off. It vibrates whenever my friends talk, so when I’m playing Call of Duty with my friends, it seems like it was constantly vibrating. Almost made my friends talking sound like it was reverberating and not natural speech. It got to the point where you felt like you were hearing motors vs feeling the feedback. I ultimately turned it off.
I want to specifically mention the haptic feedback because it’s the first time I wore a gaming headset that vibrated. It has 3 different levels of vibration. While at first it’s cool, and makes the bass seem deeper, it becomes an issue after a while. Forget about the highest vibration setting, as it’s too annoying and distracting. At the lowest setting, however, it was still distracting. Call of Duty, for example, was cool at first. Feeling the explosions was an additional level of immersion. It was neat. But after a bit it was a bit annoying. When my friends talked however, was when I turned it off. It vibrates whenever my friends talk, so when I’m playing Call of Duty with my friends, it seems like it was constantly vibrating. Almost made my friends talking sound like it was reverberating and not natural speech. It got to the point where you felt like you were hearing motors vs feeling the feedback. I ultimately turned it off.
CONCLUSION
At $200, I simply cannot recommend this headset. The audio quality is fine, but the microphone quality is its achilles heel. And if the vibrations didn’t become so annoying or noticeable, it might have overcome my complaints about the microphone but it doesn’t. Because I turned that off too. It’s really comfortable, but there are just as good sounding headphones at a cheaper price point.
At $200, I simply cannot recommend this headset. The audio quality is fine, but the microphone quality is its achilles heel. And if the vibrations didn’t become so annoying or noticeable, it might have overcome my complaints about the microphone but it doesn’t. Because I turned that off too. It’s really comfortable, but there are just as good sounding headphones at a cheaper price point.
No, I would not recommend this to a friend.


Share this review:
+1point
1of 1voted this as helpful.
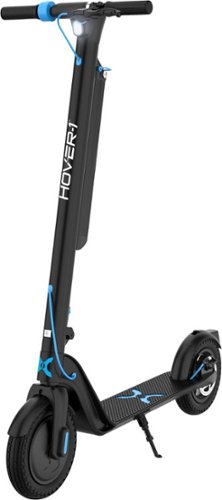
Level up with the new Highlander Pro! This extraordinary eScooter is built to hit speeds up to 15 mph and cruise along for 18 miles in a single charge. Not to mention, the Highlander looks as great as it rides. Featuring a disc and foot brake and a bright LED display & headlight, you can ride hard and bright at any time of day. Highlander comes equipped with two 10~ pneumatic tires and a 350W brushless electric motor for a neat and comfortable ride with maximum stability.
Customer Rating
5
Just plain fun
on February 8, 2022
Posted by: callmeageeth
from Louisville KY
Age:35-44
Gender:Male
Fun and sturdy scooter, similar in quality to scooters from Bird, etc. that you can rent. And a very reasonable price point. I’m impressed with it, although I have to admit, I worry about long term use once the “newness” wears off. If you know you want an electric scooter, this is one to definitely consider. If you’re on the fence, give it some thought as to how you would use it.
IN THE BOX
There’s obviously the scooter itself, it comes folded up. You get the instruction manual, a set of keys (to lock the battery), a small pump (more on that below), a hex wrench and a few bolts to put the handle together. And then there’s the charger.
There’s obviously the scooter itself, it comes folded up. You get the instruction manual, a set of keys (to lock the battery), a small pump (more on that below), a hex wrench and a few bolts to put the handle together. And then there’s the charger.
SETUP
I also have an electric bike, which required a bit of assembly and some inherent knowledge of how to put a bike together. Nothing tough, but it took a little bit of trial and error. I can confidently say that’s not the case here. There is a little assembly, but it’s very simple. The scooter comes folded. It folds for “portability” so to get it set up you unfold the handlebar so it’s pointing up and there’s a convenient clamp that you push down which locks it in place. From there, you put the kickstand up and go to the handlebar. In the box the handlebar is disassembled, but it’s connected by a cable. There’s only way it fits into the handlebar and all you have to do is screw in 4 screws with the hex screw. I had some difficulties using the included tool (getting enough torque) and used my allen wrenches to help me screw them in quicker. From there, you will likely need to pump the tires up. Now, I noticed it came with a small pump, which I appreciated it, but it was small, so I wanted to use my bike tire air pump which is bigger. I could use my bike pump on the rear tire, but due to the design of the front (presumably where the motor is located) I couldn’t use a traditional tire pump. I had to use the included pump. The end of the hose on the included pump is smaller, and you screw it over the valve to connect it. But the smaller pump was no problem, you have to bend over further as its short, but after a few pumps my tires were ready to go.
I also have an electric bike, which required a bit of assembly and some inherent knowledge of how to put a bike together. Nothing tough, but it took a little bit of trial and error. I can confidently say that’s not the case here. There is a little assembly, but it’s very simple. The scooter comes folded. It folds for “portability” so to get it set up you unfold the handlebar so it’s pointing up and there’s a convenient clamp that you push down which locks it in place. From there, you put the kickstand up and go to the handlebar. In the box the handlebar is disassembled, but it’s connected by a cable. There’s only way it fits into the handlebar and all you have to do is screw in 4 screws with the hex screw. I had some difficulties using the included tool (getting enough torque) and used my allen wrenches to help me screw them in quicker. From there, you will likely need to pump the tires up. Now, I noticed it came with a small pump, which I appreciated it, but it was small, so I wanted to use my bike tire air pump which is bigger. I could use my bike pump on the rear tire, but due to the design of the front (presumably where the motor is located) I couldn’t use a traditional tire pump. I had to use the included pump. The end of the hose on the included pump is smaller, and you screw it over the valve to connect it. But the smaller pump was no problem, you have to bend over further as its short, but after a few pumps my tires were ready to go.
The last thing to do was to charge the battery. I was anxious to test it, and I couldn’t quite figure out how to take the battery off (or if it in fact came off) but the power cord was long enough to reach the battery terminal, which is toward the bottom of the vertical handlebar. It was recommended that you charge it for 8 hours initially. I charged it overnight.
USE
I have to admit, I didn’t have a scooter when I was younger, so I had to familiarize myself with it (I have ridden a for rent Bird scooter before). So at first I just used it as a traditional non-motorized scooter and manually pedaled myself around. I’m 6’4” and about 250 pounds. I never felt any “bowing” in the scooter or otherwise felt like I might break it. I also found the handlebar height to be just fine. Shorter people might find it too high, but I would think for most people, it’s just fine. Depending on your height, your center of gravity will obviously be different.
I have to admit, I didn’t have a scooter when I was younger, so I had to familiarize myself with it (I have ridden a for rent Bird scooter before). So at first I just used it as a traditional non-motorized scooter and manually pedaled myself around. I’m 6’4” and about 250 pounds. I never felt any “bowing” in the scooter or otherwise felt like I might break it. I also found the handlebar height to be just fine. Shorter people might find it too high, but I would think for most people, it’s just fine. Depending on your height, your center of gravity will obviously be different.
After getting comfortable balancing and just scooting about, I turned it on. There’s a big blue button that you hold to turn it on. It makes a beep and the speedometer lights up with big bright text. Obviously it reads zero when you first turn it on. The throttle is a turn throttle on the right side. For presumably safety reasons, the throttle won’t engage at a complete standstill. You have to be moving just ever so slightly for the throttle to engage. Once it does though, it’s a blast.
I haven’t driven too much because of the snow and ice, but on the somewhat warmer days I took it for a spin in my neighborhood and had a blast. The packaging says it goes 15 MPH, but I only got up to about 13 or 14, presumably because of my size. But honestly, that was fast enough for me. It was so much fun zipping around. The ride is extremely smooth. The scooter is solid and well built. As I said previously, I never had any concerns about its durability or ability to hold me. The steering is smooth as you would expect.
It has disc brakes which are great. They make a minor squeak, but it’s not concerning at all and usually only makes a noise when slamming on the brakes at higher speeds. It’s a traditional bike type brake on the left side. Like non motor powered scooters, you can also brake by pushing down on the cover over the rear tire with your foot.
I haven’t driven it a full 9 miles to test it’s range, but I rode it for about 15 minutes on separate days (without charging) and didn’t have any issues. The battery meter has only dropped one bar over that week. The good news, even if it dies when you’re out and about, you can obviously still operate it as a traditional scooter.
OTHER FEATURES
It has a headlight which is surprisingly bright. It’s the other button that on the throttle that sits above the power. It’s easy to use, you simply hold it down for a few seconds. I would caution against riding at night, but when the need calls, it’s a pleasant addition. I haven’t driven it enough to comment on the drain on the battery but I would guess it’s relatively minimal.
It has a headlight which is surprisingly bright. It’s the other button that on the throttle that sits above the power. It’s easy to use, you simply hold it down for a few seconds. I would caution against riding at night, but when the need calls, it’s a pleasant addition. I haven’t driven it enough to comment on the drain on the battery but I would guess it’s relatively minimal.
It also has a bell. Something seemingly simple that I imagine is necessary when driving around congested areas. It’s not really an issue for me, as I imagine I’m only using it in my neighborhood but it’s a nice touch. And its sound is a nostalgia of being a kid.
This is a folding scooter, so it is in some respects, portable. A couple of comments on that for those intending to take this with them. It does fold, and it folds easily. As I mentioned there’s a little handle that has a safety button that you push and flip up that disengages the pole allowing it to fold. It’s relatively compact when folded given it’s overall size, but it is pretty heavy. Not so heavy that you wouldn’t take it with you, but if you were the type to use this for commuting or are in a situation where you might carry it around, that could get cumbersome. Nothing to be unexpected, a battery powered scooter isn’t a light portable scooter. Just something to keep in mind if you’re expecting to travel with it. And while it folds to a compact size for what it is, it is still a large scooter with a large foot platform. So it’s not exactly small. Just something to keep in mind.
The biggest con I can think of is the length it takes to charge. With proper planning or limited use, it won’t be a problem. But if you are going on a vacation and you take it with you, or it gets a lot of use from multiple people, it takes several hours to charge from 0% to full.
CONCLUSION
If you are looking for a fun way to travel short distances, or just like joy rides exploring, this is a terrific scooter to get. Putting aside your use cases, this is a high quality scooter that can hold just about anybody, that is somewhat portable and frankly, just fun to use. If you’re in the market, I highly recommend it.
If you are looking for a fun way to travel short distances, or just like joy rides exploring, this is a terrific scooter to get. Putting aside your use cases, this is a high quality scooter that can hold just about anybody, that is somewhat portable and frankly, just fun to use. If you’re in the market, I highly recommend it.
I would recommend this to a friend!
Design
5
Durability
5
Quality
5
Value
5
Ease of Use
5


Share this review:
+2points
2of 2voted this as helpful.
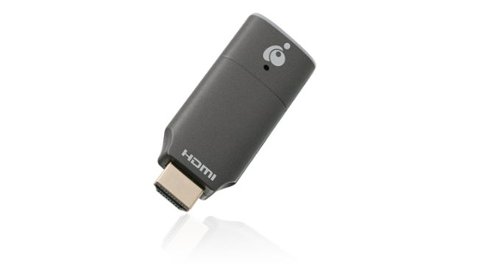
Never compromise the viewing experience from your computer or smartphone with IOGEAR~s Mini Wireless 4K Screen Sharing receiver. Stream video and audio up to 4K @30Hz resolution ensuring your content playback looks as sharp on your 4K UHDTV or projector as it does on your device's display. The Mini Wireless 4K Screen Sharing receiver is the perfect solution for wirelessly streaming 4K video and audio from your Windows 10+ device, Android device, macOS X, iPhone or iPad to your 4K UHDTV, projector or monitor. Use the built-in dedicated Wi-Fi to stream high quality 4K video and audio from up to 30 feet to any connected screen. Enjoy all your favorite content in 4K such as movies, videos, photos and online streaming sites including YouTube~, Hulu~ and Netflix~* in HD from a single low-profile receiver without any additional cables or dongles. Installation is fast and straightforward. Simply connect the receiver to your TV and follow the simple onscreen instruction. Mini Wireless 4K Screen Sharing receiver can create its own wireless network and is not reliant on an existing in-building Wi-Fi network to share photos, spreadsheets or presentations in your office or home. *Streaming videos from your iOS device to a TV screen may not be supported by some online video providers such as Netflix, Amazon Prime Video, Hulu, etc. However, Android users may be able to use Miracast, Smart View or similar technologies to effect screen sharing. Please check the specifications of your devices and providers before purchasing.
Customer Rating
5
Works great, but niche product
on January 25, 2022
Posted by: callmeageeth
from Louisville, KY
This is a screen sharing solution that works incredibly well, but it’s a niche product for limited purposes. From my perspective, it’s main use is for sharing content from your phone to an older “dumb” HDTV and cutting the wire when using a projector. I think it’s best suited for use when traveling and giving presentations with a projector. For other things, like turning an older TV into a smart TV, I don’t know why you would pick this device over Roku, Fire Stick or Google TV. Having said that, for my purposes, it works fantastic and I recommend it for that limited use.
IN THE BOX
You get the iogear device itself, which is similar to a Fire Stick, but thinner, a micro-USB cable that splits into two cables. One end of the cable is the USB type A port (traditional rectangle port you’re used to seeing) and the other end of the cable is what appears to be the wireless transmitter, with some extra length so you have the ability to get the best reception depending on your setup. Other than that, you get a helpful start guide and that’s it. No USB wall power adapter, but surely you have an extra one around the house in 2022, should you need it.
You get the iogear device itself, which is similar to a Fire Stick, but thinner, a micro-USB cable that splits into two cables. One end of the cable is the USB type A port (traditional rectangle port you’re used to seeing) and the other end of the cable is what appears to be the wireless transmitter, with some extra length so you have the ability to get the best reception depending on your setup. Other than that, you get a helpful start guide and that’s it. No USB wall power adapter, but surely you have an extra one around the house in 2022, should you need it.
SETUP
It’s pretty darn simple. You plug the iogear device into an open HDMI port of your TV, projector, or monitor. Then you plug in the power. If your TV, computer, projector has a USB slot for power you can plug it in there. Otherwise, you’ll have to get a wall adapter and power it through a plug in the wall.
It’s pretty darn simple. You plug the iogear device into an open HDMI port of your TV, projector, or monitor. Then you plug in the power. If your TV, computer, projector has a USB slot for power you can plug it in there. Otherwise, you’ll have to get a wall adapter and power it through a plug in the wall.
When you change the input on your device that’s displaying the image, a “home screen” gives you all the information you need to complete setup. There’s even a QR code for you to scan to take you to the device’s homepage on your phone (which is nice). But basically, you connect to the Wi-FI network, from your phone or computer, and then from you there you go to a browser and enter in the IP address which takes you to a page to connect your iogear to the internet.
Based on my testing, the purpose of connecting your iogear to your internet is to permit you to access the internet while you’re connected to the iogear (so you can stream things). It also allows any device to connect to it from the internet itself, without having to connect to the iogear network.
Once that’s done, you’re good to go. You simply need to case your screen to your output device.
STREAMING QUALITY AND USE
Iogear claims it can support 4K up to 30 FPS and up to 30 feet away. I didn’t really test the distance by measuring, but I could stand across the room and it worked just fine.
Iogear claims it can support 4K up to 30 FPS and up to 30 feet away. I didn’t really test the distance by measuring, but I could stand across the room and it worked just fine.
As a quick aside, I use a Samsung phone and a Windows computer. So I can’t speak to the actual screen mirroring on iOS devices, but I’m certain it’s as simple a process with Android phones and Windows computer. For me, I swipe down on my phone and go to the “Smart View” button which brings up a list of devices to share my phone’s screen with. Luckily, the iogear device’s name is easy to find (assuming your phone brings up multiple options). Clicking on that and some permissions immediately had my phone’s screen on the display. From my Windows computing perspective, (I’m using Windows 11, which I’m new to…) I found the option to share my screen under settings, display, connect to a wireless display. Then a screen popped up and showed me the iogear and it connected immediately without issues.
The bigger issue, and this applies to most if not all, wireless mirroring devices/programs is scaling. So my phone immediately showed a small truncated screen. And the phone’s display was adjusted for scaling as well. However, when you rotate your screen horizontally, the screen fills up. From my Windows computer, the screen was stretched out and looked funky. But a few adjustments on my computer itself, I got the aspect ratio where things weren’t stretched out. But all this depends on your monitor/projector/TV (I was testing on a wide screen computer monitor). So it’s not always plug and play (at least speaking re using a Windows computer), but it’s a few minor resolution adjustments and you’re good to go. Not a big deal, but just know the screen may not fit perfectly, or might need some adjustments. Which is easy to do.
From a quality standpoint, I was impressed. I’ve mirrored my phone on a Google TV before and there was significant lag. This iogear device had some lag, the animations of screen swiping wasn’t perfect, but it was much better. Watching movies, streaming from my phone, was a pleasure. The picture quality was really solid. From my computer, same compliment. I ran a presentation through it, and it was as if my computer was plugged into the projector.
WHO’S THIS FOR?
The one main thing to consider about this device, is who is it for? You might already have an Amazon Fire Stick, Apple TV or Google TV. And if you do, you are able to mirror your devices to those (for Google TV, I can stream my computer through Chrome). SO this device seems duplicative. However, for me, and this is just my opinion, this is best suited for business users who travel and give presentations. For me, it works perfect. I can walk into a new building, bring my projector and connect my screens wirelessly without concern of a dropped signal. Having the ability to mirror my phone is just a plus. If I’m in the hotel, it’s nice carrying this tiny dongle and being able to watch whatever I want without the limitations of hotel cable.
The one main thing to consider about this device, is who is it for? You might already have an Amazon Fire Stick, Apple TV or Google TV. And if you do, you are able to mirror your devices to those (for Google TV, I can stream my computer through Chrome). SO this device seems duplicative. However, for me, and this is just my opinion, this is best suited for business users who travel and give presentations. For me, it works perfect. I can walk into a new building, bring my projector and connect my screens wirelessly without concern of a dropped signal. Having the ability to mirror my phone is just a plus. If I’m in the hotel, it’s nice carrying this tiny dongle and being able to watch whatever I want without the limitations of hotel cable.
CONCLUSION
The iogear delivers. Is easy to setup, easy to use, the image quality is phenomenal. But it’s a bit duplicative for most people. Unless you simply rely on your phone for your entertainment (or computer) you are probably better served with another streaming device. But for those who travel frequently and/or give presentations, this device can be extremely useful.
The iogear delivers. Is easy to setup, easy to use, the image quality is phenomenal. But it’s a bit duplicative for most people. Unless you simply rely on your phone for your entertainment (or computer) you are probably better served with another streaming device. But for those who travel frequently and/or give presentations, this device can be extremely useful.
I would recommend this to a friend!

Share this review:
+4points
4of 4voted this as helpful.

An industry defining 49~ 1000R curved screen, equipped with a cutting edge Quantum Matrix HDR2000 panel, 240hz refresh rate, G-Sync and FreeSync Premium Pro support, 1ms GTG response rates, and fully customizable Odyssey Infinity Core lighting.
Customer Rating
4
Terrific Screen, but niche product w/ quirks
on December 24, 2021
Posted by: callmeageeth
from Louisville, KY
This is a beast of a monitor. It’s undoubtedly gigantic, so your work/gaming space must be sufficiently large to handle it, but the picture quality is fantastic. It’s the equivalent to having two 27 inch monitors side by side. It’s got the latest display tech, but it does feel at times to be too big. Gaming performance varied by game with the 32:9 aspect ratio causing a number of problems depending on the game. The biggest issue is the cost. If you absolutely must have the largest monitor and can afford it, it’s a no brainer, but it’s a lot of money for just a monitor when you can get two monitors with high resolution and refresh rate for less money (and end up with the same screen real estate).
IN THE BOX
If you’re looking to buy it and haven’t seen it, the box itself is huge. Like extremely long as you’d imagine. Inside is the monitor, the stand (which is in a few pieces), a wall mount (I think??), a USB 3.0 cable, HDMI 2.1 cable, and DisplayPort cable (I’m not sure of the specs, but I assume it’s the latest and greatest). Frankly, it comes with everything you need and expect in such an expensive monitor.
If you’re looking to buy it and haven’t seen it, the box itself is huge. Like extremely long as you’d imagine. Inside is the monitor, the stand (which is in a few pieces), a wall mount (I think??), a USB 3.0 cable, HDMI 2.1 cable, and DisplayPort cable (I’m not sure of the specs, but I assume it’s the latest and greatest). Frankly, it comes with everything you need and expect in such an expensive monitor.
SETUP
The instructions suggest two people put it together and put it on your desk. I put it together myself. And the monitor itself isn’t too terribly heavy, but it’s awkward to hold because of its size. And when moving it when assembled, I always worry about the best way to hold it so nothing breaks (not to mention the logistics of having to move it again, especially a new apartment/house!).
The instructions suggest two people put it together and put it on your desk. I put it together myself. And the monitor itself isn’t too terribly heavy, but it’s awkward to hold because of its size. And when moving it when assembled, I always worry about the best way to hold it so nothing breaks (not to mention the logistics of having to move it again, especially a new apartment/house!).
Putting the stand together is really no different than most monitors. But you will need a Phillips screwdriver. Samsung was actually very thoughtful about putting it together. The top part of the box contains the stand, and they instruct you to put that together and attach to the monitor while it’s still face down in the box. Then you rotate the box on its side after the stand is attached to easily get it out. But the stand is a monstrous wide metal bar that is bent into a shallow V shape. That part screws into the vertical monitor support bar, which then screws in (with actual screws) into the back of the monitor. It literally takes 2 minutes to get that part done.
The biggest hassle was connecting the cables during this process. They suggest you plug in the cable, then attach the back cover plate (which is nice for aesthetics of the back of the monitor) but kind of a cable management pain. Particularly for plugging a USB device into the monitor itself. But, it’s not a huge deal, you get the cables in, run them through the stand to minimize their visibility. The issue with plugging them in during the set up is the fact that they’re dangling while you are putting the computer monitor in your desk. With a second person it’s easy, that person could move the cables so you don’t put the stand on them. But holding the monitor with two hands and trying to move cables out of the way by yourself was a little more difficult. But that comes with the territory of this monitor being so big.
INITIAL SETUP WITH MY COMPUTER
A little caveat, I’m using a prebuilt Alienware PC that’s about 4 years old. It has a Nvidia GTX graphics card, which is a couple generations old. I’m also not a PC savant. My PC knowledge is certainly greater than the average person, but the nitty gritty details and the infinite settings are a bit daunting to me. Basically, I rely on the PC to optimize settings, most of the time.
A little caveat, I’m using a prebuilt Alienware PC that’s about 4 years old. It has a Nvidia GTX graphics card, which is a couple generations old. I’m also not a PC savant. My PC knowledge is certainly greater than the average person, but the nitty gritty details and the infinite settings are a bit daunting to me. Basically, I rely on the PC to optimize settings, most of the time.
Having said that, I plugged in the DisplayPort cable to my PC to take advantage of the higher refresh rates. I don’t know for certain, but don’t believe my GTX card is compatible with the newest HDMI 2.1 standard. When I plugged it in, it took a few “unplugs” and “plugging back in” to actually detect the monitor. Nothing I ever experienced before. Once it turned on and was working, I never had that issue again, so not sure what happened.
USE AS A PRODUCTIVITY MONITOR
Before I get to gaming, I want to get back to this as simply a computer monitor. Putting aside the refresh rate, etc. I cannot overemphasize how big it is. I do a lot of email, word processing, watching movies, and some video editing on my machine. I found all of those tasks to be a blast on this large screen. I can have a complete timeline in Adobe Premiere Elements and STILL have room for Chrome next to it. It’s just an absurd amount of real estate. Part of me wishes it would be a little bit taller (some of the newer monitor models with wider aspect ratios intrigue me). But I say that only because it’s so wide, it almost feels “not tall.” Dragging things from one side of your monitor to the other is a bit cumbersome, requiring you to pick up your mouse and set it back down. However, I got into a workflow where I didn’t to that, that often.
Before I get to gaming, I want to get back to this as simply a computer monitor. Putting aside the refresh rate, etc. I cannot overemphasize how big it is. I do a lot of email, word processing, watching movies, and some video editing on my machine. I found all of those tasks to be a blast on this large screen. I can have a complete timeline in Adobe Premiere Elements and STILL have room for Chrome next to it. It’s just an absurd amount of real estate. Part of me wishes it would be a little bit taller (some of the newer monitor models with wider aspect ratios intrigue me). But I say that only because it’s so wide, it almost feels “not tall.” Dragging things from one side of your monitor to the other is a bit cumbersome, requiring you to pick up your mouse and set it back down. However, I got into a workflow where I didn’t to that, that often.
GAMING
Here's where things were a bit of a letdown, and I think some of my issues were in part, user error. I've been gaming my whole life. Mostly on consoles. I only recently started gaming on PCs. I'm pretty knowledgeable on PCs, in the practical sense of using it and getting done what I need to get done. I understand the principles on how they work. But, I get overwhelmed at the complexity. Not only in opening and playing a game, but also changing the graphical settings, making sure monitor and PC have the right settings. I only mention this to give some context to my experience.
Here's where things were a bit of a letdown, and I think some of my issues were in part, user error. I've been gaming my whole life. Mostly on consoles. I only recently started gaming on PCs. I'm pretty knowledgeable on PCs, in the practical sense of using it and getting done what I need to get done. I understand the principles on how they work. But, I get overwhelmed at the complexity. Not only in opening and playing a game, but also changing the graphical settings, making sure monitor and PC have the right settings. I only mention this to give some context to my experience.
I first opened up GTA V. It was the first game I opened after setting up my monitor. When it loaded in, the display was centered in the monitor, it didn’t automatically go to 32:9 aspect ratio. I thought, that makes sense, I need to change the settings. I go into the graphics settings in GTA V and adjust the screen resolution to match the 32:9 aspect ratio. But then, everything is stretched out and doesn’t look right. I spent some more time tweaking the settings, I ultimately go into the GeForce Experience, optimize the game and then when I load back in, the visuals fill the screen without “stretching.” For me, it was a pain in the butt. I can’t blame the monitor per se, it was a combination of my hardware and user knowledge. Which I mention to serve as a warning to persons looking into this monitor. If you don’t know your way around graphics’ settings and resolution and the tweaking of settings in general, buyer beware. You could be in for some frustration.
This is in large part because 32:9 isn’t necessarily an accepted ratio for games. Most games are developed for your standard widescreen 16:9. Halo Infinite, which I haven’t played, is supposedly able to play in 32:9 aspect ratio out of the box. That is nice, if only for the fact that it will be easier to change the settings to fit the screen. I hope more games are geared that way.
In other games, like Control, I ended up with having my screen not extend to the edges of my monitor. Like black bars, but to the left and right sides. This was a fine experience, the graphics looked amazing and the black bars were in no way distracting, but it leaves you wondering, why have all that real estate if you can’t use it?
In terms of the actual screen itself, putting aside the aspect ratio, I found it amazing. It’s essentially QHD resolution (twice as wide as a 27 inch monitor) with 240 hz refresh rate. Not to mention HDR. The movements on screen were buttery smooth, especially with Windows 11. With HDR on, the colors really popped off the screen. Even a blue Windows 11 default background looked amazing. Truly, the screen is amazing.
CONCLUSION
I love this monitor, I really do. I love the screen real estate. The colors on the screen just pop. The curved screen really feels immersive. But it’s not for everyone. Price aside, you literally have to turn your head from left to right to see things on the far edges of the screen. And while the wide-wide screen sounds great in theory for gaming, it actually seems to be too much. But for productivity, including handling multiple programs, and/or video editing, it’s amazing. The screen is sharp, the motion is fluid with the high refresh rate, but the price is difficult to justify. Not to mention its size/weight/footprint which can limit where you can use it and how often you move it.
I love this monitor, I really do. I love the screen real estate. The colors on the screen just pop. The curved screen really feels immersive. But it’s not for everyone. Price aside, you literally have to turn your head from left to right to see things on the far edges of the screen. And while the wide-wide screen sounds great in theory for gaming, it actually seems to be too much. But for productivity, including handling multiple programs, and/or video editing, it’s amazing. The screen is sharp, the motion is fluid with the high refresh rate, but the price is difficult to justify. Not to mention its size/weight/footprint which can limit where you can use it and how often you move it.
Mobile Submission: False
I would recommend this to a friend!


Share this review:
+1point
1of 1voted this as helpful.
callmeageeth's Review Comments
callmeageeth has not submitted comments on any reviews.
callmeageeth's Questions
callmeageeth has not submitted any questions.

Meet the unrivaled, everyday noise canceling headphone for people who want to keep it simple. Hesh ANC is engineered with just the right amount of added features to make your life a little easier without a lot of additional technology that you might not need.
Do these headphones have a mute button and how long is the battery life if using for office calls?
I don't think there's a dedicated "mute" button on the headphones, I didn't find one, so it will need to be controlled from your phone. I never measured battery life for calls, but I've used them for calls (they sound good) and listened to hours of music over the course of a couple of weeks (of and on, not every single day) before having to recharge them. I feel pretty confident you could go a full day of calls without the battery dying.
5 years, 5 months ago
by
callmeageeth
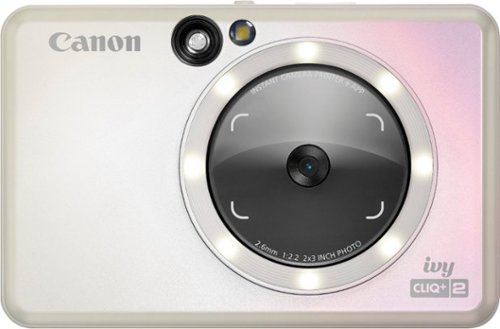
Easily shoot, print, edit, and stick photos, with the IVY CLIQ+2. Capture every moment with the Canon IVY CLIQ+2 ~ an easy to use Instant Camera Printer that is portable so you can take it with you! Instantly shoot and print 2~x3~ photos and place them almost anywhere thanks to a peel and stick backing. You can take the perfect selfies with a Large Selfie Mirror and 8 LED Ring Light. Plus, you can connect your mobile device to the Canon Mini Print App1 to print photos from your camera roll and add filters, effects, emojis and more!
Does it automatically print a picture you take? Or can you chose which photos to print and which to just keep in your usb memory?
Yes it prints immediately. I believe, but am not 100% certain, that if you have a microSD card inserted, it will save a digital copy of the picture you take (and print)
5 years, 8 months ago
by
callmeageeth

The Ninja brand has been a leader in kitchen appliances delivering innovative products for decades. Now introducing the Ninja Professional Plus Food Processor~make food prep easier with its power, intelligence, and versatility. The 1000-peak-watt motor and preset programs chop veggies, shred cheese, and make smooth sauces and cookie dough from scratch~all at the touch of a button.
is there a storage container for the blades with this one or separate?
Unfortunately, there's no storage for the attachments which is a bummer. Obviously there's space in the container for one (where I keep the sharp chopping attachment) and I keep the shredding/slicing disc in a cardboard container that it came with for the packaging.
5 years, 10 months ago
by
callmeageeth
The Ninja brand has been a leader in kitchen appliances delivering innovative products for decades. Now introducing the Ninja Professional Plus Food Processor~make food prep easier with its power, intelligence, and versatility. The 1000-peak-watt motor and preset programs chop veggies, shred cheese, and make smooth sauces and cookie dough from scratch~all at the touch of a button.
Can I use this to cut together flour and butter?
Yes you can, with the "dough" attachment that's included
5 years, 10 months ago
by
callmeageeth
Use the Google Smart Light Starter Kit to control the lights using just your voice. Set up in a snap: just plug in Google Home Mini, screw in the GE C-Life smart light bulb, and download the Google Home app to get started. Then just say "Hey Google" to dim, brighten, turn on and turn off the lights."
Can I use this to turn off my lights while I am away from home? Also, do I get the starter kit and then multiple bulbs or do I need to get a box thing for each room? Thanks so much
Yes, you can turn off your lights from your phone (via Google Home app) when you are away from home. You don't need this starter kit per room unless you want multiple Google Home minis throughout your home (I have several) but obviously the number of smart bulbs (should you want them) will outweigh the number of Google Home minis you need. In other words, one Google Home mini could control all of the smart bulbs you have in your house. You would just need to be within earshot of that one mini when asking Google to turn lights on and off. For me, I keep one Google Home on each floor of my house
7 years, 6 months ago
by
callmeageeth

Handle storage demands with this Western Digital SATA solid-state drive. Its 560MB/s read speed and 530MB/s write speed are suitable for intensive applications, and its 2.5-inch form factor fits most desktops and laptops. The solid-state drive has no moving parts, making the drive resistant to shock to protect your data. Includes the WD SSD Dashboard to keep track of the drive's status.
Would this work for a Mac Mini? 2014 and newer??? Or a an older MacBook Pro 13 inch. 2011 version I believe.
Yes, I put it in my 2012 Macbook Pro without any issues. Substantially improved the performance
7 years, 9 months ago
by
callmeageeth
Handle storage demands with this Western Digital SATA solid-state drive. Its 560MB/s read speed and 530MB/s write speed are suitable for intensive applications, and its 2.5-inch form factor fits most desktops and laptops. The solid-state drive has no moving parts, making the drive resistant to shock to protect your data. Includes the WD SSD Dashboard to keep track of the drive's status.
Does this ssd works on MacBook Pro
Yes, I installed it in my 2012 Macbook Pro. I would find a SATA cable, plug it in to your Macbook and clone your existing HDD, use a small Phllips Head screw driver to remove the bottom plate, unscrew the mounting bracket, insert the pegs from your old HDD to the new SSD using a torx screw (very small) and put the plate back on and that's it. Very simple and painless process
7 years, 9 months ago
by
callmeageeth

Improve your viewing of local TV channels with this indoor Mohu Arc TV antenna. Its multidirectional range captures clear broadcast signals within its 40-mile radius, and its plug-and-play operation provides a convenient enhanced TV setup next to your TV or hang on the wall. This Mohu Arc TV antenna is compatible with HDTV units, letting you enjoy the full quality of Full HD and Ultra HD over-the-air programs.
Will it connect to tv with hdmi input only?
No, it connects via coaxial cable
8 years, 6 months ago
by
callmeageeth
Get the perfect angle for your Arlo security cameras. Easily adjustable mount provides 360 degree swivel and 90 degrees of tilt for the Arlo cameras. It's easy to Quick Start and adjust the camera position for indoor, outdoor, wall and ceiling mounting.
Does it rotate or move?
The base itself doesn't rotate as it is secured to wherever you put it, but the end of the mount (where the screw thread is located) swivels 360 degrees adding a lot flexibility to your placement options.
9 years, 1 month ago
by
callmeageeth
This Logitech Harmony 915-000194 smart control lets you use your compatible Apple~ iPhone~, iPod~ touch or iPad~ or Android device to control up to 8 components for simple, multifunction use.
Does this remote work with Xbox one?
Yes, sort of, depending on what your asking. The remote itself doesn't control anything but commands to the Logitech Home. But yes, the Logitech Home does turn on my Xbox One S. I've controlled a Blu-Ray before but must admit I haven't tried to navigate the console menu.
9 years, 3 months ago
by
callmeageeth